If you have ever handled any kind of large project before, you have more than likely realized the extent to which lost work can influence a detrimental setback. Similarly, you would have quickly learned the importance of backing up work, should you have experienced such a setback in the past. This importance carries over when working online. While there are no native means to back up a SharePoint site itself, it’s quite easy to backup its associated documents.
| Solution | Description |
| Unsynced downloads | As SharePoint utilizes OneDrive, most documents can be downloaded locally and will remain synced. Unsyncing the copies will allow them to remain effectively backed up and unchanged. (Unsyncing is only needed if the files are stored in your OneDrive folder) |
| Version control | If enabled, the initial state of a document is recorded and stored as a version- with new versions being created by each change made to a file between saves. If needed, you are provided with the ability to revert the file to a prior version. |
| Recycle bin | Deleted files are sent to the recycle bin, where they can be restored within 93 days. |
| The second stage recycle bin | Administrators can set up an additional recycle bin to store items within after the initial 93 day store period. Items may be restored from there. Not much information can be given about what happens in this recycle bin due to it being configured by your site’s admins. |
In this post, we will be addressing the four best ways to effectively backup SharePoint documents, with step-by-step walkthroughs on locally storing and unsyncing SharePoint files, restoring a file to a past version through version control, and lastly restoring lost items from SharePoint’s recycle bin.
Contents:
- Demo | Storing SharePoint Online files locally
- Reference | Unsyncing local SharePoint files
- Guide | Using version control in SharePoint Online
- Demo | Restoring documents from the recycle bin in SharePoint Online
Demo | Storing SharePoint Online files locally to back up
While you can stop at simply storing SharePoint files locally, it can be considered as not enough. By default, the files will be synced. Synced files are particularly useful as changes made locally will automatically be applied to the versions on your site. However, this can be problematic if your site or computer system is compromised. Take for instance a ransomware attack, if your synced files become encrypted and unusable, SharePoint will apply the same changes to the same files on SharePoint.
Step 1 – Open your site’s document library
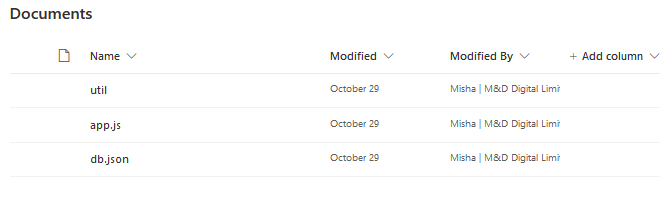
Before we can locally store any files or folders, we will first need to access the location they are stored within. Proceed by accessing your SharePoint Online site and opening the document library you use to store the files you’d like to backup.
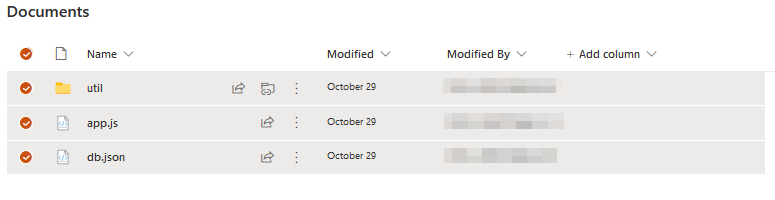
Step 2 – Select the files you’d like to backup
If you’re looking to backup all the files within your library, remain at the start of the directory and check the circle next to the Name title. Otherwise, check hold control and select each file/folder you’d like to backup. If you’d also like specific files within a folder, you’ll need to repeat the process within that folder.
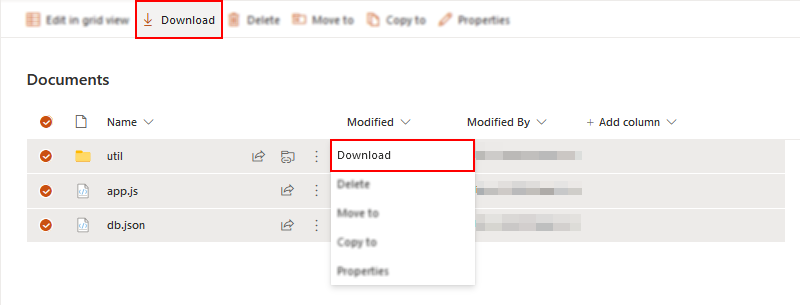
Step 3 – Download your selection
To download your selection, use the context menu, resembling a tri-dotted colon to access a download prompt or select Download from the action bar above the file space.
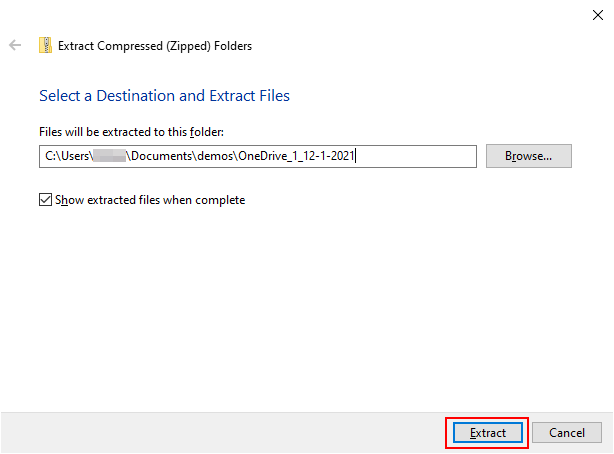
Step 4 – Extract your downloaded files
To download your selection, use the context menu, resembling a tri-dotted colon to access a download prompt, or select Download from the action bar above the file space.
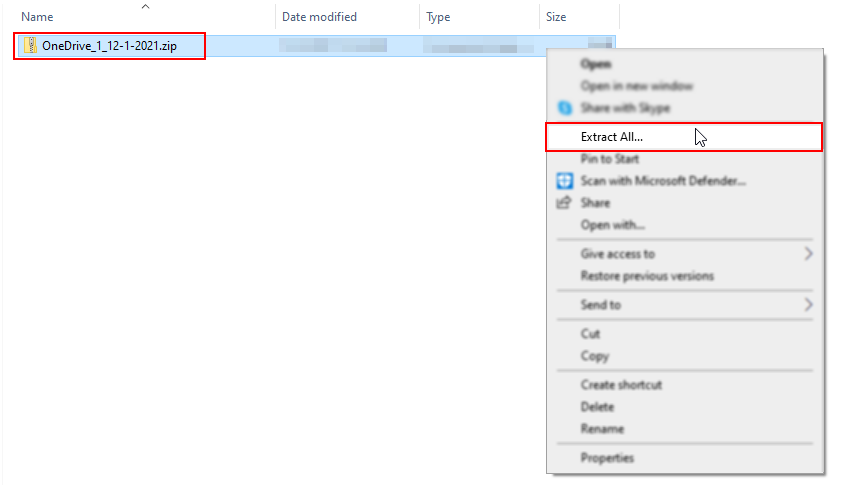
Step 5 – Confirm extraction destination
While your extraction location isn’t particularly important, we recommend extracting your documents somewhere accessible and memorable. Please note you will need to ensure files are unsynced if placed within your OneDrive/SharePoint folder.
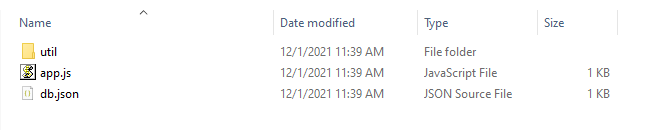
Step 6 – Ensure files extracted properly
Open the location your documents were extracted to, ensure everything is there. Furthermore, try opening or using the files to ensure they were in no way corrupted.

Reference | Unsyncing local SharePoint files
Provided below is a brief guide on how you can go about unsyncing OneDrive/SharePoint files you’re accessing locally. If you would like a more comprehensive and well-explained guide, please consult our past post linked here.
Brief guide
- Right click the OneDrive toolbar icon
- Select settings from the dropdown
- Switch to the account tab
- Select Stop sync
- Click Unlink account (if needed)
Guide | Using version control in SharePoint Online
Version control is a tool used in various roles, both physically and digitally. Digital version control operates by developing a timeline of recorded versions, from the file’s initial version to its present-day current version.
Using version control
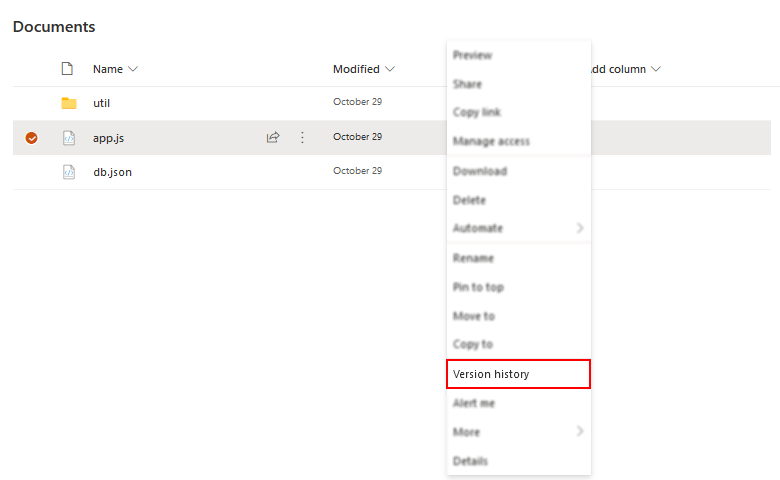
Version control can be accessed within SharePoint Online with a simple right-click on a file. The version control tool will be listed as Version history. As it will allow you to observe the version timeline for the file in question.
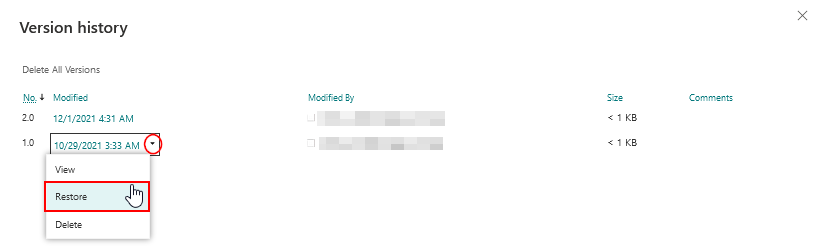
Restoring a file to its prior version
If a problematic change has occurred with your file, you can open the dropdown for an older version and select Restore, reverting the changes made by overwriting the current version, with the recorded past version.
Demo | Restoring documents from the recycle bin in SharePoint Online
Deleting a file in SharePoint Online does not actually delete it, but instead moves it to the recycle bin, which serves as a list of documents scheduled for deletion at a later date (93 days after being added to the recycle bin). Therefore making your “deleted” files restorable for up to 93 days, before either being permanently deleted or being sent to the second stage recycle bin if one was set up.
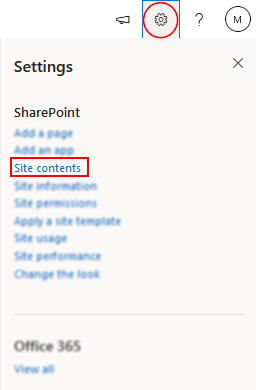
Step 1 – Open your site’s contents page
Access the Settings dropdown from the cog icon in the top right corner of the window. From the dropdown, select Site contents.
Step 2 – Open the recycle bin
Ignoring the main section of the site contents and instead of looking to the rightmost part of the action bar. Select Recycle bin.

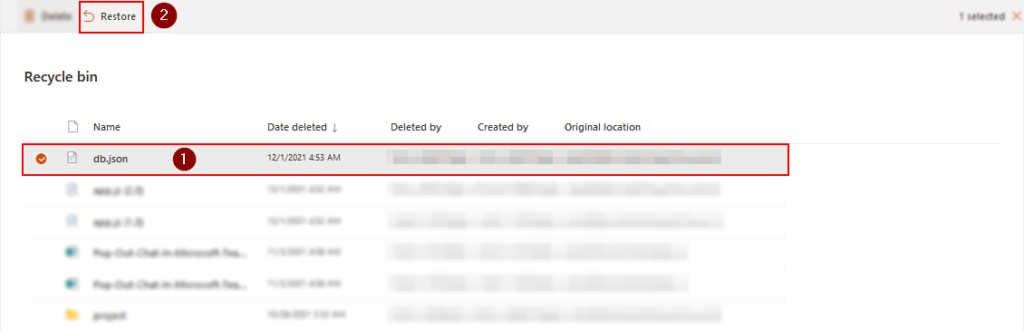
Step 3 – Restore your file
Select the file you’d like to re-attain and select Restore from the action bar above the file space.
Endnote | Recap & Farewell
Recap
As of the time of this post, there is no native method to backup your SharePoint site. However, there are a number of ways to backup your site’s files and folders. This method includes creating copies stored locally, unsyncing the files from your Desktop sync folder, version control, and the recycle bin content restoration. While the latter two do not specifically back up your files, they allow you to revert potentially harmful changes to your files, or even restore unintentionally deleted files.
Farewell
As usual, this section is dedicated to thanking readers for their support. We’d be pleased to know you found this post useful and/or informative. If you have any more Office 365 related queries, please consult our related articles (listed below). However, if you have other queries, consider looking at the rest of the site. We’re frequently posting new stuff each week and may just have the guide or troubleshooting tips you need. Regardless, we wish you a good day/night. Farewell readers.
Our related articles:
- How to unsync SharePoint folder from desktop – When a user uses the OneDrive sync client to synchronize a SharePoint Document library, the whole library of files and folders is transferred to the user’s PC. It is not, however, simply replicated. Between the user’s PC and SharePoint, a two-way relationship is formed. Any changes in one location are immediately reflected in the other. This is unwanted behaviour if you intend to merely copy. As such we’ll be showing you how to unsync SharePoint.
- How to approve access requests in SharePoint Online – People can use the access request function to seek access to material that they do not presently have the authorization to see. As the site owner, you may set the functionality to send you an email whenever someone seeks access to your site. You can then decide whether to accept or reject their invitation. If you approve the request, you may additionally indicate the degree of authority you want to provide a user.
- SharePoint: can’t add site members: Causes and fixes – SharePoint servers as a collaborative document manager. As such, the collaboration-based functionality is about as important as the management functionality. Despite that, SharePoint may on occasion run into issues adding site members- in this blog we’ll be running through some causes and discussing fixes.
- All the ways to change your SharePoint site’s URL – These days, SharePoint has gone through many revolutionary changes, and Microsoft has made SharePoint professionals’ lives much easier, one of which is changing or renaming the site URL – now, we should not be concerned about the site URL; if your site URL does not meet your requirements, you have the flexibility to rename or change the site URL. Previously, the SharePoint Online URL could not be altered, which was a huge issue for firms that rebranded or went through a Merger, Acquisition, or Divestiture (MAD)