While time management is important, it’s not a skill everyone comes to possess. Fortunately, the internet is full of tools to help accommodate this, and countdown clocks and timers are good example. Unfortunately, Teams doesn’t have a native timer, so in this blog post, we’ll show you how to use a timer or countdown clock in Microsoft Teams.
How to use a timer or countdown clock in Microsoft Teams:
- Navigate to a Teams channel
- Select the “+” icon in the tab bar
- Find and select the “Website” option
- Name your tab and link a web-timer
- Test your timer

How to use a timer or countdown clock in a Microsoft Teams channel:
- Add a new media source to OBS
- Browse your local files for your timer video
- Import the timer video for your media source
- Start OBS’ virtual camera
- Initiate a Teams meeting
- Toggle your camera on
- Open the meeting settings panel via the cog
- Open the camera dropdown under Video Settings
- Select OBS Virtual Camera
- Join the meeting
- Get Microsoft Teams from just $4.00 per month with Microsoft Teams Essentials.
Today we’re discussing timers within Microsoft Teams. Unfortunately, Teams lacks support for native timers; hence, we’re dependent on third-party sources wherever we use a timer in Teams. In this post, I’ll be showing you how you can use timers in Teams channels and Teams meetings.
Below, I have provided three links; you can use each link to access relevant content quickly.

Show – Countdown intros for MS Teams
Create intros, breaks, and outros for your meetings with animations, countdown timers, music, and more!
To use a timer or countdown clock in Microsoft Teams
Microsoft Teams does not currently feature a timer tab; however, we can use the “Website” tab to create our own timer tab. If you don’t know of any online timers, you can use the same timer I’ll be using. You can find the site here.
![]() Note: Please be aware that each instance of the integration will operate differently for each user. For instance, if you set a 10-minute timer, your colleague can simultaneously run a 15-minute timer.
Note: Please be aware that each instance of the integration will operate differently for each user. For instance, if you set a 10-minute timer, your colleague can simultaneously run a 15-minute timer.
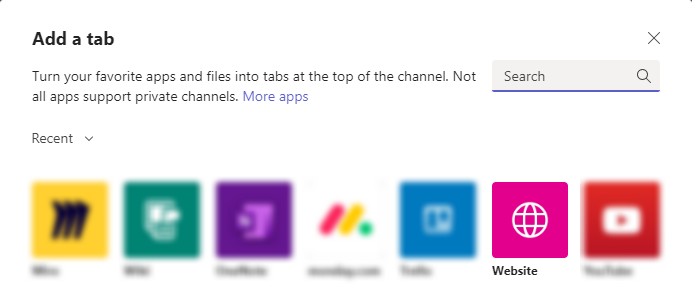
1. Open a Chat or Channel and click the + plus icon at the top.
To start, head to your desired Teams channel and look for the “+” button in its tab bar. You need to click the “+” button to proceed.

2. Select “Website.”
You now have access to Teams vast number of importable tabs; to continue, find and select the “Website” tab. If you’d like to save time, you can search “Website” via the search bar in the top right of the popout menu.
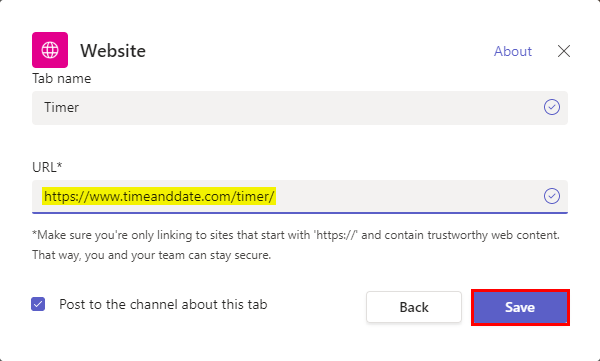
3. Enter a tab name and use https://www.timeanddate.com/timer as the URL
Before you can use your website tab, you must specify a URL for the tab. Afterward, you can optionally name the channel. In the screenshot below, I enter the URL for an online timer (https://www.timeanddate.com/timer/). You can use the same timer or find your own. When you have done everything, click “Save.”
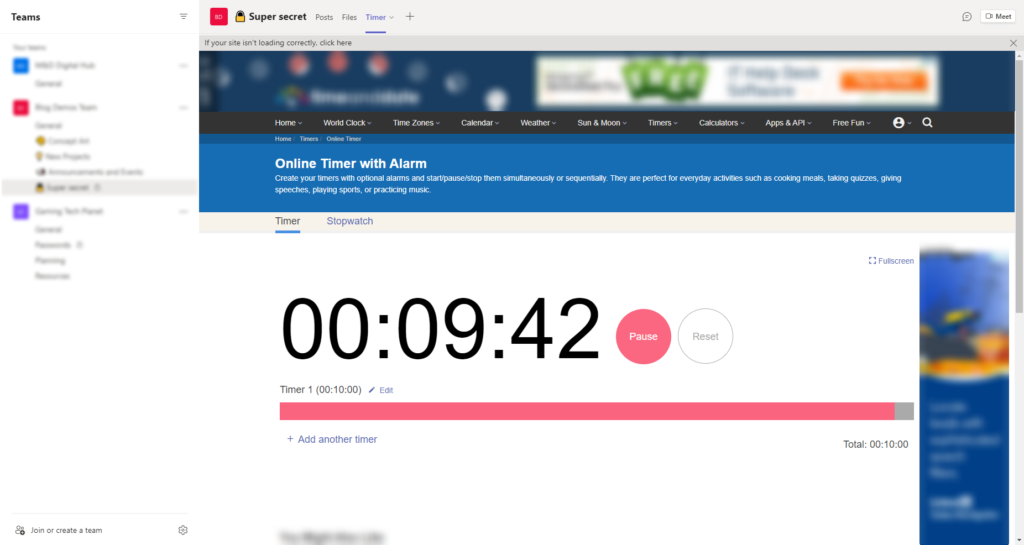
4. Test the timer
Provided nothing went wrong, you should now be able to use your decided timer tool within the Teams channel of your choice.
How to use a timer or countdown clock in a Teams meeting
Teams meetings don’t have any native timers. Hence, if you’d like to use timers within a Teams meeting, you’ll need to take advantage of third-party programs like OBS. If you’re unfamiliar with OBS, you can download it here.
OBS is primarily used by streamers; however, the program also features some video editing tools. In the following guide, we’ll be taking advantage of OBS’s virtual camera functionality.
Step 1 — Add a new source in OBS
With OBS freshly opened, hit the “+” icon in your “Sources” box. In doing so, you will be able to choose a source type to add.
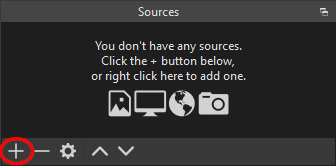
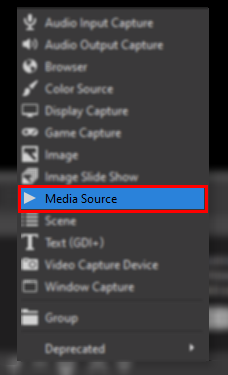
Step 2 — Choose the Media Source option
OBS features various source types. A source type determines what we’d like to add to our output. For example, we’d use an “Image” source if we wanted to display an image. However, for a video, we must select “Media Source.”
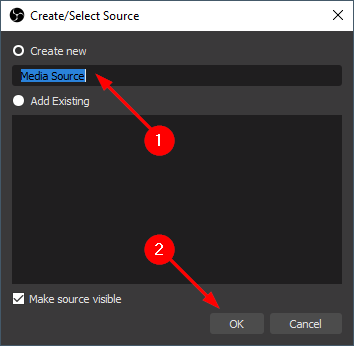
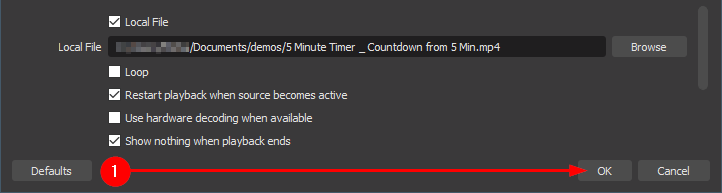
Step 3 — Create your Media Source
After selecting a source type, OBS will prompt you to confirm the new source’s creation. If you’d like, you can name the new source or skip ahead and click “OK.”
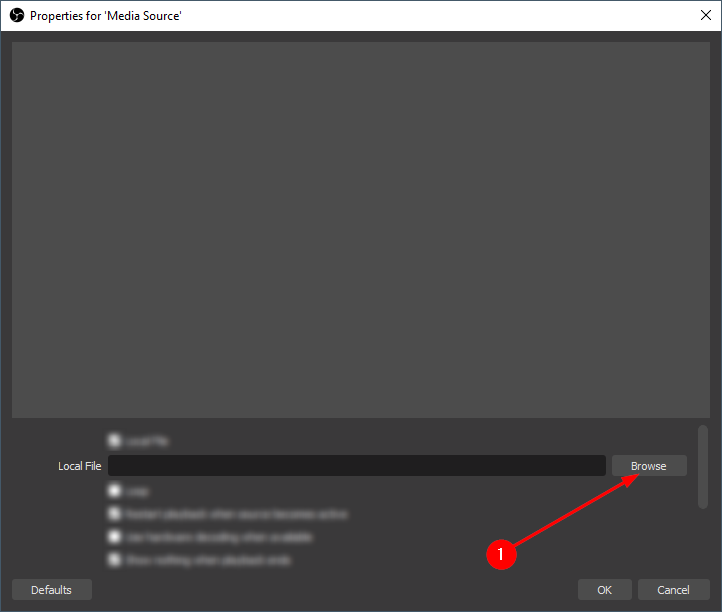
Step 4 — Import a timer video
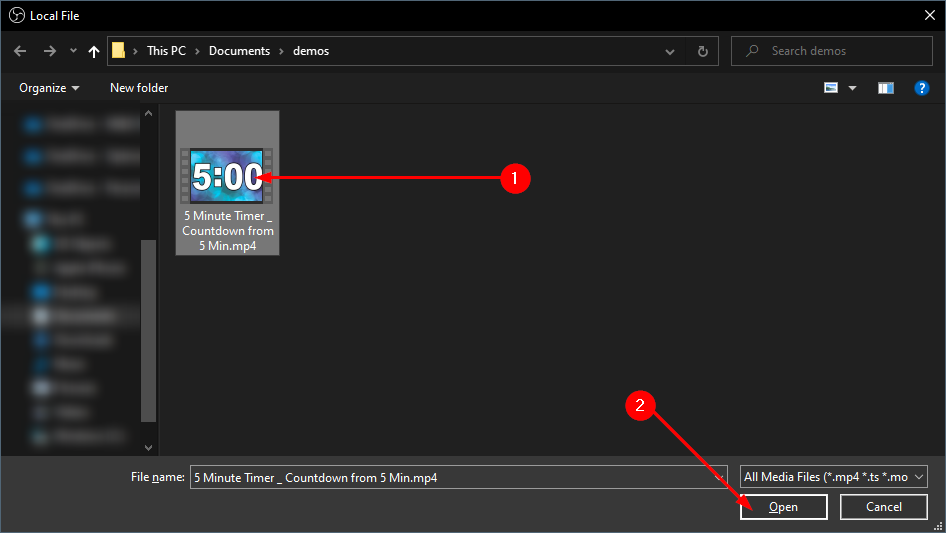
In your media source’s customization menu, click “Browse” to reveal the Windows file explorer. After, navigate to your countdown video; click it and select “Open.”
Step 5 — Confirm your media source’s settings
If you would like your timer to restart when it reaches its end, ensure you have checked the “Loop” box. Otherwise, leave the box unchecked and click “OK.”
Step 6 — Start OBS’s virtual camera
Under the “Controls” category, you will find numerous function buttons. Find and select “Start Virtual Camera.” Before proceeding, you should ensure your media source fits the constraints of the workspace— it should leave any whitespace.
Also, click the cog next to the “Start virtual Camera” button and ensure that “Output Type” is set to “Source” and that the “Output Selection” is your countdown clock.

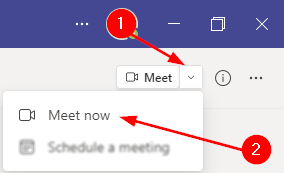
Step 7 — Initiate a Teams meeting
With your virtual camera active, head to Teams. Open the dropdown in the top right corner. In the dropdown, click “Meet now.”
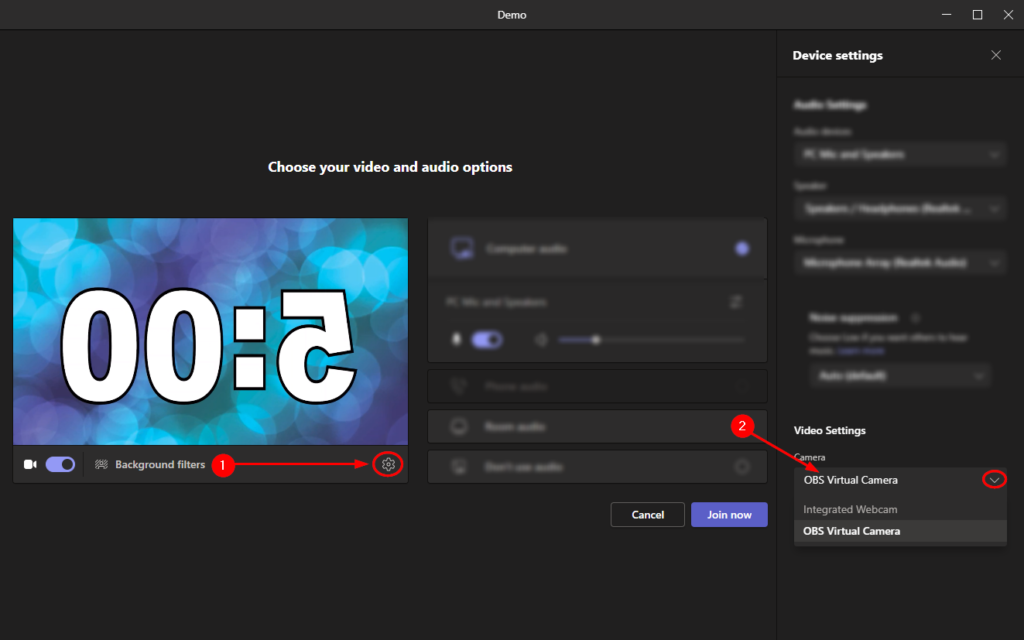
Step 8 — Display your OBS virtual camera feed
Toggle your camera on and select the adjacent cog icon (⚙). Teams will reveal a hidden panel. The panel contains a category titled “Video Settings.” Under the Video Settings category, open the “Camera” dropdown and select “OBS Virtual Camera.” You can now click “Join now.”
If you can’t see the option for “OBS Virtual Camera” you can try restarting your device or running OBS as an adminstrator.
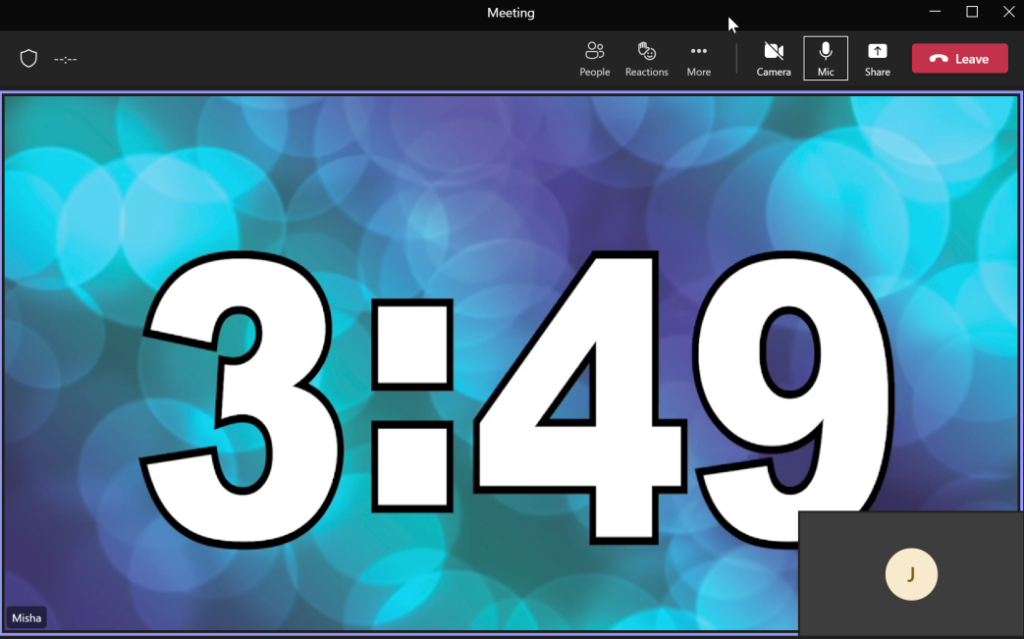
Step 9 — Test the timer with a colleague
When a colleague joins, they should be able to observe the timer via your video feed.
Blog post recap
Although Teams does not natively support timers, we can use a channel’s web tab to integrate one of our choosing. Similarly, we can use OBS’ virtual camera feature to display pre-recorded timer videos during meetings.
If you found this post helpful or simply enjoyed it, consider taking a look at the rest of our content. If you run into any issues, please leave a comment below; we’re always happy to help.
- What does clearing the Microsoft Teams cache do?
- Does clearing the Teams cache delete chat history.
- Is it possible to recover deleted Teams messages?
- Can my employer see deleted Teams messages?
   |