 Key Takeaways
 Labels are used to tag other elements in Microsoft Loop, and you can use them with headers, lists, and tables. [More…]
 There are two default label groups: Priority and Progress. However, you can quickly create your own labels. [More…]
 You can only use a label with components made in the Microsoft Loop app.

Labels in Microsoft Loop allow you to tag elements, such as tables and lists. They allow you and your team to update each other on the progress of a project, or set the priority level of a particular task. You can also create custom label groups, which we’ll discuss later in this this guide.
All you need to know about Labels in Loop:
- You can use Labels to tag other elements in your Loop page.
- You can add labels anywhere in the page or with these elements: Headers, Lists, and Tables.
- The default Label groups are “Priority” and “Progress.”
- You can create custom label groups.
- You can change the name, color, and order of the labels.
- Custom labels exist only within the page where you made them unless you paste them into a new page.
- Labels don’t work in components made outside the Loop app, e.g., in Teams or Outlook.
We’ve also create a video to help guide you through the process:
 Overview: What are Labels in Microsoft Loop?
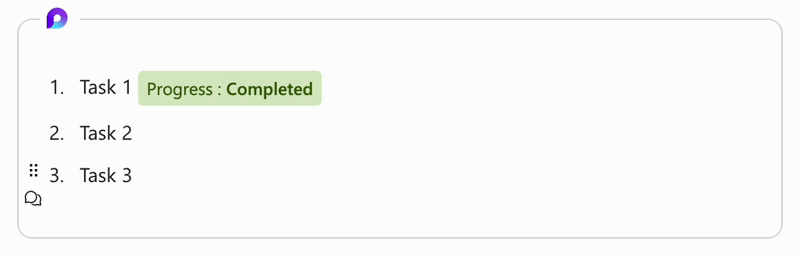
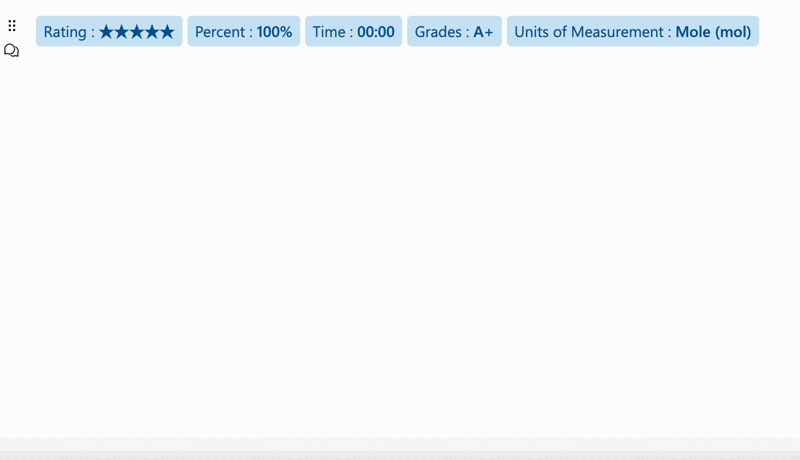
Labels in Microsoft Loop allow you to tag table cells, list items, and other elements within your Loop component. The two default label groups are Priority and Progress, which contain the following options:
Priority:![]() Low
Low![]() Medium
Medium![]() High
High
Progress:![]() Not started
Not started![]() In progress
In progress![]() Completed
Completed![]() Off track
Off track
You can also create your own custom label groups with different options and colors. We’ll get into more detail on how you do that later in the guide.

 All you need to know about Labels in Loop

How to add a label in Microsoft Loop
In this section, we’ll show you how to add labels.
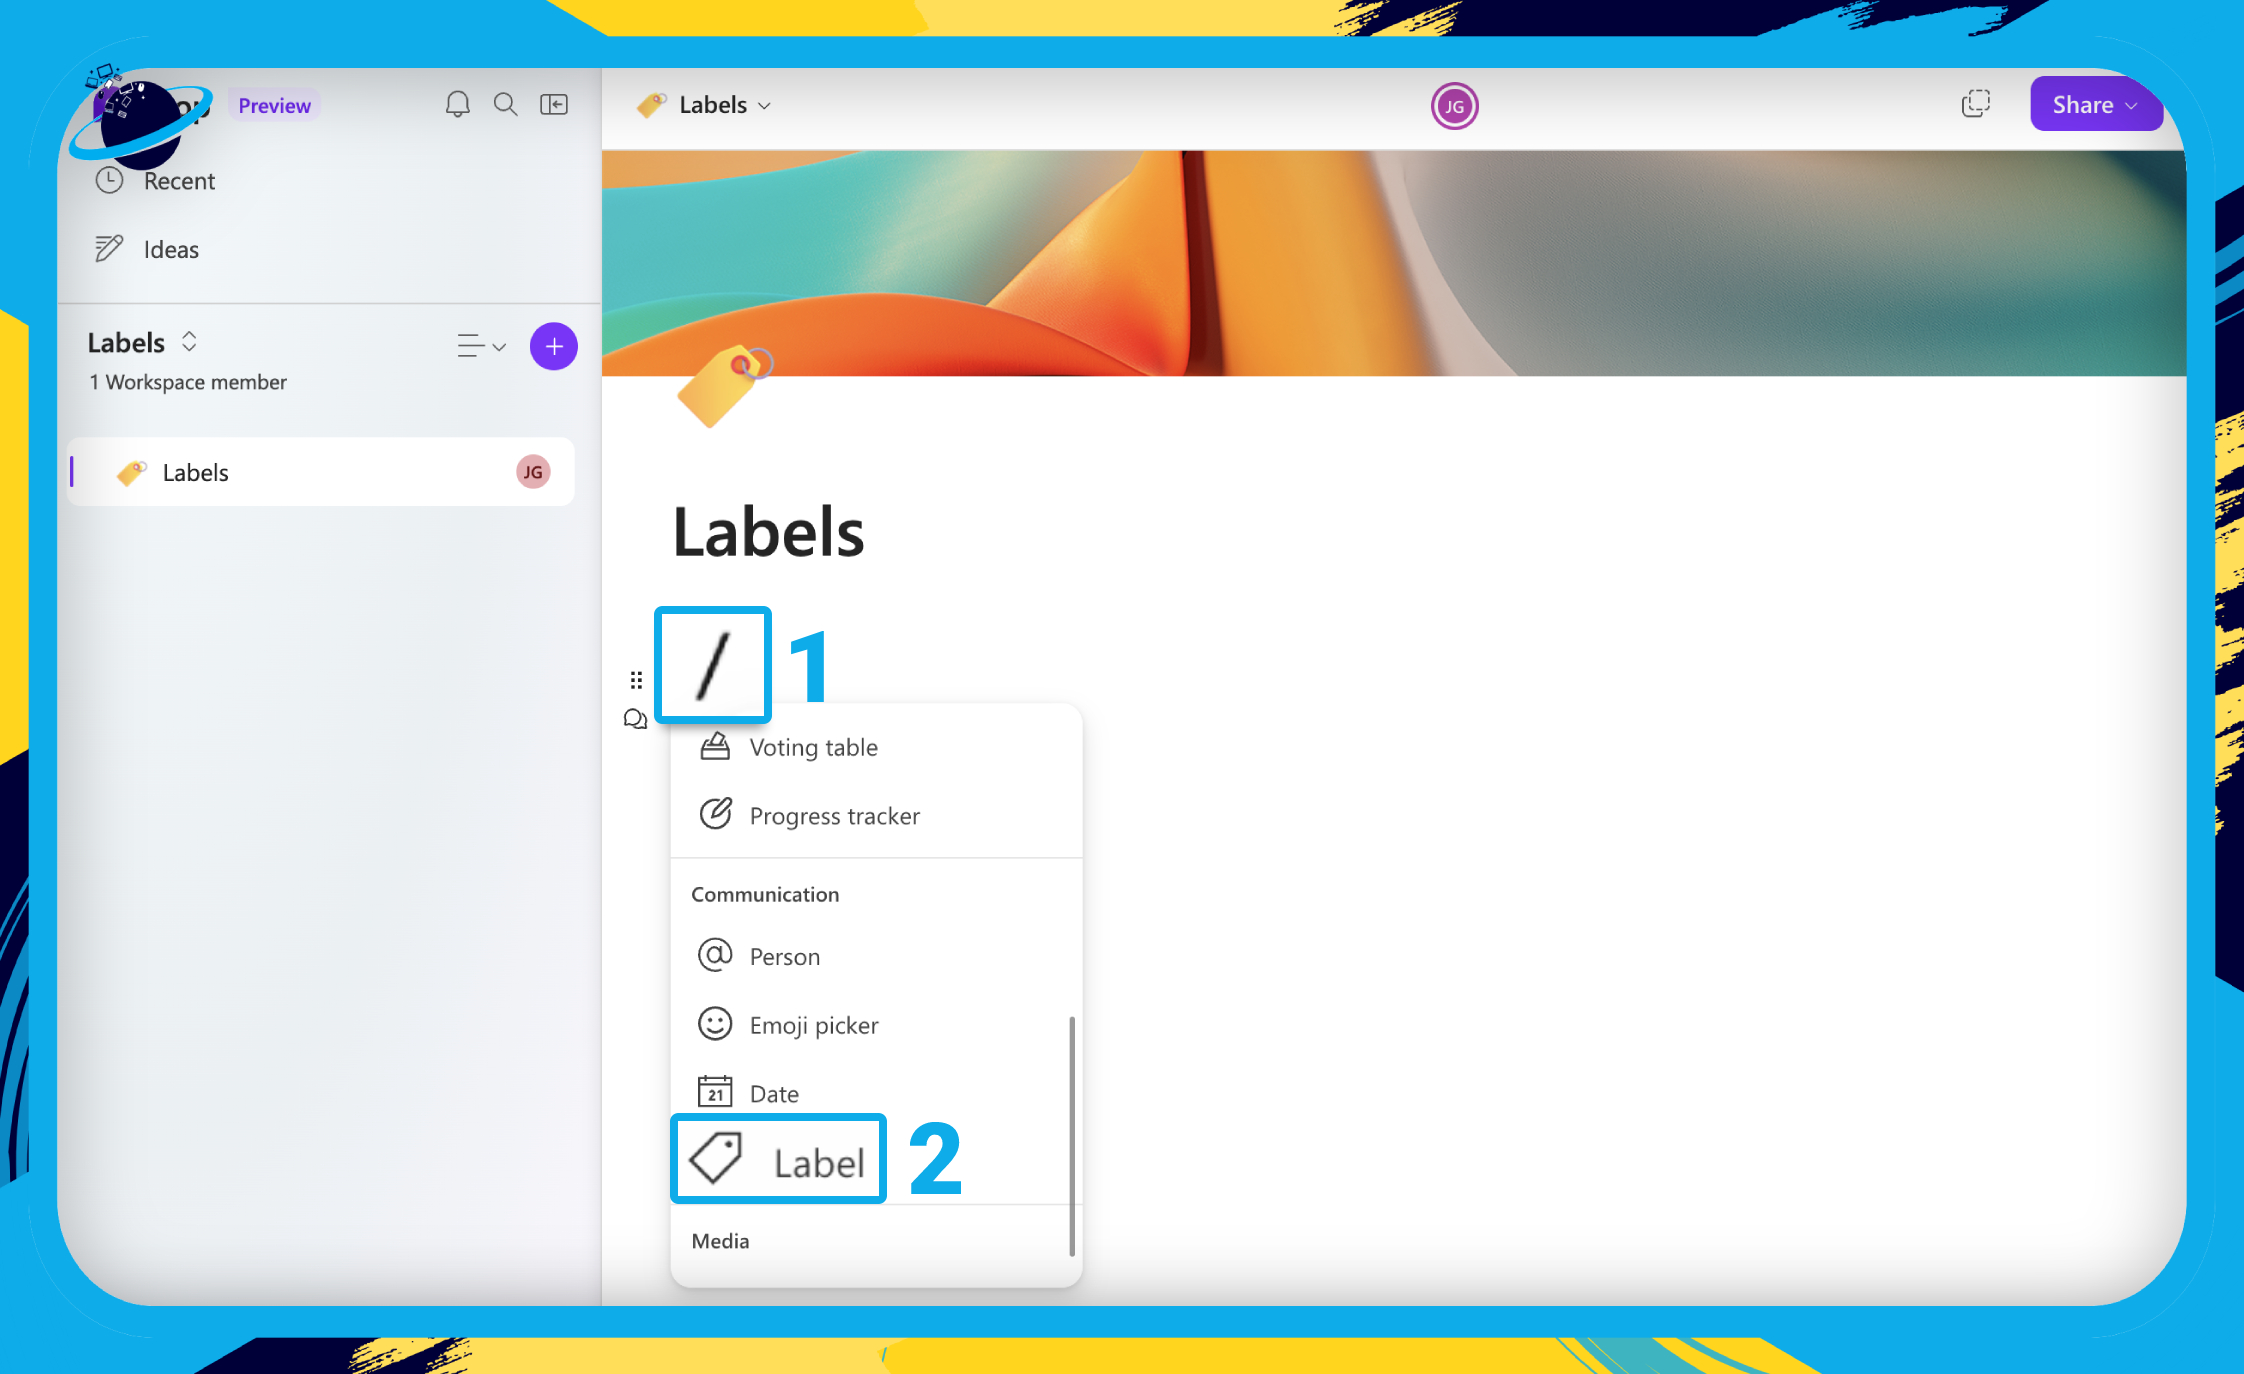
- To add a label in Microsoft Loop, you can type a / forward slash [1]
- And then select
 “Label” from the popup list. [2]
 - Alternatively, you can type “/label” and then hit ⏎ Enter on your keyboard.
You can also copy and paste labels into different elements. To do that, click to the left or right of the label and drag across as if you were highlighting text. Then press Ctrl/command + C on the keyboard to copy, and Ctrl/command + V to paste.

Elements you can and can’t add labels to in Loop
In this section, we’ll show you which elements or components you can and can’t add labels to.
Currently, labels only work in the Microsoft Loop app, or with shared components that were made in the Loop app. Components made in Teams and Outlook don’t have the option to add labels.
Here are the elements you can add labels to in Microsoft Loop:
![]() Table cells with the
Table cells with the ![]() “Text” column type.
“Text” column type.![]() Headers – H1, H2, H3
Headers – H1, H2, H3![]() Check Lists
Check Lists![]() Bulleted Lists
Bulleted Lists![]() Numbered Lists
Numbered Lists
You can add labels to the above elements by typing a forward slash and selecting “Label.” But with tables, you can also create a “Label” column type, which makes it easier to add labels to a cell.
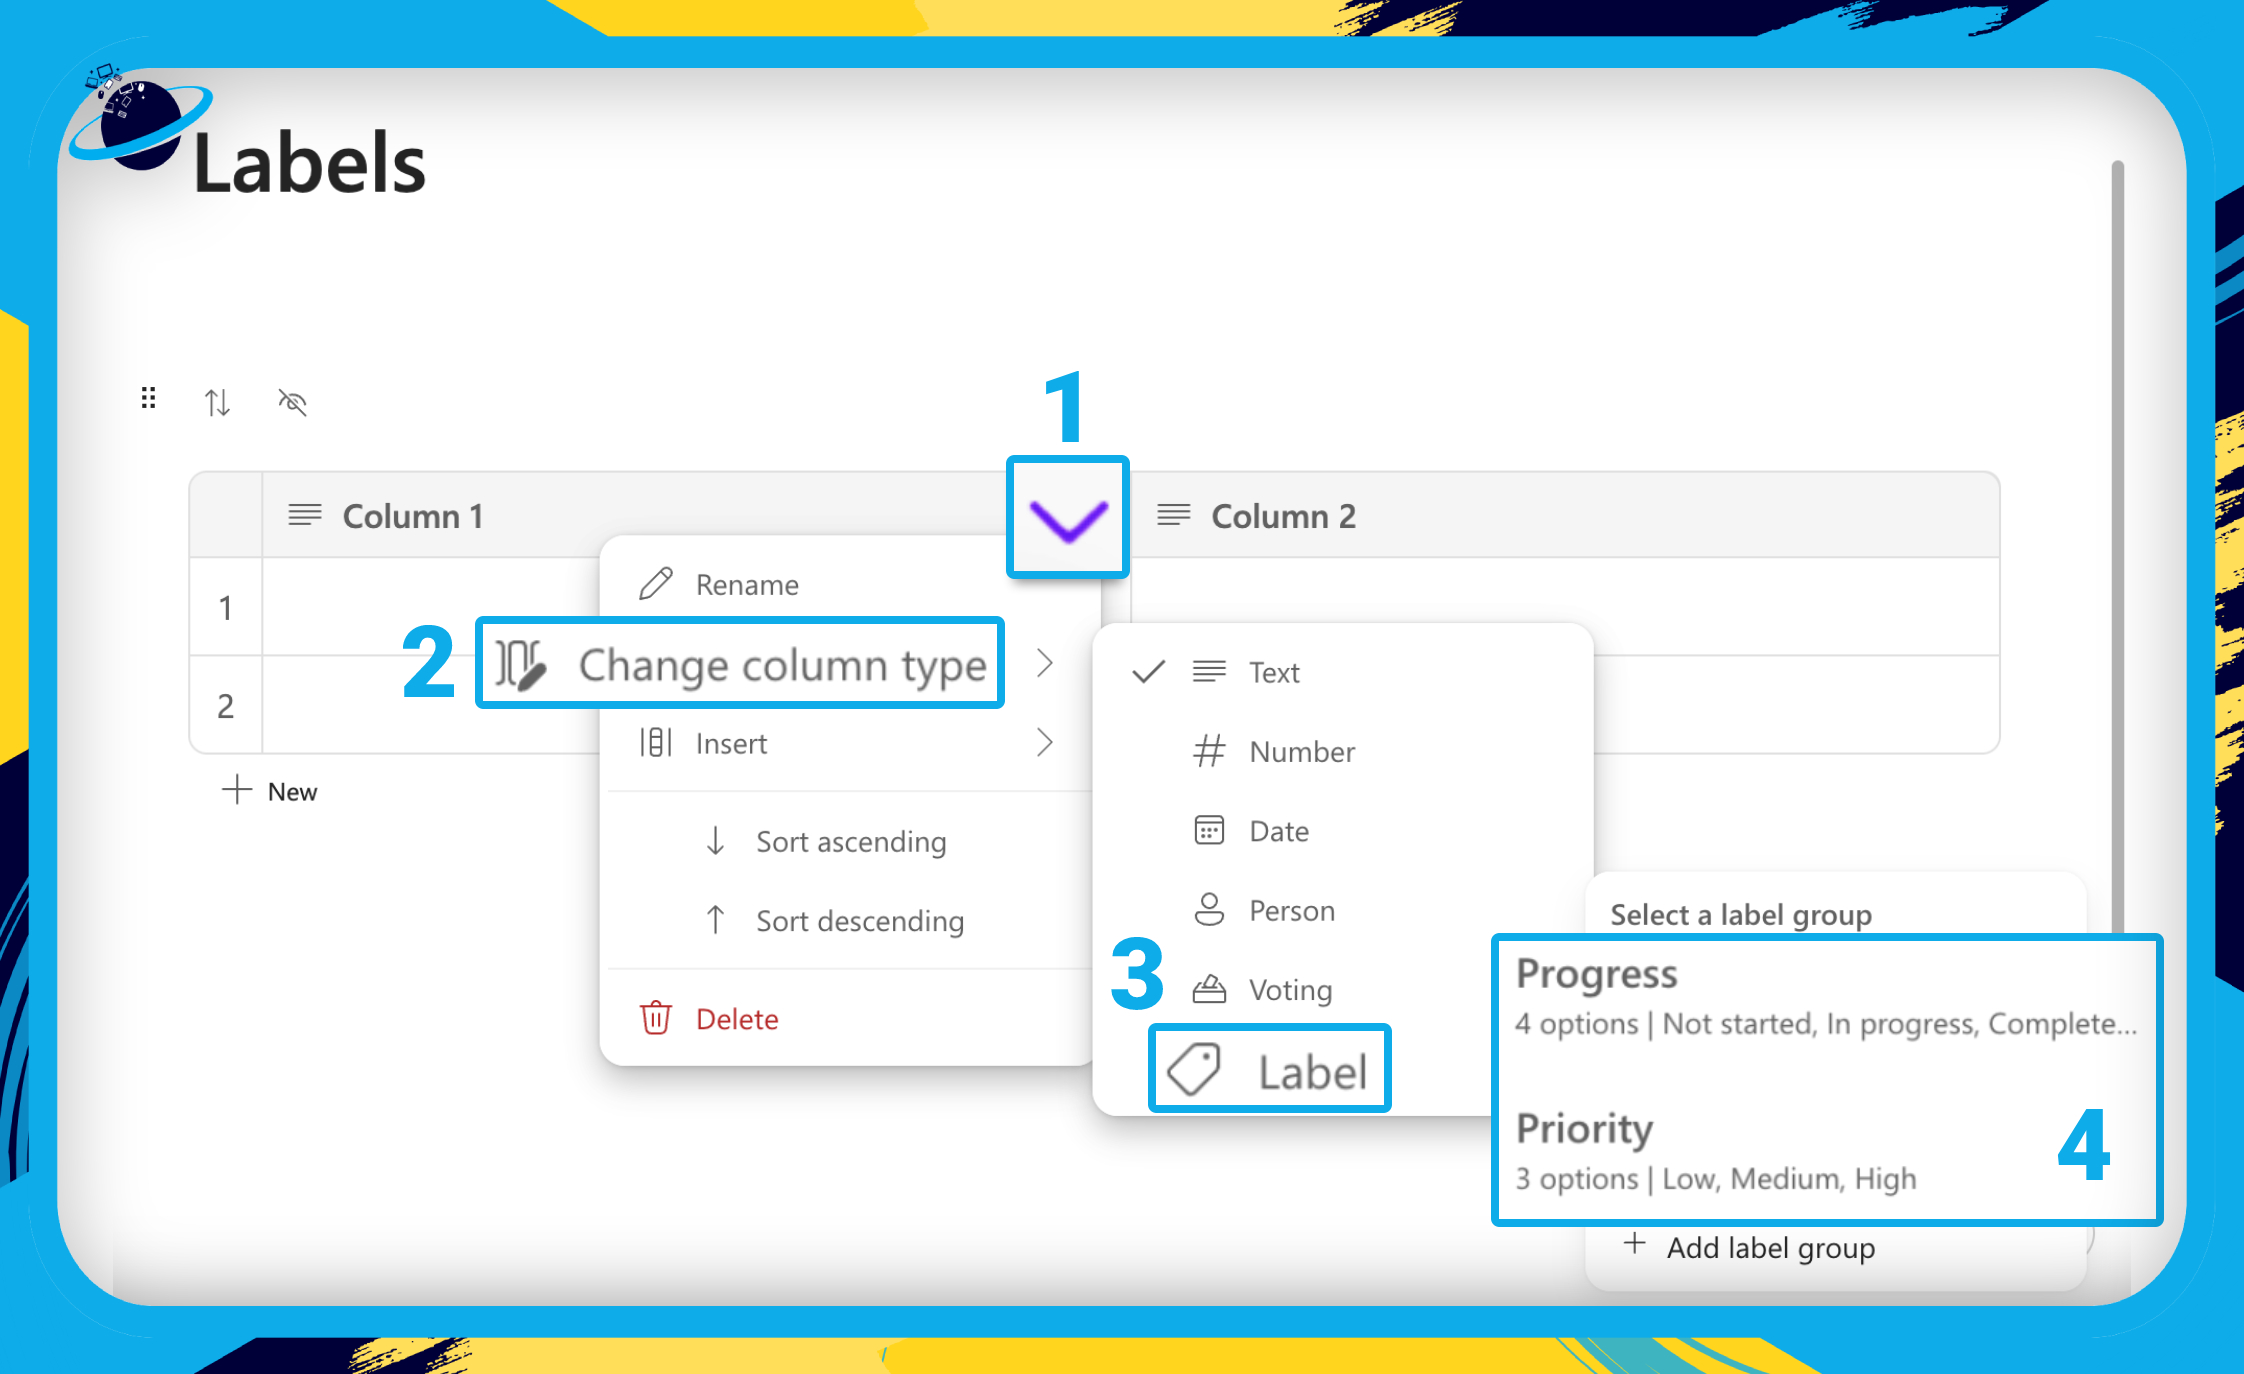
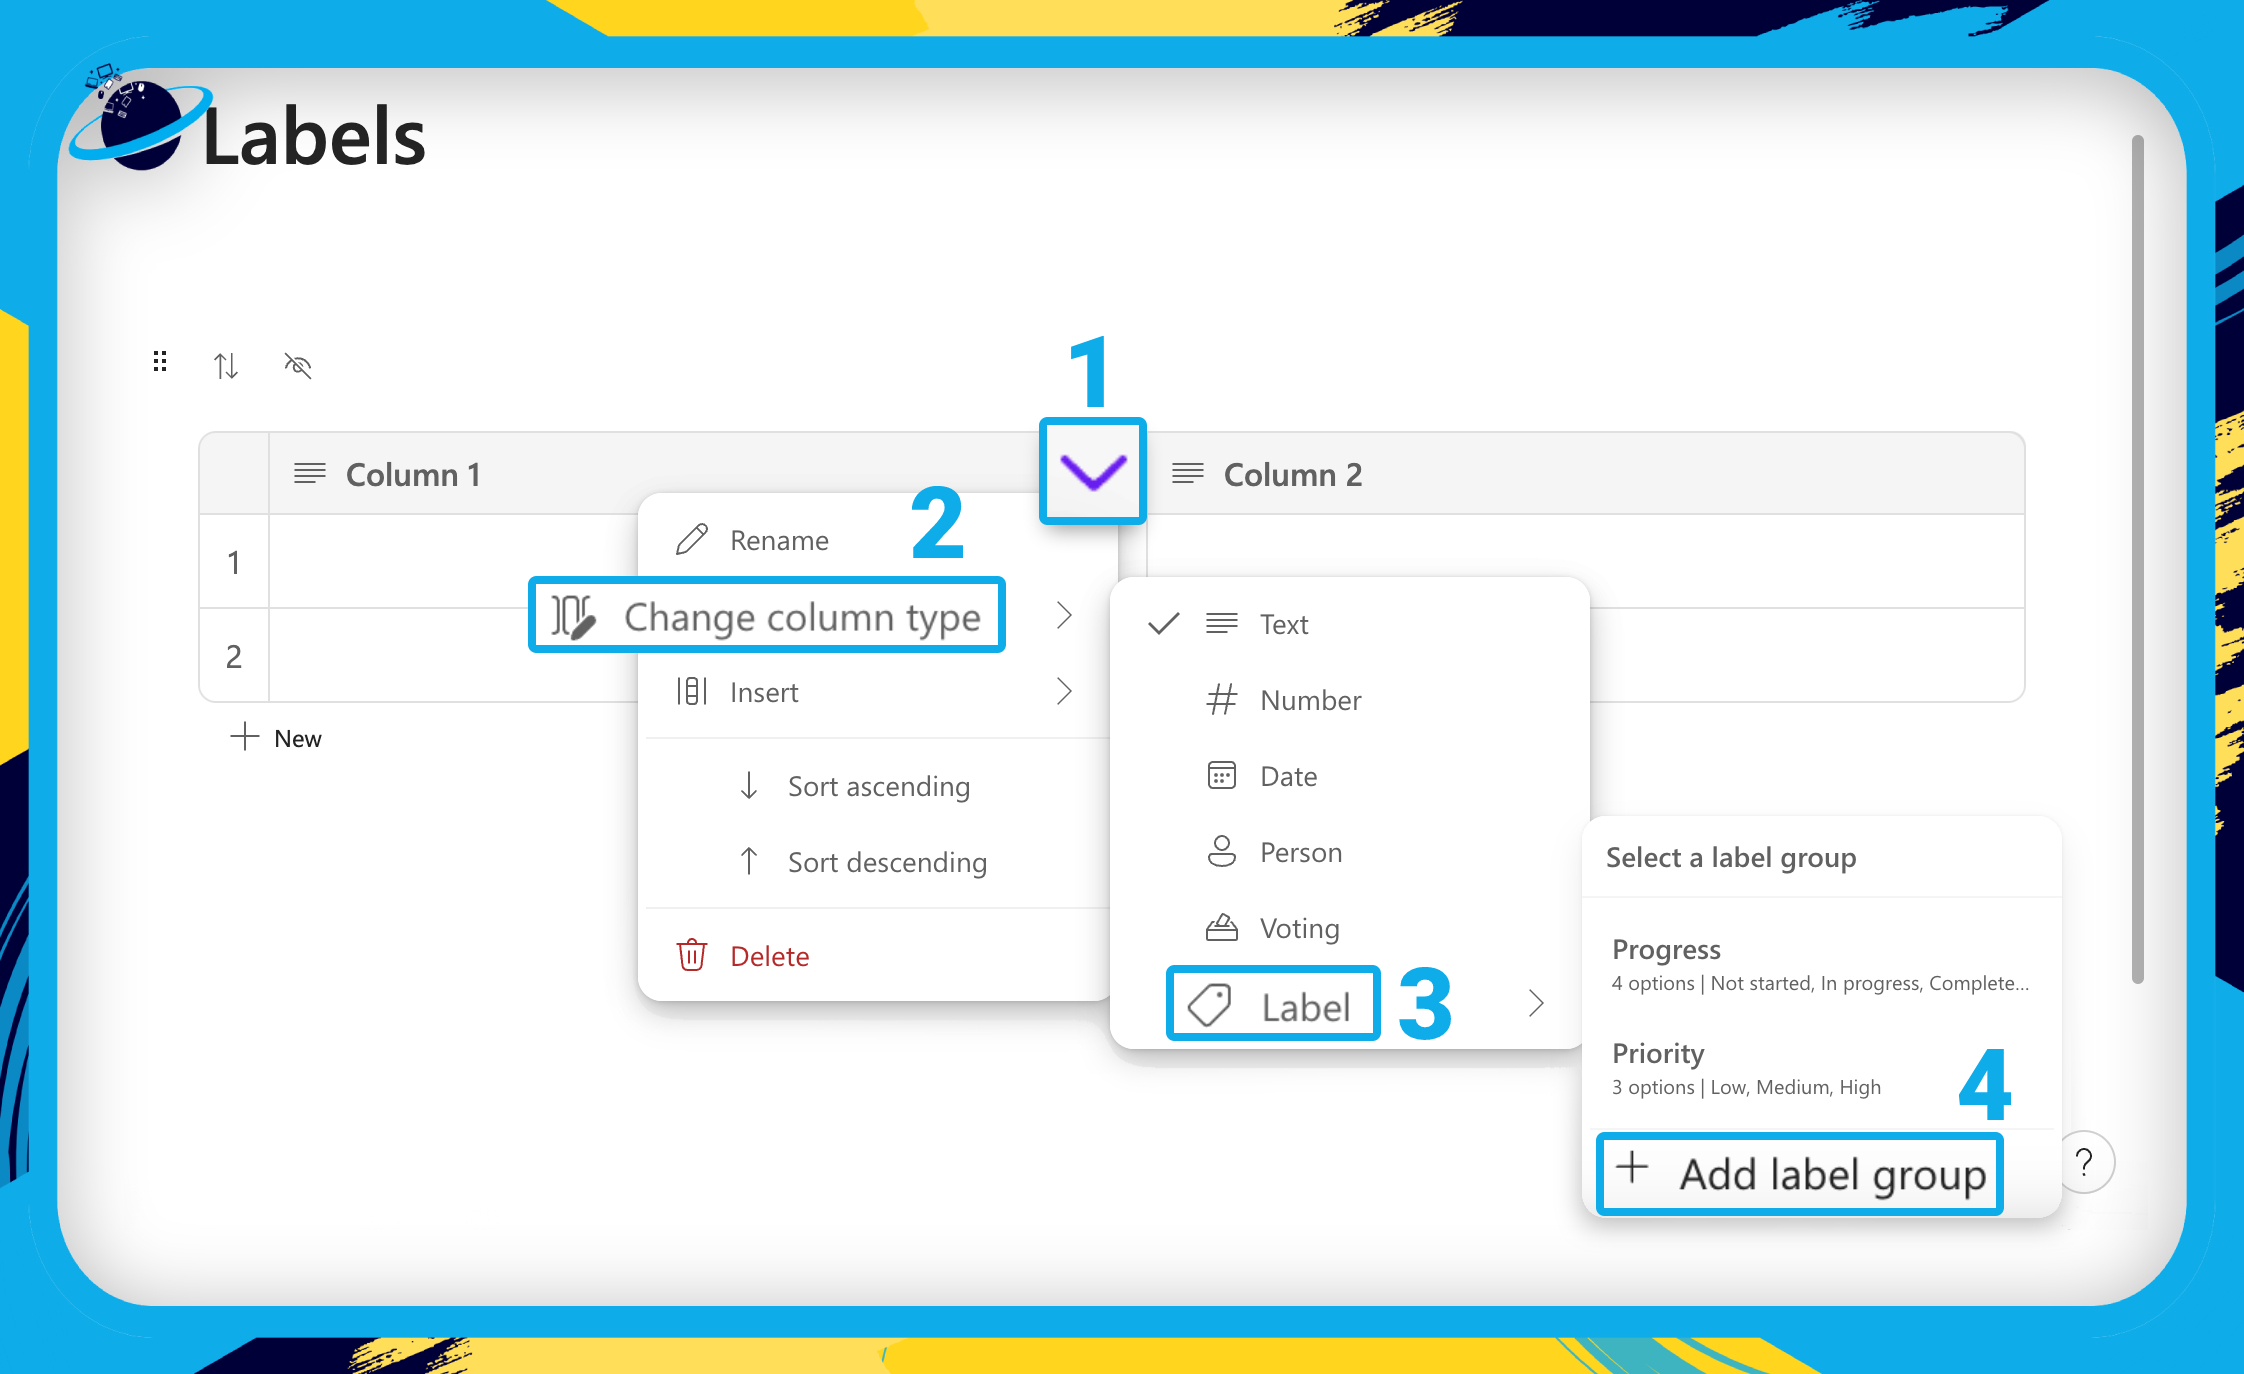
- To create a label column type, click the down arrow in the column header. [1]
- Go to
 “Change column type.” [2]
 - Then select “Label.” [3]
- You can now select from the following preset label groups: [4]
- Priority
- Progress
The column name will change to the title of the label group you select. We selected “Priority,” so the column name is also “Priority.” The column icon has also changed from ![]() “Text” to
“Text” to ![]() “Label.”
“Label.”
You can now click any cell in the Priority column and select from a list of options.


How to modify the labels in Microsoft Loop
In this section, we’ll show you how to rename, recolor, and reorder the label options.
Labels are highly customizable in Microsoft Loop. If you want to modify the options, start by creating a label. In this demonstration, we’re using a label column type.
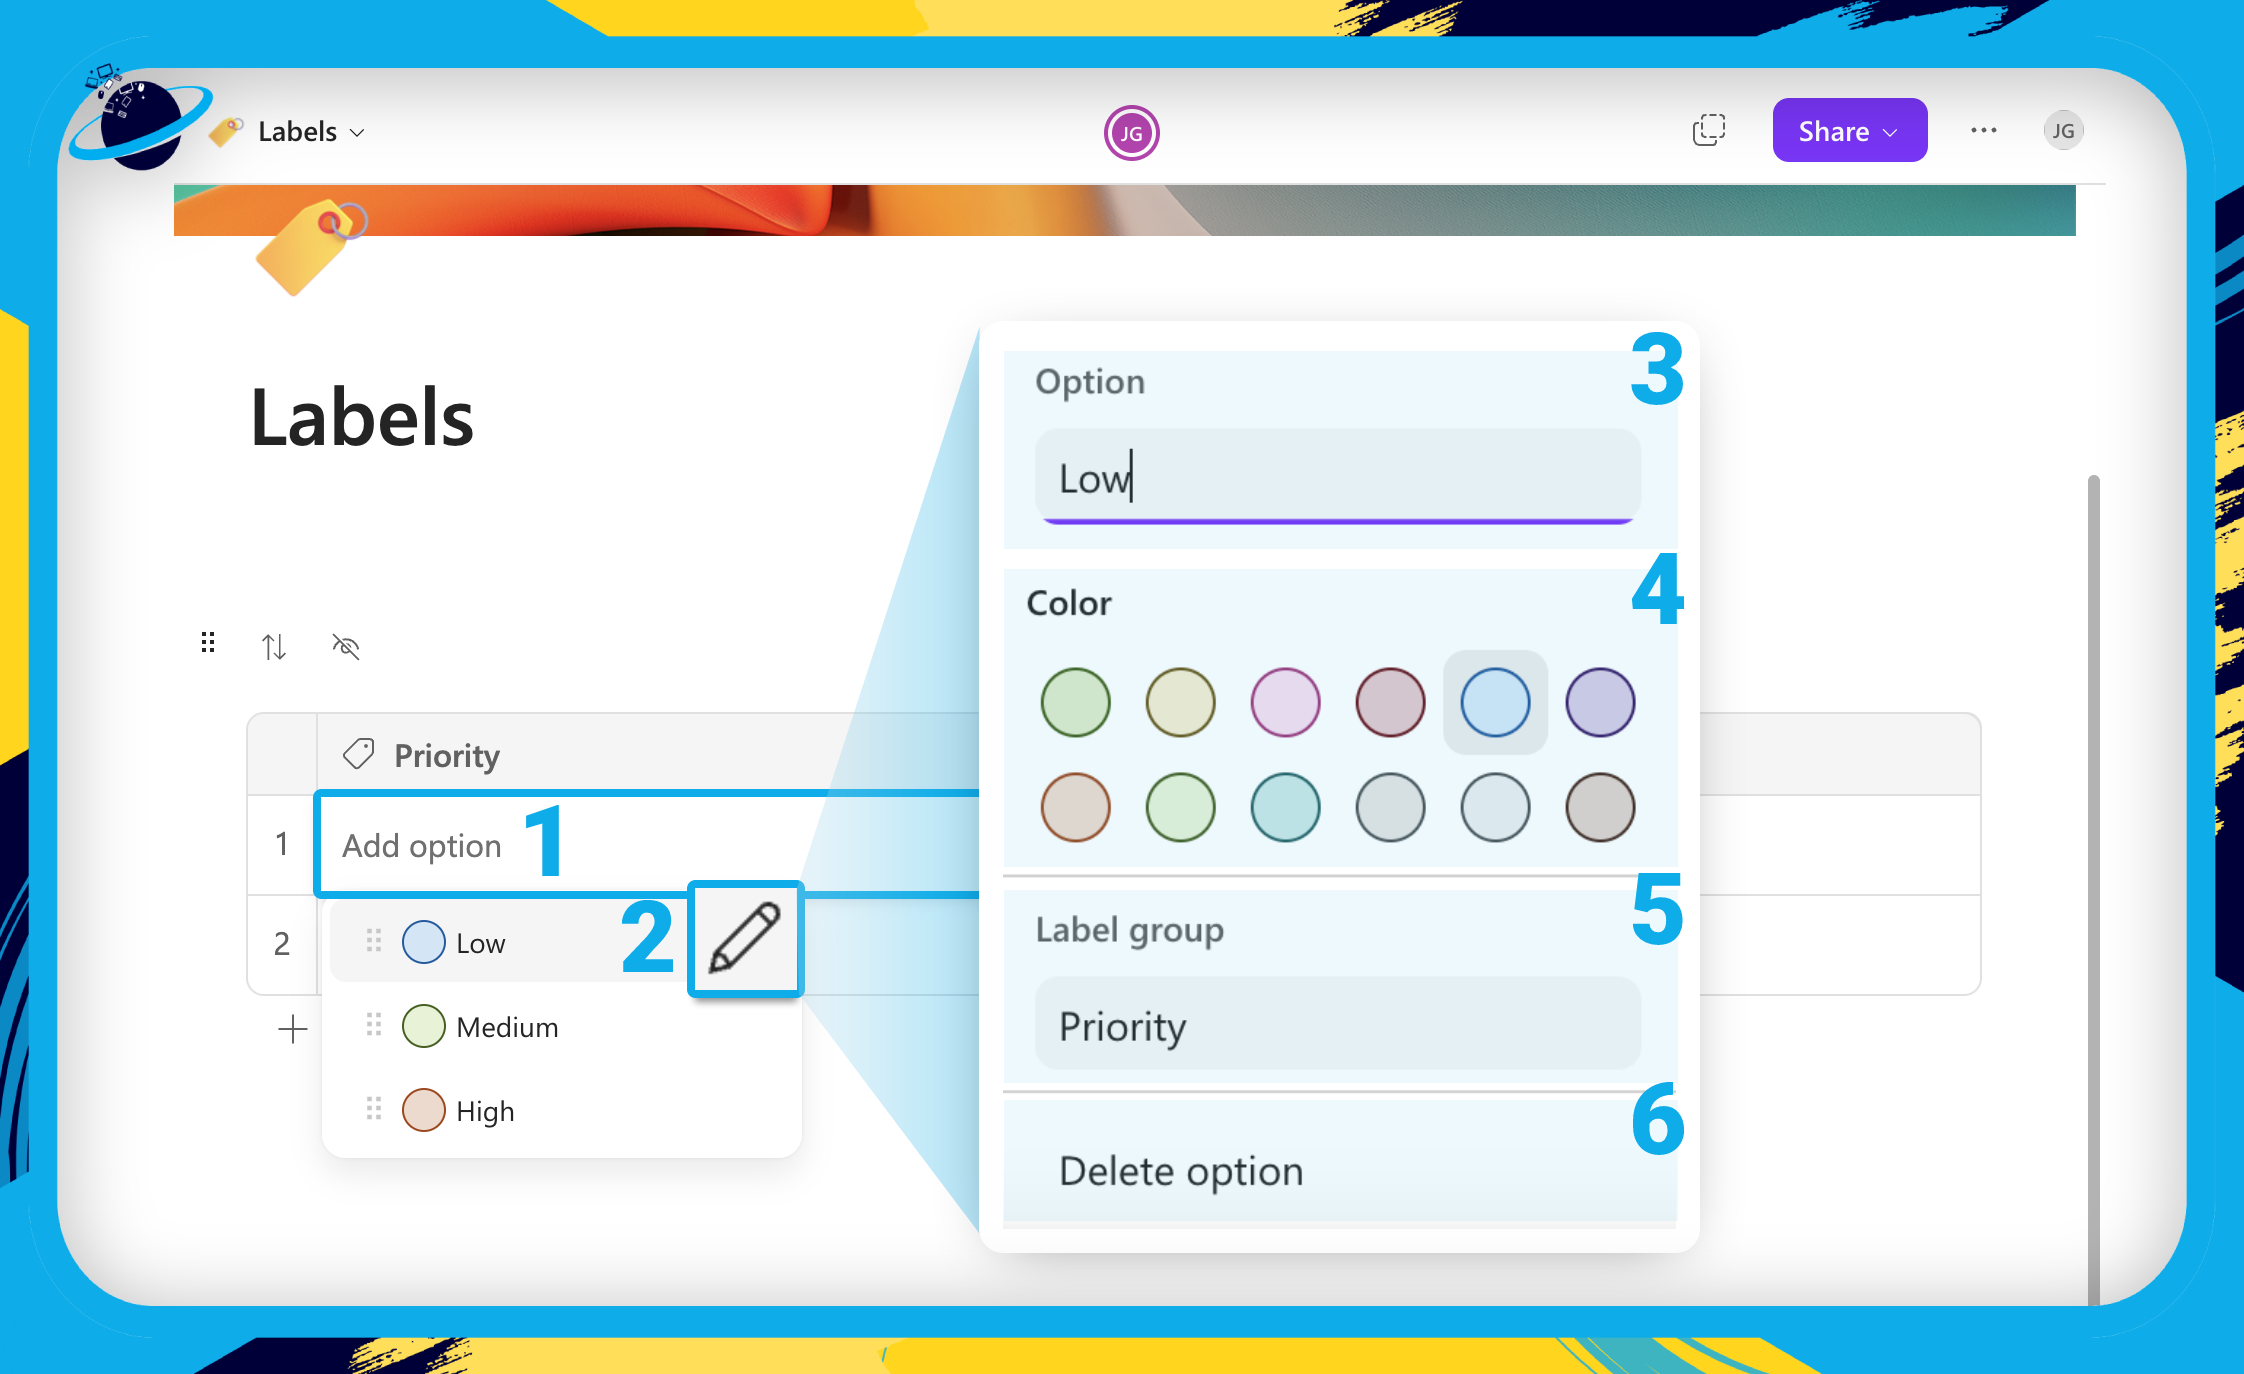
- First, click the “Add option” cell, or a label that you want to modify. [1]
- Then hover over the list of options and click the
 pen icon. [2]
 - In the popup box you can rename the option. [3]
- Select a new color from a list of predefined colors. [4]
- Change the label’s group name. [5]
- And delete the option. [6]
To add new options to an existing label group, you need to add the label to a compatible element that is not a table column type. As described in the image below, options in the “Priority” column don’t allow you to create additional options. Whereas a standard label in the opposite cell does.
- Create and select a standard label, then click
 “Add option.”
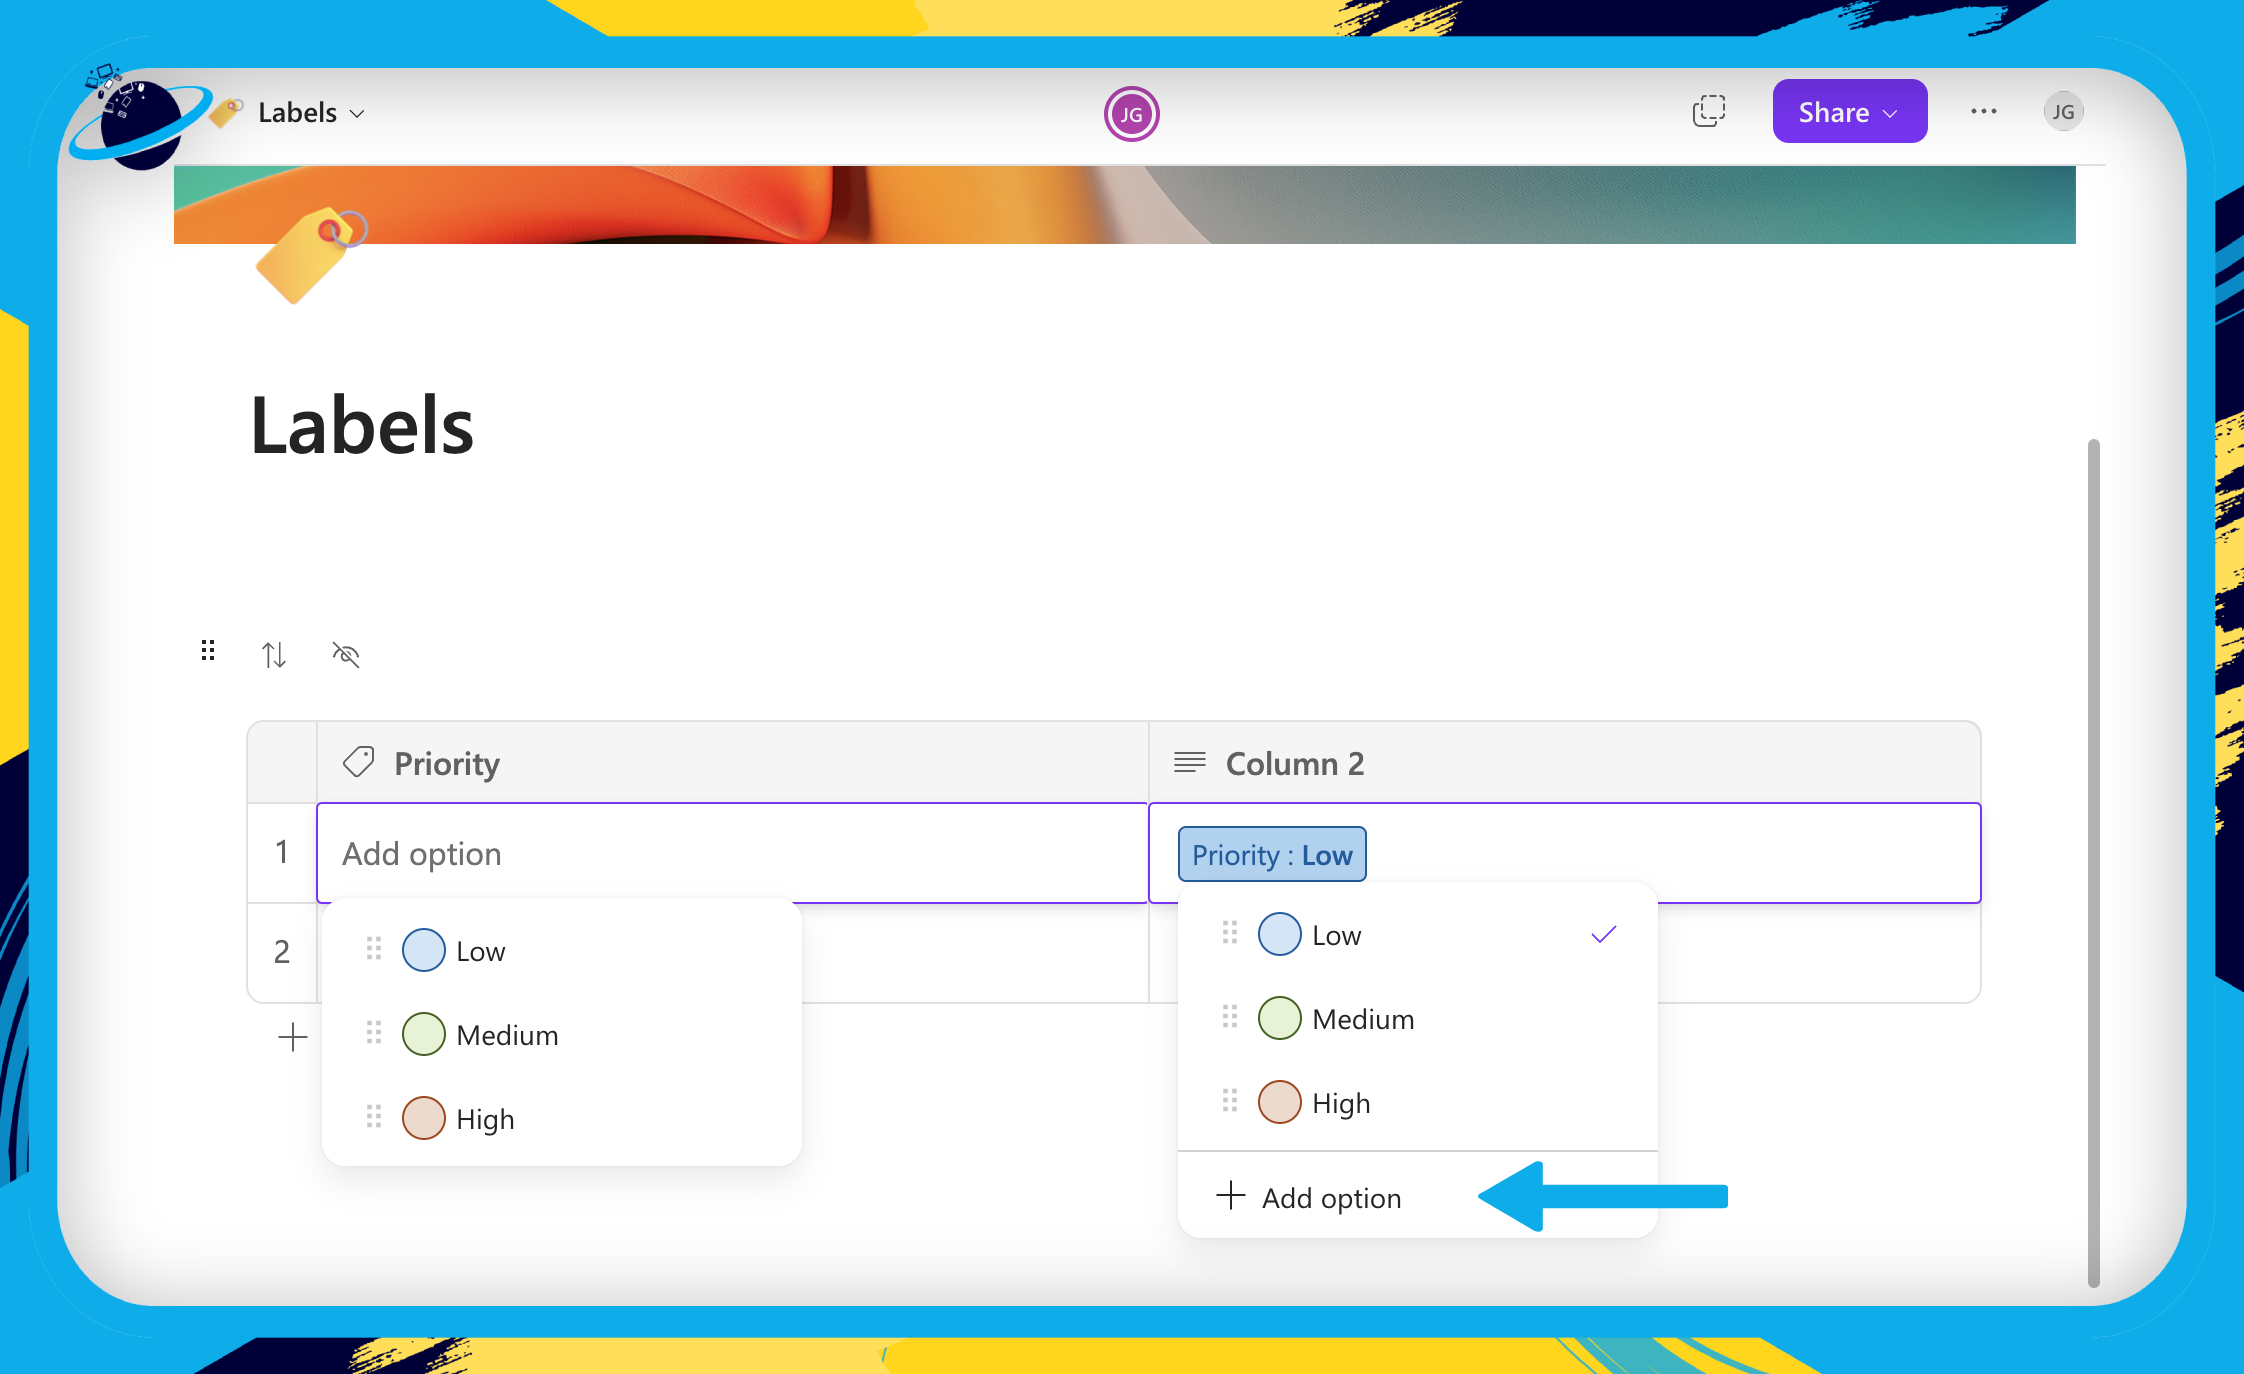
- Enter a name for your new option. [1]
- Then click the
 checkmark. [2]

- To reorder the options, click the label.
- Hover over the options and click the
 six dots next to the option you want to move.
 - Then drag the option up or down the list.


How to create a custom label group in Microsoft Loop
In this section, we’ll show you how to create a new label group.
If you want to do more than set progress and priority statuses for your projects, then simply create your own label groups. There are various ways of utilizing label groups, for example, you could ![]() use labels to create a survey to get feedback off your team members.
use labels to create a survey to get feedback off your team members.
Before we start, here are some label ideas for you to implement in your projects:
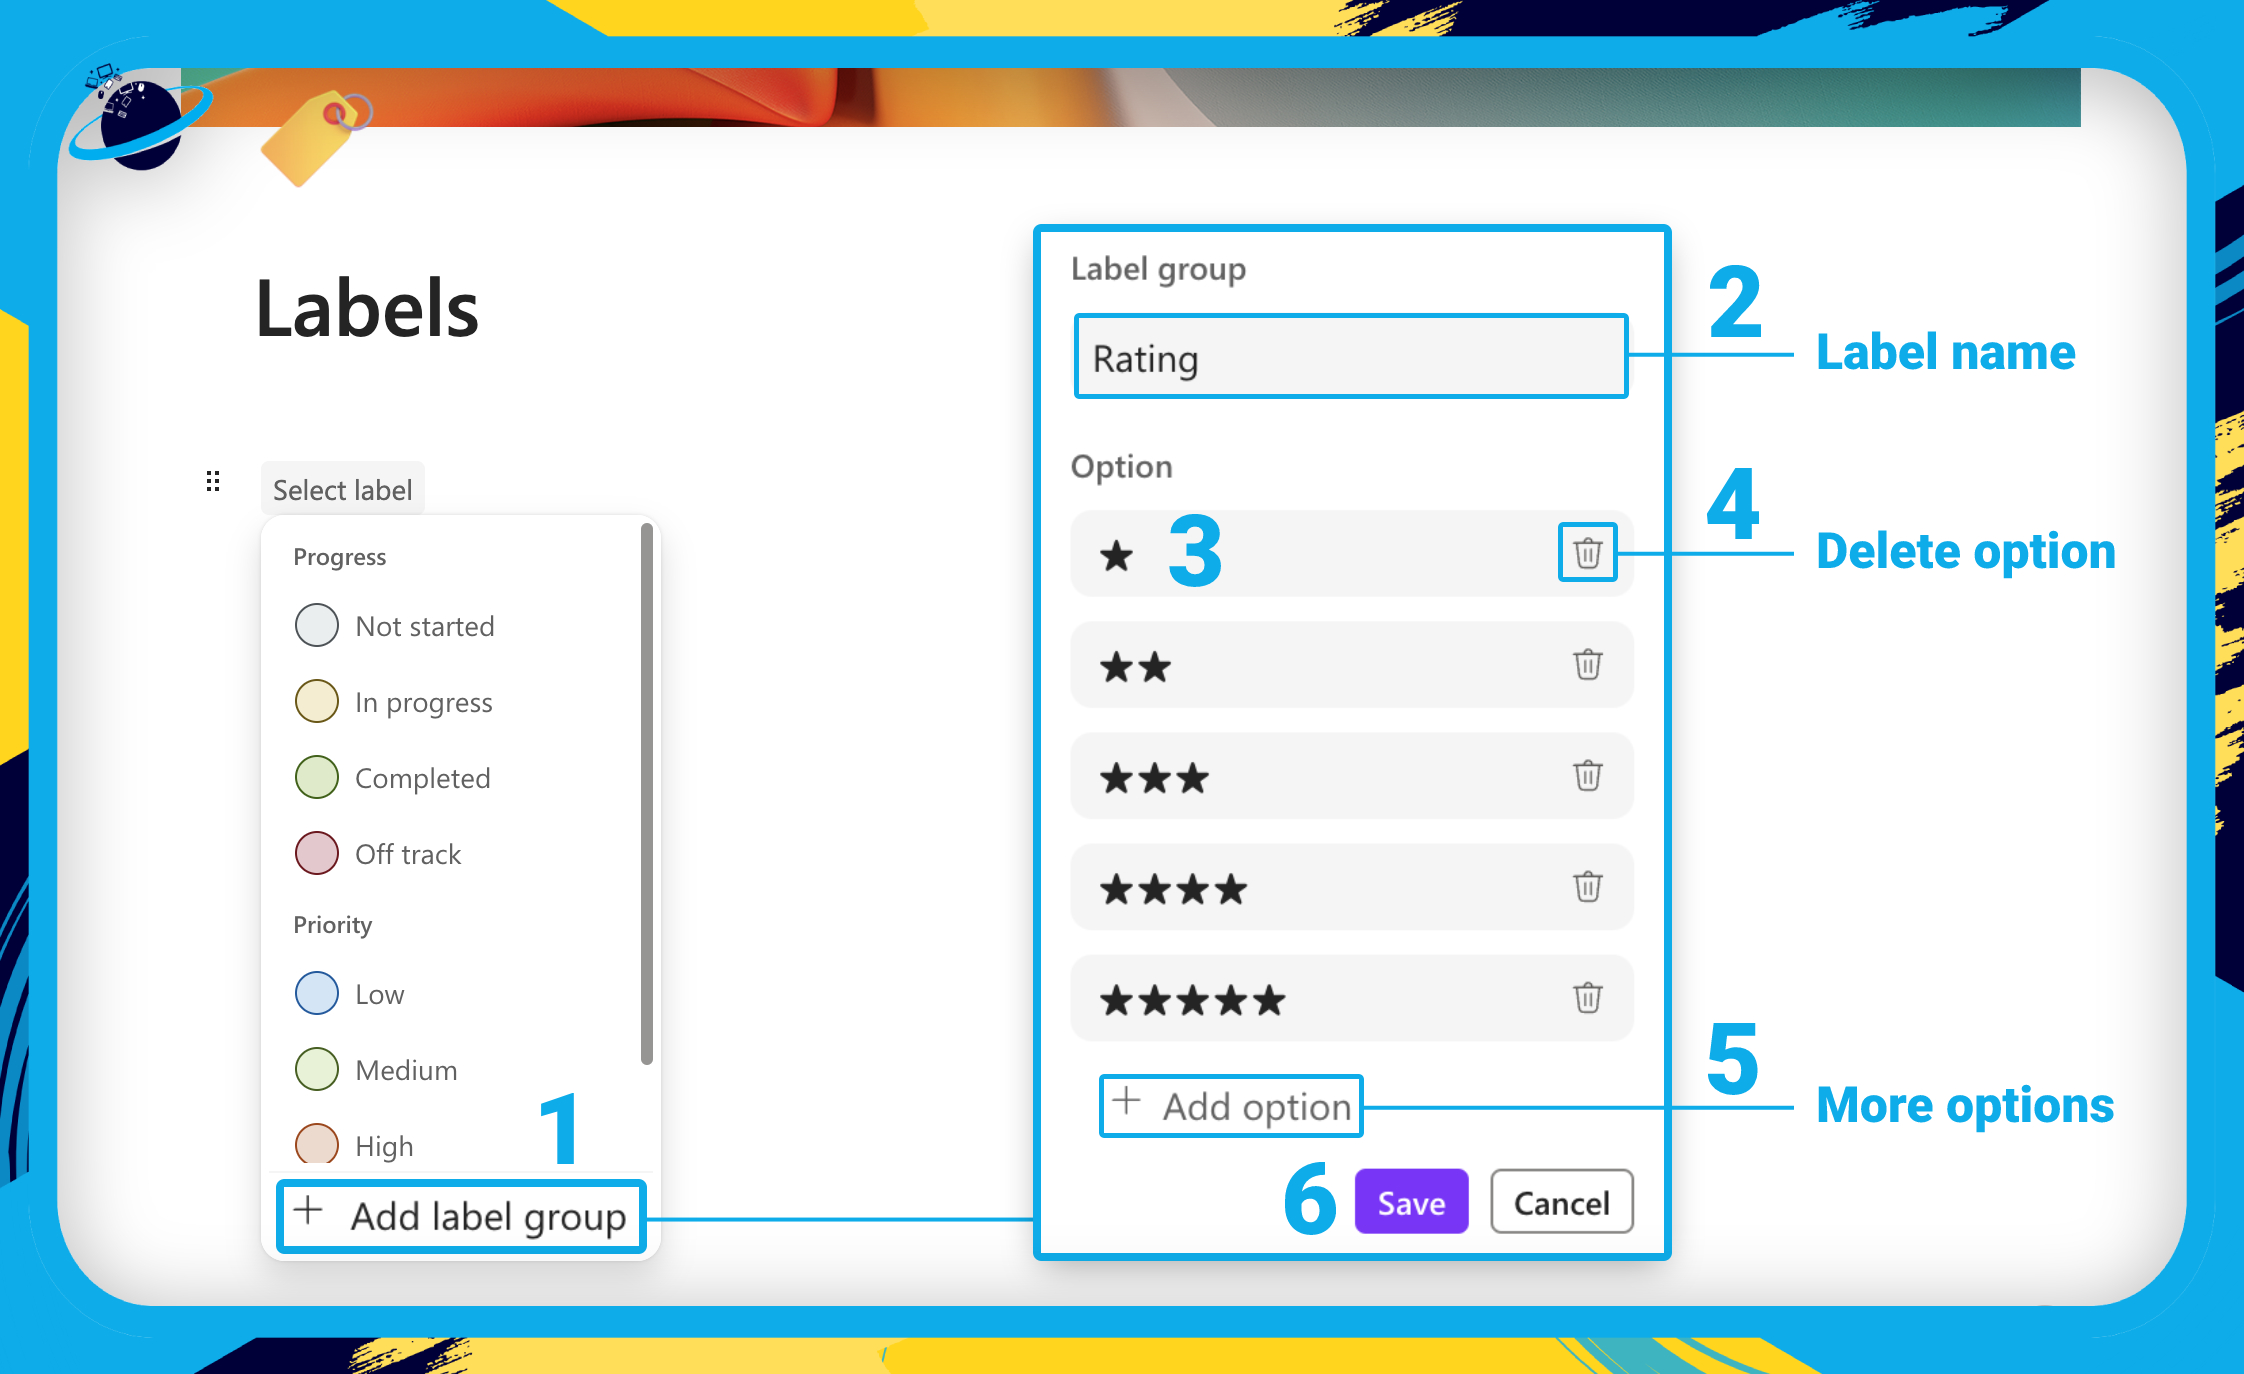
- To create a new label group, type “/label” and hit ⏎ Enter on your keyboard.
- Then click “Add label group” at the bottom of the list. [1]
- Add a name for your label group at the top. [2]
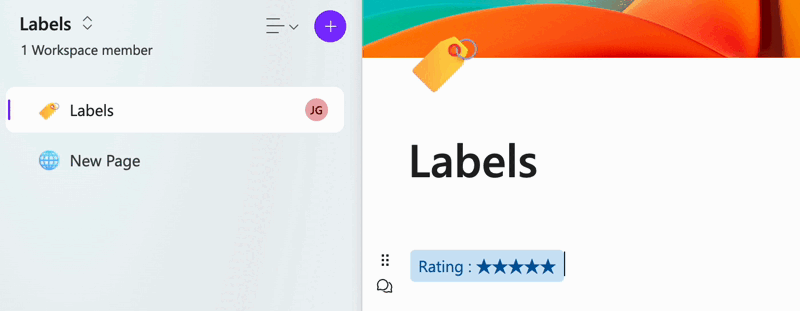
- Enter the options — we used ★ star symbols to create a rating system. [3]
- If you want to delete an option, hit the
 bin icon. [4]
 - Click “Add option” to create more options. [5]
- Finally, hit “Save.” [6]
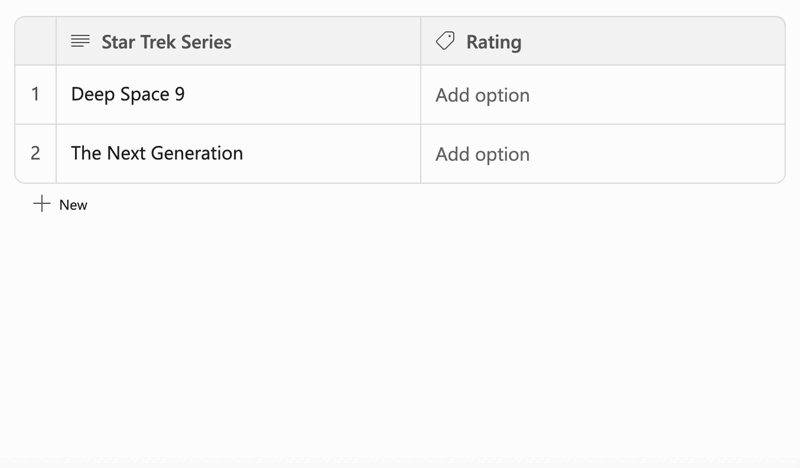
You can now add your new label group and start rating!
- You can also create a new label group inside a table.
- Hover over a column header and click the down arrow. [1]
- Go to “Change column type.” [2]
- Select “Label.” [3]
- Then click “Add label group.” [4]

How to use a custom label group in other pages
In this section, we’ll show you how to use your custom label groups in other pages and workspaces.
When you create a new label group, you can only use it within the page in which it was created. To work around that limitation, you can copy and paste the label into a new page.
If you make a lot of label groups and want to use them in different pages, consider building a dedicated labels page where you can store all your custom labels. That way, you can keep track of where your label groups are, and simply copy and paste them into any page you want to work on.
Frequently Asked Questions (FAQ)
 Can you delete a label group?
You can’t currently delete label groups in Microsoft Loop. However, as label groups can only be used inside the page they were created in (unless you copy and paste the label to a new page) then deleting the page will also delete the label group.

Conclusion
Labels in Microsoft Loop are a highly customizable and versatile tool for tagging other elements within your component. They can be used to add priority levels, progress updates, or anything you want to a task or element.
You can’t use labels outside the Microsoft Loop app, except for shared components that were originally made in Loop. That means you can’t use labels in Outlook or Teams.
Furthermore, you can’t delete a custom label group unless you delete the page in which you made it.
Thanks for reading!