Messaging on Teams is convenient when you’re not in the room with someone because it allows you to compensate for their distance; however, digital communication isn’t just a compromise— it has some perks. By utilizing Teams and Outlook, you can compose a message and schedule it for a later date or time. This feature is perfect for setting up reminders beforehand.
Although Teams does not natively support message scheduling, you can exploit its connection to Outlook and create scheduled messages via your email. If you’d like to try, use the guide below:
- In Teams
- Right-click your target channel
- Select “Get email address”
- Copy the email address
- In a web browser
- Open the Microsoft 365 home page
- Launch Outlook via the app launcher
- Click “New message”
- Paste the channel’s email into the “To” field
- Add a subject and message
- Click “Send later”
- Select “Customized time”
- Enter a date and time
- Click “Send”
In the following post, I will guide you on how you can schedule a Teams message for later. We’ll be doing this by exploiting Teams’ relationship with Outlook. If you found the above guide too brief, you’ll be glad to hear the rest of the post features in-depth, step-by-step guides with pictures.
If you’re looking for something specific, you can use the following links to access relevant content quickly:
- How to schedule a Teams message with Outlook (web)
- How to schedule a Teams message with Outlook (desktop)
- Blog post recap
How to schedule a Teams message with Outlook (web)
Much like the brief guide above, the following guide utilizes Outlook’s web browser client. However, consider using the guide below if you prefer using Microsoft 365’s desktop applications.
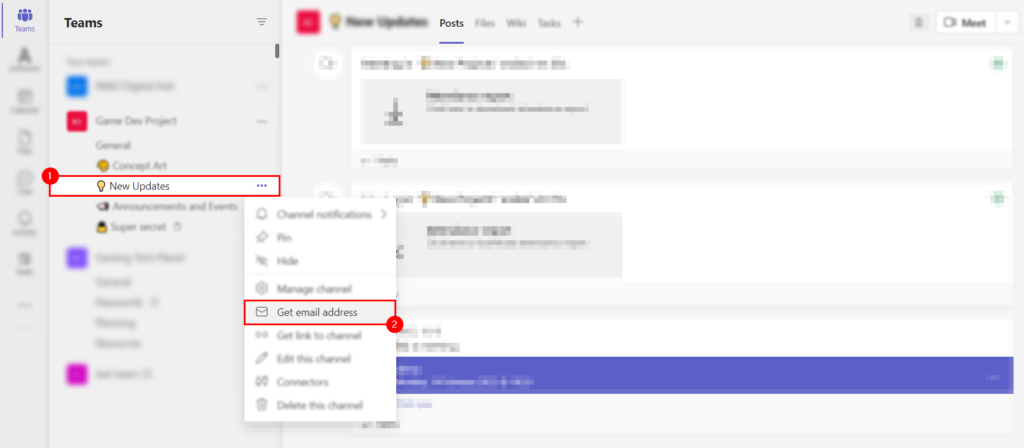
Step 1 — Find your channel’s email address
Teams channels possess email addresses. Thus, when an authorized user sends a message to the said email, it will also appear within the respective channel. To find a channel’s email address, you must right-click it in the channel bar. Then, in the resulting menu, select “Get email address.”
Step 2 — Copy the email address
Now that you’ve found the channel’s email address, you’re likely aware it’s not easy to remember. Fortunately for us, Windows, macOS, and most Linux systems feature a clipboard. Select “Copy” and close Teams.

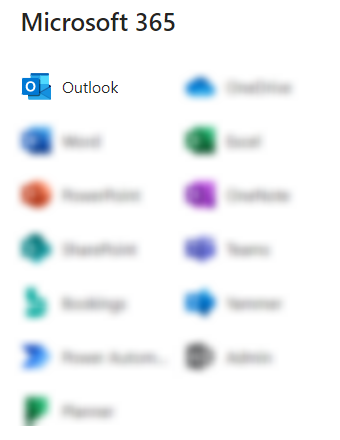
Step 3 — Launch Outlook via Microsoft 365
Head to the Microsoft 365 home page and open the app launcher. The app launcher is in the top left and resembles a quadrilateral consisting of nine dots. Then, via the app launcher, launch “Outlook.”
Step 4 — Compose a new message
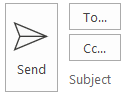
You will need to compose a message before sending it; however, that’s not possible via your inbox. To get to the composition field, click “New message.” You will find the blue button on the upper left part of the window.

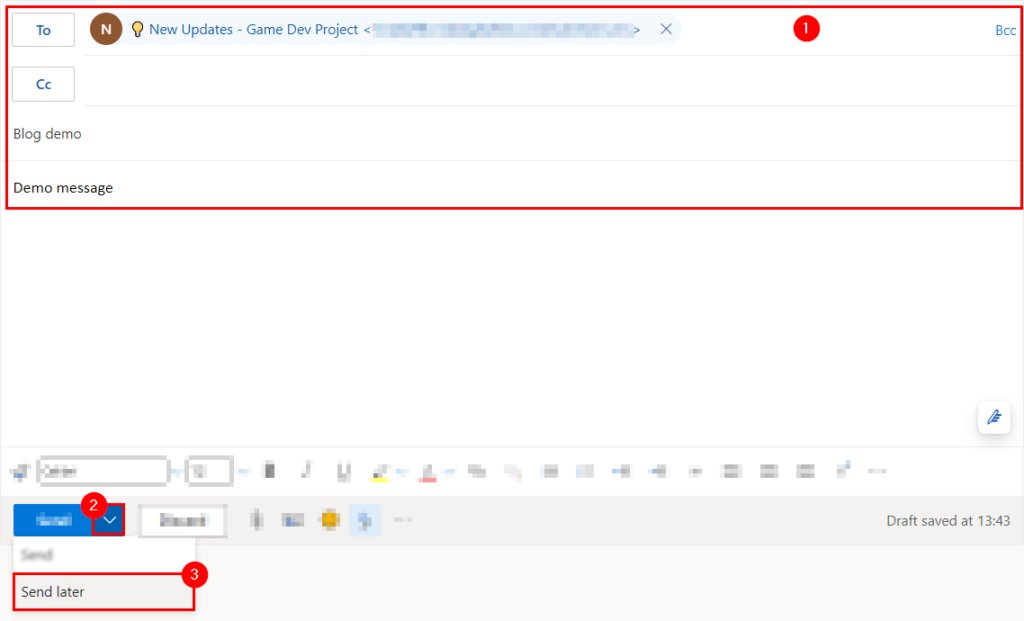
Step 5 — Compose a message and “send later”
After opening the composition field, fill its necessary fields: “To” and (optionally) “Subject.” Then, enter your message into the main text box. After completing these tasks, click the downward-facing arrow on the “Send” button and select “Send later.” Ensure the “To” field contains the email address you copied earlier.
Step 6 — Access the custom scheduling options
At first, Outlook will present some standard, albeit limited, scheduling options; ignore them and select “Customized time.”
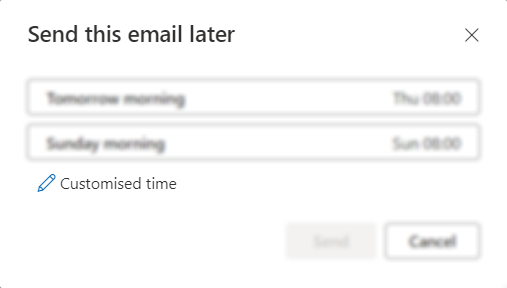
Step 7 — Schedule your preferred time and date
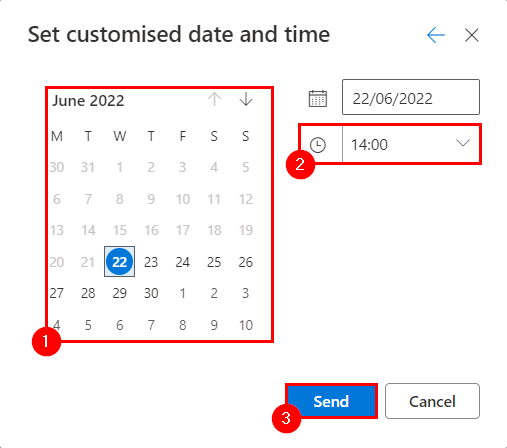
Use the calendar on the left to determine the correct date to deliver your message. On the right, underneath the date, you can specify the intended delivery time. Then, click “Send.”

How to schedule a Teams message with Outlook (desktop)
Unlike the previous guides, the following one takes advantage of Outlook’s desktop client; hence, it’s ideal for those who hate browser clients.
Step 1 — Find your channel’s email address
Teams channels possess email addresses. Thus, when an authorized user sends a message to the said email, it will also appear within the respective channel. To find a channel’s email address, you must right-click it in the channel bar. Then, in the resulting menu, select “Get email address.”
Step 2 — Copy the email address
Now that you’ve found the channel’s email address, you’re likely aware it’s not easy to remember. Fortunately for us, Windows, macOS, and most Linux systems feature a clipboard. Select “Copy” and close Teams.
Step 3 — Launch the Outlook desktop client
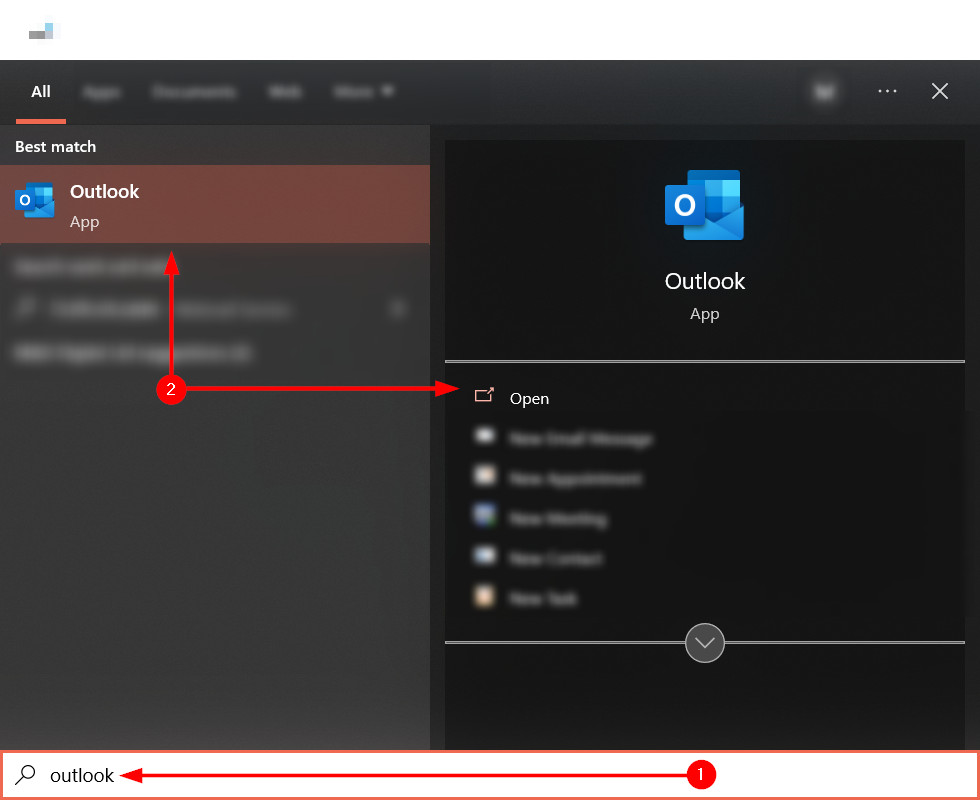
First, tap the “Start” key and type “Outlook.” Then, hit the “Enter” key or select “Outlook” under “Best match.”
Step 4 — Start composing a new email
You will need to compose a message before sending it; however, that’s impossible via your inbox. To get to the composition field, click “New email.” You will find the option in the “Home” tab under the “New.” category.

Step 5 — Fill the needed fields and delay delivery
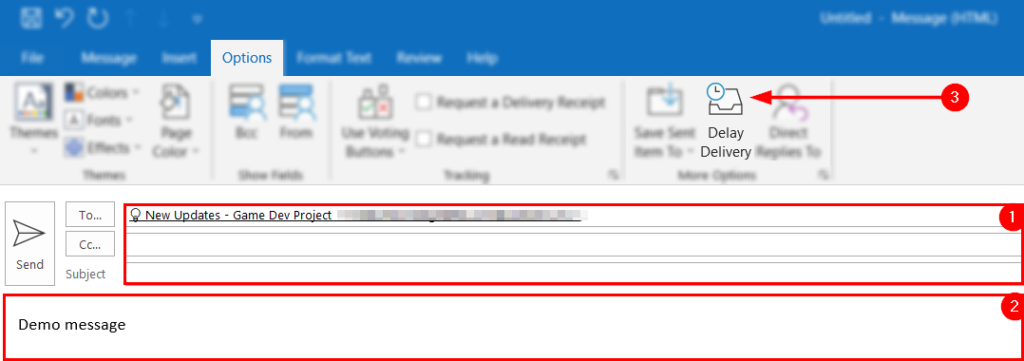
After opening the composition field, fill its necessary fields: “To” and (optionally) “Subject.” Then, enter your message into the main text box. Ensure the “To” field contains the email address you copied earlier. Once you have completed these tasks, head to the “Options” tab and select “Delay Delivery” under the “More Options” category.
Step 6 — Schedule your message
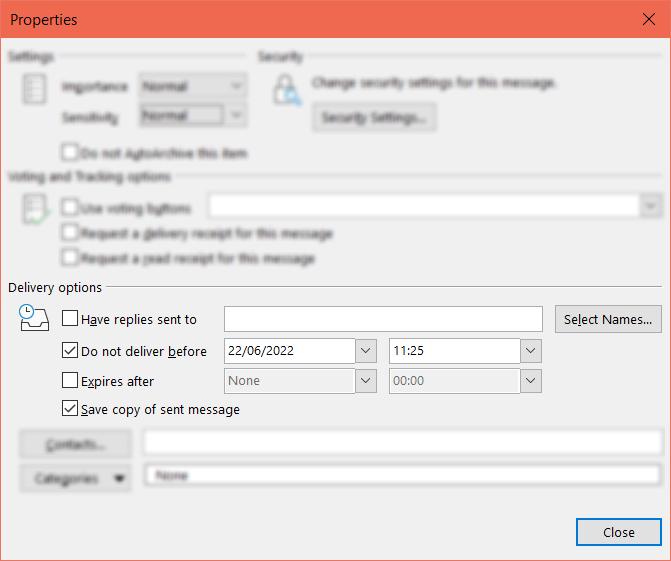
Under “Delivery options,” you will find a checkbox suffixed with the message, “Do not deliver before.” First, ensure you have checked this box. Then, you’ll need to update its horizontally adjacent options. The first determines the date Outlook should deliver your message. The second box determines the time at which Outlook should deliver your message.
Step 7 — “Send” the message
Lastly, click “Send.” Don’t worry— Outlook won’t deliver the message until the stated date and time.
Blog post recap
By exploiting Microsoft Teams’ relationship with Outlook, we’re able to schedule emails that (when delivered) will trigger a Teams message mirroring its content.
If you enjoyed this post or found it helpful, consider checking out the following related posts: