No one wants to risk emails getting automatically deleted. As a result, you probably want to know whether or not Outlook automatically gets rid of emails after a certain amount of time. So, does Office 365 (Outlook) automatically delete emails?
Office 365 does not automatically delete emails as standard. You can configure Office 365 within Outlook and using retention policies to automatically delete emails.
Out of the box, your emails won’t automatically be deleted when using Office 365/Microsoft 365 business email. However, if your emails are being automatically deleted, there could be numerous causes, which I’ll detail in this blog post. I’ll also explain how you can turn on/off the automatic deletion of emails.
  | |
 Compatible with Windows, Mac OS, and Android. Compatible with Windows, Mac OS, and Android. | FROM $6.00 user/month |
Does Office 365 Automatically Delete Emails?
If you leave Office 365 and Outlook at default settings, emails will not be deleted automatically. However, retention policies and archiving settings might result in emails disappearing from your inbox.
These settings have to be set up and configured, but it’s possible that they may have been set up on your behalf; for example, if you work with a managed service provider who looks after your IT solutions.
If you don’t have an IT provider and your emails are automatically deleting, or you want to configure your system so that emails automatically delete, I’ll take you through how to do so now.

How Do I Stop Office 365 From Deleting Emails?
Several settings can cause emails to be automatically deleted when using Office 365 Outlook.
- Retention policies
- Auto-archiving
If either of the two features above are used, your emails may be deleted automatically after a certain time – although archived emails aren’t deleted per se.
In this blog post, I’m going to demonstrate how you can modify and use both features above – and disable/enable them if you want to.
   |
Changing Email Retention Policy Settings in Microsoft 365
In Microsoft 365, admins can create retention policies. With retention policies, you can manage your company’s email in numerous ways:
- Retain-only: Ensure that content cannot be deleted for a specific period of time – or forever.
- Delete-only: Automatically delete emails after a specified period of time.
- Retain and delete: Ensure that content cannot be deleted for a period of time. After that period of time, emails are automatically deleted.
If your business is using any kind of delete-only or retain and delete retention policy through Microsoft 365, your emails could be automatically deleted at some time.
If you are a system administrator, there are numerous ways to modify retention policies. The quickest and easiest route is what I’ve outlined below. However, you do have to be a Microsoft 365 global administrator to follow this process.
- Log into Microsoft Office. You can do this by going to portal.office.com.
- Select ‘App launcher’ to open the menu [screenshot below shows where to click] and select ‘Admin’.
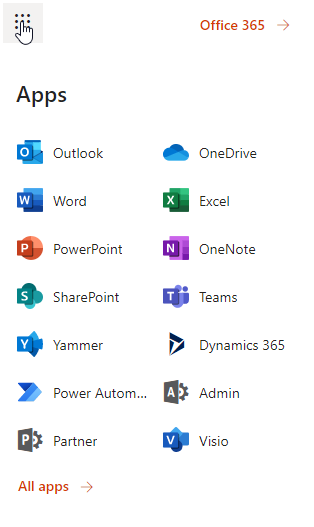
- Once the Microsoft 365 admin center loads, select ‘Exchange’ [shown in the screenshot below].
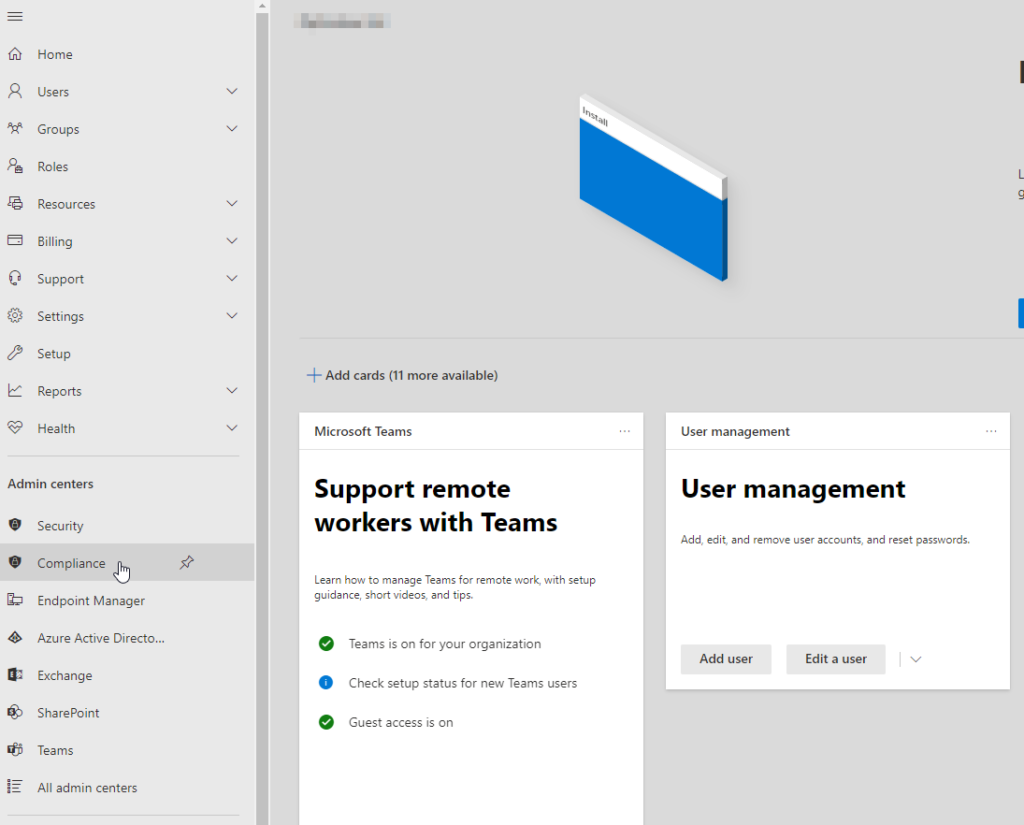
- When the Exchange admin center loads, select ‘compliance management’ on the side menu [note: you must be using the classic Exchange admin center]

- When the compliance management page loads, select ‘retention policies’. On this screen, any email retention policies you have active will be shown. The next tab along, ‘retention tags’, tells you what each retention tag means, how they work, and lets you create new ones.
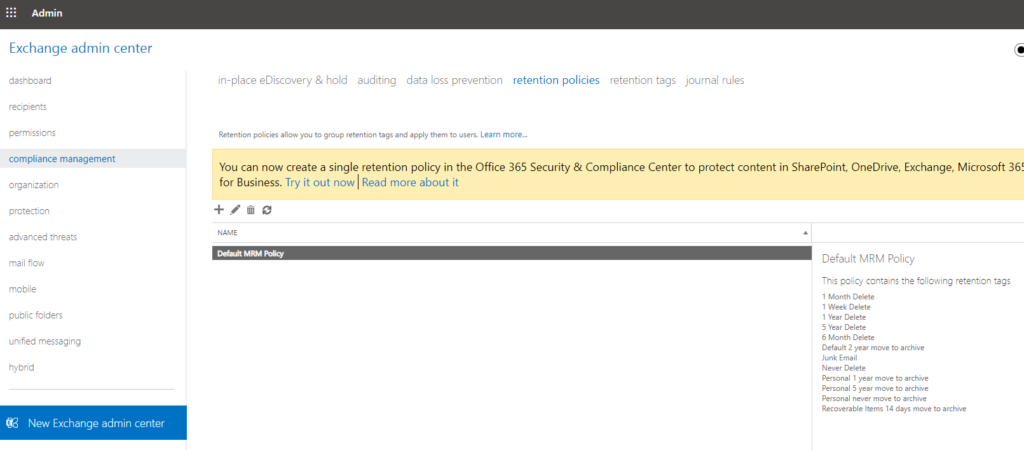
If a retention policy is shown here, have a look at the retention tags. For example, the Default MRM Policy shown in my screenshot has a range of retention tags set up, because it’s just a default. However, yours might have just the 1 Month Delete tag, for example, which would tell you why your emails are being automatically deleted.
To circumvent the issue and prevent emails from automatically deleting, delete the policy – if you’re sure you don’t need it – or edit it. If you simply want to stop emails from getting deleted, you could add in the Never Delete tag, which will overrule any deletion tags and prevent your emails from being automatically deleted.
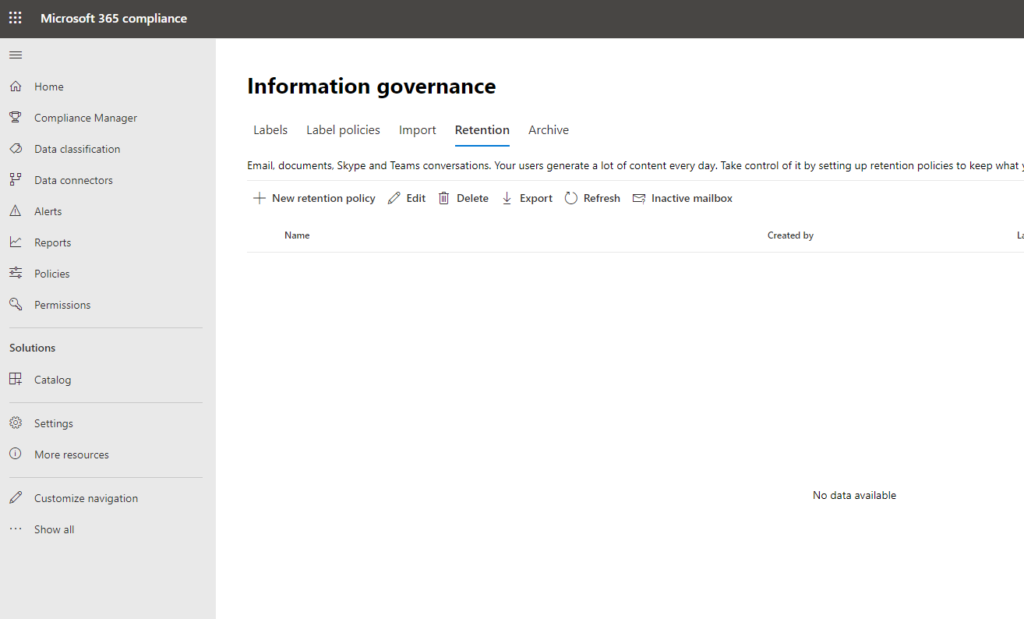
If there are no retention policies shown in the Exchange admin center, it doesn’t mean there are no retention policies set for your email. Retention policies can also be created and set in Office 365 Security & Microsoft 365 compliance.
- Log into Microsoft Office. You can do this by going to portal.office.com.
- Select ‘App launcher’ to open menu and select ‘Admin’.
- Once the Microsoft 365 admin center loads, select ‘Compliance’.
- After Microsoft 365 compliance loads, select ‘Policies’ on the side menu. When the next screen loads, select ‘Retention’. If you have any policies created and enforced, they will be shown here.
Changing Archiving Settings Within Outlook
If it seems that your emails are disappearing, but you’re not using any retention policies, you could have AutoArchive turned on. AutoArchive doesn’t delete your emails, but it moves them to a separate archive mailbox. As a result, you might think that your emails have been deleted.
There are a couple of things to note about AutoArchive.
- AutoArchive might not be available if your mail profile connects to an Exchange Server
- If your business has a mail retention policy set up, it might override AutoArchive
Now we’ve covered that, here’s how you can check if AutoArchive is turned on.
- Open the desktop Outlook application
- Select ‘File’
- Select ‘Options’
- Select ‘Advanced’
- Select ‘AutoArchive Settings…’
When you click AutoArchive Settings following the process above, a new window will open.
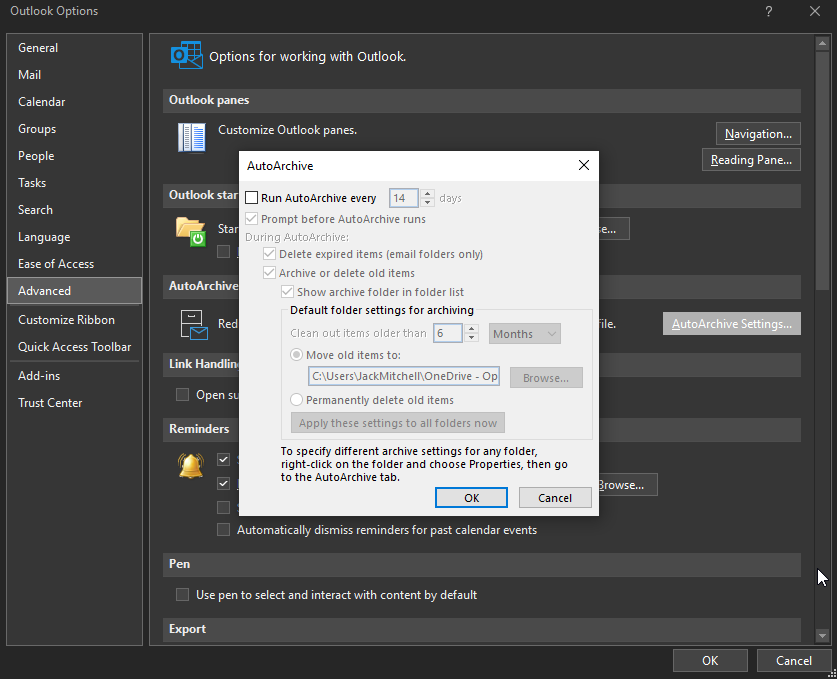
The image above shows the window I am referring to. As you can see, I don’t have AutoArchive enabled. However, if you do have it enabled, that will be reflected here. Furthermore, it’ll show you where your old emails are being stored, or if they’re being deleted instead of stored.
Check Exchange Account Settings to Check Email Is Downloaded
Depending on how your email account and the desktop version of Outlook are configured, you might have a limited number of emails downloaded – if any at all. After a certain time, your settings might mean emails are deleted locally while still being stored in the cloud.
Exchange Cache Mode is a setting available within Outlook that saves a copy of your mailbox to your computer. This provides quick access to your data, so you can access it regardless of your connection and whether you can sync your data or not.
If you are ‘Online with Microsoft Exchange’, this means your Outlook application is connected to the Exchange directly with no data saved locally. Your inbox can take a long time to sync and some emails may sync through slowly – for example, those with large attachments – resulting in a poor experience. That’s why most providers will enable Exchanged Cache Mode as standard.
However, this is where problems can arise. When you set up Cached Exchange Mode, you choose how many emails you want to download locally – 1 years’ worth of email, for example. This is constantly updating, so you might think your mail is going missing if it’s more than one year old.
To check your Exchange account settings, here’s a step by step guide with screenshots.
- Open the Outlook application and select ‘File’.
- Select ‘Account Settings’. When the drop-down menu appears, select ‘Account Name and Sync Settings’.
- Here you can see whether or not you are using Cached Exchange Mode. You can also decide how many emails you want to have downloaded locally, ranging from 3 days to all – meaning all the email ever sent to and from your account.
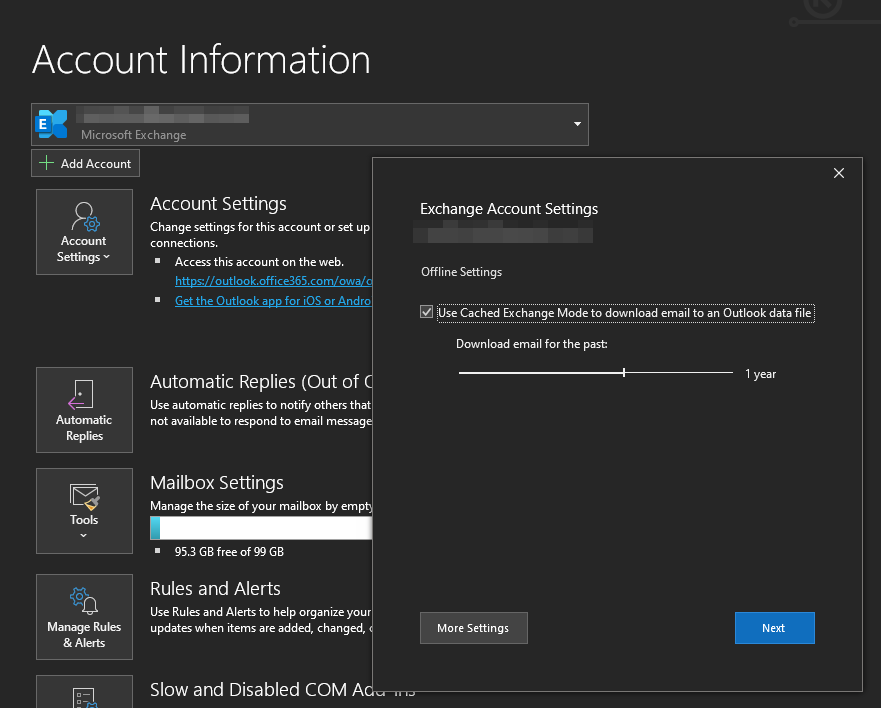
I have a year of email downloaded locally, as you can see in the screenshot above. Downloading too much email can slow down your computer while having just a few days’ worths of email means syncing can take a long time. I feel like having a year’s worth of email downloaded is a healthy in-between.
I hope this blog post has helped you to learn much more about Office 365 and Outlook and whether or not emails are automatically downloaded.