Imagine you have an Excel table with some irrelevant rows that you don’t want to get rid of. You might wish to “hide” them in this situation. In Excel, there are various options for hiding and showing columns and rows. You may not be aware that you may conceal and unhide many columns or rows at the same time, even if they are not adjacent. If they’re close together, you can utilize Excel’s Grouping tool. Follow through for more information on how you can group columns to hide.
- Hide columns using the group feature
- How to hide and unhide columns
- How to turn the group feature off
We developed a list of key points after conducting a comprehensive study to assist you in fully comprehending the working mechanics employed for grouping columns to conceal. As we get to grips with everything there is to know about grouping columns to conceal, read on for a complete guide to all of the points and much more in this blog.
–
Hide columns using the group feature in Excel
The instructions below detail how to utilize the Group option in Excel for practically all versions; however, if you are using an older version than 2007, it will not function because the feature isn’t available. Only contiguous columns can be grouped together — follow through for more information.
Step by step process – Hide columns using the group feature
- First, open your Excel document.
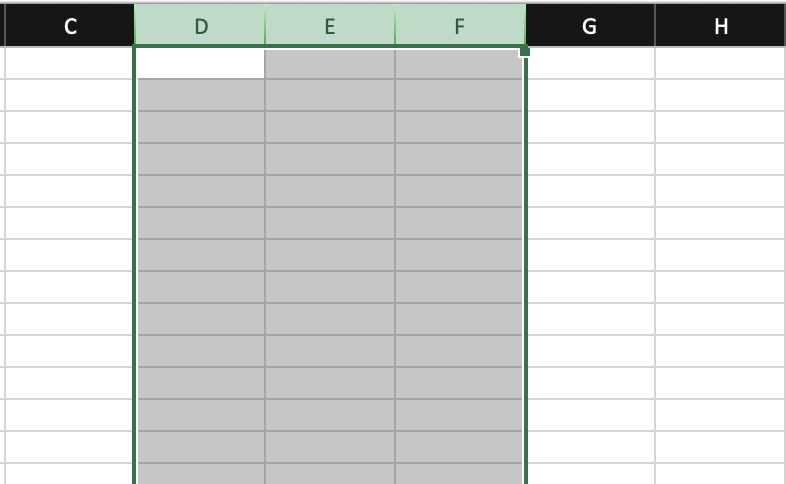
- Next, click on the column header, using the shift key to select multiple columns.
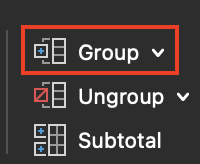
- Now navigate over to the “Data” tab.
- Click on “Group”.
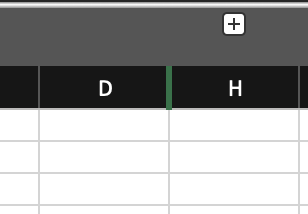
- A new bar will show above the column headers, here click on the little “-” symbol.
- Finally, view the results.
Your columns now grouped can now be hidden away with a single click on that symbol in the corner, make sure you have the correct columns selected you can always ungroup and regroup if you have selected the incorrect columns. You can go across and apply this feature to multiple columns this makes it easier to group and hide columns that may now be necessary now but can be used later on.
This is a pretty simple layout really, there will be a “+” symbol in place of the minus to expand the columns when you require them.
Apply multiple groups to multiple columns, they will be stacked for easier conveniences, for instance, if you have multiple address tables they can be grouped and then grouped again to group the groupings. Lots of options available to suit your preferences, be sure to follow through for more information on grouping columns to hide. Because it is so simple to use, many users prefer the “Hide” function for hiding rows or columns:
- Make a note of the row(s) or column(s) you wish to conceal.
- Hide the row number or column letter by right-clicking on it.
Column accessibility
Excel’s ability to conceal columns is really useful. There might be a variety of reasons why some details aren’t displayed:
- You’d want to compare two or three columns, but they’re separated by a few others. For example, you’ll need to compare column A with column Y. You might also find the article Freezing Panes useful.
- You have a few assistance columns containing calculations or formulae that might be confusing to other workbook users.
- You don’t want your coworkers to read or alter certain crucial formulas or personal information. If you look at Disable the Unhide column option in Excel, you may discover how to keep your columns from being shown.
Continue reading to learn how to quickly conceal columns in Excel. In this post, you’ll also learn about a clever approach to hide columns using the Group option, which provides customized icons to instantly hide and reveal certain columns.
–

How to hide and unhide columns in Excel
- Choose the number of columns or rows you’d want to hide (use the Control key to select additional noncontiguous columns or rows).
- Choose to Hide Columns or Rows from the Format button on the Home tab / Cells group (another option is to Right-click on a highlighted column or row heading and select hide).
- Your Columns and Rows have been hidden for the time being.
- Unhide Columns or Rows by selecting the Format button beneath the Home tab / Cells group (another option is to drag over the range of columns or rows you are interested in unhiding then Right-click in the column or row heading and choose to unhide).
- The Columns and Rows you created are now visible.
–
How to turn the group feature off
- Choose the number of Columns or Rows you want to Ungroup.
- On the Data tab / Outline group, click the Group icon, then choose.
- The Grouping function has been deactivated.
In-depth – Step by step process – Hide columns using the group feature
- First, open your Excel document.
- Next click on the column header, using the shift key to select multiple columns.
- Now navigate over to the “Data” tab.

- Click on “Group”.
- A new bar will show above the column headers, here click on the little “-” symbol.

- Finally, view the results.
All the columns that needed to be hidden are now hidden. This will work rows as well; as mentioned earlier you can select two separate columns — they have to be continuous. You can apply multiple groupings to multiple columns if that is something you require.
That’s it for this Blog thank you for taking time out to read our content, please feel free to email our team about how it went if you followed the steps or if you need more help with the questions we answered in this Blog.