If you’re facing poor performance, graphical glitches, or compatibility issues, then you may need to update your graphics drivers. In this guide, we’ll show you how to identify your graphic card model, and successfully update the drivers on Windows 10 & 11.
How to Update Graphics Drivers in Windows 10 & 11
- To update graphics drivers, right-click the start menu and select “Device manager.”
- In Device manager, click the small arrow next to “Display adaptors.”
- Then right-click your graphics card.
- Next, click “Update driver” and you’ll have the option to search automatically or browse the computer.
We’ve also created a video to help guide you through the steps:
Signs you need to Update Graphics Drivers
Think you might need to update your graphics drivers? Here are some of the signs that you may be using outdated drivers.
Poor Performance
If you notice a decrease in performance, such as lower frame rates in games, slower rendering of graphics, or sluggishness in graphic-intensive applications, it could indicate outdated drivers.
Graphical Glitches and Artifacts
Outdated drivers may cause graphical glitches, artifacts, or screen tearing during gaming or when using graphic-intensive software.
Compatibility Issues
New games or applications may not run properly or may crash if your graphics drivers are outdated. Updating your drivers can often resolve compatibility issues with new software.
System Crashes or Blue Screens
Outdated drivers can sometimes lead to system instability, resulting in frequent crashes, freezes, or blue screen errors (BSODs).
Missing Features or Functionality
New driver updates often include optimizations, bug fixes, and new features. If you’re missing features or functionality that you know should be supported by your graphics card, updating the drivers may resolve the issue.
Notifications or Alerts
Some driver management software or utilities provided by the graphics card manufacturer may notify you when new driver updates are available. It’s a good idea to pay attention to these notifications.
Security Vulnerabilities
Outdated drivers may contain security vulnerabilities that could potentially be exploited by malicious software. Updating your drivers helps ensure your system is protected against known vulnerabilities.
How to Check if your Graphic Drivers Need Updating
Sometimes poor computer performance can be due to outdated drivers in various systems. That’s why checking for driver updates could be the best option. To do that in Windows 10 & 11, follow these steps:
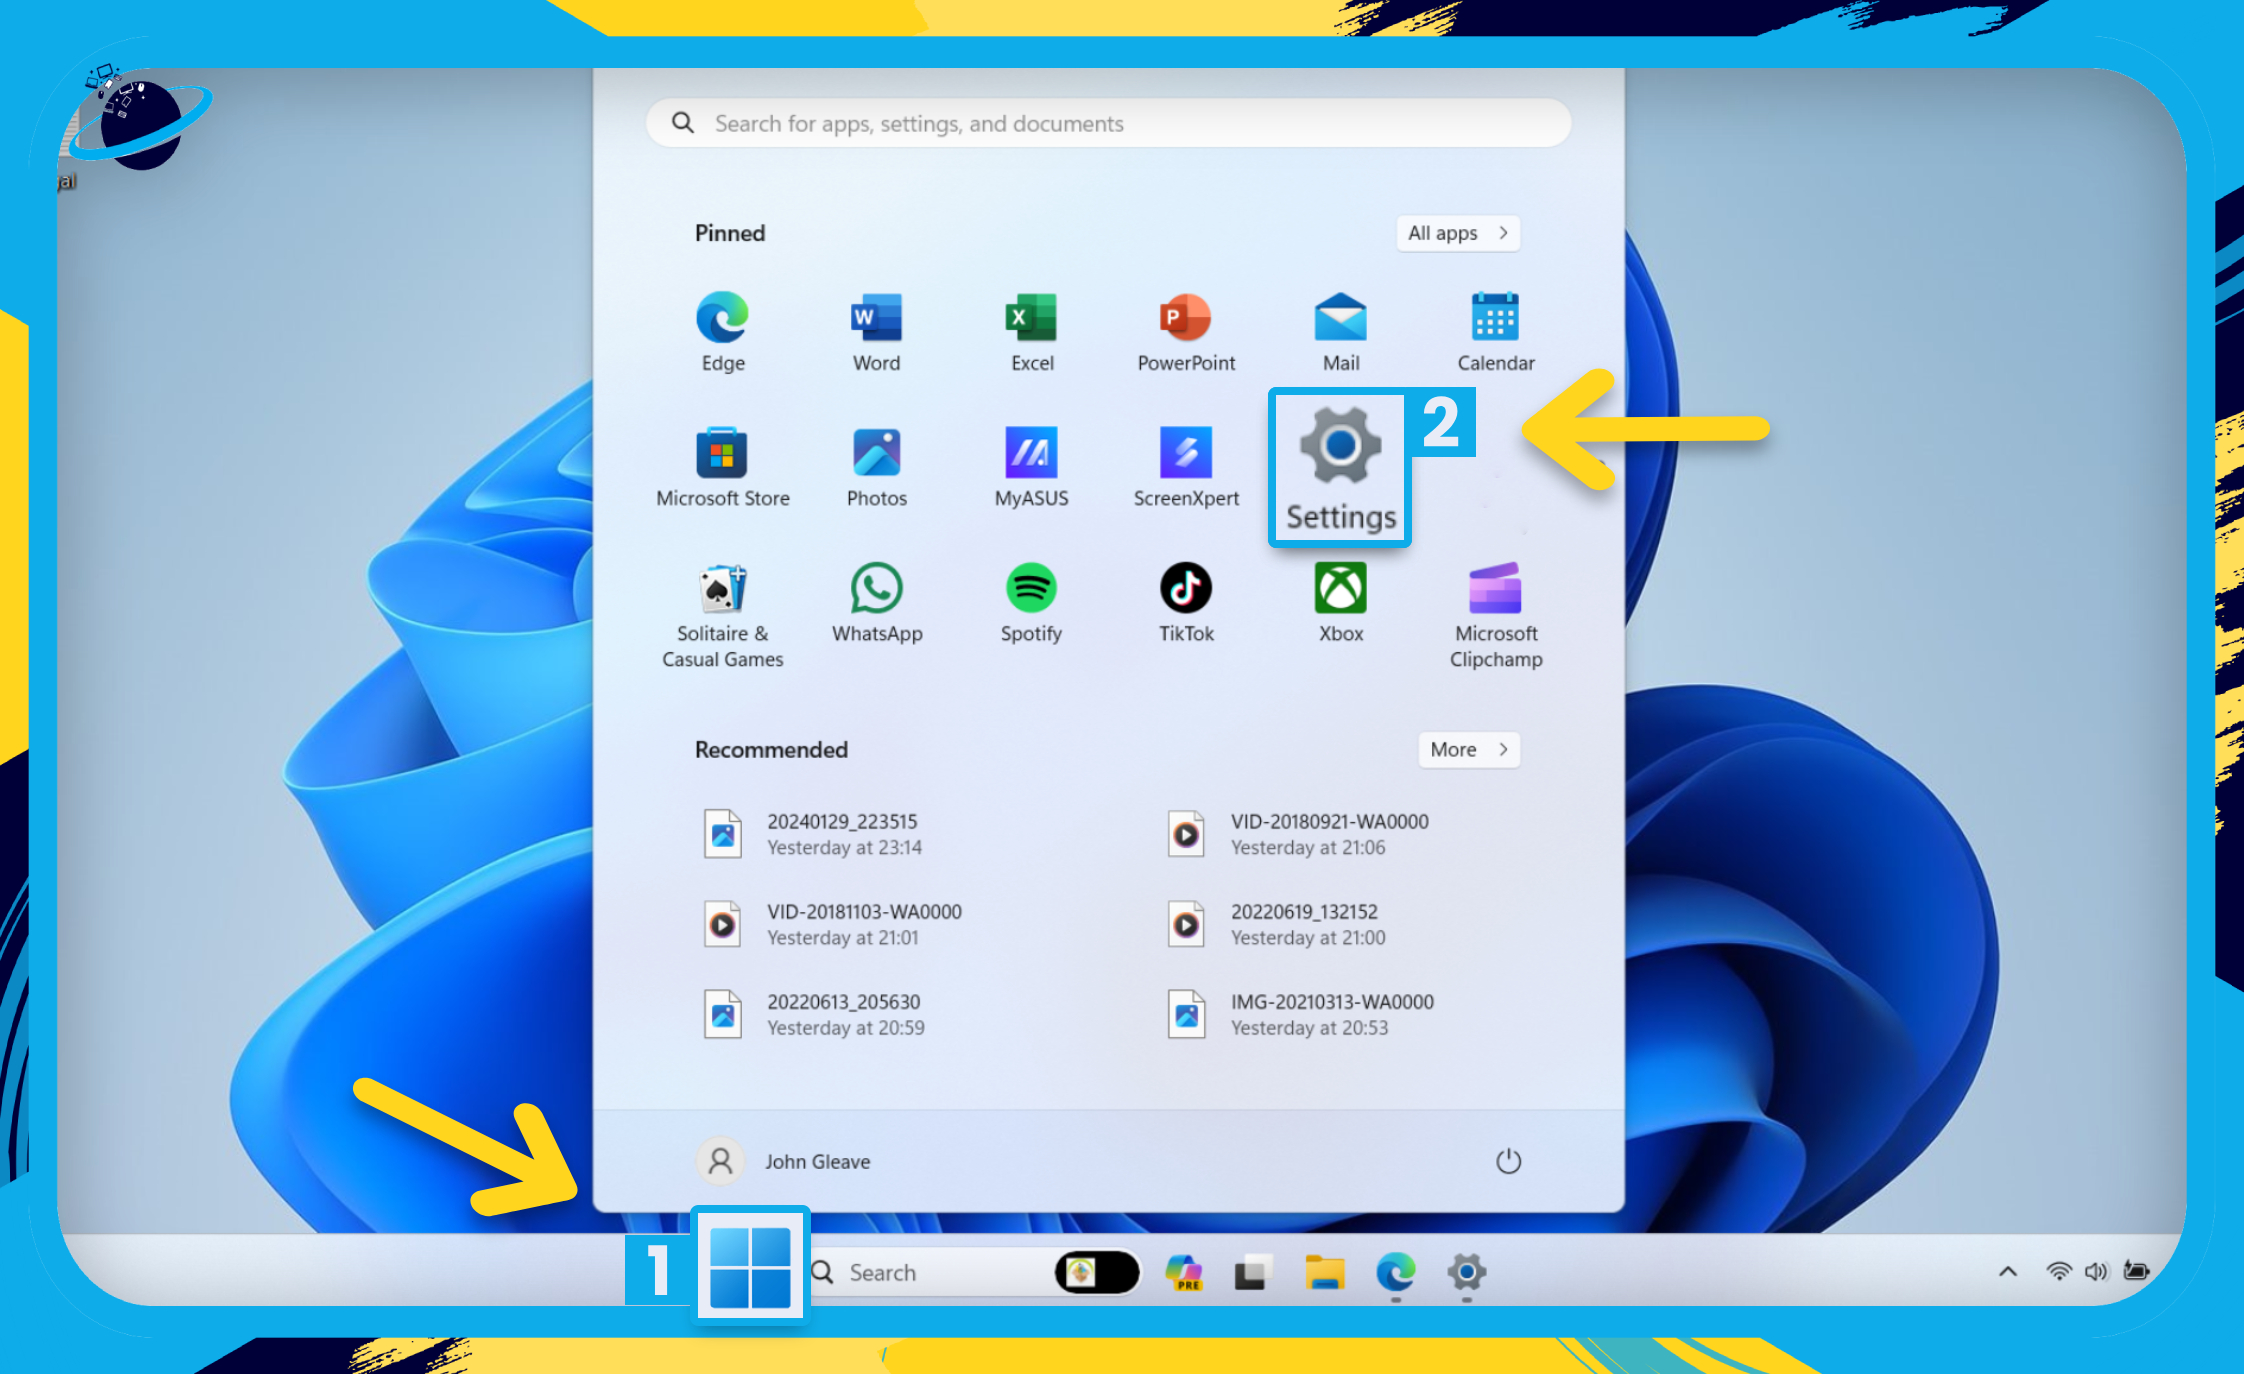
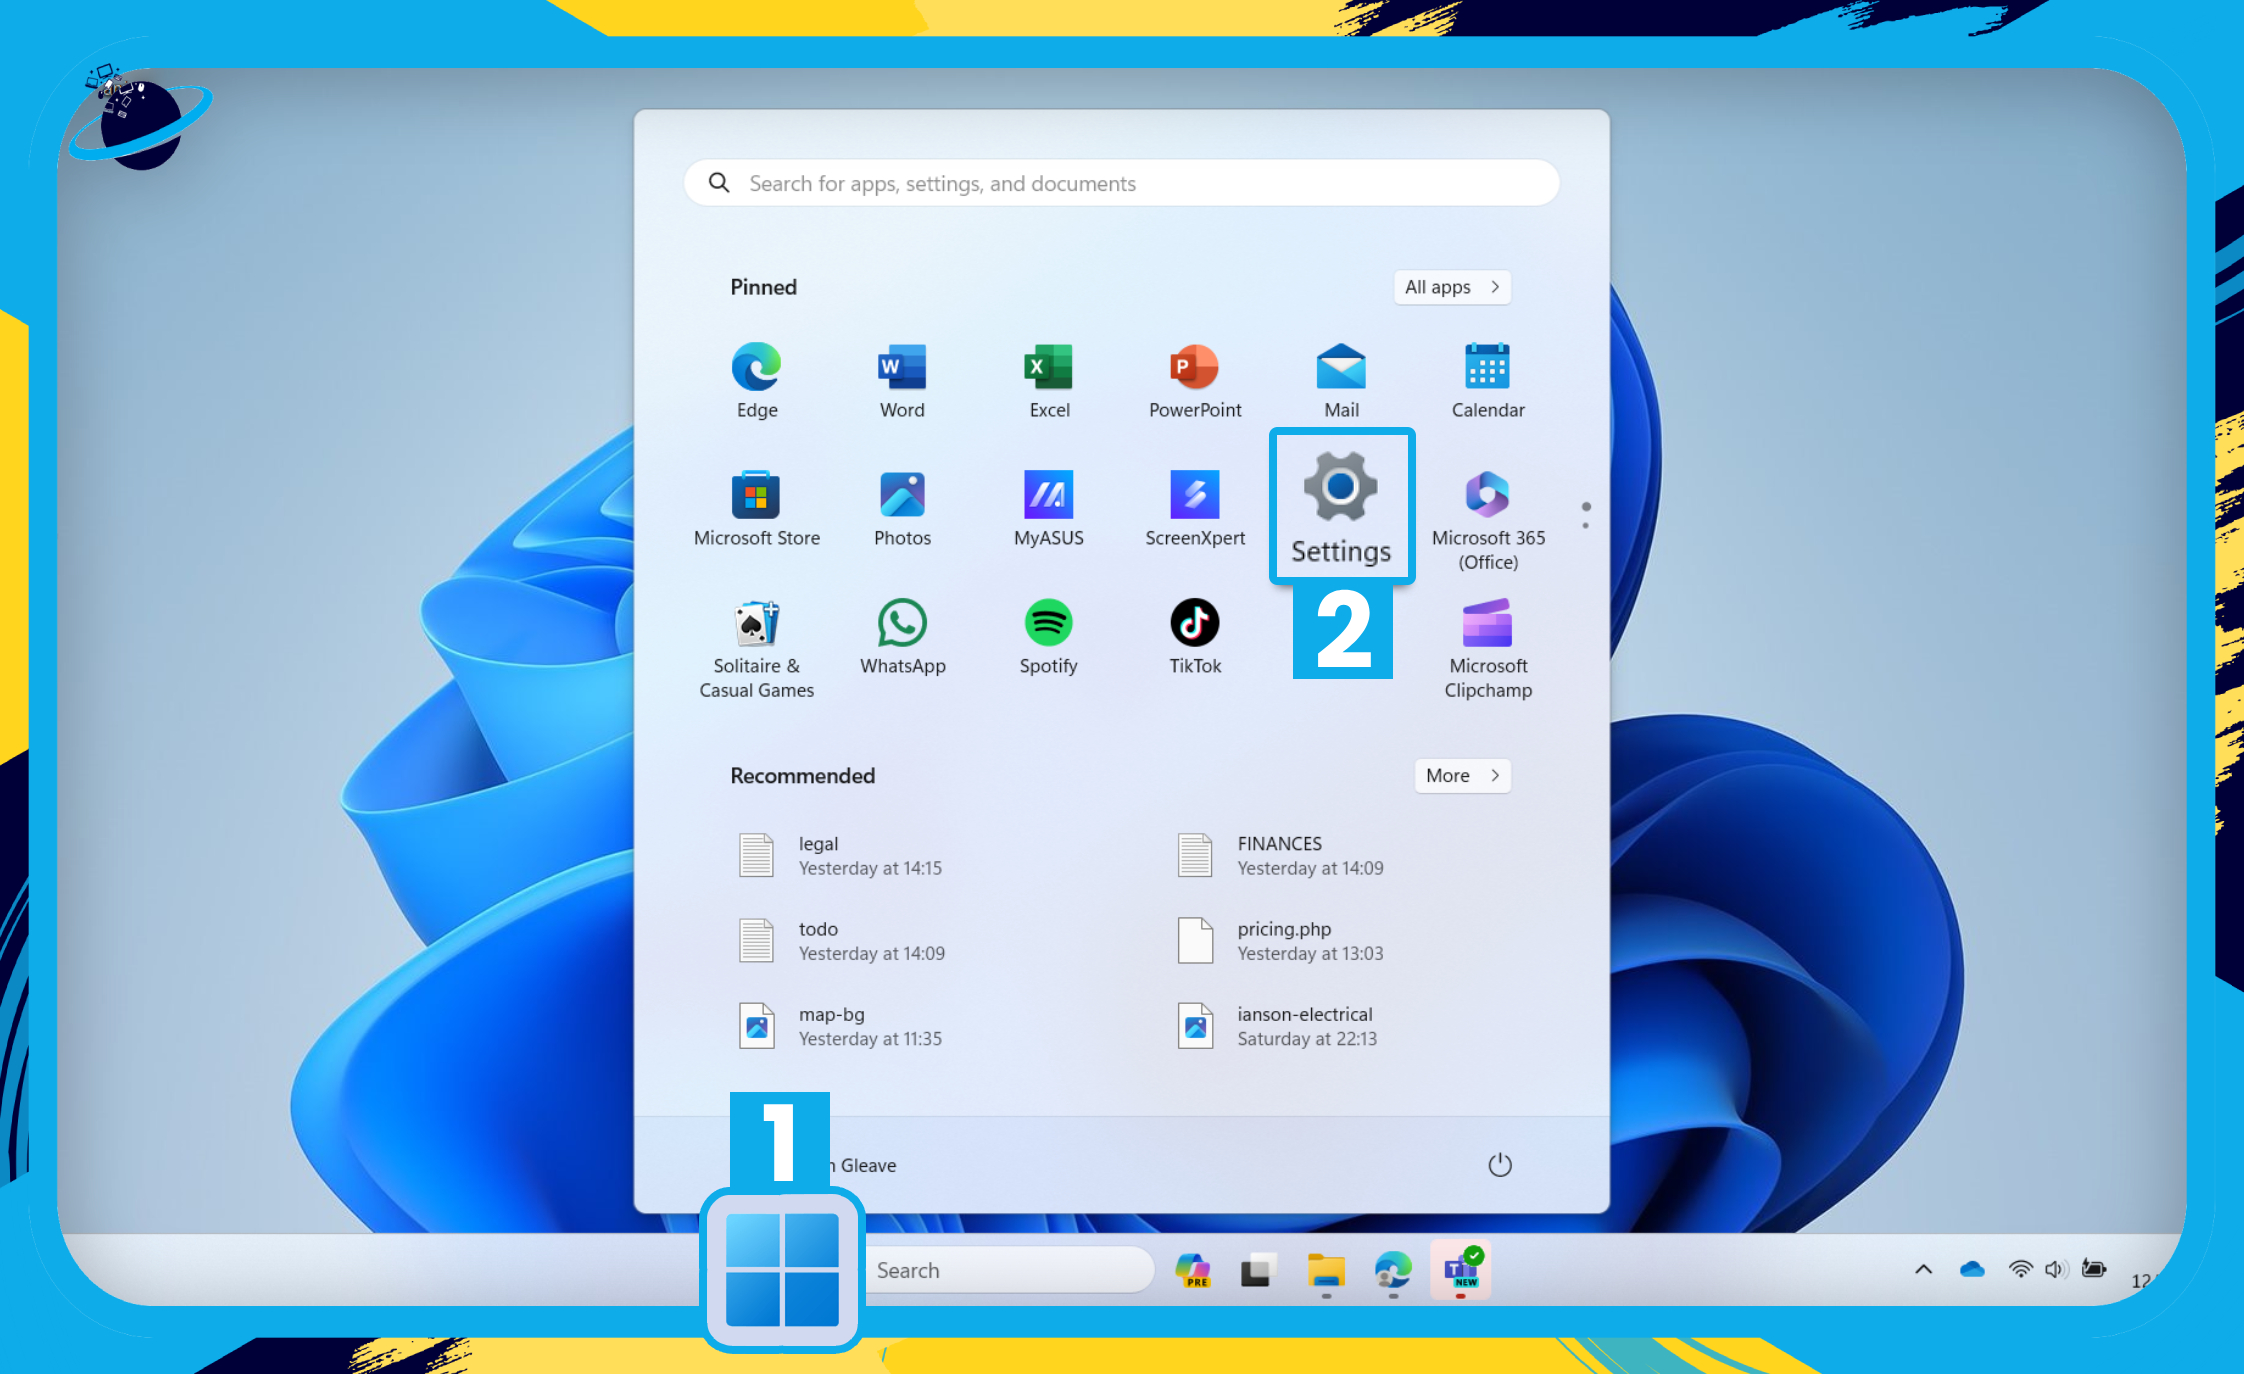
- First, click the
 Start menu [1] and select “Settings.” [2]
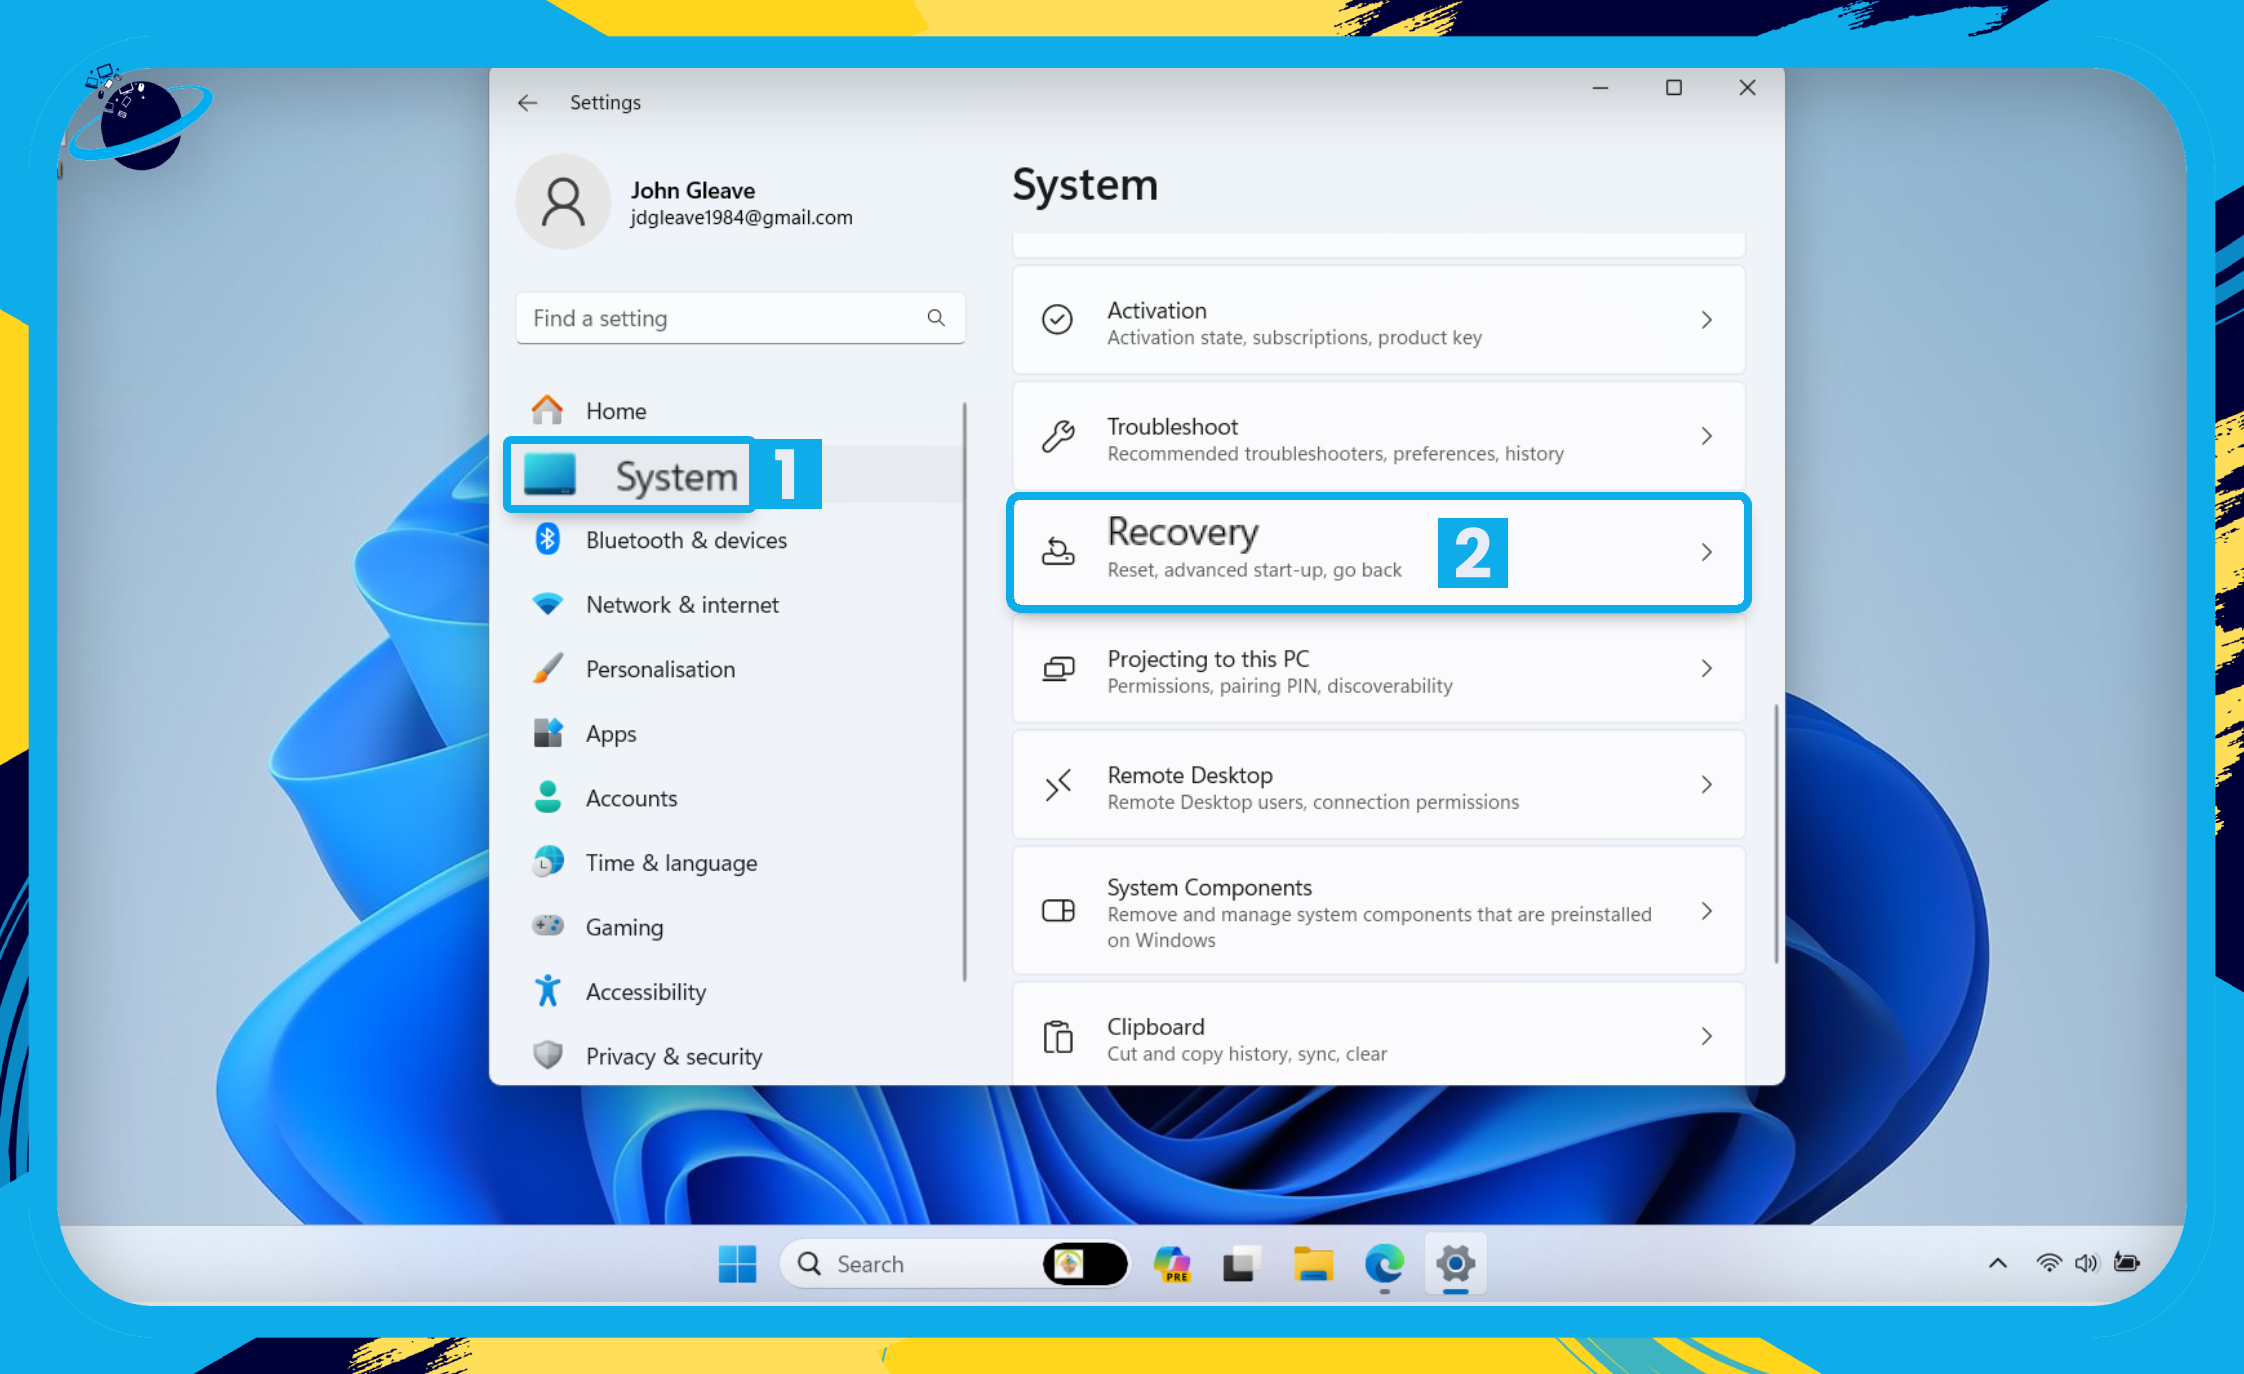
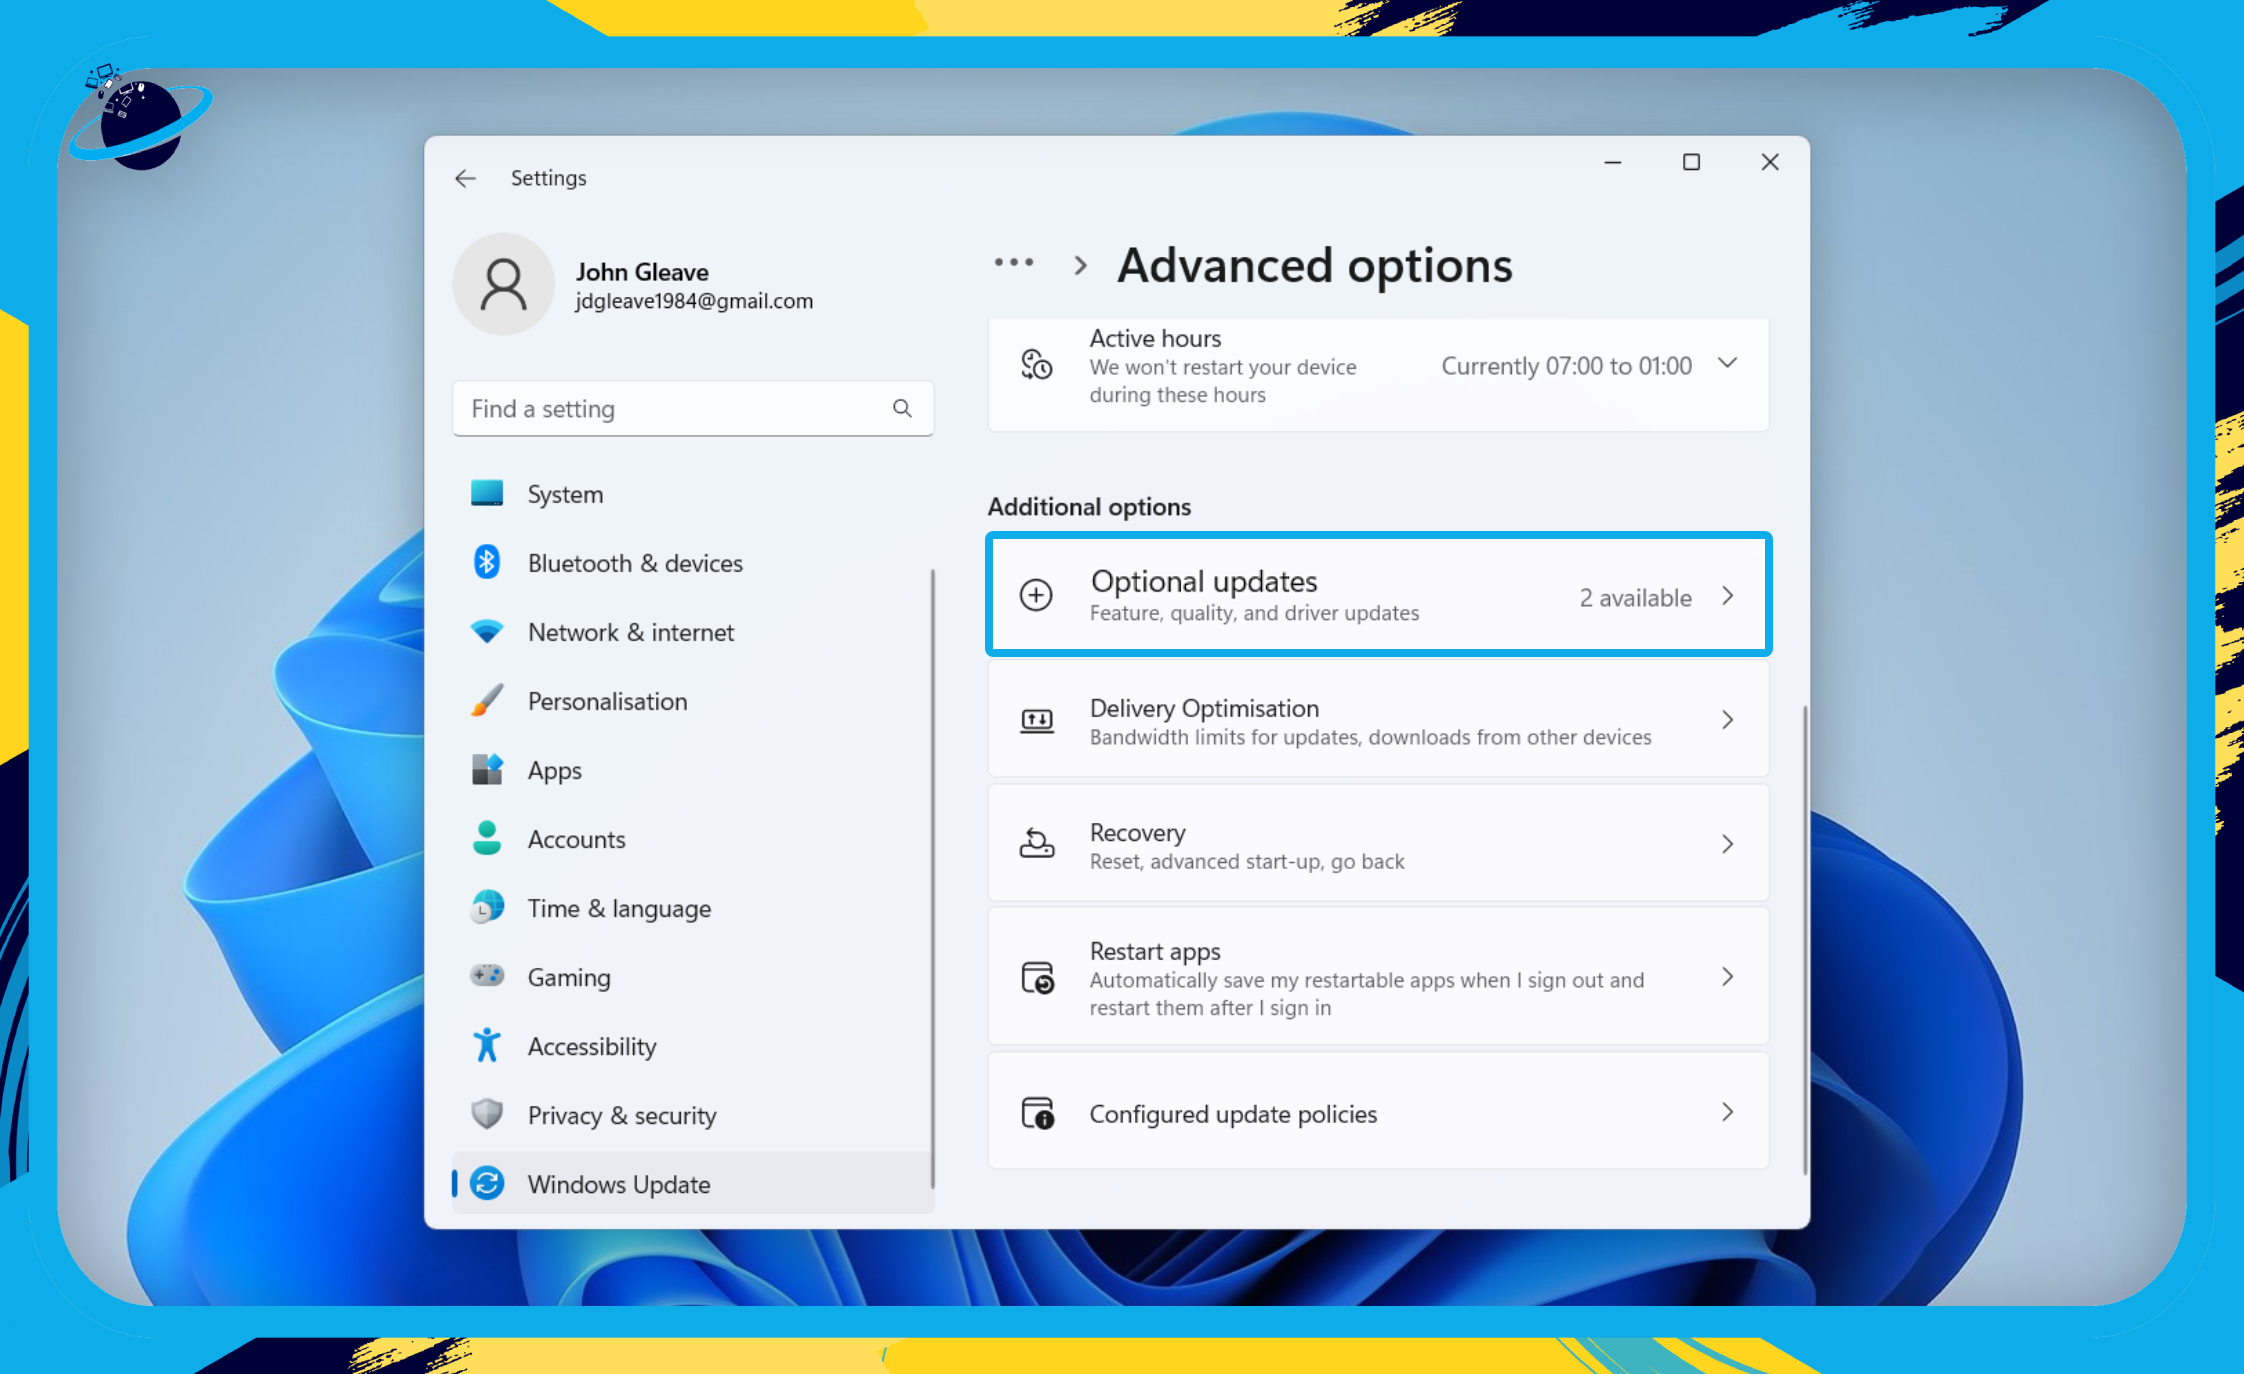
- In Windows 11, open “Windows Update.” [1]
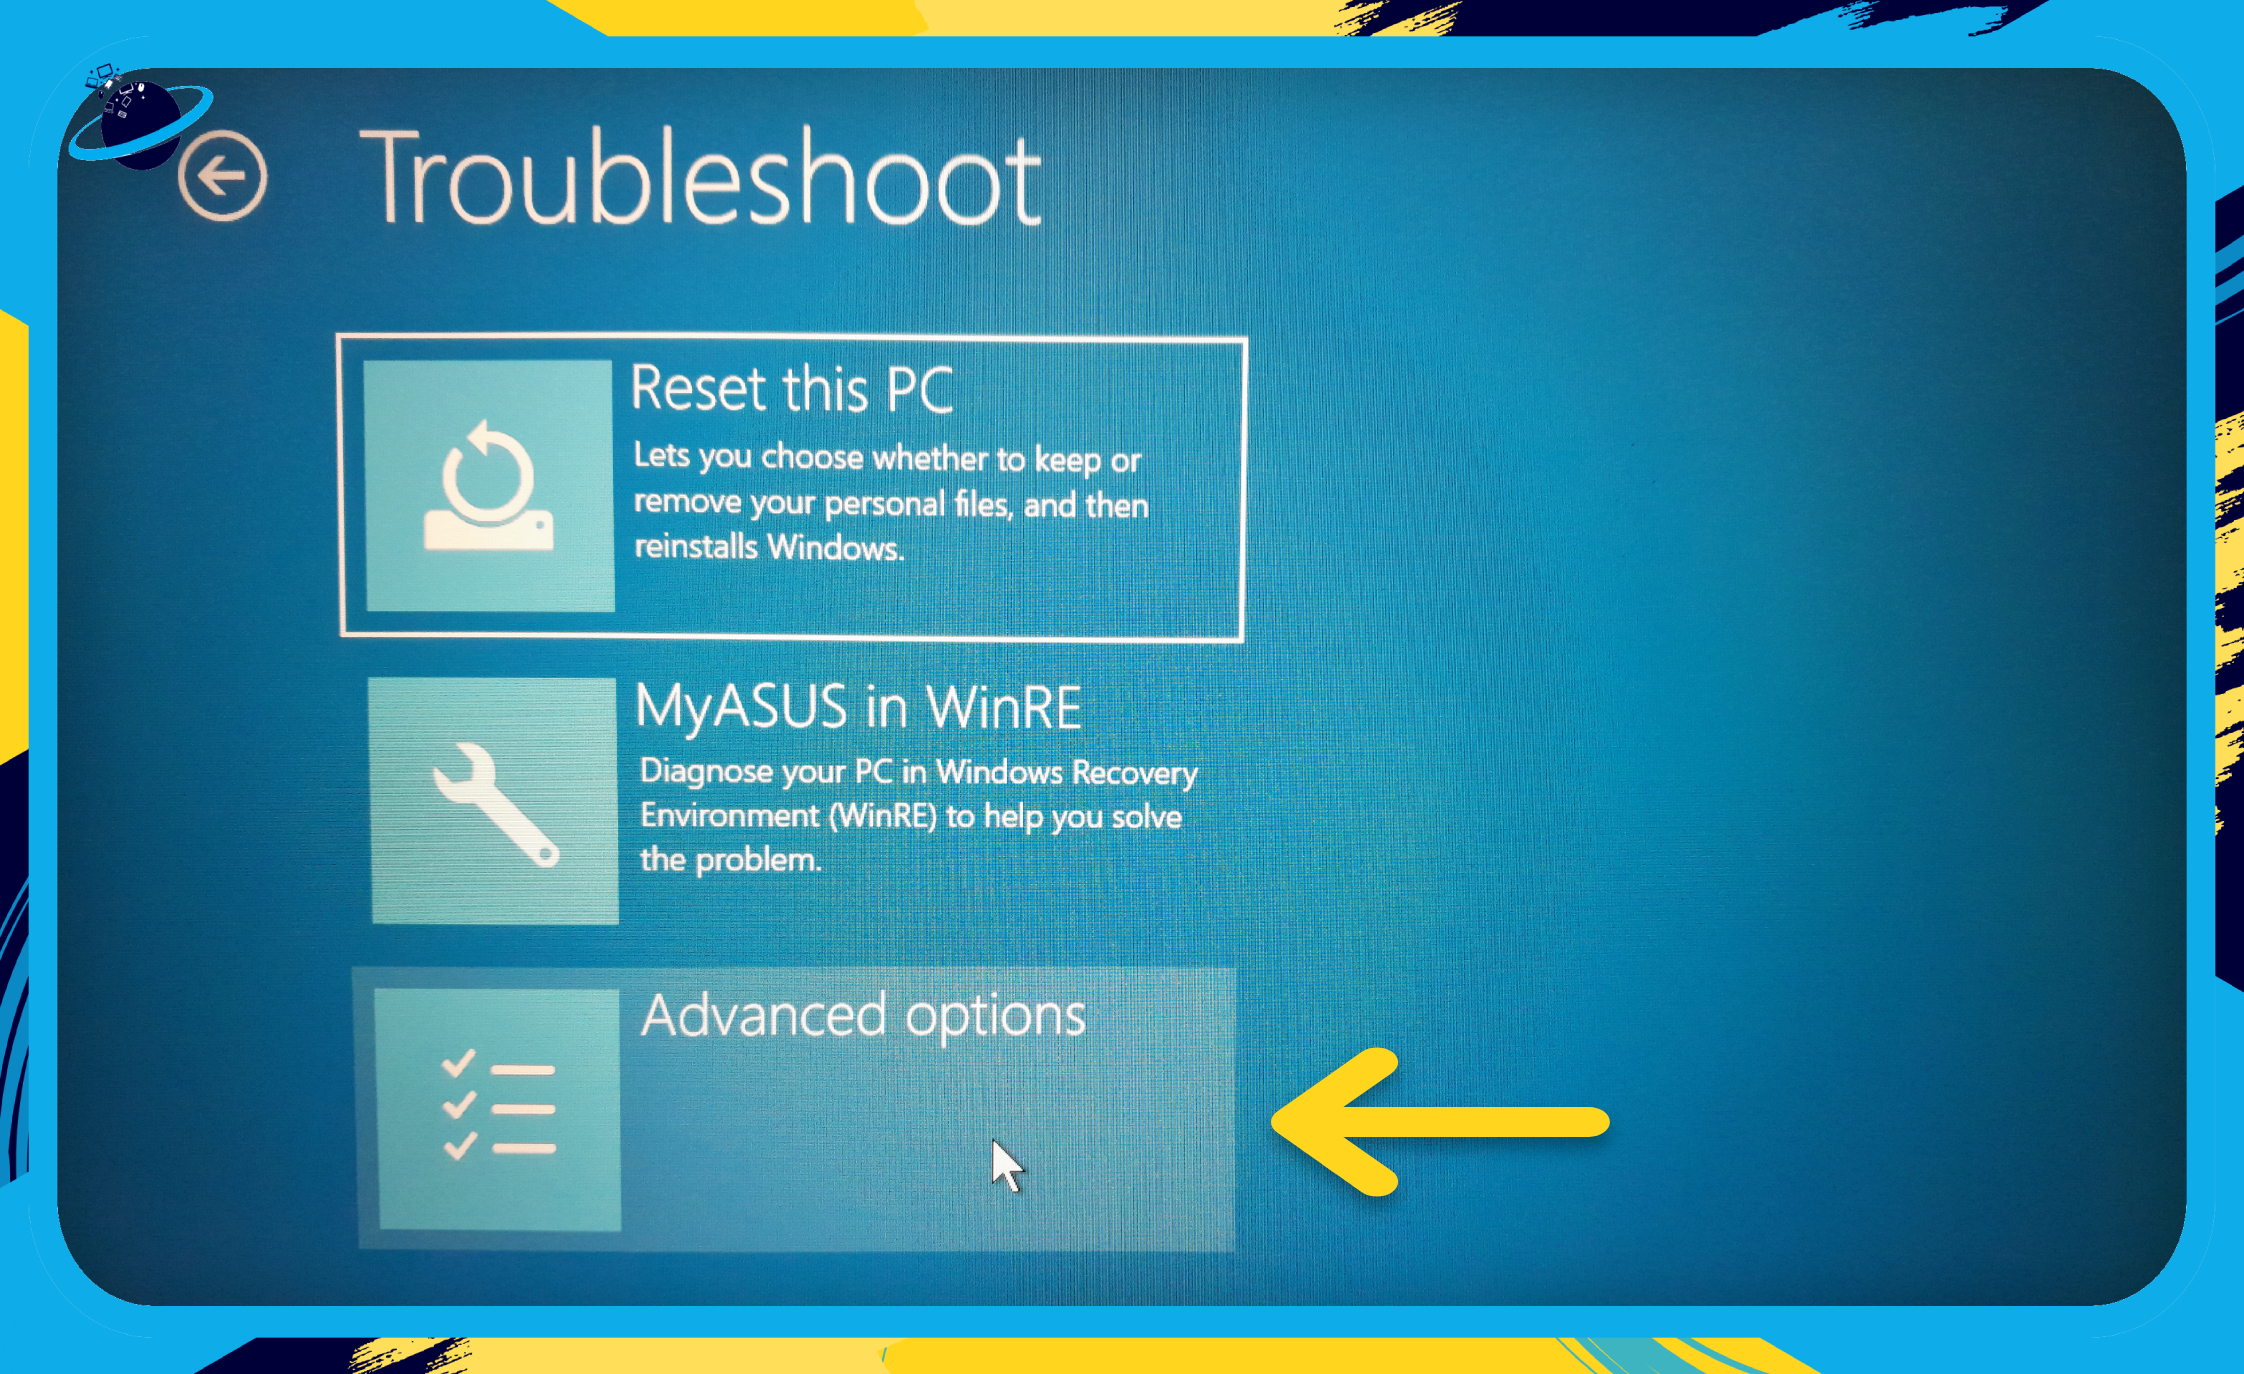
- Go to “Advanced options.” [2]
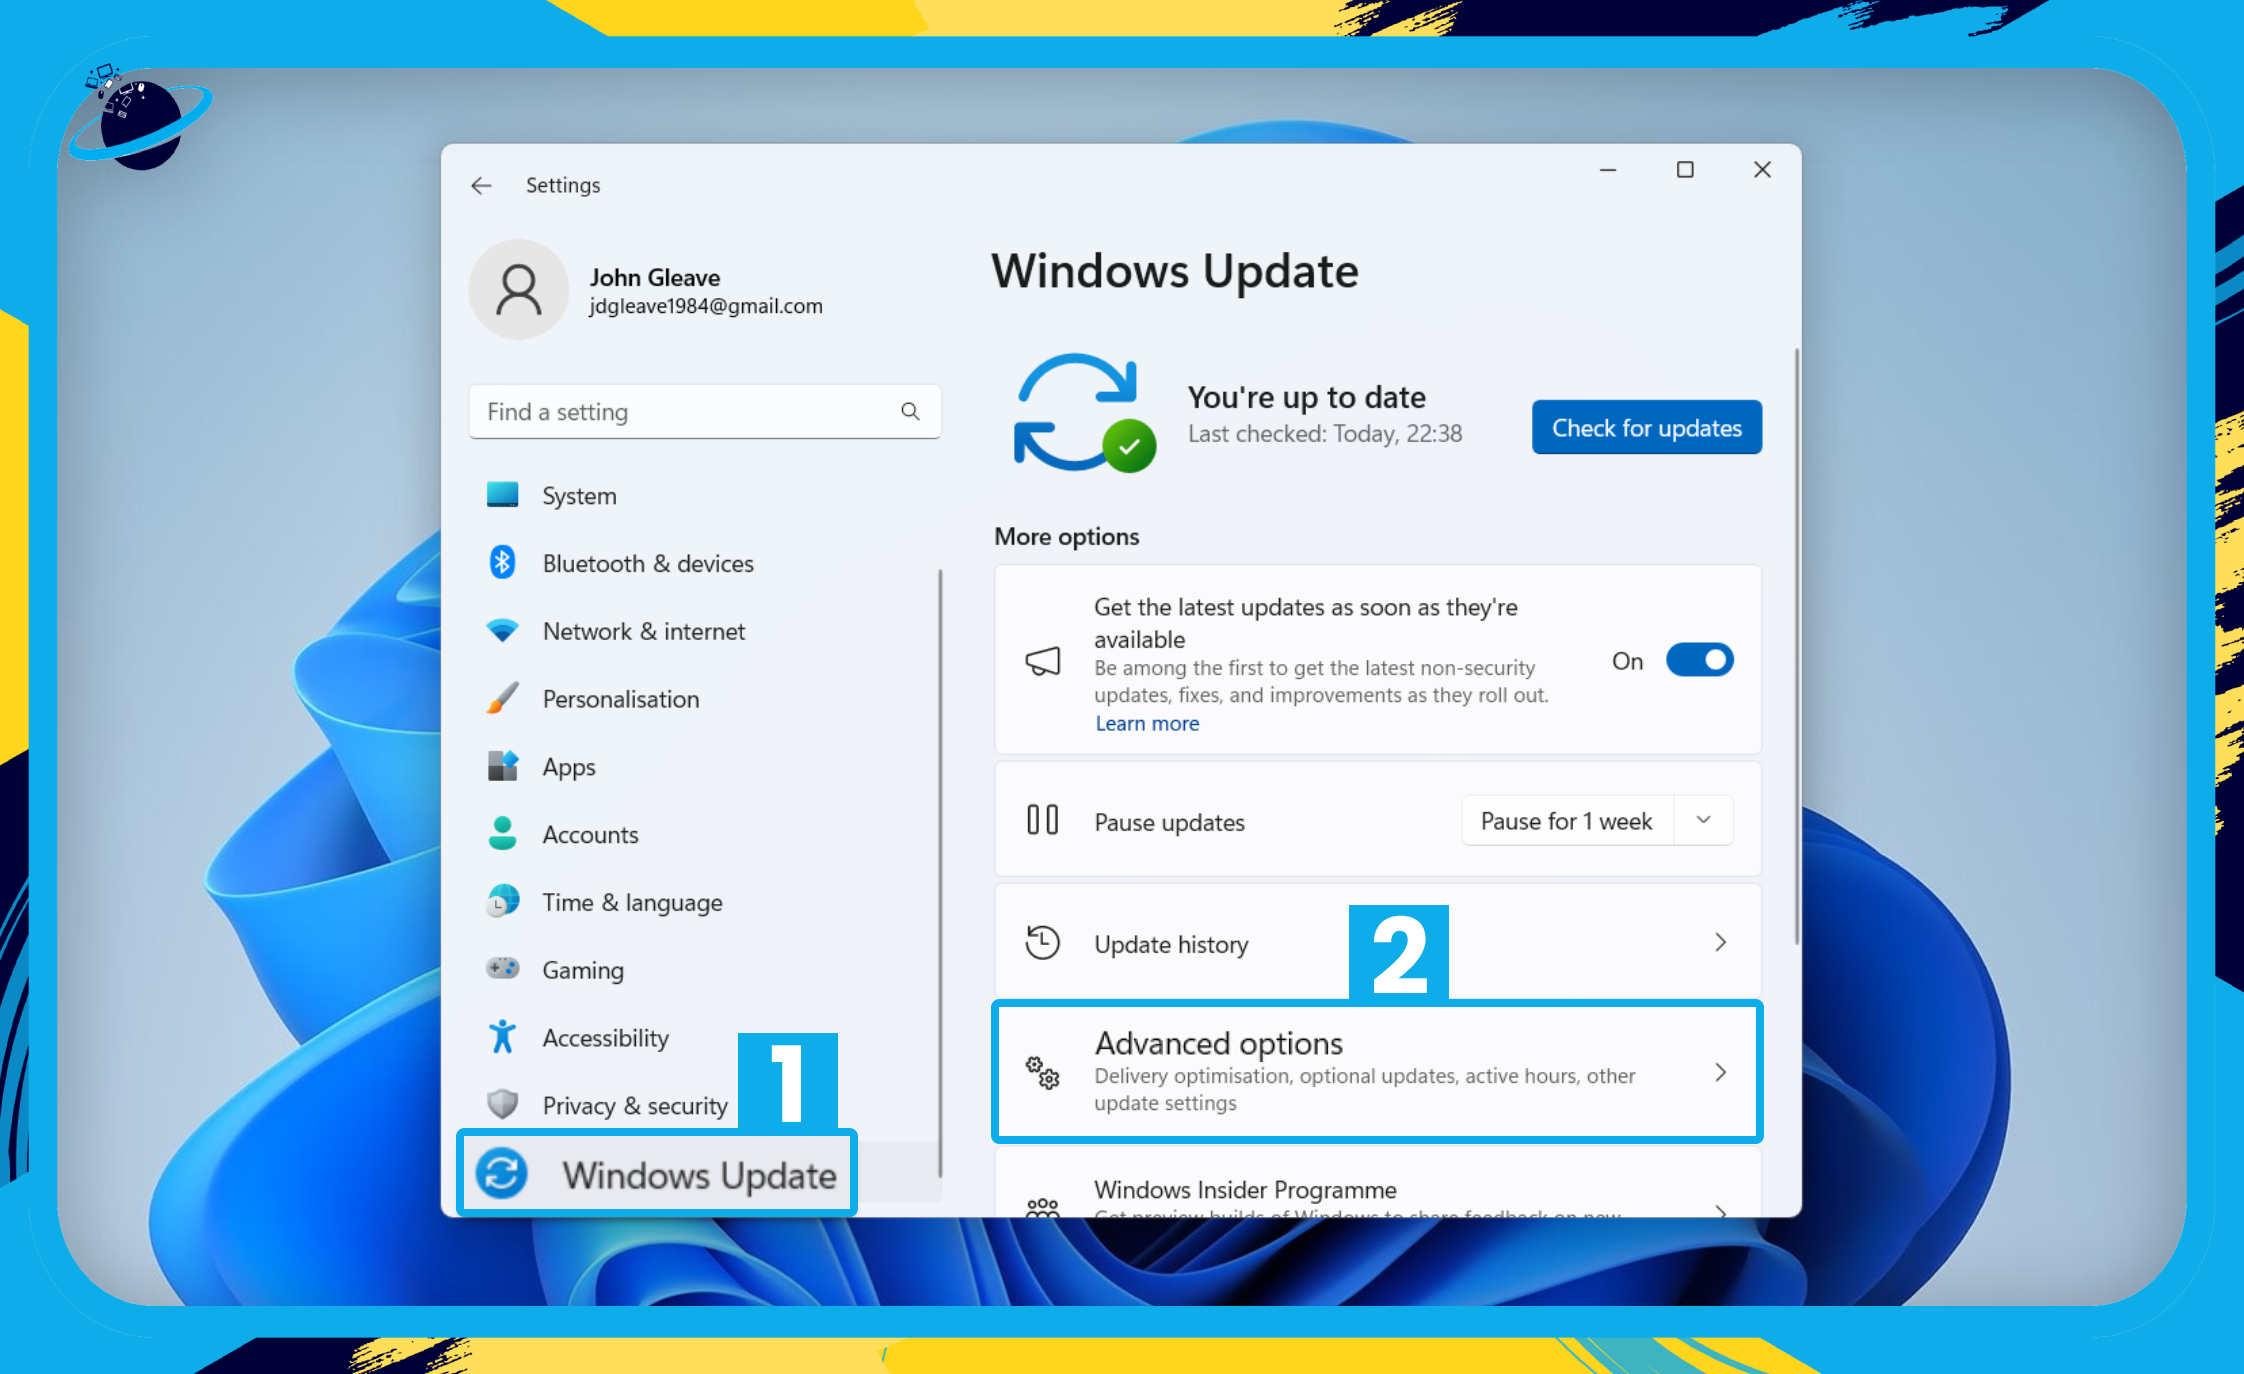
- Then head down to “Optional updates.”
- In Windows 10, open “Update & Security.”
- Then go to “Windows Update.”
- Click on “View optional updates.”
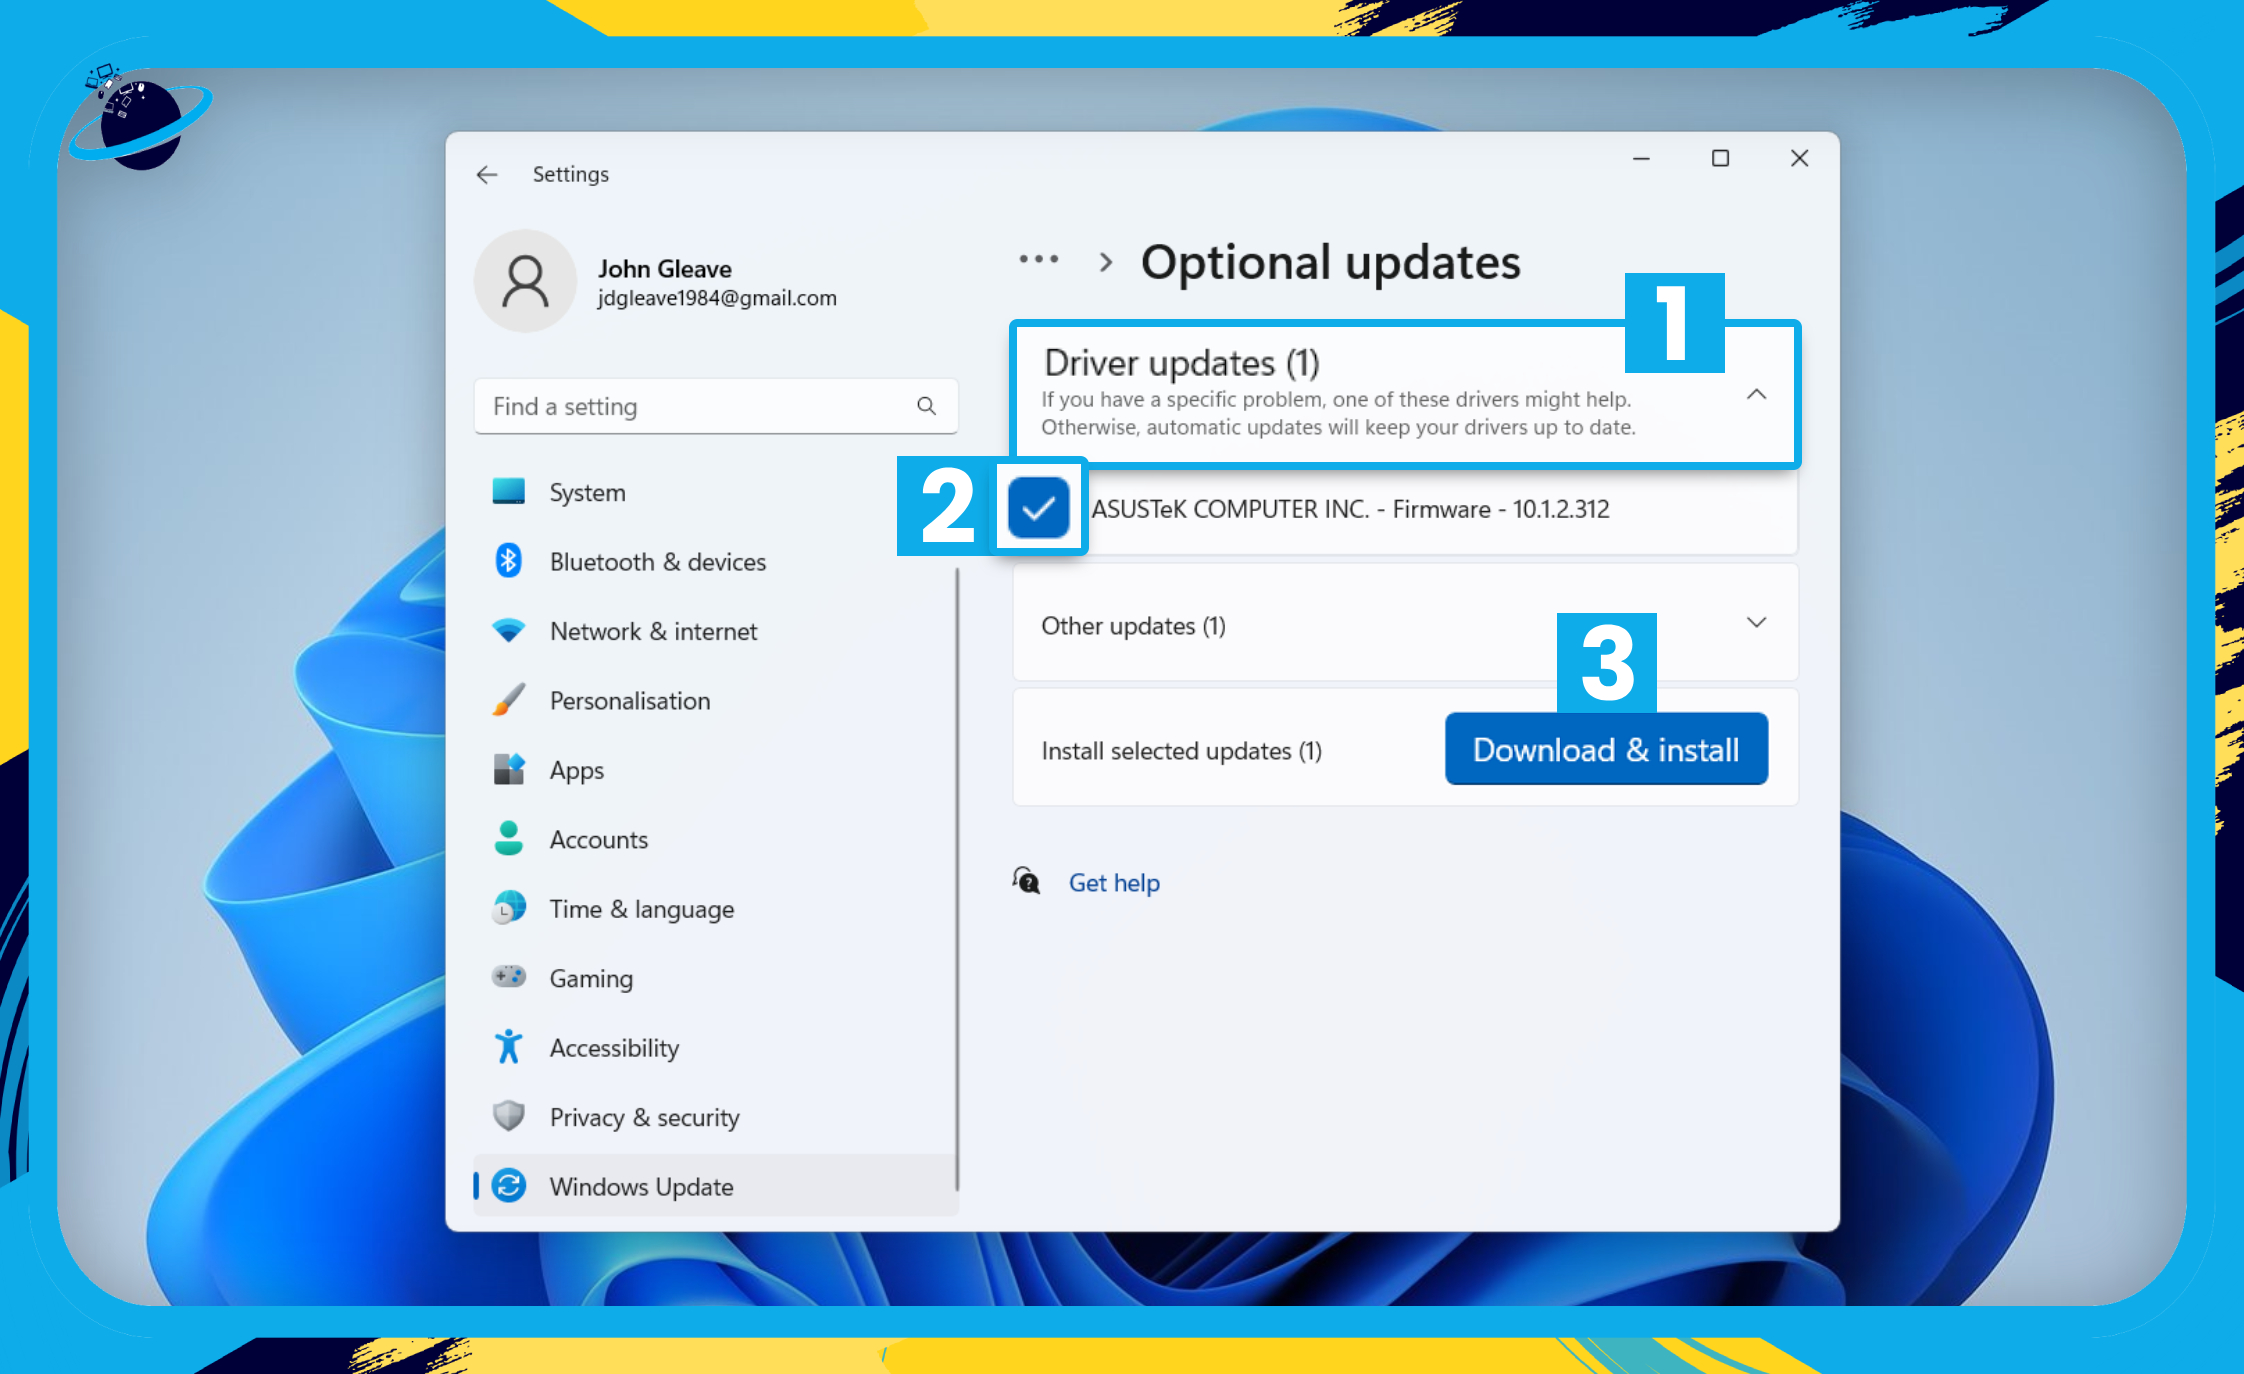
If there are driver updates available, you’ll find them listed here. To install them, follow these steps:
- Click “Driver updates.” [1]
- Check the box next to any updates you want to install. [2]
- Finally, click the “Download & install” button. [3]
- Select them and click “Download & install.”
How to Update Graphics Drivers in Windows 10 & 11 (Full Guide)
There are two ways of updating your graphics drivers. Firstly, you can scan automatically for updates, or you can browse for drivers saved on your computer. If you need to download drivers, you’ll need to know the model of your graphics card, which we’ll explain in more detail later.
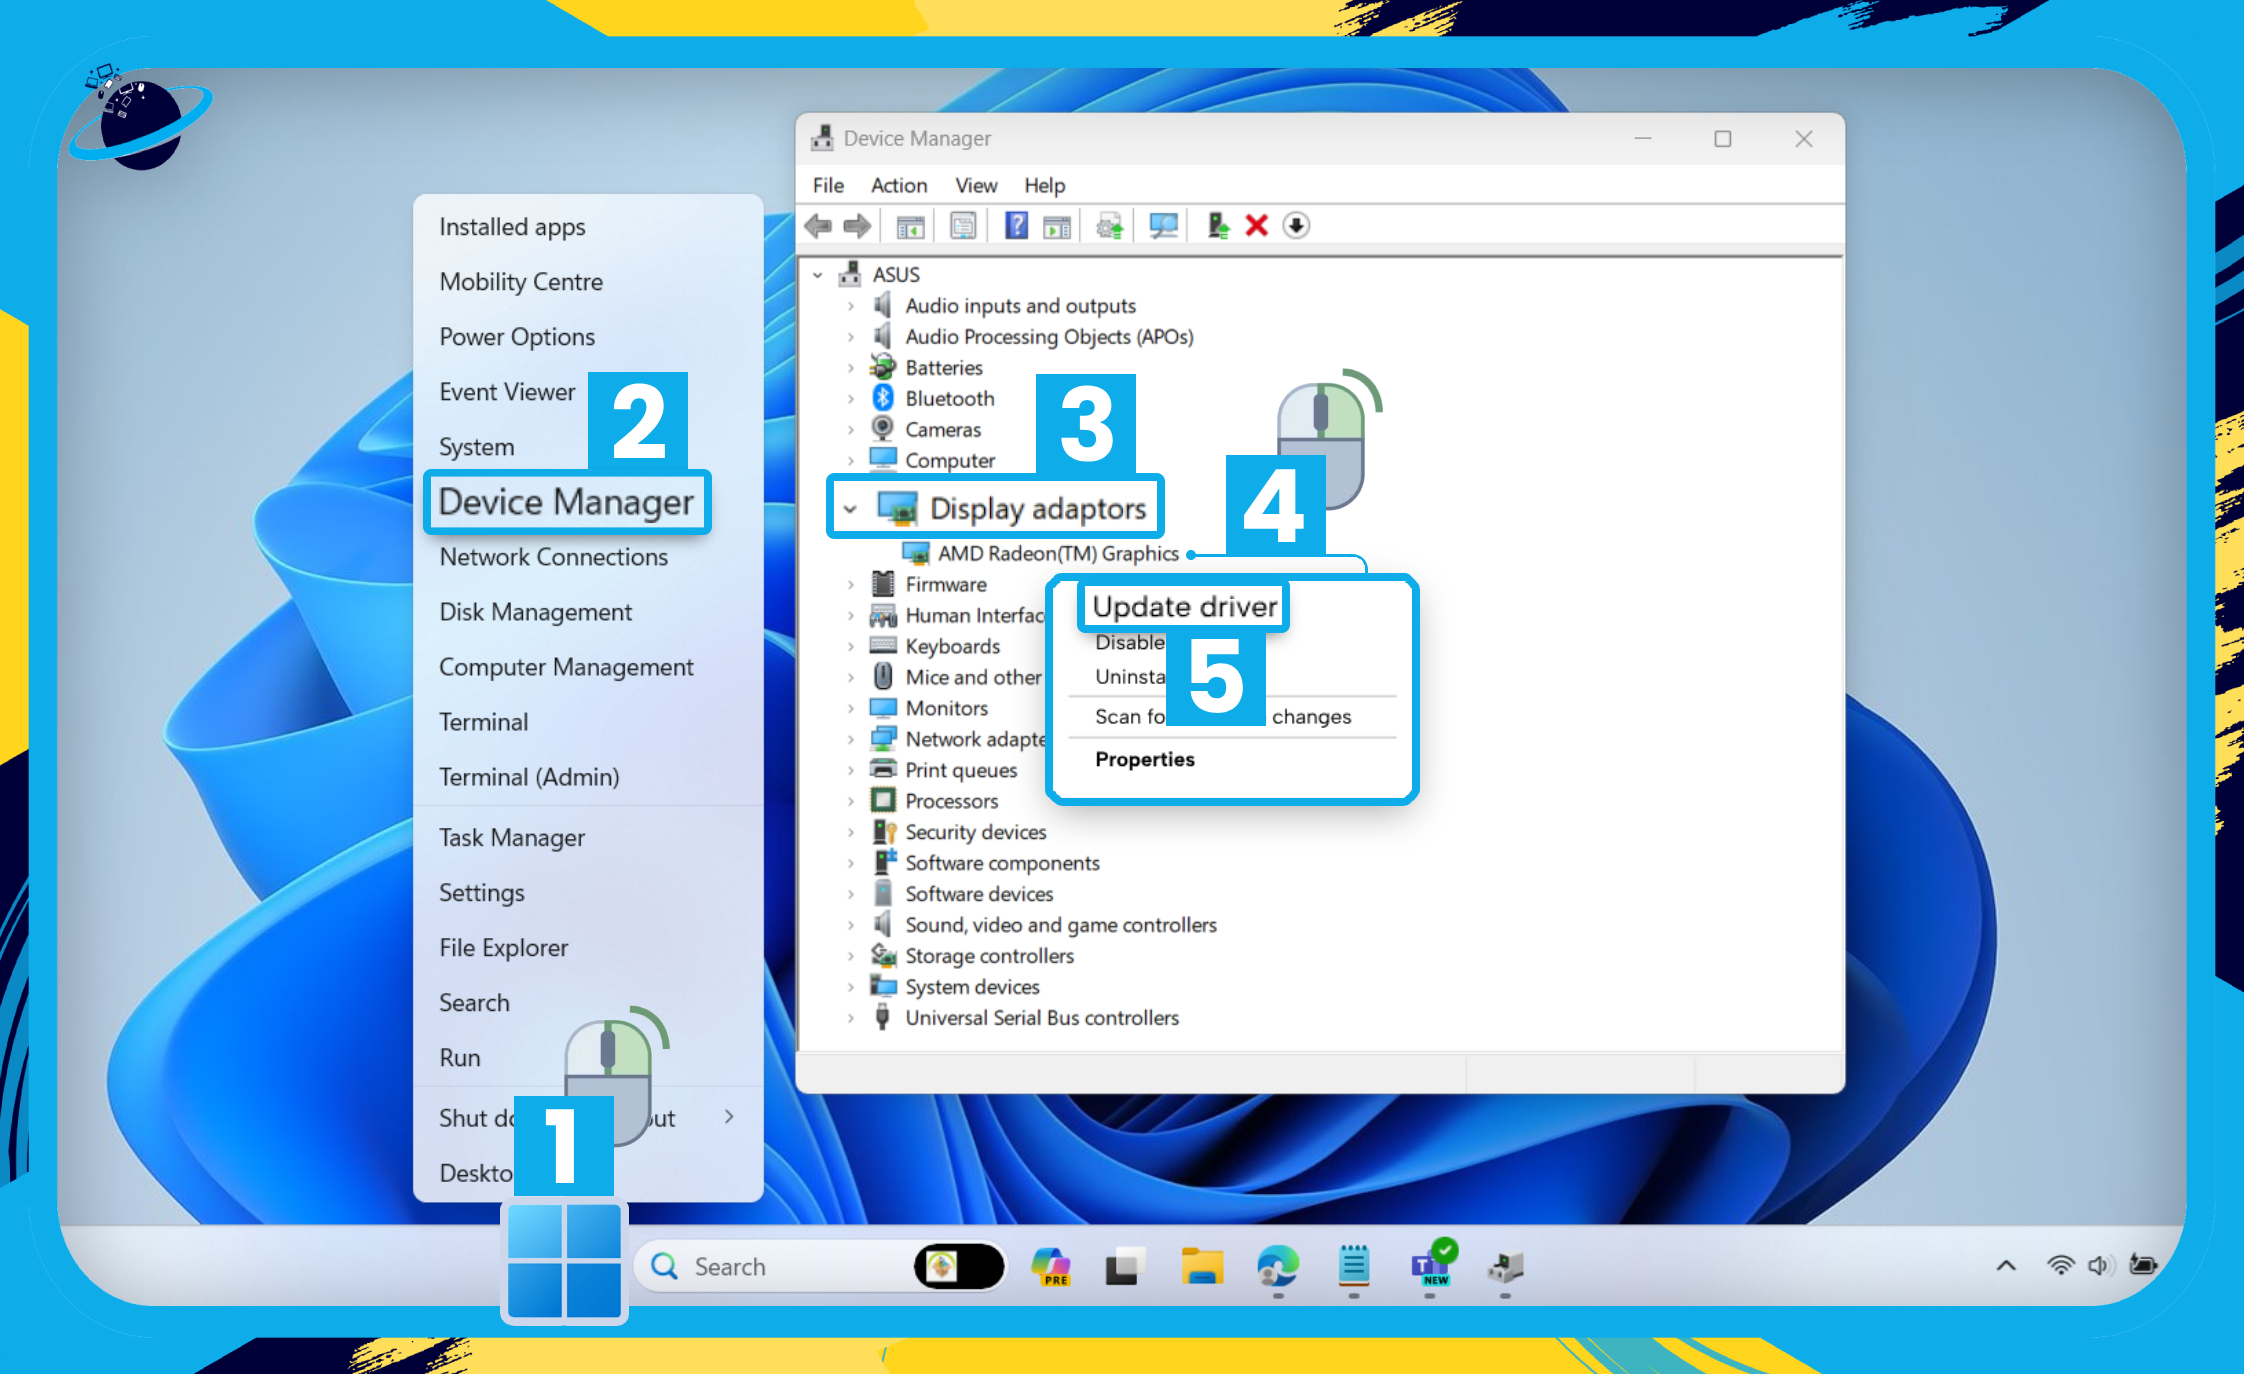
- Start by right-clicking the Start menu. [1]
- Select “Device Manager” from the popup menu. [2]
- In Device manager, click the small arrow next to “Display adaptors.” [3]
- Right-click your graphics card. [4]
- Then select “Update driver.” [5]
You’ll be presented with two options:
1: Search Automatically for Drivers
This is the simplest option, but requires an internet connection. Windows will search online for the latest drivers for your hardware and automatically download and install them.
2: Browse My Computer for Drivers
If you choose to browse for drivers, you’ll need the latest drivers downloaded on your local device, or have them stored on a physical medium, such as a CD, DVD, or USB Drive.
How to Identify the Graphics Card Model
To download the latest drivers for your graphics card, you’ll first need to identify its model. If the exact model isn’t listed in Device Manager, you can use third-party resources to find it. Here’s how:
- Right-click the Start menu. [1]
- Select “Device Manager” from the popup menu. [2]
- Click the small arrow next to “Display adaptors.” [3]
- Right-click your graphics card. [4]
- Select “Properties.” [5]

- Now go to the “Details” tab in the properties popup. [1]
- Click the select box under “Property” and choose “Hardware IDs.” [2]
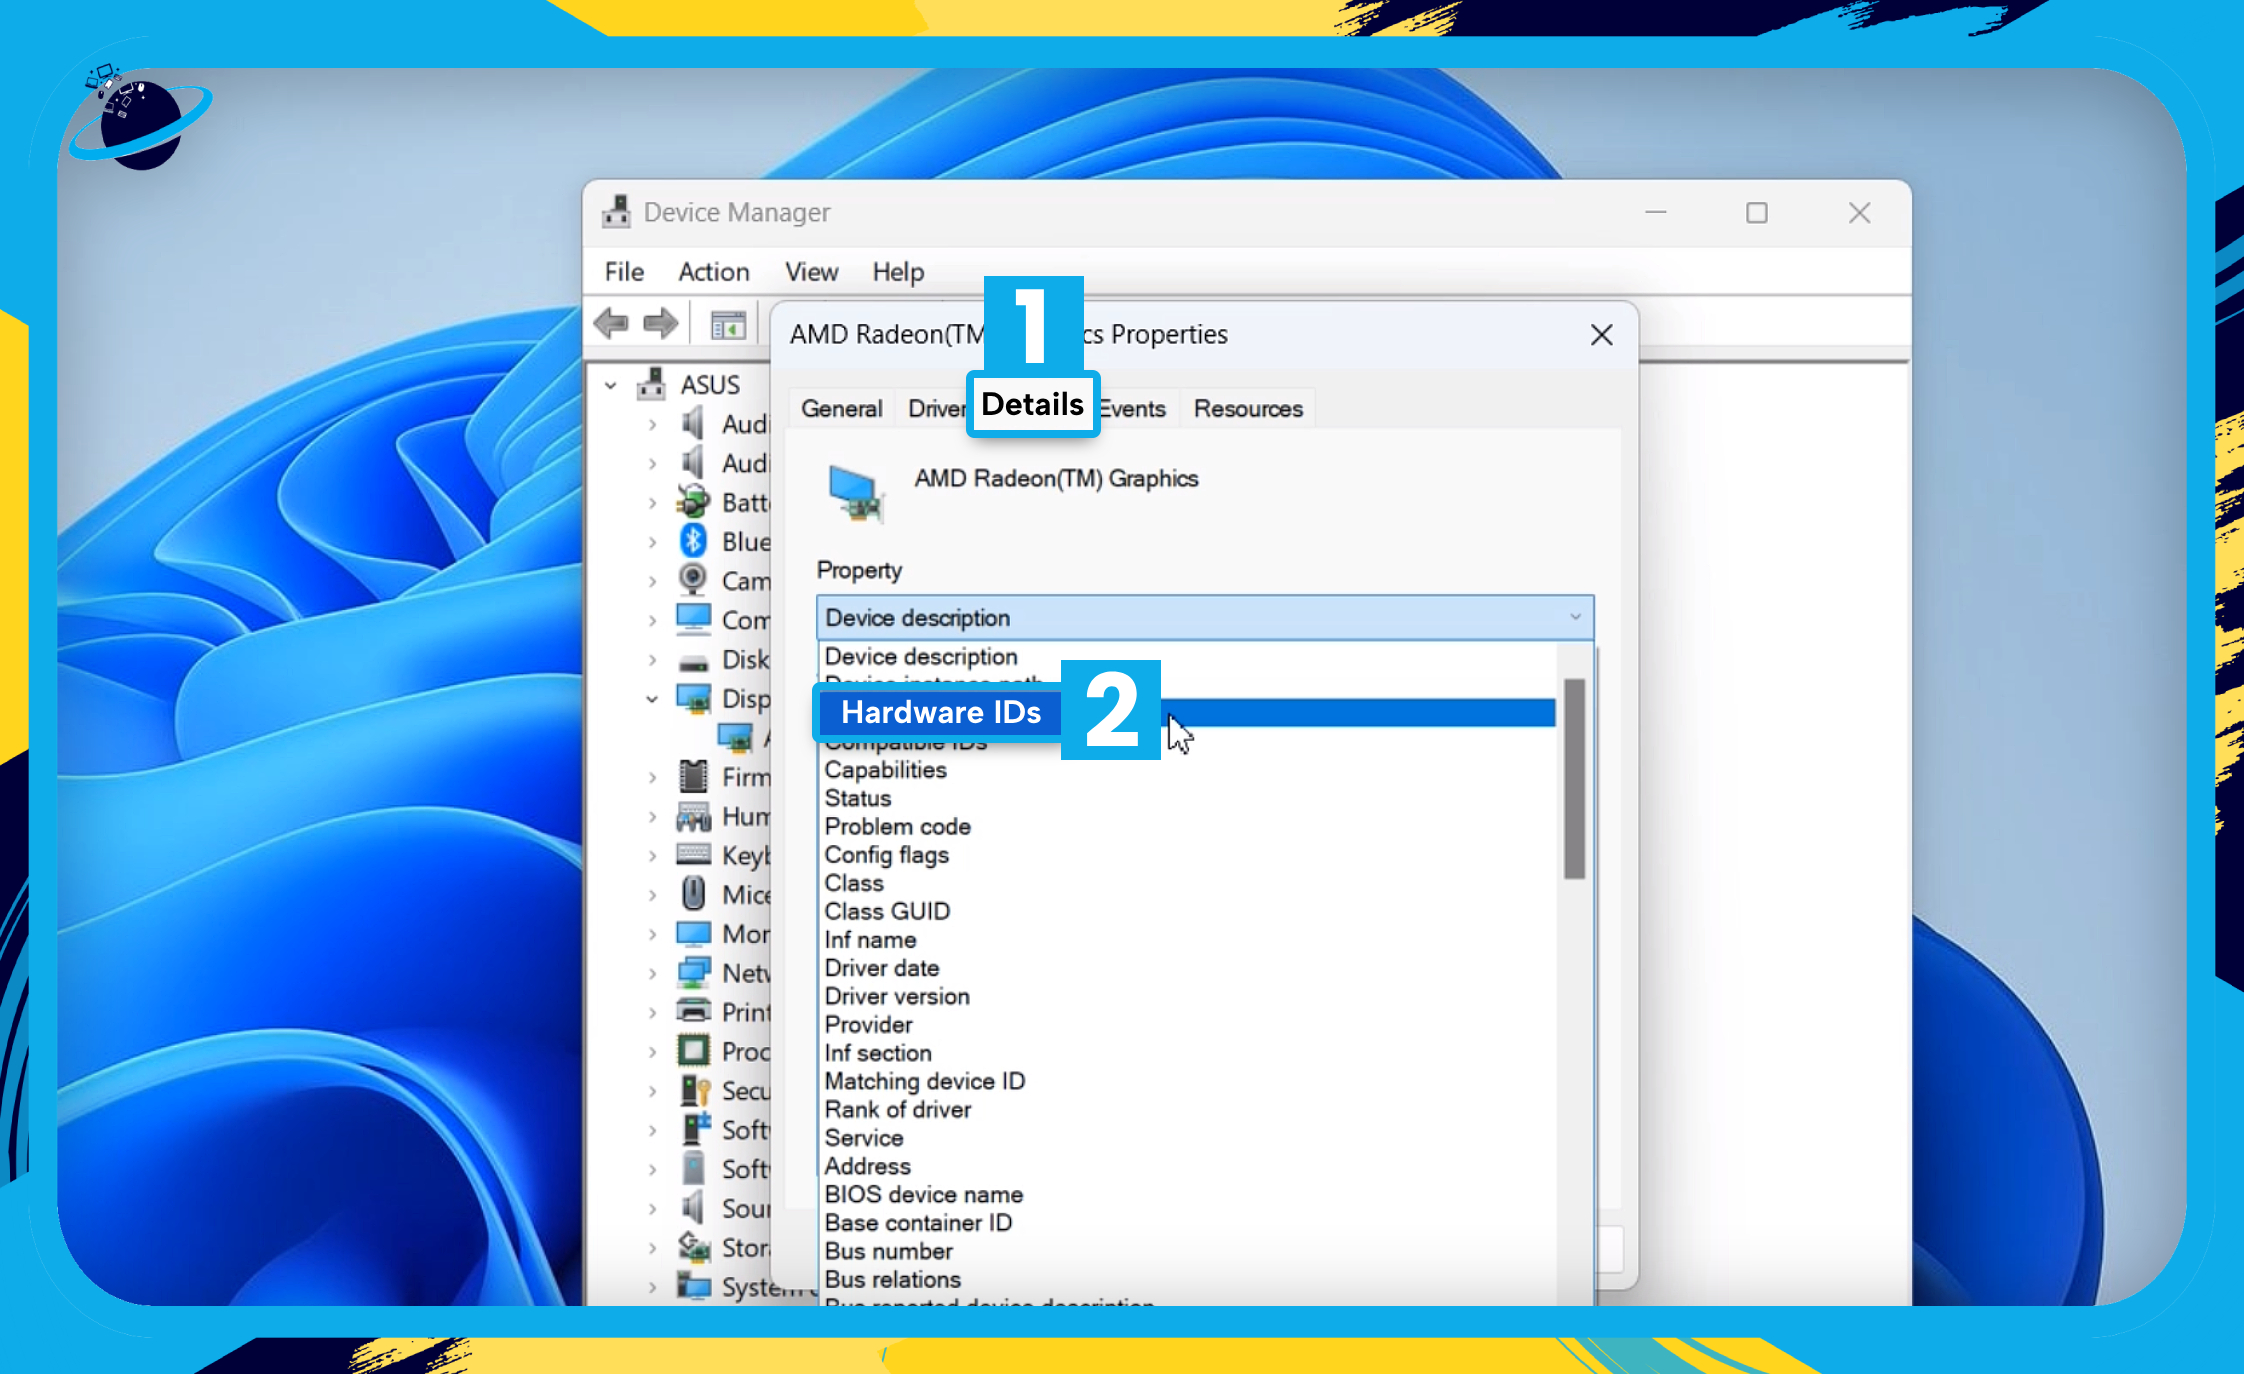
Note the following information:
- Is the graphics card “PCI” or “USB“?
- The Vendor ID, found after “VEN_” (not including the “&” symbol).
- The Device ID, found after “DEV_” (not including the “&” symbol).
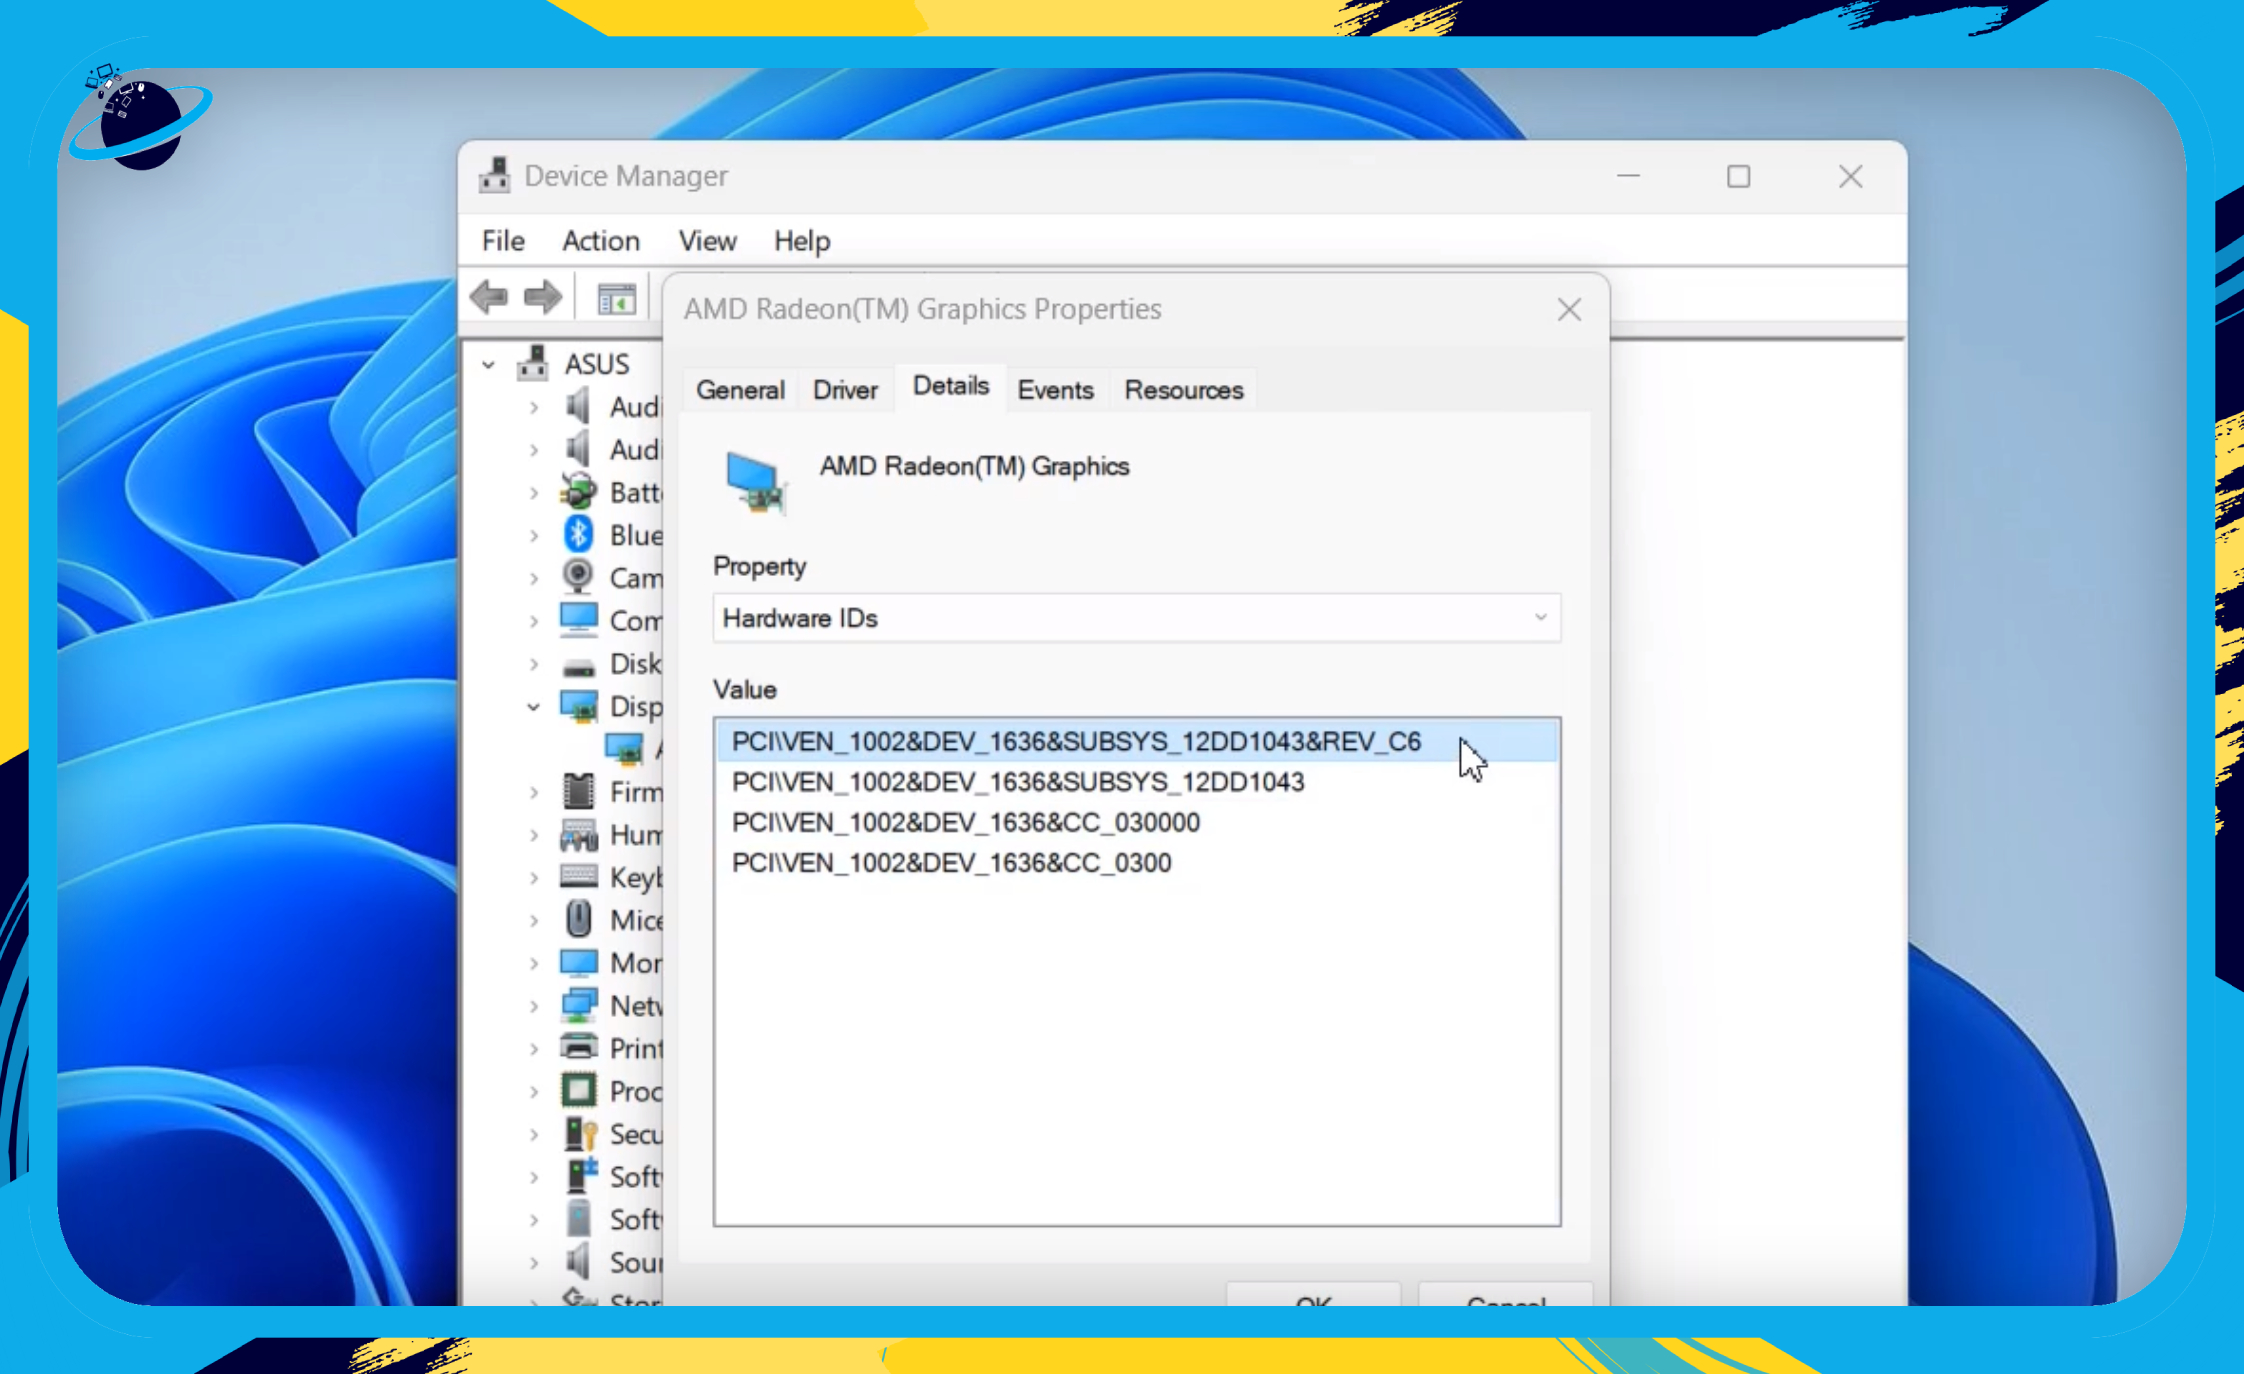
Example of a Hardware ID value for a graphics card with relevant information bolded:
PCI\VEN_1002&DEV_1636&SUBSYS_12DD1043&REV_C6- The graphics card in this example is a PCI.
- The vendor ID is 1002.
- The Device ID is 1636.
Once you have this information, head to devicehunt.com and enter the information into the “Type,” “Vendor ID,” and “Device ID” input boxes. Then browse the list of drivers for your specific operating system.

After searching, scroll down to find the drivers for the available operating systems. If you can’t find drivers for your operating system, right-click and copy the first Hardware ID in Device Manager and search for it on Google.
Troubleshooting
If you’re experiencing problems when updating your graphics drivers, you may need to rollback the drivers or perform a clean install.
Rollback Drivers
If you experience problems after updating your graphics drivers, you can rollback to the previous version by following these steps:
- Start by right-clicking the Start menu. [1]
- Select “Device Manager.” [2]
- In Device manager, click the small arrow next to “Display adaptors.” [3]
- Right-click your graphics card. [4]
- Then select “Properties.” [5]
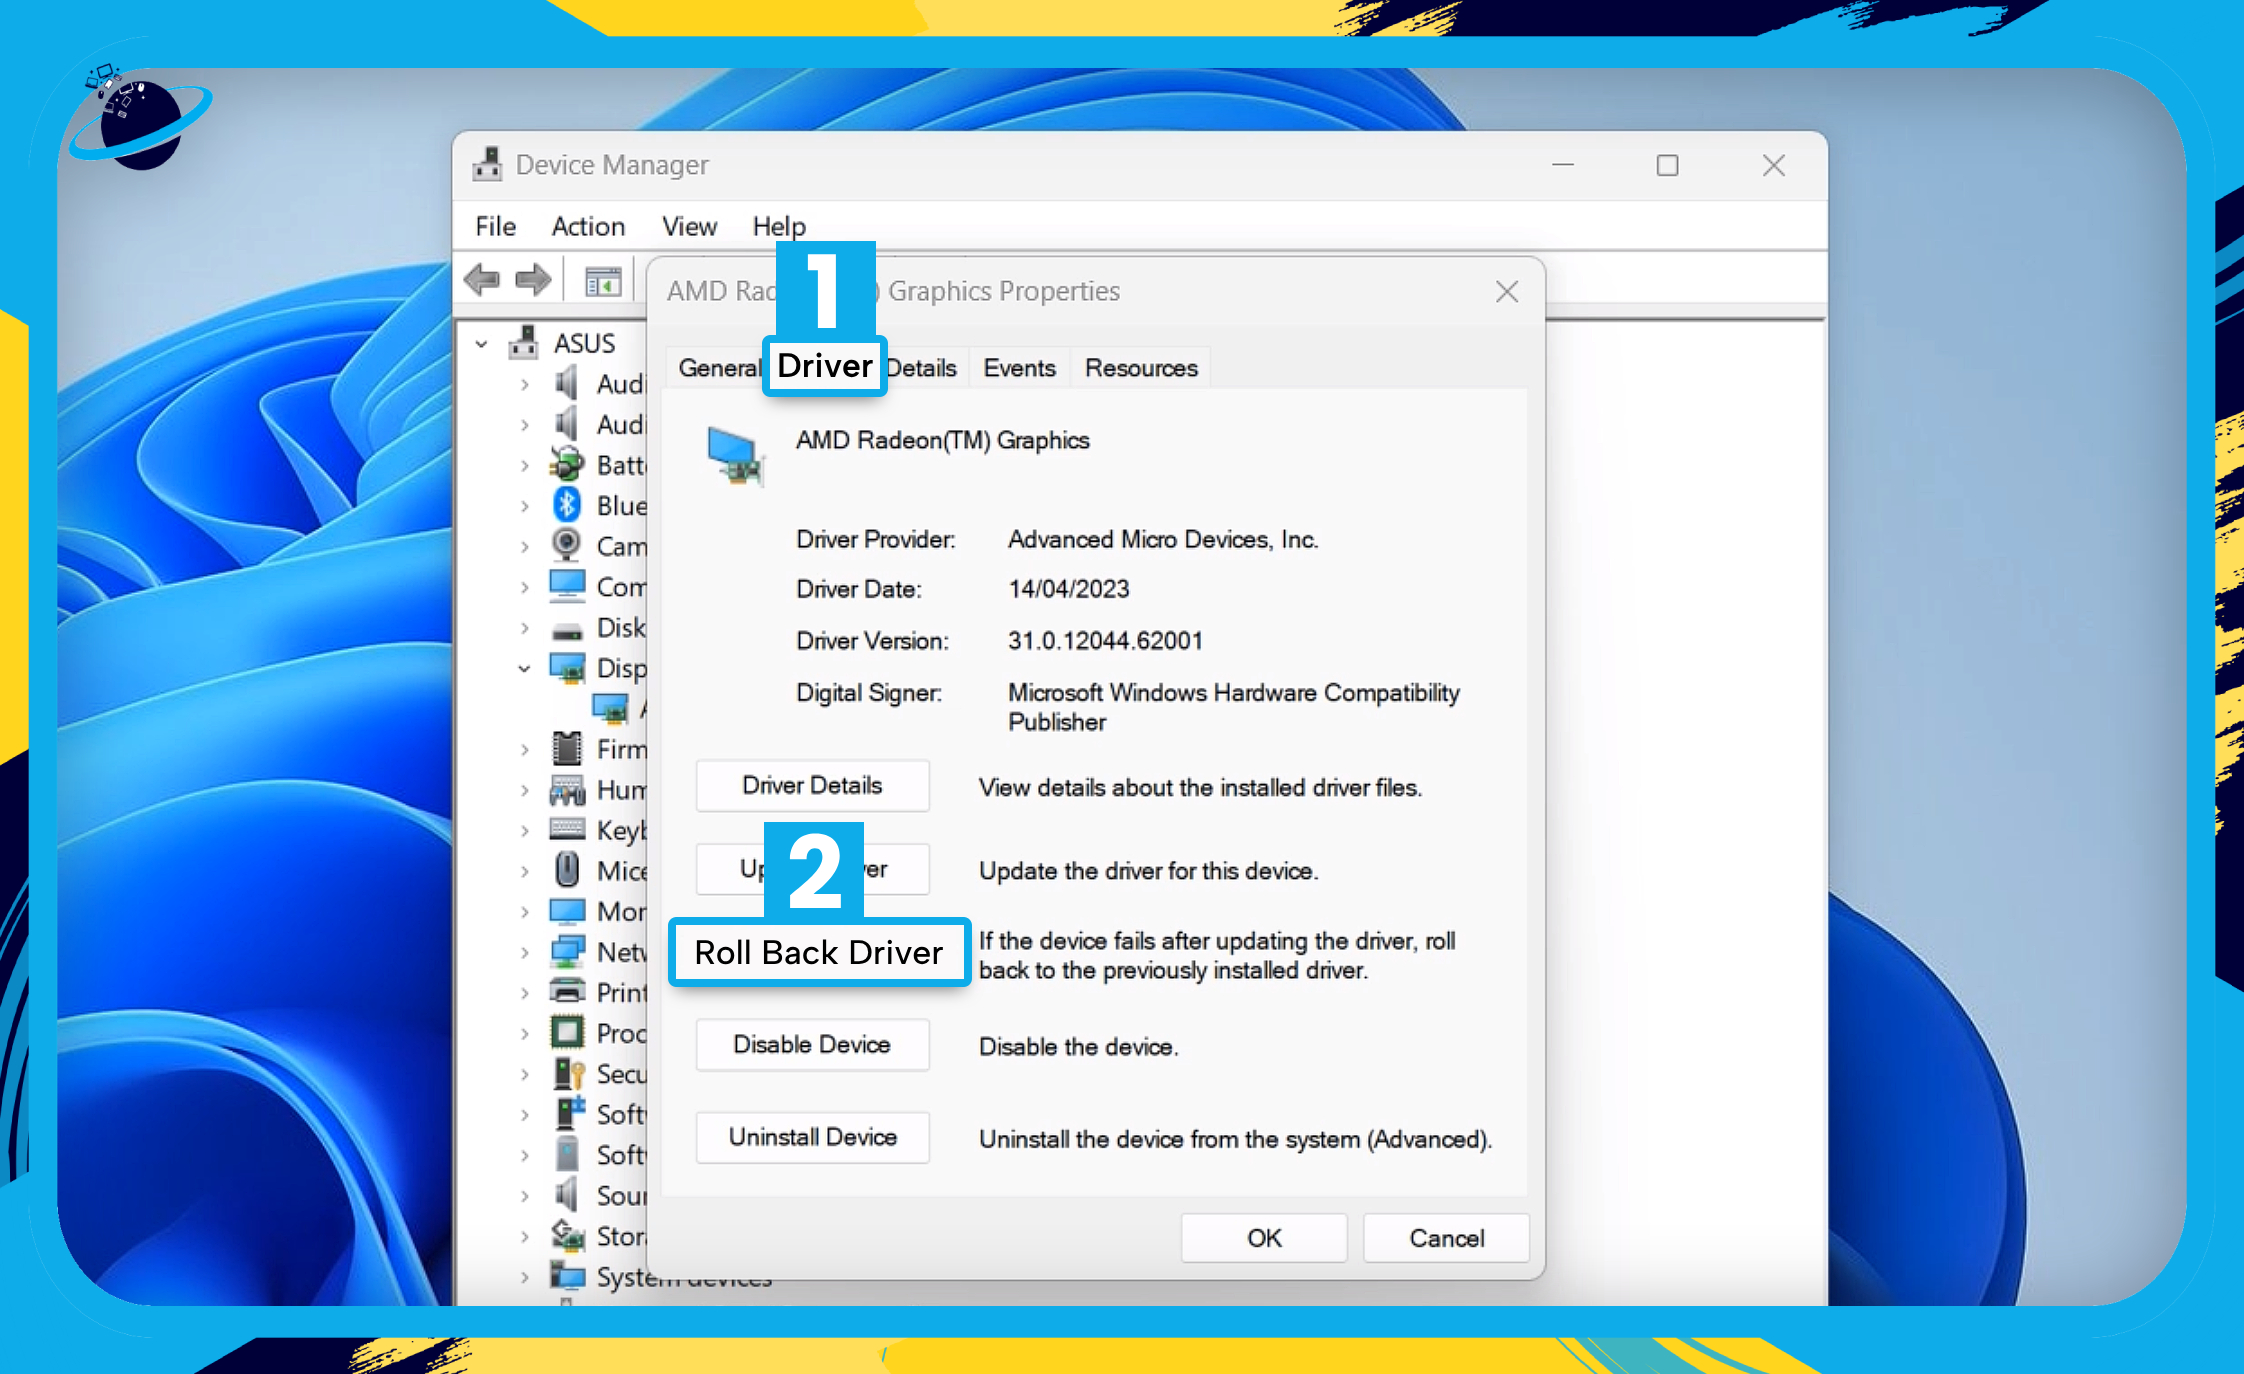
- Open the “Driver” tab in the Properties dialog box. [1]
- Then click “Roll Back Driver.” [2]
Perform a Clean Install
Before performing a clean install, it’s important to have the drivers for your graphics card downloaded to your device or stored on a CD, DVD, or USB drive. If you don’t have your graphics card drivers, follow these steps to find them.
- Start by right-clicking the Start menu. [1]
- Select “Device Manager.” [2]
- In Device manager, click the small arrow next to “Display adaptors.” [3]
- Right-click your graphics card. [4]
- Then select “Uninstall device.” [5]

- In the popup, check the box to:
- “Attempt to remove the driver for this device” (Windows 11). [1]
- “Delete the driver software for this device” (Windows 10).
- Then hit “Uninstall” to confirm. [2]
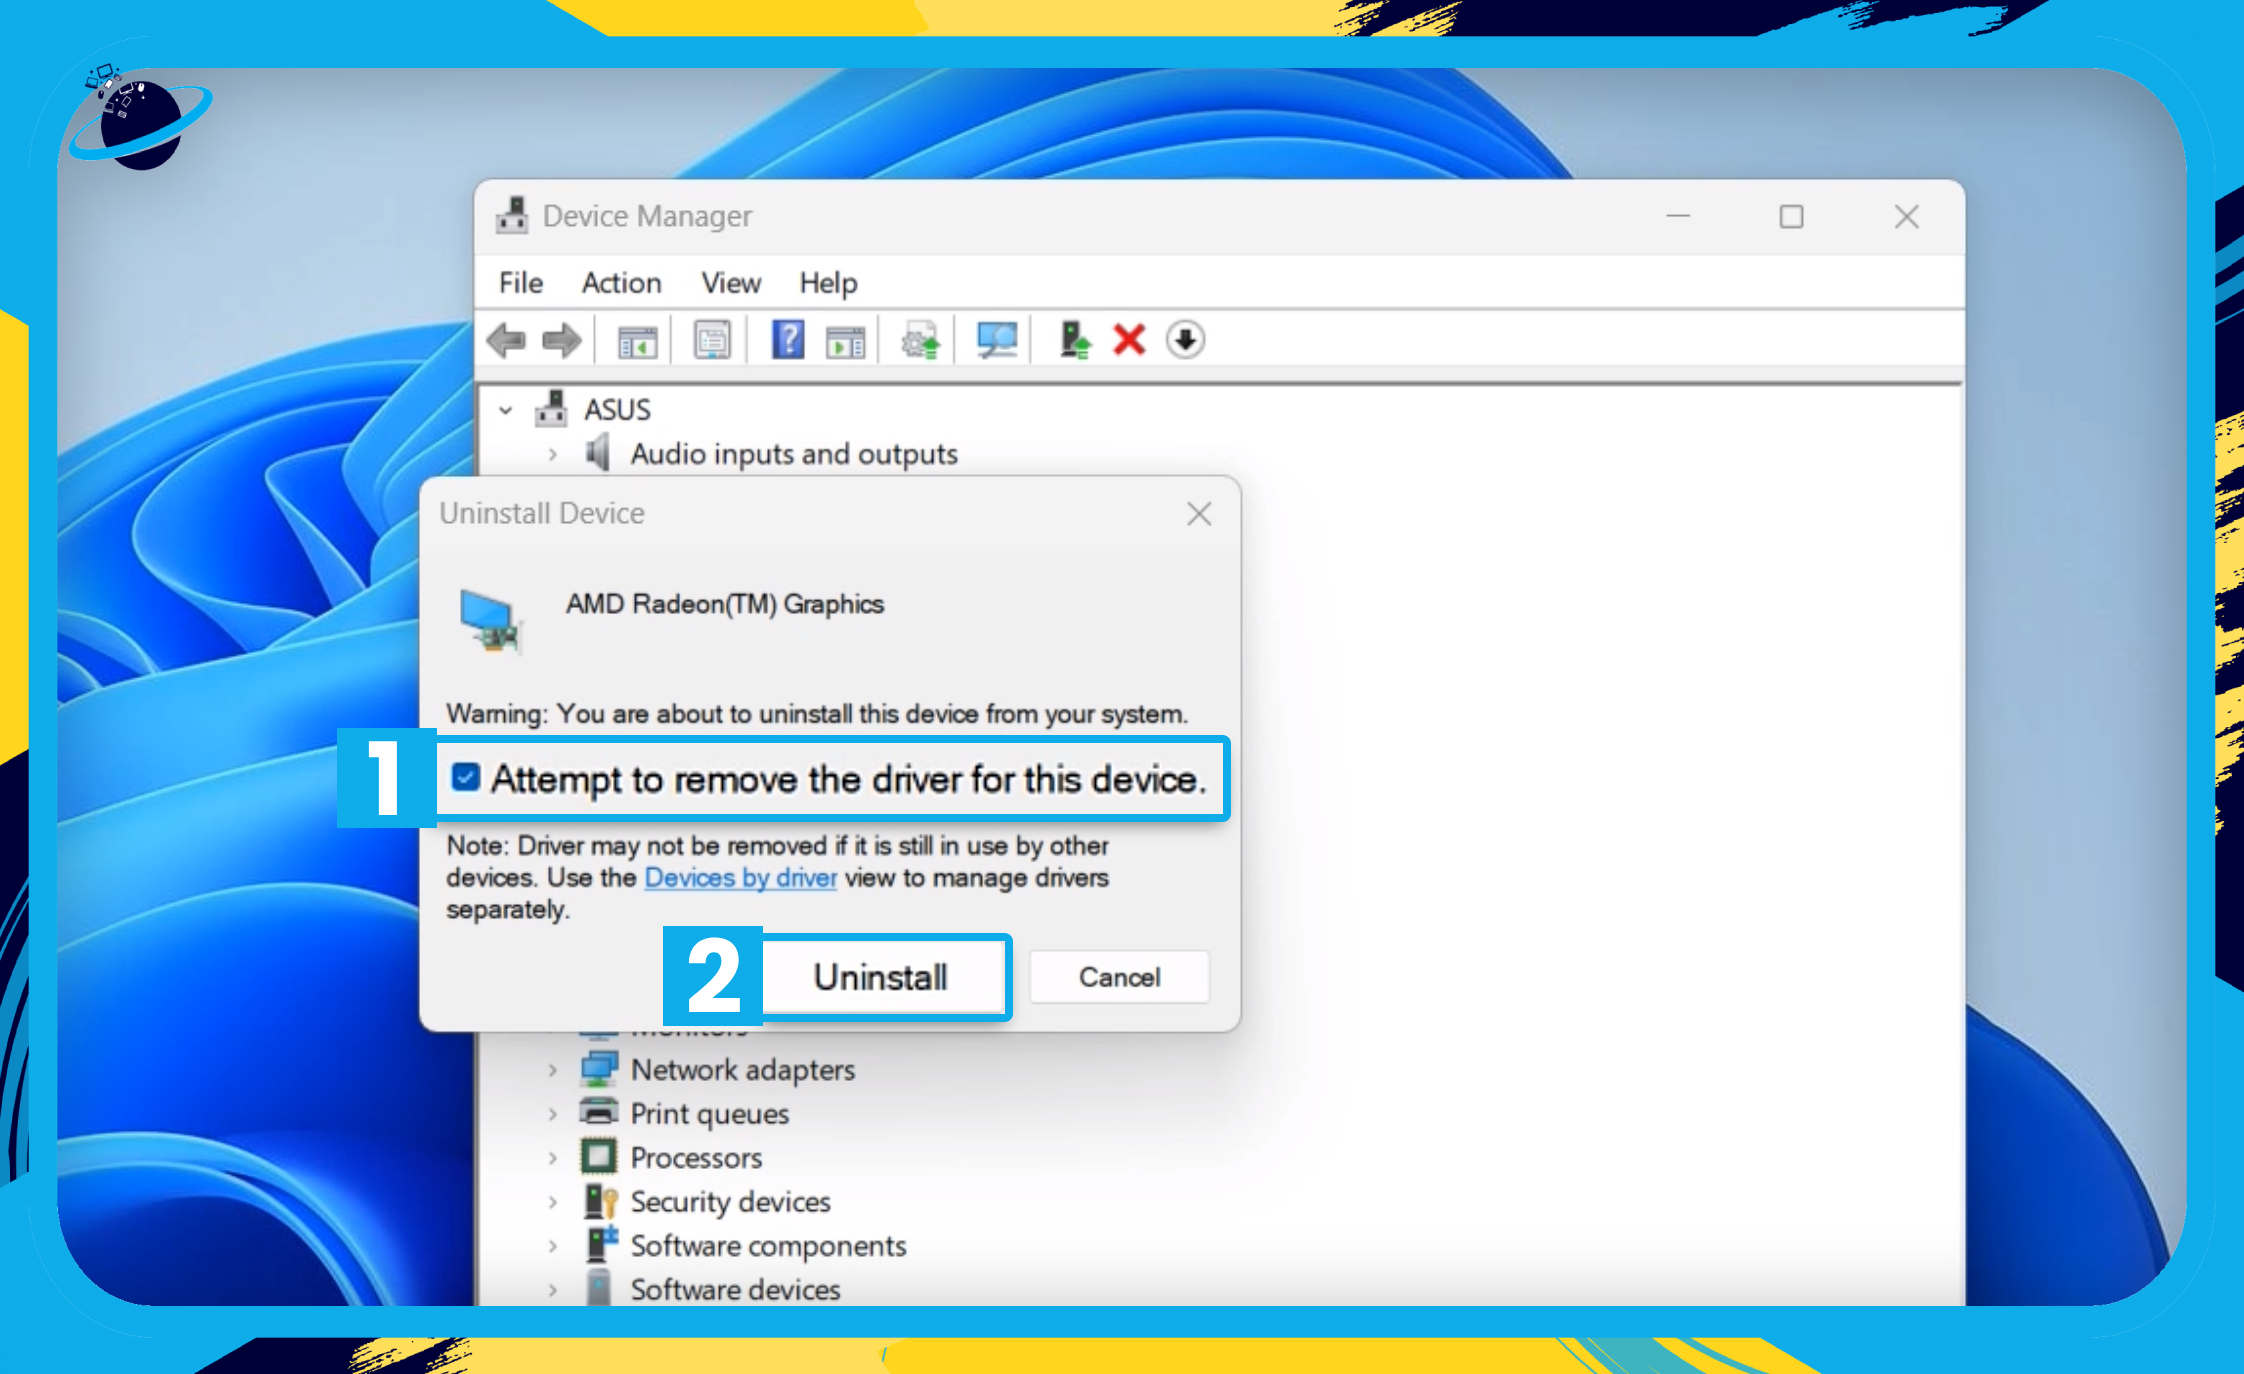
- Finally, restart your device.
After restarting your device, follow these steps to install the drivers for your graphics card:
- Run the driver installer file that you downloaded or insert the CD, DVD, or USB drive containing the drivers.
- Follow the on-screen instructions to install the drivers.
- Restart your device to apply the changes and ensure the drivers are properly initialized.
Conclusion
Ensuring your graphics drivers are up-to-date is crucial for optimal performance, stability, and compatibility with your system. This guide has provided comprehensive steps for identifying your graphics card model and updating drivers on both Windows 10 and 11 platforms.
By recognizing signs of outdated drivers, such as poor performance or compatibility issues, users can take proactive steps to address them. Additionally, troubleshooting methods, including driver rollback and clean install procedures, have been outlined to help users resolve any issues encountered during the update process.

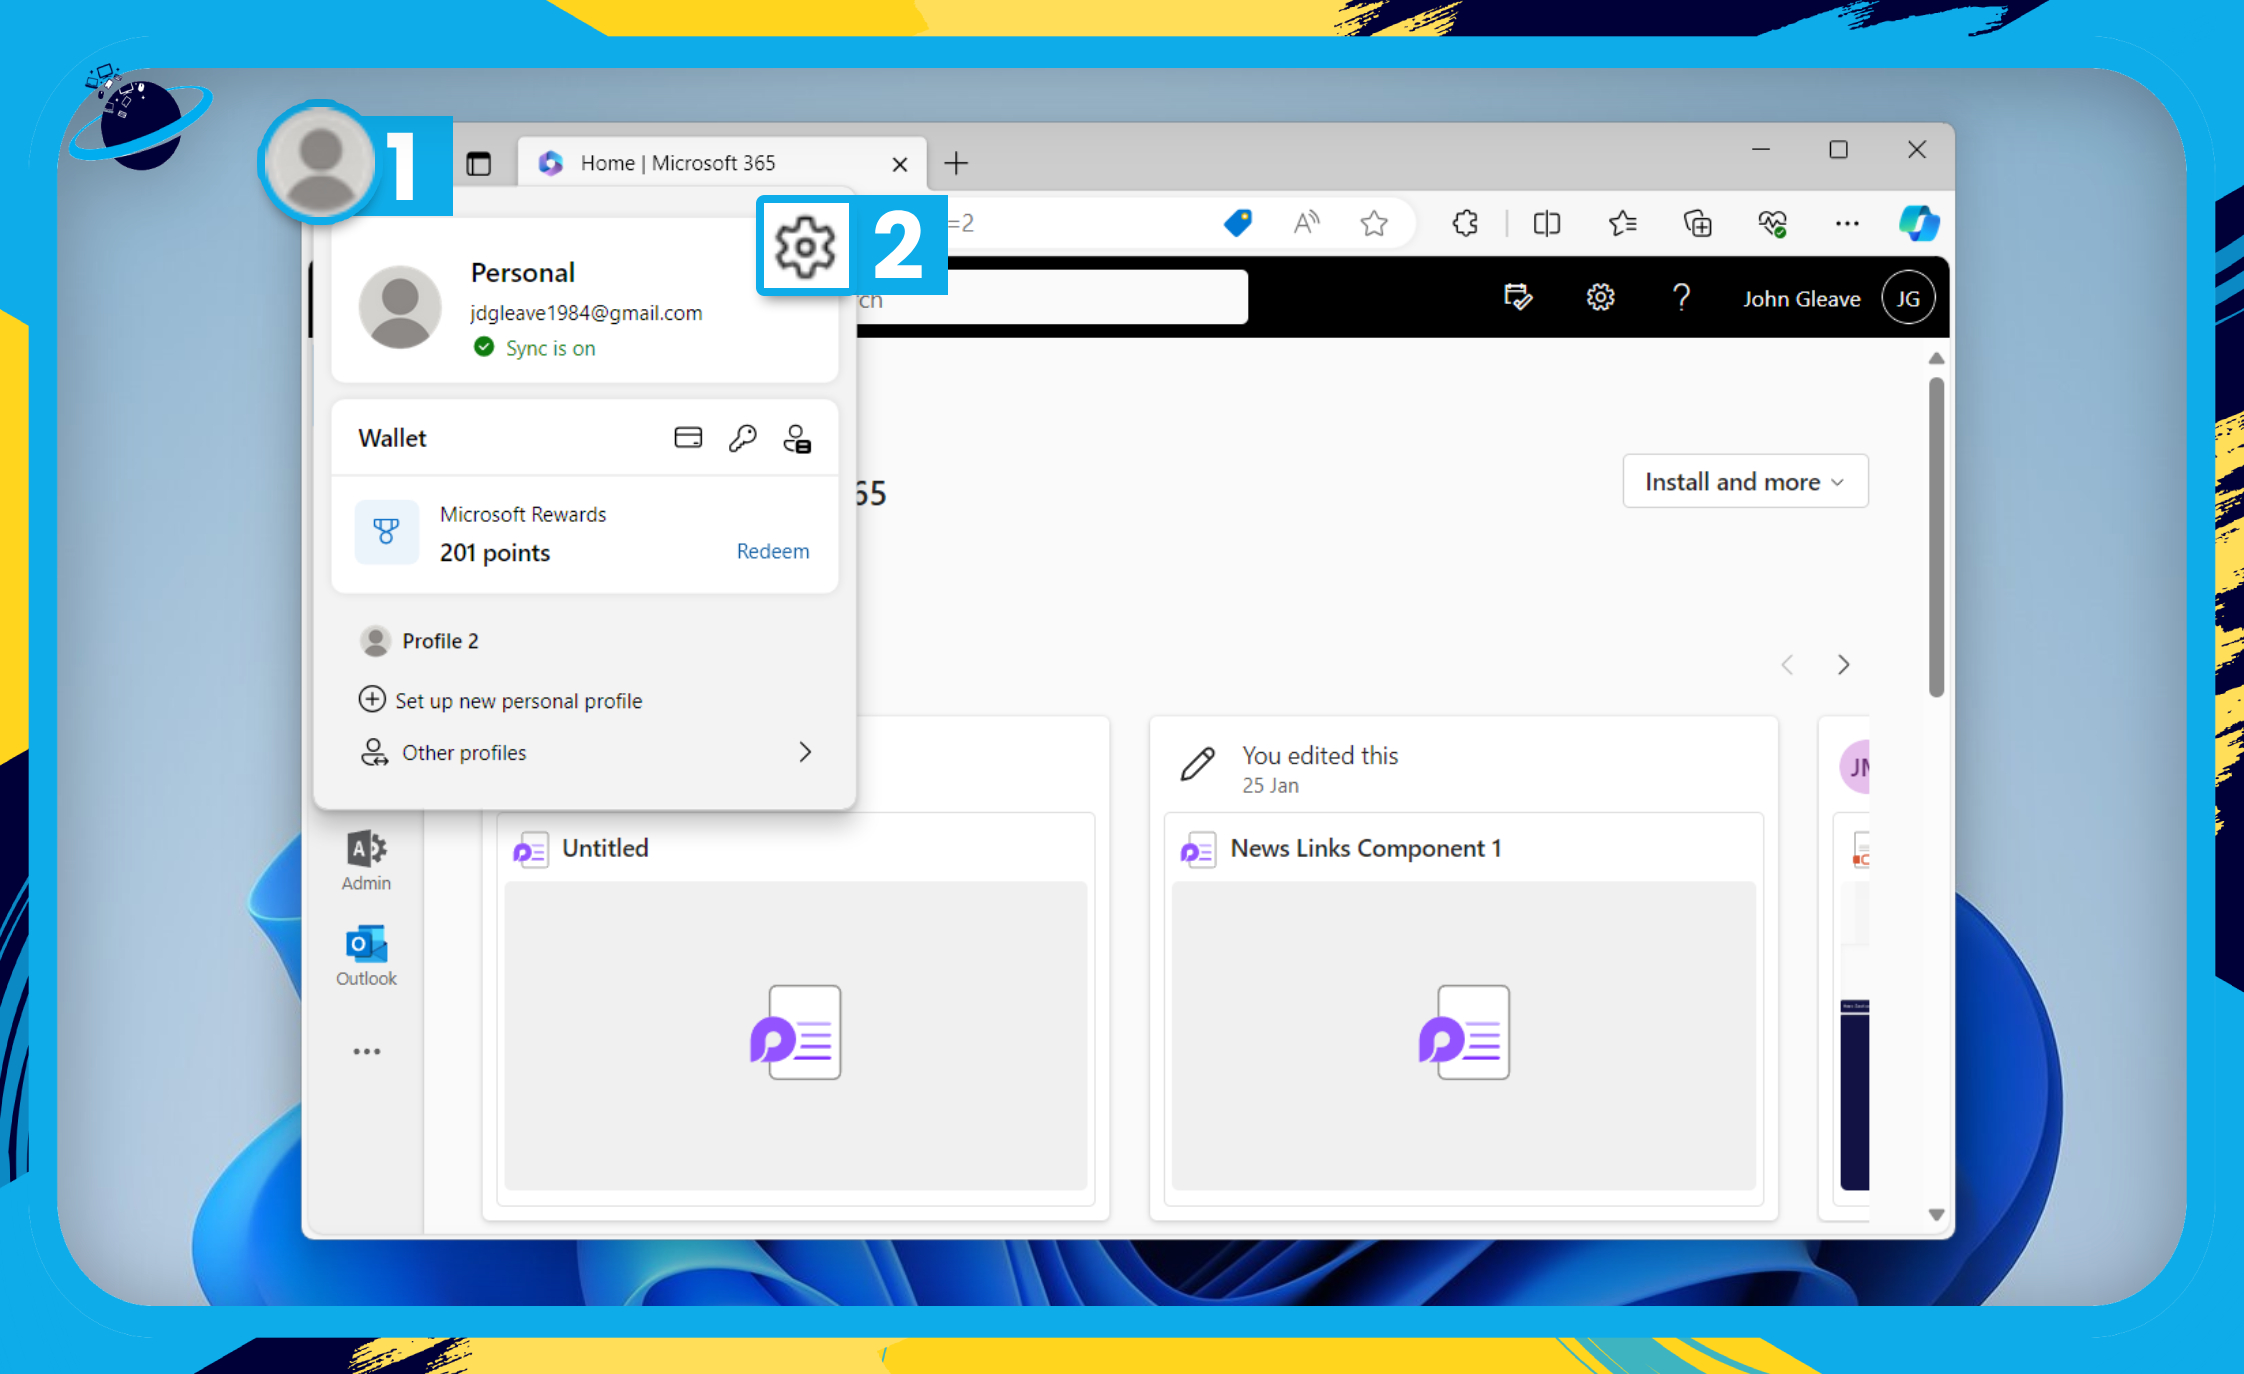
 profile icon in the top left. [1]