Your presence status in Microsoft Teams changes automatically depending on your activity. After 5 minutes of inactivity, Teams will change your status to “Away” until activity is detected on your device. When Teams detects activity on your device again, it will set your status back to “Available.” But you can also set a custom duration for idle time or always appear “Available,” and in this guide, we’ll show you how.
How to change idle time in Microsoft Teams:
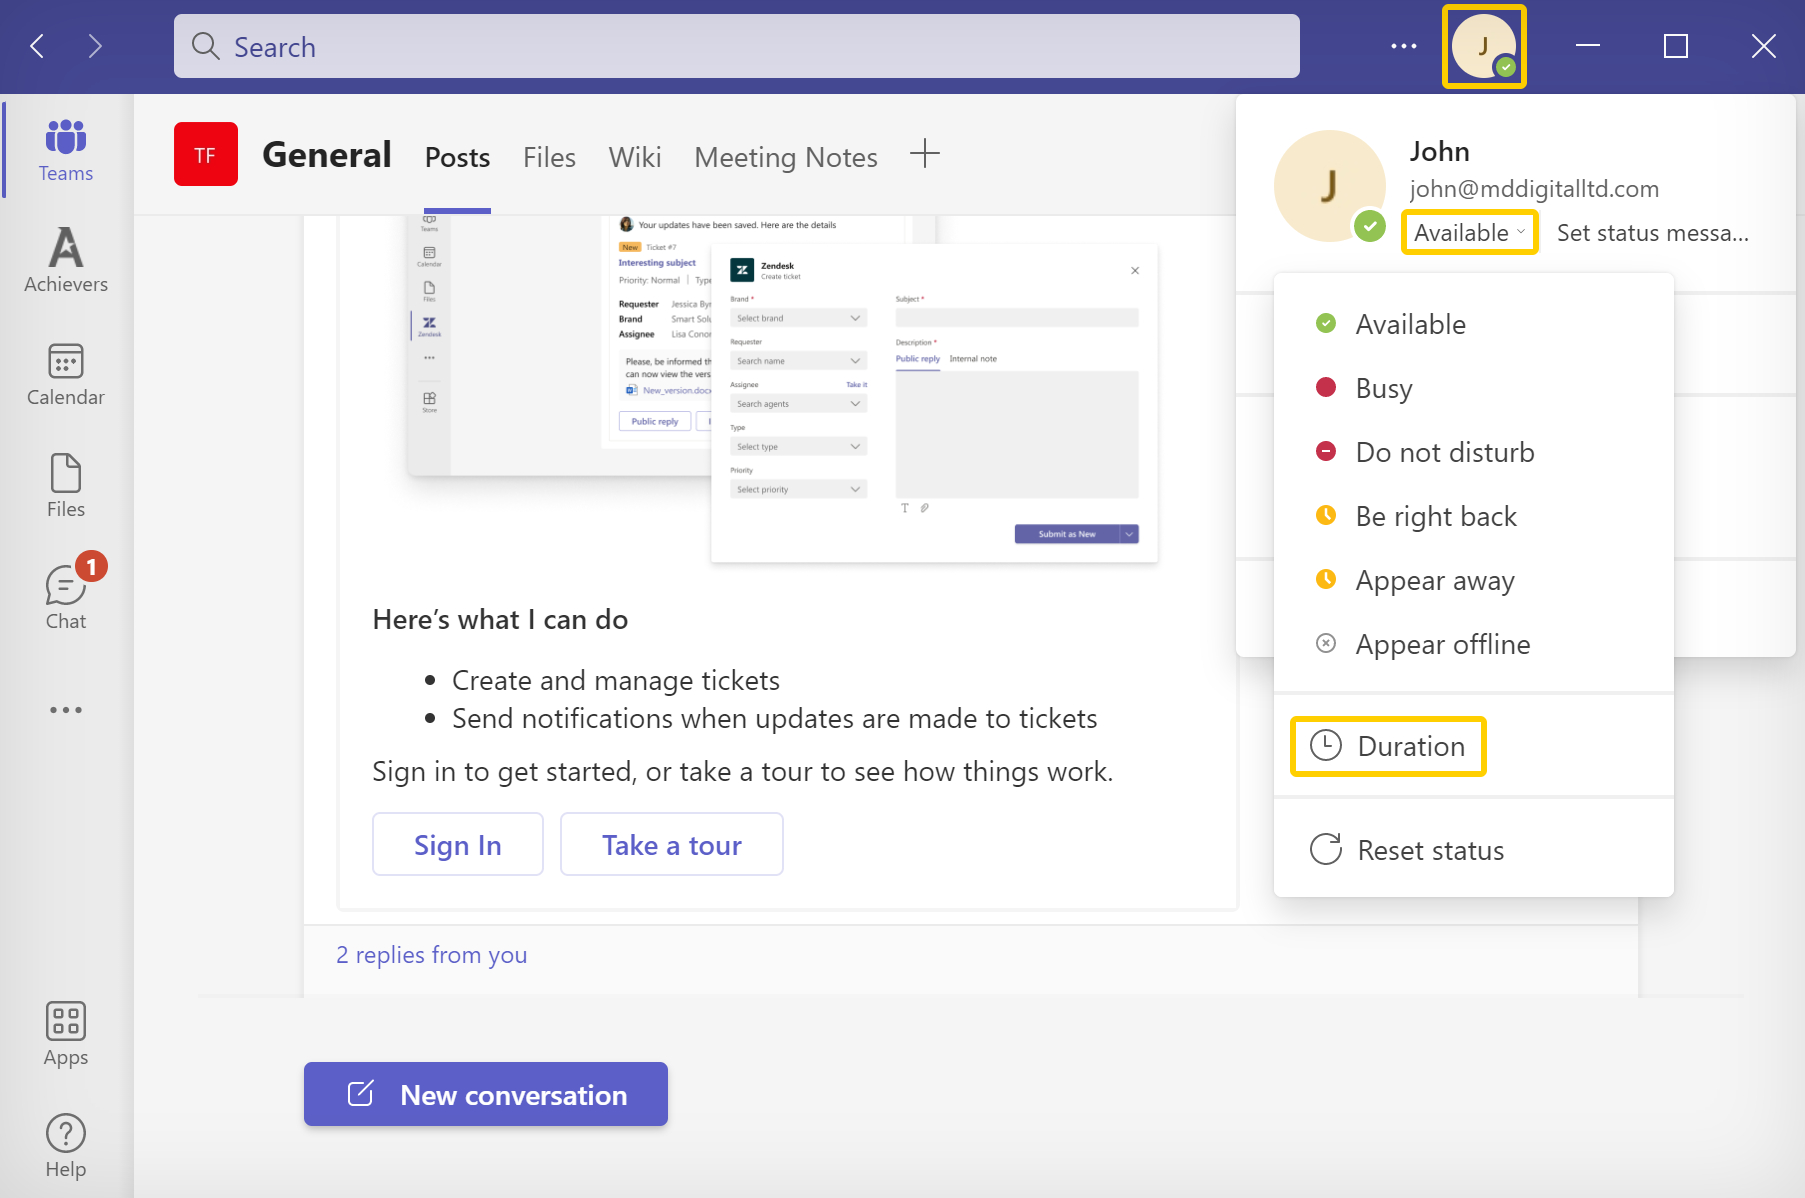
- In Teams, click your circular profile image in the top right.
- Click your current status.
- Select “Duration” from the dropdown menu.
- Choose an idle status, e.g., “Busy” or “Appear away.”
- Set a reset time.
- Finally, click “Done.“
Once you’ve completed the steps, your idle status will remain visible to you and other team members whether you are active on the device or not. Otherwise, your status will change back to “Available” after the reset duration you specified.

More about statuses in Microsoft Teams
There are several presence statuses in Microsoft Teams, and understanding what they mean is essential. So we’ve compiled a list of statuses below with concise descriptions.
| User-Configured | App-Configured |
|---|---|
App-configured presence statuses are set automatically by Teams. They are based on your activity (mouse movements and clicks or button presses), events in your Outlook calendar, if you are in a call, or presenting in a Teams meeting.
User-configured presences statuses are set by you. Those are limited to Available, Busy, Do not disturb, Away, Be right back, and Appear offline.
You can receive calls when in all presences states apart from “Do not disturb,” in which case, calls will go to voicemail. However, you can grant team members priority access.
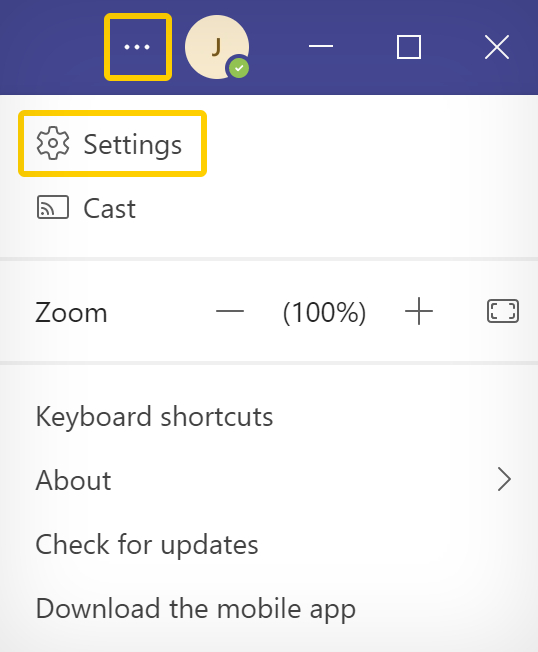
- In Teams, click on the
 three dots next to your profile image.
 - Then click on “Settings” in the dropdown menu.
 |
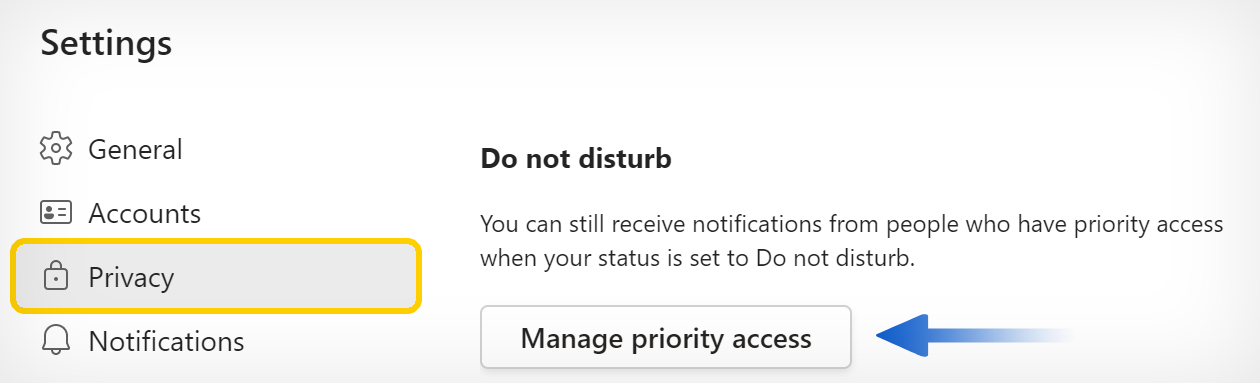
- Next, go to “Privacy” on the left menu.
- Then click the “Manage priority access” button under the “Do not disturb” header.
 |
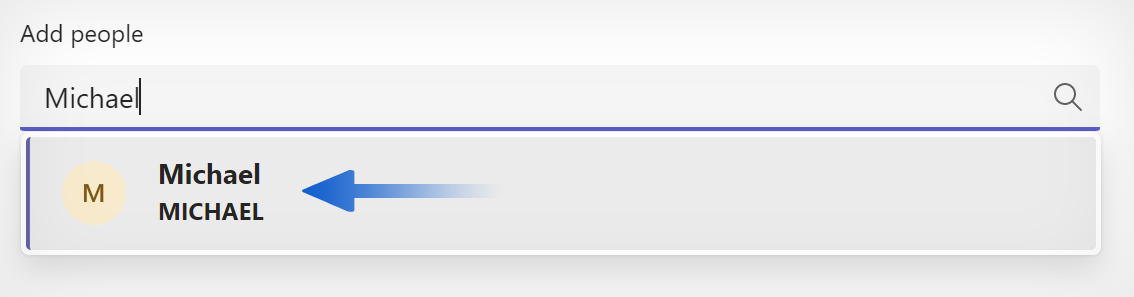
- Type in the names of people you want to grant priority access to.
- Then click on their names in the dropdown list.
 |
![]() For more information, please read
For more information, please read ![]() A complete guide to Microsoft Teams Priority Access.
A complete guide to Microsoft Teams Priority Access.
How to change idle time in Microsoft Teams
Setting a duration for idle time in Teams is currently unavailable in the mobile version. But please follow the steps below to change the status duration for the desktop or web versions. Please note: the guide below is an expanded version of the steps found at the top of the page.
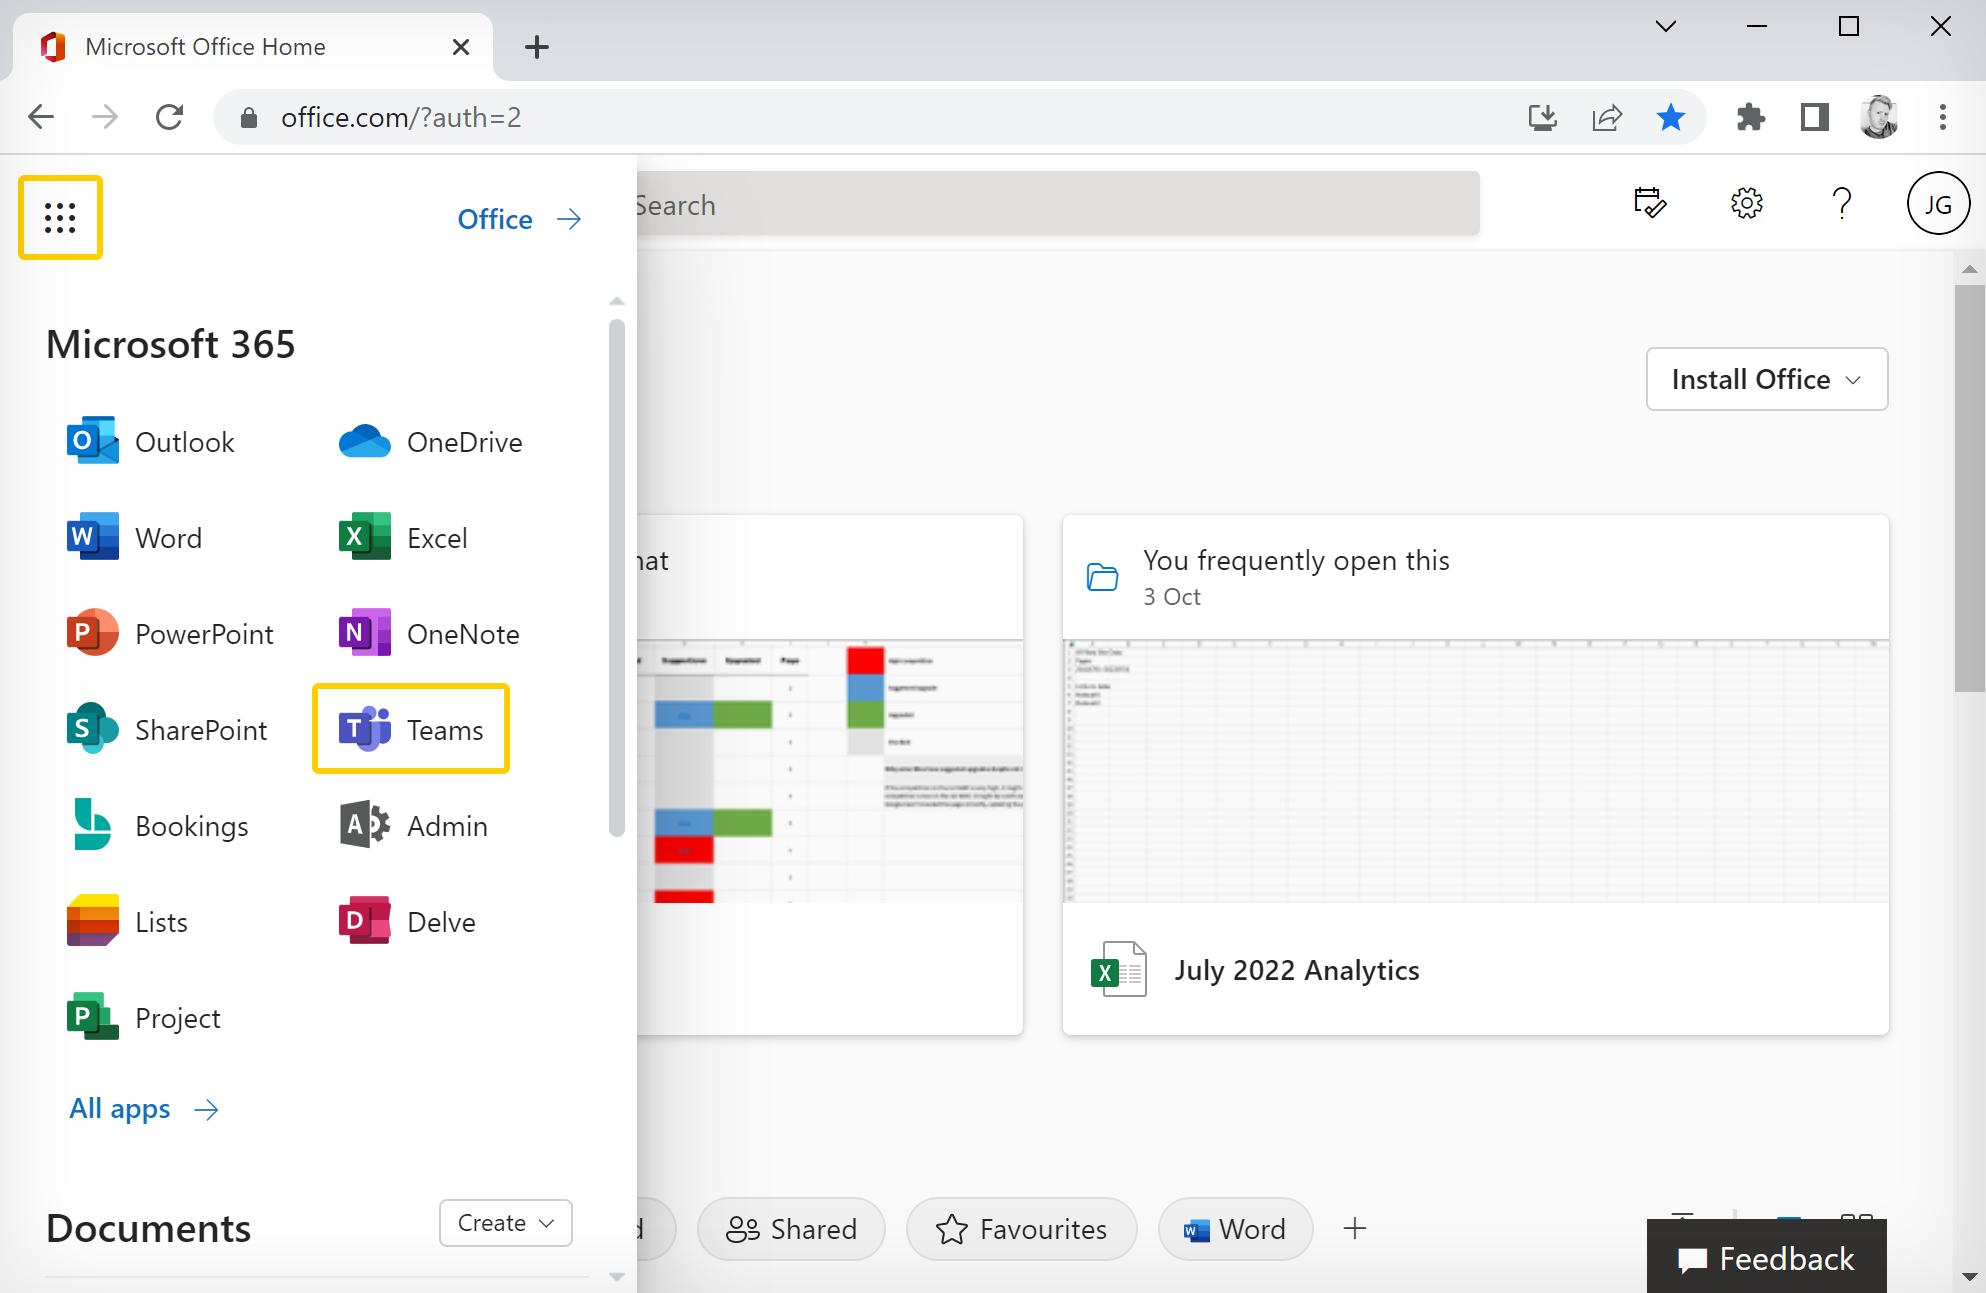
- First, go to
 office.com and open Teams, or open your Teams desktop application.
- In Teams, click your circular profile image in the top right corner.
- Click on your current status, located under your name and email address.
- Then select “Duration” from the dropdown menu.
- Choose which idle status to show, e.g., “Busy” or “Appear away.” (1)
- Set a reset time. (2)
- Click on “Customised” to set a custom date and time.
- Finally, click on “Done.” (3)

There are two ways to reset or remove your status duration. You can change your current status to something else or click on ![]() “Reset status” at the bottom of the dropdown list after clicking on your current status.
“Reset status” at the bottom of the dropdown list after clicking on your current status.
If you’re wondering if you can change how long it takes for Teams to set you to idle (“Away“), then please read through the next section of this guide.
How to always appear available in Microsoft Teams
Microsoft Teams will automatically set your status to “Away” if you have been inactive on your device for 5 minutes or more. Unfortunately, you can’t change the default idle time. However, you can trick Teams into thinking you’re still available.
![]() For more information, please read
For more information, please read ![]() How do I always appear online on Microsoft Teams.
How do I always appear online on Microsoft Teams.
This guide will focus on our favorite method for always making you appear online. The method requires the use of third-party software called Move Mouse. The application can simulate mouse movements to keep your device active. Please keep reading to find out more.
- Available on: PC
- OS: Windows 10 version 14393.0 +
- Architecture: X86 X64 ARM
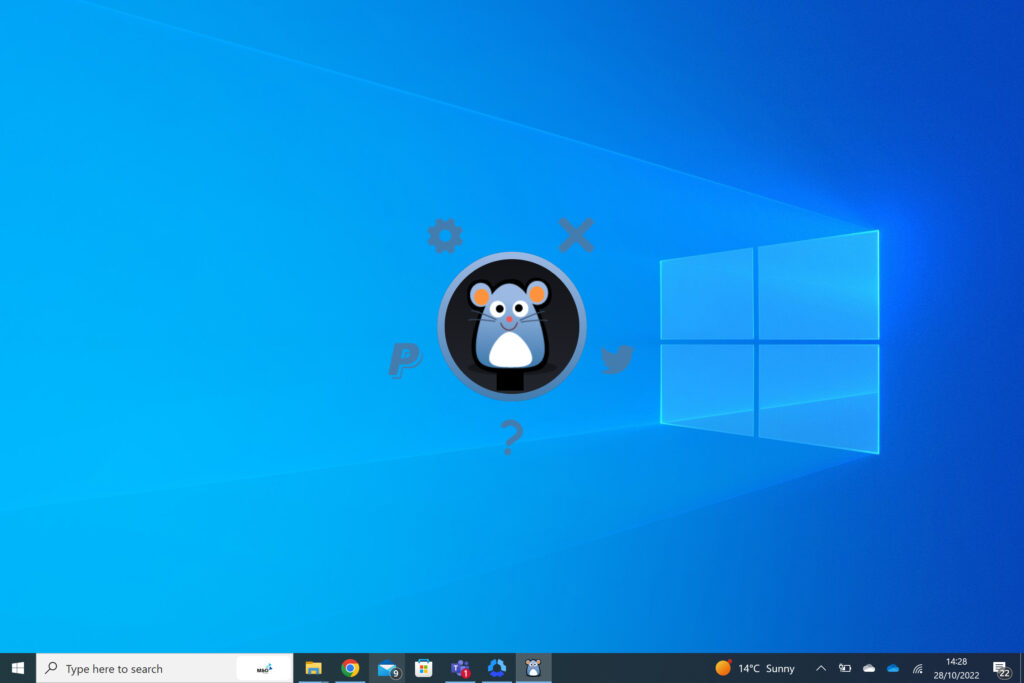
- First, download and install Move Mouse for free.
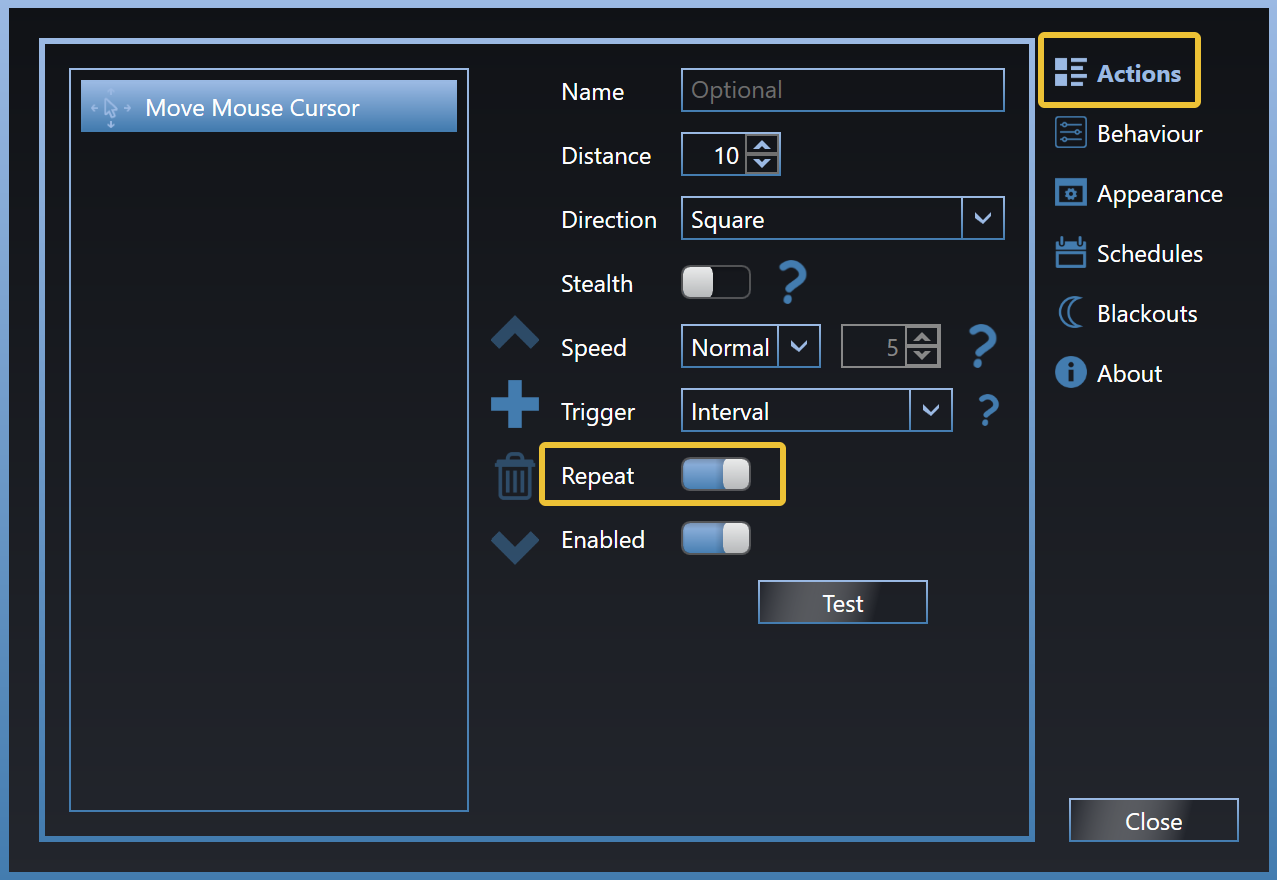
- Once you have installed Move Mouse, click on “Actions” at the top of the right menu.
- Toggle
 “Repeat” on.
 |
- Next, click on “Behaviour” on the right menu.
- Repeat actions are set to 30 seconds by default, which will work for Microsoft Teams.
- Toggle on “Automatically stop when user activity detected.”
- Toggle on “Automatically resume after 30 seconds of inactivity.”
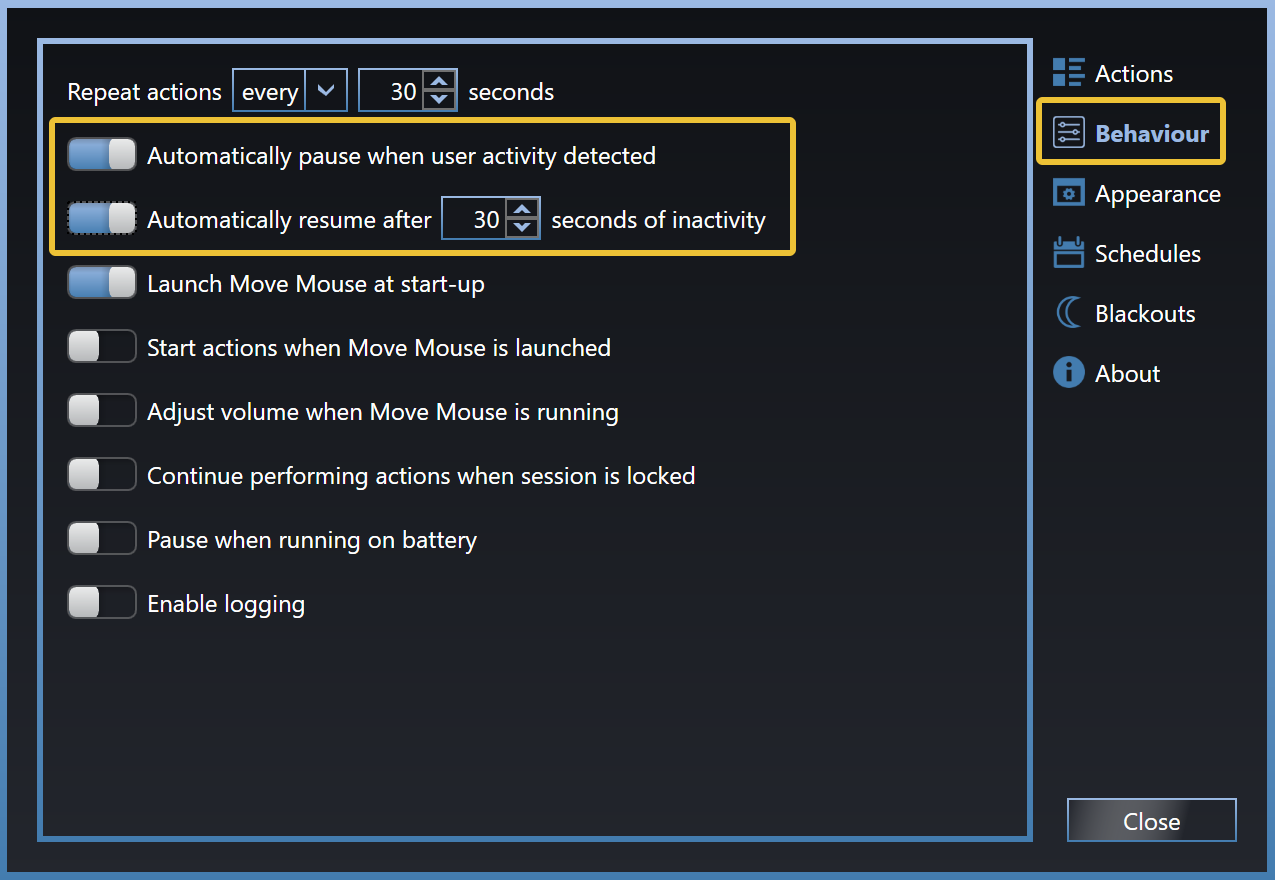 |
Finally, click the “Close” button and continue working as usual. Move Mouse will simulate activity to keep you “Available” on Microsoft Teams after 30 seconds of inactivity. And Move Mouse will automatically stop simulating mouse movements when you return to your device. Perfect! 
More activity simulating software, including options for Mac and Android:
| Auto Click Typer |  | |
 | Mouse Jiggler | |
 | Auto Clicker iOS 13.0+, macOS 11.0+ iOS 13.0+, macOS 11.0+ | |
 | Auto Clicker – Automatic tap 7.0+ 7.0+ | |
Conclusion
If you want to change your status in Teams for a certain length of time, you can do that by setting the “Duration” in the desktop or web versions of Teams — but not in the mobile version.
You can set a duration for the following statuses:
 Busy
Busy Do not disturb
 Be right back
- Appear away
 Appear offline
You cannot set a duration for the ![]() “Available” status. Instead, you will have to use workarounds such as third-party software to simulate activity on your device.
“Available” status. Instead, you will have to use workarounds such as third-party software to simulate activity on your device.
Thank you for reading our guide!