Microsoft Teams features digital conferences, more commonly referred to as “meetings.” Scheduled or unscheduled, participants may record meetings; however, this cannot occur when meeting recordings are disabled. Of course, we’ll be assuming you’re already able to record meetings.
How to access an unscheduled Teams meeting’s recording:
- Open Microsoft Teams
- Click “Meet”>”Meet now”
- Join your meeting
- Open options(
...) - Click “Start recording”
- End the meeting (when ready)
- Find your recording in the meeting’s channel
How to access a scheduled Teams meeting’s recording:
- Open Microsoft Teams
- Click “Schedule a meeting”
- Join your meeting at its due date
- Open options(
...) - Click “Start recording”
- End the meeting (when ready)
- Find your recording in the meeting’s channel
If you require further assistance: worry no more. The following content contains a step-by-step guide on accessing meeting recordings. I’ll also cover who can access a meeting’s recording and how they can share it.
We’ve also created a YouTube video to help you access an unscheduled Teams meeting’s recording. You can view it here:
What I’ll be covering in this post
- How to access an unscheduled Teams meeting’s recording
- How to access a scheduled Teams meeting’s recording
- Why I cannot access a meeting’s recording
- How can I share my Teams meeting’s recording
- Blog post recap
How to access an unscheduled Teams meeting’s recording
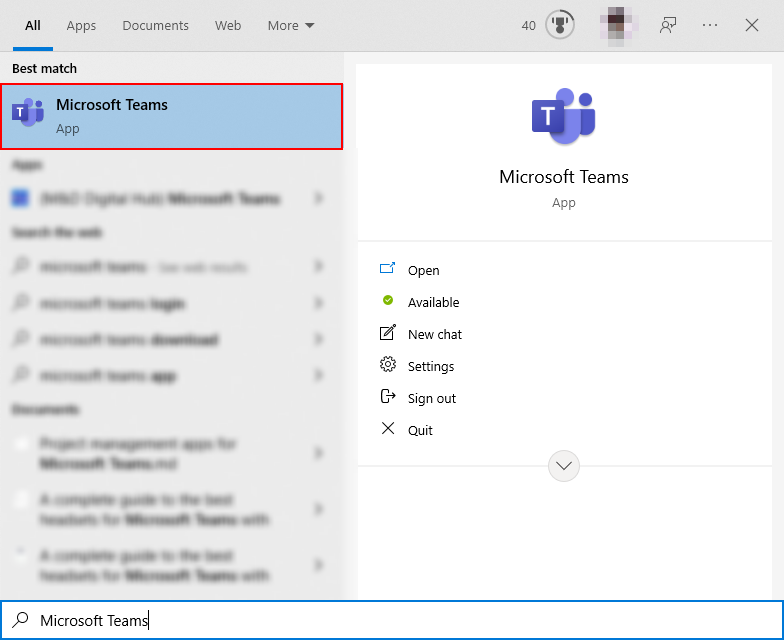
Step 1 — Open Microsoft Teams
To begin: hit the start/win key and begin typing “Microsoft Teams.” Select the application as shown below. Alternatively, access Teams in your browser.
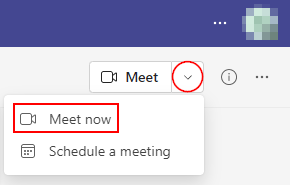
Step 2 — Start a meeting
You can spot the “Meet” button in the top right of your Teams’ window; click the dropdown icon adjacent to the button. Lastly, click “Meet now.”
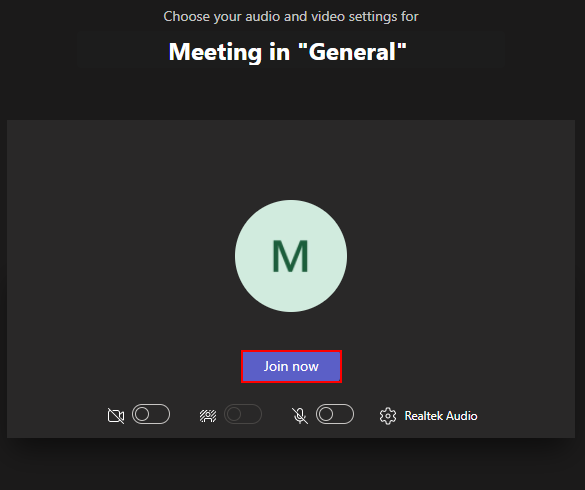
Step 3 — Join your meeting
In the new window, you can configure your meeting settings; the settings provided relate to your visual and auditory inputs and outputs.
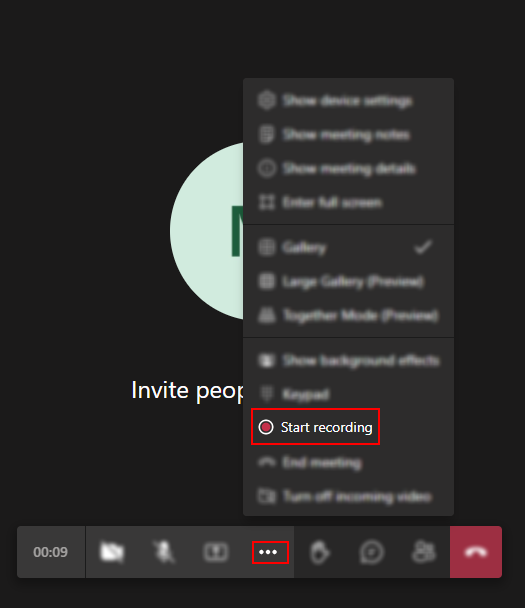
Step 4 — Start a recording
Great, you initiated a meeting. Now, you need to begin recording— how else will we access a recording? Click the “Options” button (...). Teams will provide a dropdown: select “Start recording.”
Step 5 — End the meeting
End your meeting when ready: you can do so via the “Hang up” button. Recordings automatically end when a meeting ends— this does not prevent you from ending recordings manually.

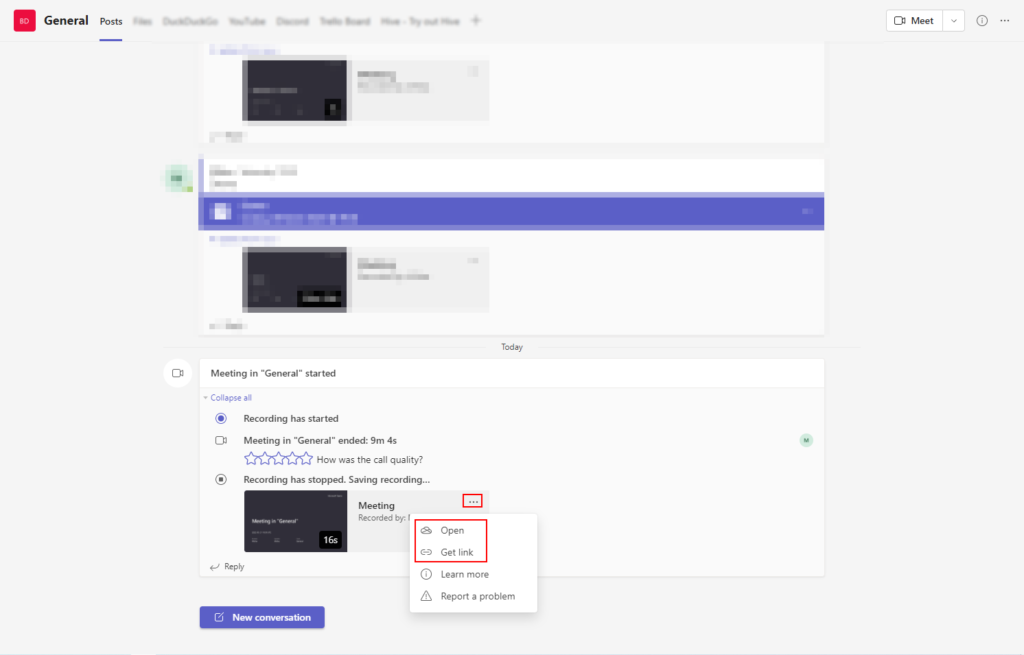
Step 6 — Access your recording
Your recording should now be accessible via the “Files” tab of your meeting’s host channel; however, you can access the recording faster via its automated post in the “Posts” tab.

How to access a scheduled Teams meeting’s recording
Step 1 — Open Microsoft Teams
To begin: hit the start/win key and begin typing “Microsoft Teams.” Select the application as shown below. Alternatively, access Teams in your browser.
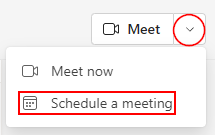
Step 2 — Start scheduling a meeting
You can find the “Meet” button in the top right of your Teams’ window; click the dropdown icon next to the button. Lastly, click “Schedule a meeting.“
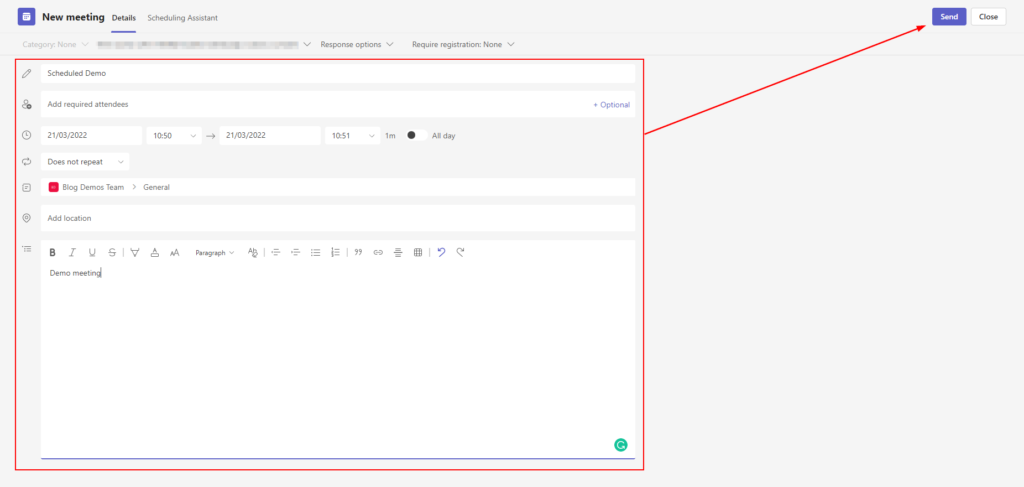
Step 3 — Schedule a meeting
Schedule a meeting sometime soon. Don’t mind your options too much— this is just a demonstration. Add a title and a description, then hit “Send.”
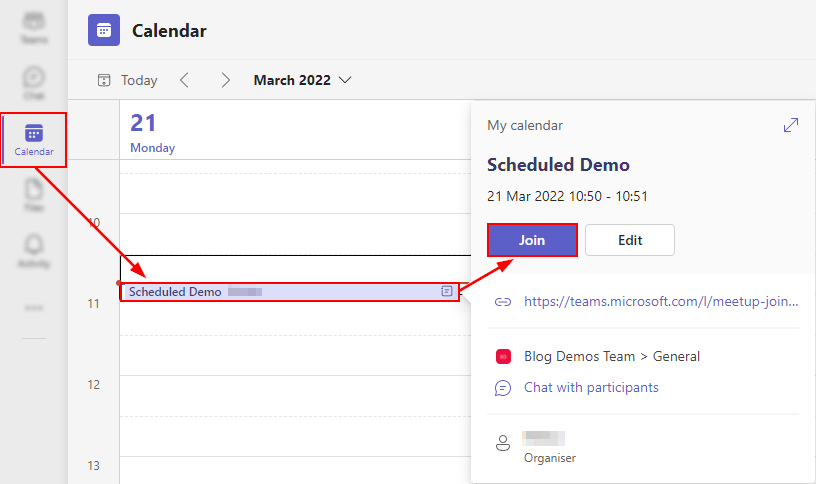
Step 3 — Join your meeting
Enter your Microsoft Teams calendar via the “Calendar” button in the left sidebar. You can find your scheduled meeting on the calendar; click the meeting and select “Join” in the popout menu.
Step 4 — Start a recording
Great, you initiated a meeting. Now, you need to begin recording— how else will we access a recording? Click the “Options” button (...). Teams will provide a dropdown: select “Start recording.”
Step 5 — End the meeting
End your meeting when ready: you can do so via the “Hang up” button. Recordings automatically end when a meeting ends— this does not prevent you from ending recordings manually.
Step 6 — Access your recording
Your recording should now be accessible via the “Files” tab of your meeting’s host channel; however, you can access the recording faster via its automated post in the “Posts” tab.
Why I cannot access a meeting’s recording
Initially, a meeting’s recording will only be accessible to the organizer. However, nothing prevents a meeting’s organizer from distributing the recording amongst meeting participants. If you’d like access to a meeting’s recording, you should consult the organizer.
How can I share my Teams meeting’s recording
While you may be aware of how you can create and access a meeting recording, you’re likely unaware of how to distribute the recordings to your meeting’s participants. I’ll be showing you the most straightforward method below.
Step 1 — Find your recording in its host channel
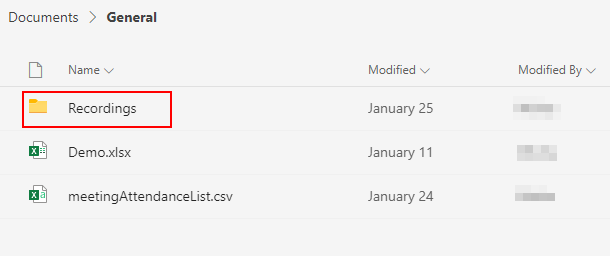
In your meeting’s host channel, access the “Files” tab. The “Files” tab details all files shared within the channel— such as recordings.

Step 2 — Enter the recordings folder
Utilizing the file explorer, navigate into the “Recordings” folder by clicking it. The folder is responsible for holding the channel’s meetings’ recordings.
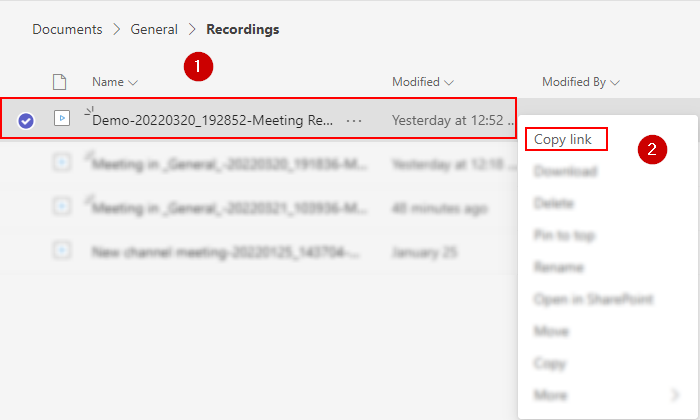
Step 3 — Copy a distributable recording link
Right-click your recording’s file and select “Copy link.” Users who receive the link can use it to access the recording.
Blog post recap
Microsoft Teams allow meeting organizers to record their meetings; this is often performed with auditing in mind instead of malice. When a meeting (and its recording) ends, you may find its recording attached to the meeting’s host channel. Depending on your setup, the file may initially be inaccessible to non-organizers. You can distribute a recording by copying and sharing a link to the file.
Related posts you may be interested in
- Do you have to pay for apps in Teams? — A vast multitude of applications can be integrated with Microsoft Teams for free. However, many users have found paywalls within a selection of applications. While these do not prevent integration, they may limit the apps functionality. Read the post to learn more.
- Can my company see my Teams messages? — If you’re a security-freak you may want to have a read. Long story short: yes, to varied extents. Shocked? Me neither. Come along, I’ll explain in greater detail.
- 2 easy ways to bulk invite your team to a Microsoft Teams meeting — Meetings are great however, inviting thirty people individually is impractical. Fortunately, I have two methods you can use to drastically minimise the issue.
- Can you rename or delete the general channel in Teams? — If you’re a fan of configuration and customization, the default “general” channel is likely a thorn in your side. If you’re wondering how it may be plucked free, have a read.