Want to track down that user who has seen or taken a document without consent? Do not be alarmed, with Microsoft 365 compliance manager the user will not get far with the document. You can use something called an audit log to track the person down and prevent the documents from being used in a malicious way. Thousands of user and admin activities in dozens of Microsoft 365 services and solutions are collected, documented, and stored in your organization’s single audit log. Users in your company can use the audit log search tool to find, examine, and export audit records for certain operations (to a CSV file).
In this blog we will show you how to access the SharePoint Online audit logs. We will also go over the issues you face with compliance such as access permissions, as well as some of the benefits of using such a tool to help create the audit log. Follow the step-by-step guide below to see how you can access the SharePoint Online audit logs.
Step by step process – How to access the SharePoint Online audit logs
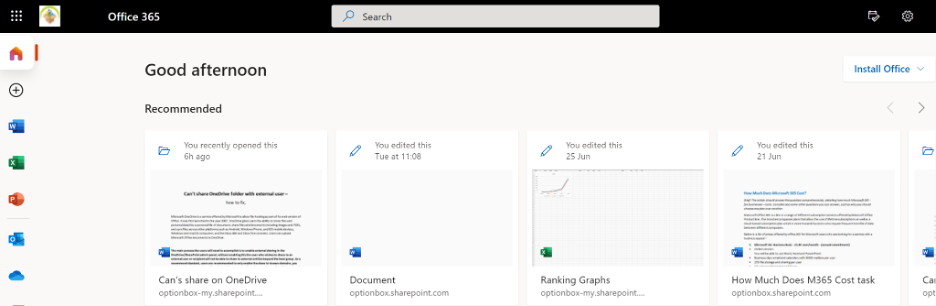
- First, sign in to Office 365 using your normal login details.
- Go to “Admin”.
- Under Admin centres click on “Exchange”.
- Under “Roles” click on “Admin Roles”.
- Now click on “Compliance management”.
- Now click on “Permissions”.
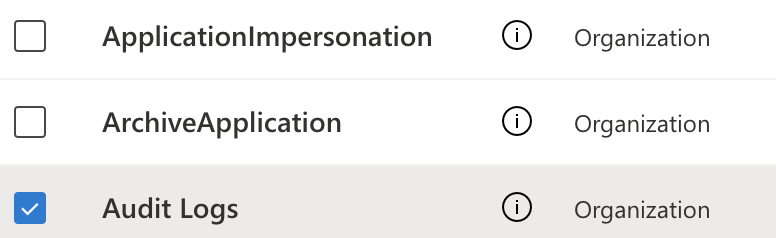
- Find and click on “Audit Logs”.
- A dialogue panel will open and under “Search for access by:” click on “All non-owners”
- Then click on “Search”.
- An infobox will show all the information such as when the user accessed SharePoint, you can now either save this for reference or share it.
Following the steps above allows you to keep a tab on your SharePoint Online account and mailboxes. Knowing who is doing what to which information in your site collection may be crucial in assisting your company in satisfying its needs, such as regulatory compliance and records management. You save an audit log report to a library in the site collection that you choose as a Microsoft Excel Preview workbook to then later view your saved audit log in a CSV format. This can either be sent for reporting or be used to help locate unauthorized access. Not just non-owners, you can even use this to track admin access to accounts, just simply switch out “All non-owners” for “Administrators” from the dropdown. You can of course edit features such as the duration of the log and the sites that need to be logged, as a compliance manager has all the tools required to make this process a lot simpler for you.
There was a feature in SharePoint which allowed you to access the audit log from SharePoint directly, however that has now been removed. We discovered that the SharePoint Audit log functionalities have been migrated to Office 365 Security & Compliance Center unified logging after evaluating this type of access! We can no longer reduce or restrict audit log events in SharePoint Online! On the site settings page, go to “Audit Log Settings” and you can see:

Audit log reports
Content viewing
Report users who have viewed content on a site. During the auditing, the captured data will be shown as blank.
Deletion
This will give you an in-depth report on what has been deleted.
Policy modifications
Reports on incidents that affect the site collection’s information management rules.
Auditing settings
Changes are to the auditing settings.
Permission settings determine whether or not you have access to audit logs
While network settings established by administrators prohibit you from defining a new rule or directing a task using Powershell, you should also be aware of other permissions that may limit you from accessing information in Exchange.
| Owner | All objects and files may be created, read, modified, and deleted, as well as subfolders. You can alter the permission levels that other users have for the folder as the folder owner. (Note that this does not apply to delegates.) |
| Publishing editor | All documents and files may be created, read, modified, and deleted, as well as subfolders. (Note that this does not apply to delegates.) |
| Editor | All things and files may be created, read, modified, and deleted. |
| Publishing Author | Create and read things and files, as well as subfolders, as well as change and remove items and files. (Note that this does not apply to delegates.) |
| Author | Create, read, and change things and files, as well as remove items and files you’ve created. |
| Contributor | Only create objects and files. The folder’s contents do not appear. (Note that this does not apply to delegates.) |
| Reviewer | Only read objects and files. |
| Custom | Carry out the tasks specified by the folder’s owner. (Note that this does not apply to delegates.) |
| None | You do not have authorization. You are unable to open the folder. |
In depth Step by step process – How to see which mailboxes an admin has accessed Office 365?
Step by step breakdown:
- First sign into your Office 365 account.
Use your account details or if you have a current Skype account with the Office account in question, you can use this.
- Use the application launcher to navigate towards “Admin”.
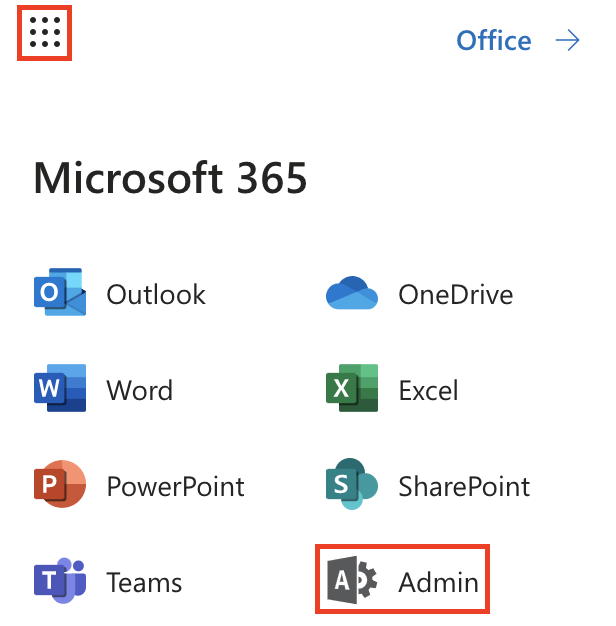
The launcher is illustrated by nine dots in the right corner, click on it and find “Admin” as shown above.
- In the admin dashboard, under “admin center”, click on “Exchange”(you may need to click “Show all” to access).
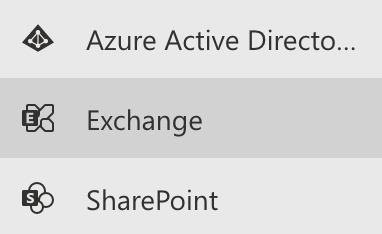
In this example “Exchange” was pinned to the menu bar, however, in your dashboard you may need to click on “Show all” which will bring you to the Exchange panel.
- Under “Roles” click on “Admin Roles”.

You will now enter the admin dashboard where you can access admin-related settings made for Exchange. The admin panel will be users who need more authority over the network and therefore will be able to control more of what happens in the network associated with a business. In the admin menu panel under “roles” click on Admin Roles.
- Now click on “Compliance management”.

Once you’re in the Admin Role section you now need to click on Compliance Management “This role group will allow a specified user, responsible for the compliance, to properly configure and manage compliance settings within Exchange in accordance with their policy.”
- Find and click on “Audit Logs”.
- A dialogue panel will open and under “Search for access by:” click on “All non-owners”
- Then click on “Search”.

- An infobox will show all the information such as when the user accessed SharePoint, you can now either save this for reference or share it.
- An infobox will show all the information such as when the user accessed SharePoint, you can now either save this for reference or share it.
That’s it for this Blog thank you for taking time out to read our content, please feel free to email our team about how it went if you followed the steps or if you need more help with the questions we answered in this Blog.