A Microsoft 365 distribution list is a list of contacts who you can message at once. Your organization may consider using distribution lists to inform staff of recent or upcoming changes within the business. As you would imagine, sending a single message to ten people takes far less time than sending ten messages to ten people. Contrary to what one might believe, a Microsoft 365 group’s distribution list may include external contacts- however, it is not a feature initially enabled by default.
Solution:
- Open the Microsoft 365 Admin Center
- Access the Exchange Admin Center
- Select “Recipients” followed by “Contacts”
- Click “+” icon and select “mail user”
- Fill all mandatory fields appropriately
- Click save
- Create mail > Send > Check all users received the mail
I’m going to demonstrate how to add an external contact to a distribution list, as well as how you can create a distribution list in Microsoft 365/Outlook. Continue reading for a step-by-step walkthrough with screenshots.
Contents:
- [1] What is a Microsoft 365 distribution list
- [2] How to add an external contact to a distribution list in Microsoft 365
- [3] How to create a distribution list in Microsoft 365
- [4] Recap & Farewell
What is a Microsoft 365 distribution list?
A Microsoft 365 distribution list is a list of contacts (primarily) used in Outlook to deliver a single message to multiple recipients. Distribution lists have several good uses. One example is mailing lists: let’s say your organization sends out a weekly news message detailing in-office projects and updates. While you could deliver this message to each employee individually, it would become more tedious as your organization grows. Hence, you would instead send the same message to each employee- with a distribution list.

How to add an external contact to a distrubution list in Microsoft 365
Step 1 – Open Outlook
To begin, open Outlook. Within Outlook, you can create and edit existing distribution lists.
Step 2 – Access the “people” page
Inside Outlook, access the “people” page with the button resembling two people in the left sidebar.

Step 3 – Edit your distribution list
The “people” page is responsible for storing your contacts and your contact groups. To begin, find “Your contact lists” under the “Contacts” dropdown. After, you should be able to see each of your distribution lists in the rightmost panel. Next, select the distribution list you’d like to add external members to and click “Edit” on their card.
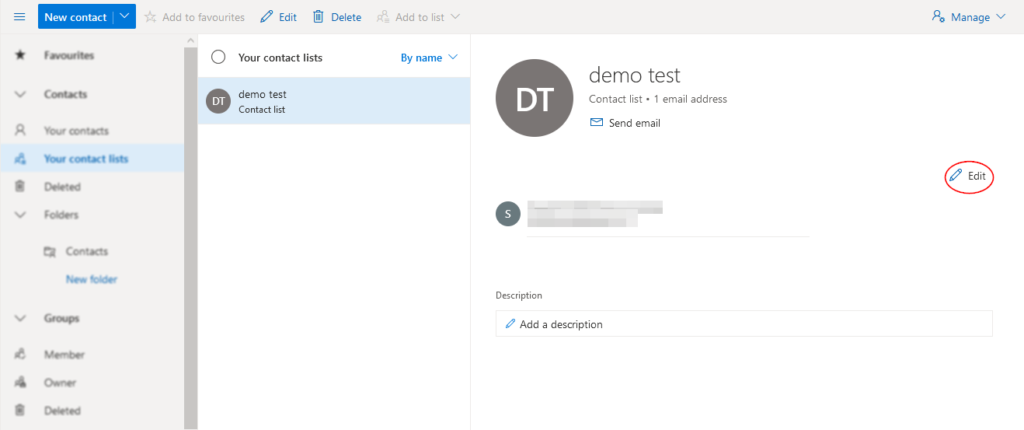
Step 4 – Add external contacts
After selecting “Edit,” Outlook will display a pop-out menu; you use it to alter your distribution list’s properties and members. To add an external member, first, enter their email address into the field labeled “Add email addresses.” Finally, click the “Add” button or hit the enter key. You can click “Save” once you’ve finished adding members to the list.

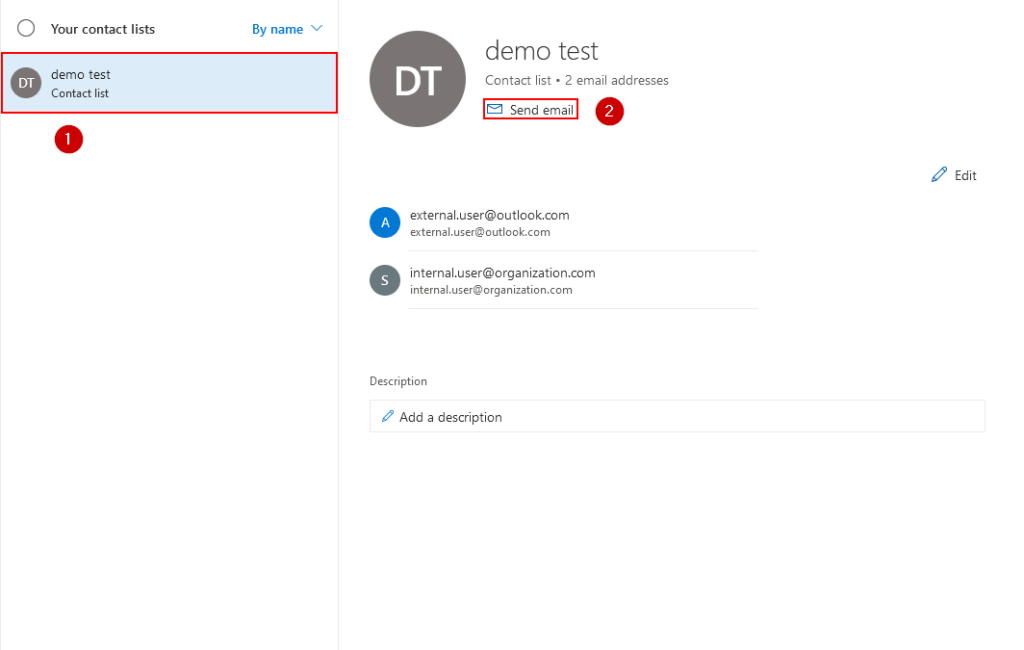
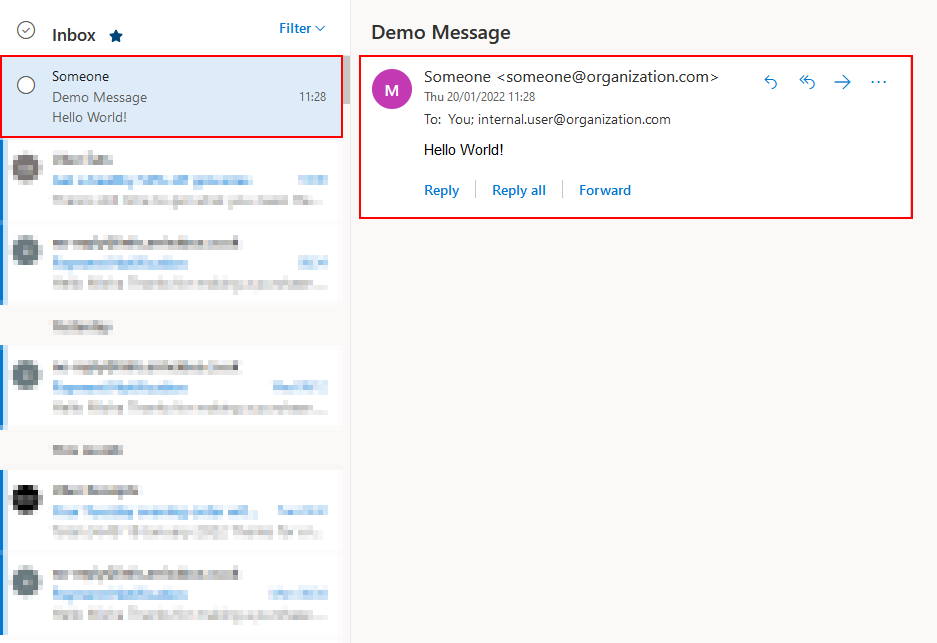
Step 5 – Test your changes
After saving your changes, you should be able to see your newly added members in your distribution list. While this may be enough to confirm your changes are in effect for some, I’d like to prove things further. So hit “Send email” under the distribution list’s name.
Step 6 – Compose a message and send a message
You can compose a message outfitted with a main body and subject in the composition window. You will find Outlook has already placed your distribution list within the “To” field.
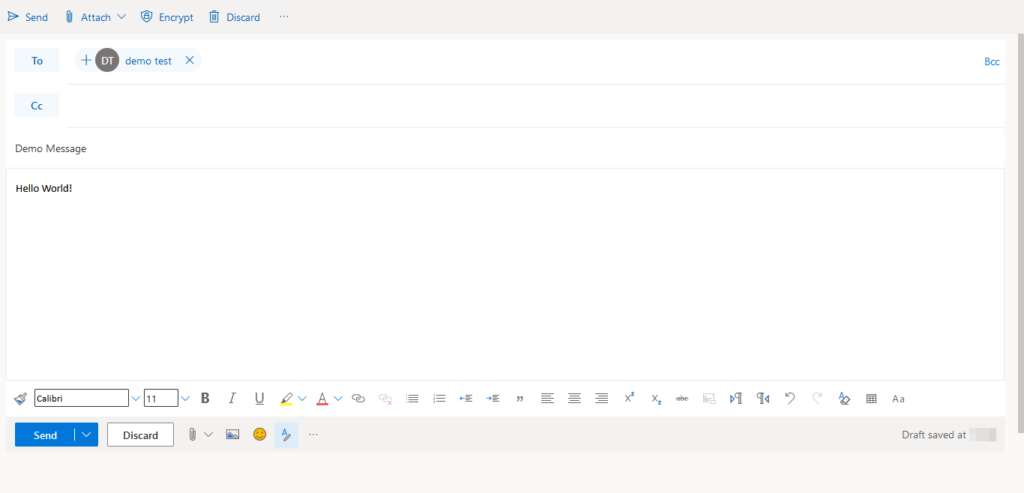
Step 7 – Confirm the message was received
After composing a message, hit “Send” and confirm with your external recipients that they received the message.
How to create a distribution list in Microsoft 365
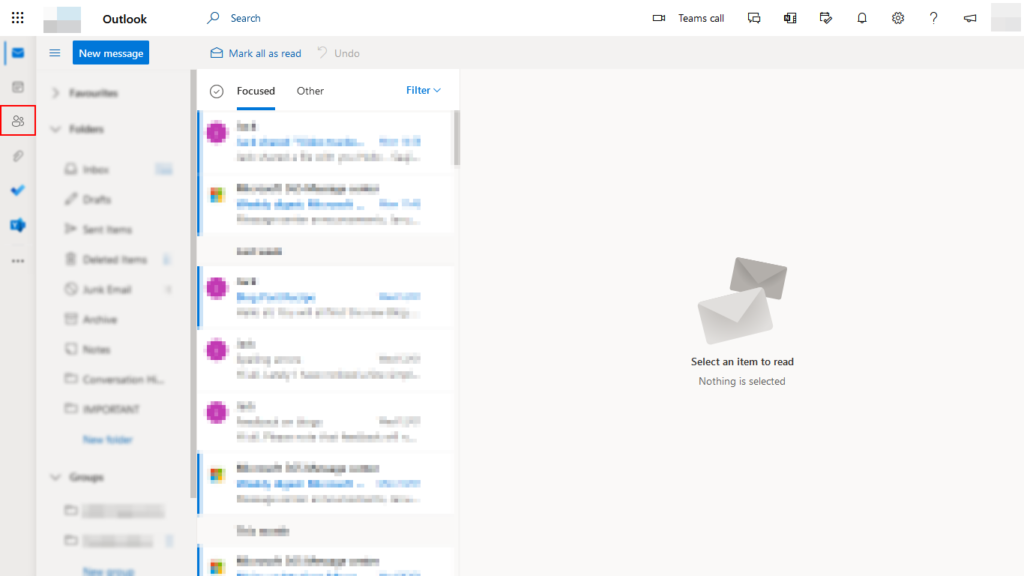
Step 1 – Open Outlook and navigate toward the contacts page
First, access Outlook in your browser; look for the “people” icon in the leftmost side panel and click it. The button will lead to the contacts page.
Step 2 – Initiatie the contact list creation process
On the contacts page, you’ll spot a blue button labeled “New contact.” On the button’s right is a downward-facing arrow. Click the arrow to reveal the dropdown. From the dropdown, select “New contact list.”

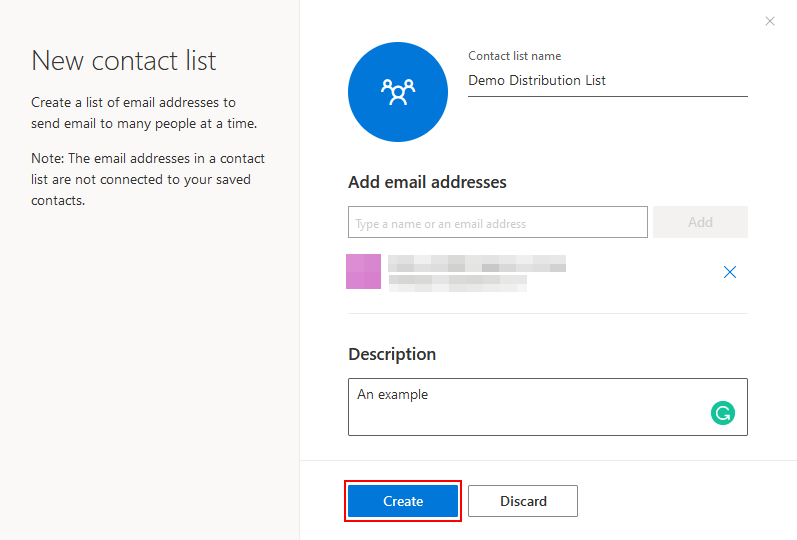
Step 3 – Fill mandatory fields
You should now see a pop-out window containing three main fields and two buttons. For the first field, enter a name for your distribution list. Next, add contacts you wish to include in your distribution list in the second field. In the final field, provide an informative description of your distribution list. Lastly, click the “Create” button.
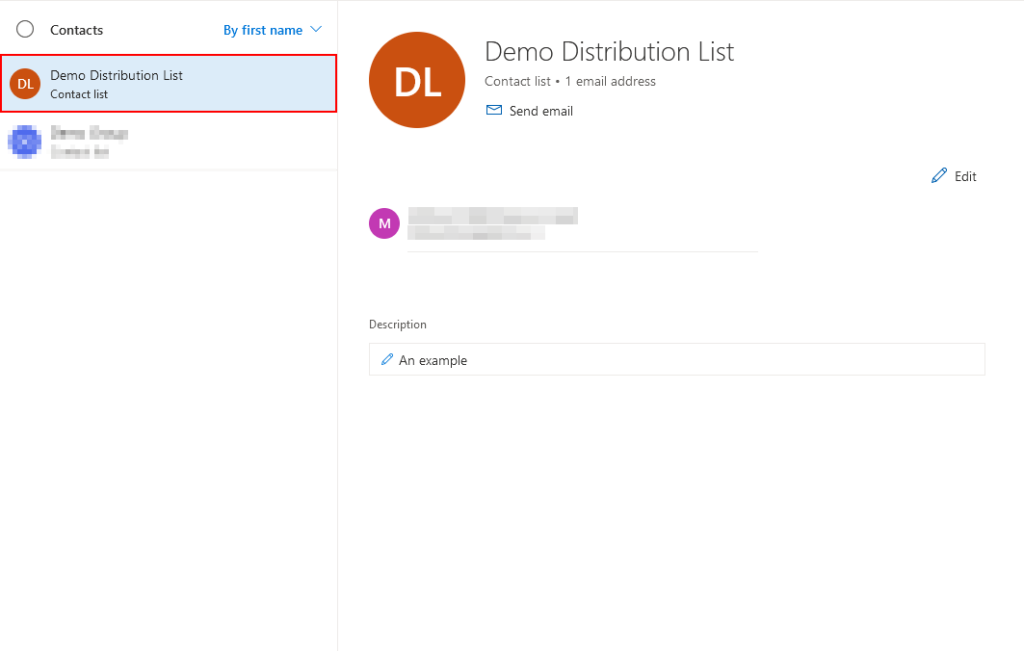
Step 4 – Ensure your distribution list is as intended
After creating a distribution list, Outlook’s contact page will automatically display it to you. You now have an opportunity to look over your distribution group- checking its description and members are correct.
Recap & Farewell
Recap
Microsoft 365 distribution lists allow you to deliver a single message to several recipients- in no less time than it would take to send it to one. Similarly, getting a distribution list created takes no notable amount of time. In addition, once completed, a distribution list can contain contacts both within and outside of your organization.
Farewell
Thank you for reading this post. Business Tech Planet aims to provide the best resources on the internet- being both comprehensive and practical. If you’re an everyday user of Microsoft 365 applications, I recommend you look through the rest of our site. We post new content often, and we’re always looking for new queries to answer.
Our related articles:
- How to share a group contact list (distribution group) in Outlook – Group contact lists are similar to distribution lists in terms of use. If you’re curious about sharing them, you’ll find this post to be an adequate solution.
- How to change display sender name in Outlook: Desktop and cloud version walkthroughs – In some cases, sending a message can reveal a little too much- take for instance your fullname or organization name. The following post provides a step-by-step guide on updating your display name for Outlook.
- How to open another user’s mailbox in the Outlook web application – If you’re looking to manage several mailboxes, opening multiple mailboxes within Outlook may sound more helpful than using a device for each account. If you don’t know how, this post will fix that.
- Microsoft 365 Outlook: How to recall a sent email – If you’ve delivered a message but forgot something, or fear something is not quite right, you may wish to retract it. While this is not always possible, you will be glad to know we can help you out with when it is possible.