If you want to add users to a site but restrict what they can access — in this case, particular folders — it’s a fairly simple process. In most cases, creating a new site for the users you want to add as members makes life easier. However, if that isn’t possible with your current setup, here’s how you can restrict access to certain folders.
There are a few different processes for adding users to a SharePoint site, but the easiest process is the one I’ll explain first. Follow the steps given below to add users to a SharePoint site but restrict access to certain folders:
- Navigate to Office.com and sign in using your Microsoft 365 login details > Open the SharePoint app using the app launcher
- Open the SharePoint site you want to add users to > Click the cog icon (Settings) > Click Site permissions
- Click Advanced permissions settings
- Click Create Group
- Fill in site information > Choose permission level for group members > click Create
- Click New to add people to the new group
- Enter the names/email addresses of the users > Type a message (optional) > Click Share
- Return to site home page > open the document library where the files are stored
- Select the folder > click the three vertical dots (⋮) > Click Manage access
- Locate the group of users > Click the drop-down > Click Stop sharing > Repeat process for all folders you want to restrict access to
Please note that you must be the owner of the SharePoint site — or a Microsoft 365 SharePoint or global admin — to follow the steps given above. Site members cannot follow the process.
This is the easiest method for adding users while restricting their access to certain folders stored in the site. That being said, you could add the users one by one rather than adding them into a group. However, I find that creating the group and then restricting access to certain parts of your site makes life much easier.
  | |
 Compatible with Windows, Mac OS, and Android. Compatible with Windows, Mac OS, and Android. | FROM $6.00 user/month |
Step-by-step: How to add users but restrict access to certain folders — SharePoint Online
Adding users to SharePoint Online and restricting their access to certain folders is a relatively simple process. The steps I’ve given below explain the easiest way to add numerous users — by creating a group and adding all the users to it — and restrict the group’s access to certain folders.
Follow the steps below to add users to SharePoint Online but restrict their access to certain folders:
- Navigate to Office.com and sign in using your Microsoft 365 login details > Open the SharePoint app using the app launcher
- Open the SharePoint site you want to add users to > Click the cog icon (Settings) > Click Site permissions
- Click Advanced permissions settings
- Click Create Group
- Fill in site information > Choose permission level for group members > click Create
- Click New to add people to the new group
- Enter the names/email addresses of the users > Type a message (optional) > Click Share
- Return to site home page > open the document library where the files are stored
- Select the folder > click the three vertical dots (⋮) > Click Manage access
- Locate the group of users > Click the drop-down > Click Stop sharing > Repeat process for all folders you want to restrict access to
Please note that you must be a site owner, a SharePoint admin or a Microsoft 365 global admin to follow the steps given above. Site members cannot follow the steps as they do not have access to the advanced permissions settings.
Now we’ve clarified the permissions you must have, I’m going to demonstrate all the steps given above, including screenshots to make following along simple.
1. Navigate to Office.com and sign in using your Microsoft 365 login details > Open the SharePoint app using the app launcher
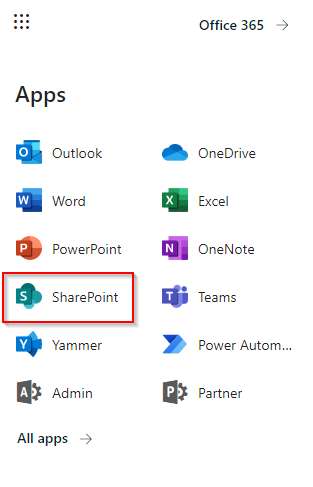
First, navigate to Office.com and sign in using your M365 credentials. Once you’re signed in, open the SharePoint application using the app launcher.
2. Open the SharePoint site you want to add users to > Click the cog icon (Settings) > Click Site permissions
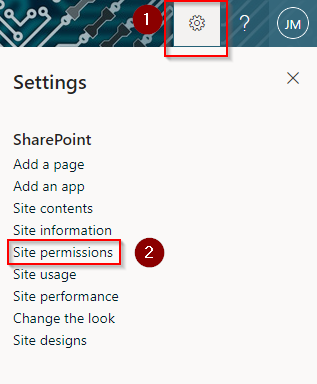
First, open up the SharePoint site that you want to add users to. After opening the site, click the cog icon in the top right. If you hover over this, a tooltip will pop up saying ‘Settings’.
After clicking the cog icon, click Site permissions.
3. Click Advanced permissions settings
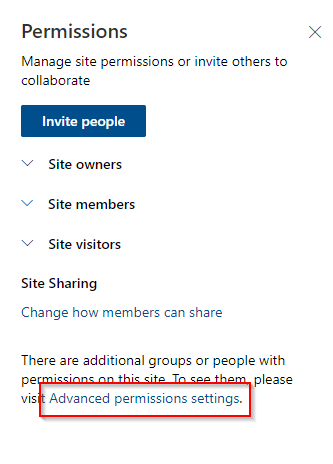
After clicking Site permissions, the permissions menu will open up. At the bottom of the permissions menu there is a text link to the advanced permissions settings — as indicated in the screenshot above. Click this link.
Please note — if you don’t see this link, it’s because you don’t have the right permissions. To follow these steps you must be one of the following:
- Microsoft 365 SharePoint admin
- Microsoft 365 global admin
- Site owner of the site you’re editing
- A user with ‘full control’ privileges for the site you’re editing
4. Click Create Group

Once the advanced permissions settings page loads, click the Create Group button on the ribbon.
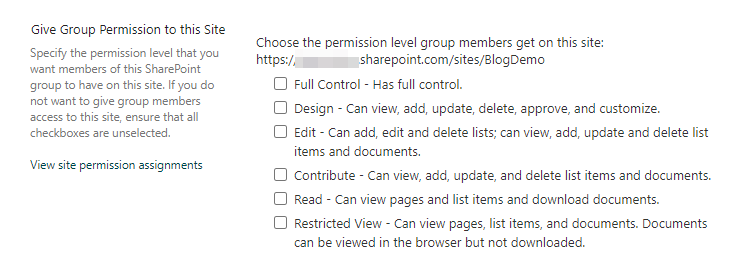
5. Fill in site information > Choose permission level for group members > click Create
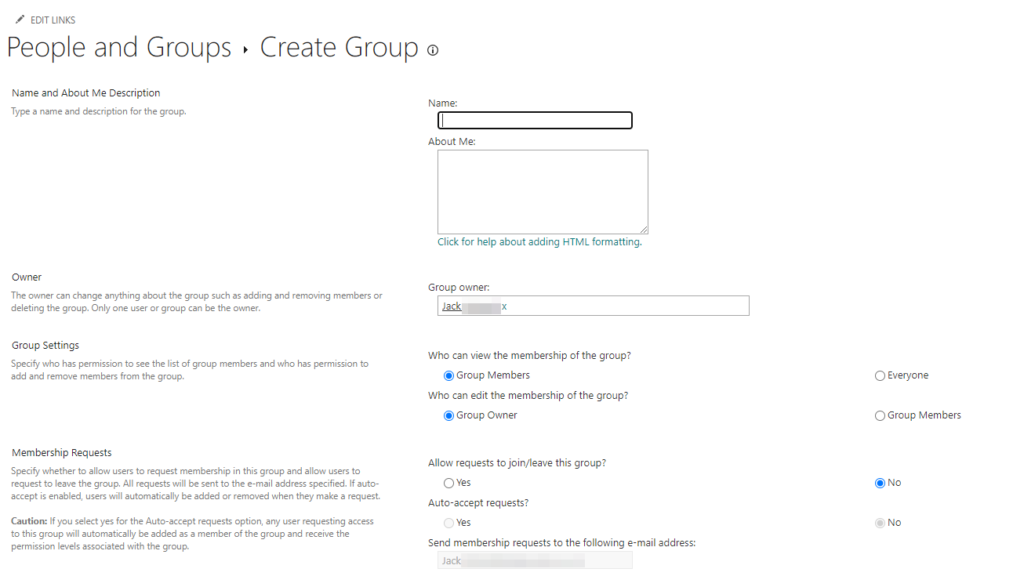
After clicking Create Group, a new page will load. This is the page where you create your group, choosing its name and description while configuring a number of other settings.
After choosing the name for the group and customizing its group and membership request settings, you need to choose the permission level for members of the group. The permission level you choose here doesn’t matter, as long as you don’t select full control. You can still restrict access to folders stored in the site regardless of the permission level you choose. Just bear in mind that the permissions you choose here will dictate how the users you add to the group can use your site.
6. Click New to add people to the new group
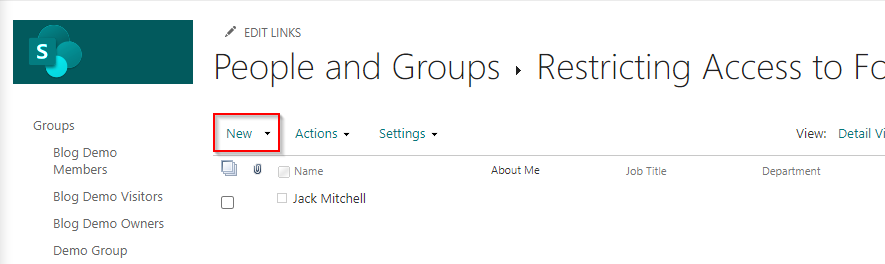
After you create the group, the page will refresh. You’re now on the page where you can add users to the group.
Click New — as indicated in the screenshot above — to begin adding users to the group you’ve just created.
7. Enter the names/email addresses of the users > Type a message (optional) > Click Share

Once you click New, a new menu will appear. This is the menu where you can add users to the group.
Type in the names/email addresses of the users you want to add to your site. If they’re already a part of your organization’s directory, simply typing in their names will usually bring the users up. Otherwise, type in their email addresses.
Optionally, include a personal message. For example, it might be a good idea to explain the purpose of the SharePoint site and why you are giving the users access.
Click show options to reveal a setting that chooses whether or not users are informed that they’ve been added to the SharePoint site. Check/uncheck this check box and then click Share to add the users to the group you’ve just created.
8. Return to site home page > open the document library where the files are stored
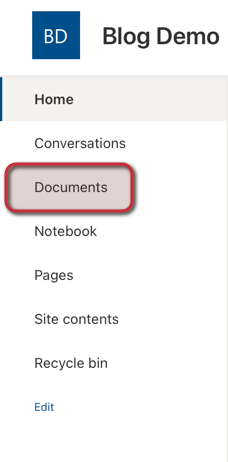
9. Select the folder > click the three vertical dots (⋮) > Click Manage access
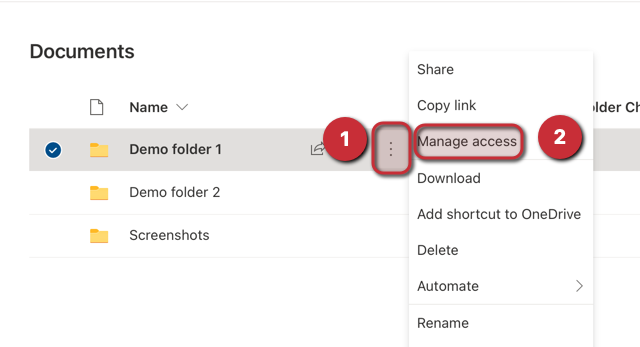
Once the document library loads, click the three vertical dots to open up the settings menu for the folder in question. Then click Manage access to open up the menu where we’ll prevent access to this folder.
10. Locate the group of users > Click the drop-down > Click Stop sharing > Repeat process for all folders you want to restrict access to

Locate the group once the manage access menu opens up. Click the drop down — which should be a pen icon — and then click Stop sharing.
This will immediately remove the group’s access to the folder that you’ve selected. Repeat steps 9 and 10 for any other folders that you don’t want the group accessing.
After following all 10 steps, you’ve successfully added users to your SharePoint site while restricting their access to certain folders. I hope this blog post has helped you with your issue, but if you have any questions please feel free to leave a comment below and I’ll reply as soon as possible.