When it comes to document management in SharePoint, copying or transferring files from one document library to another is a typical occurrence. It might be as simple as transferring a few documents over to another folder located on another site. However, there may be an instance where users may require automation of this process. Where they need to transfer a file over to another site automatically. This can be achieved with the use of a native Office 365 software called Power Automate. This Software by Microsoft enables people to automate processes within various Microsoft applications. With Power Automate, anybody can create automated processes using flows. Automate repetitive, monotonous activities with ease using low-code, drag-and-drop tools and hundreds of prebuilt connections. With a process adviser, you can record and visualize your end-to-end processes while getting guided advice for designing flows and detailed insights that take the guesswork out of deciding what to automate. So how do we automatically copy files to another SharePoint site? Follow the steps below to see how.
Step by step process – How to automatically copy files to another SharePoint site
- First, sign into your Microsoft 365 account.
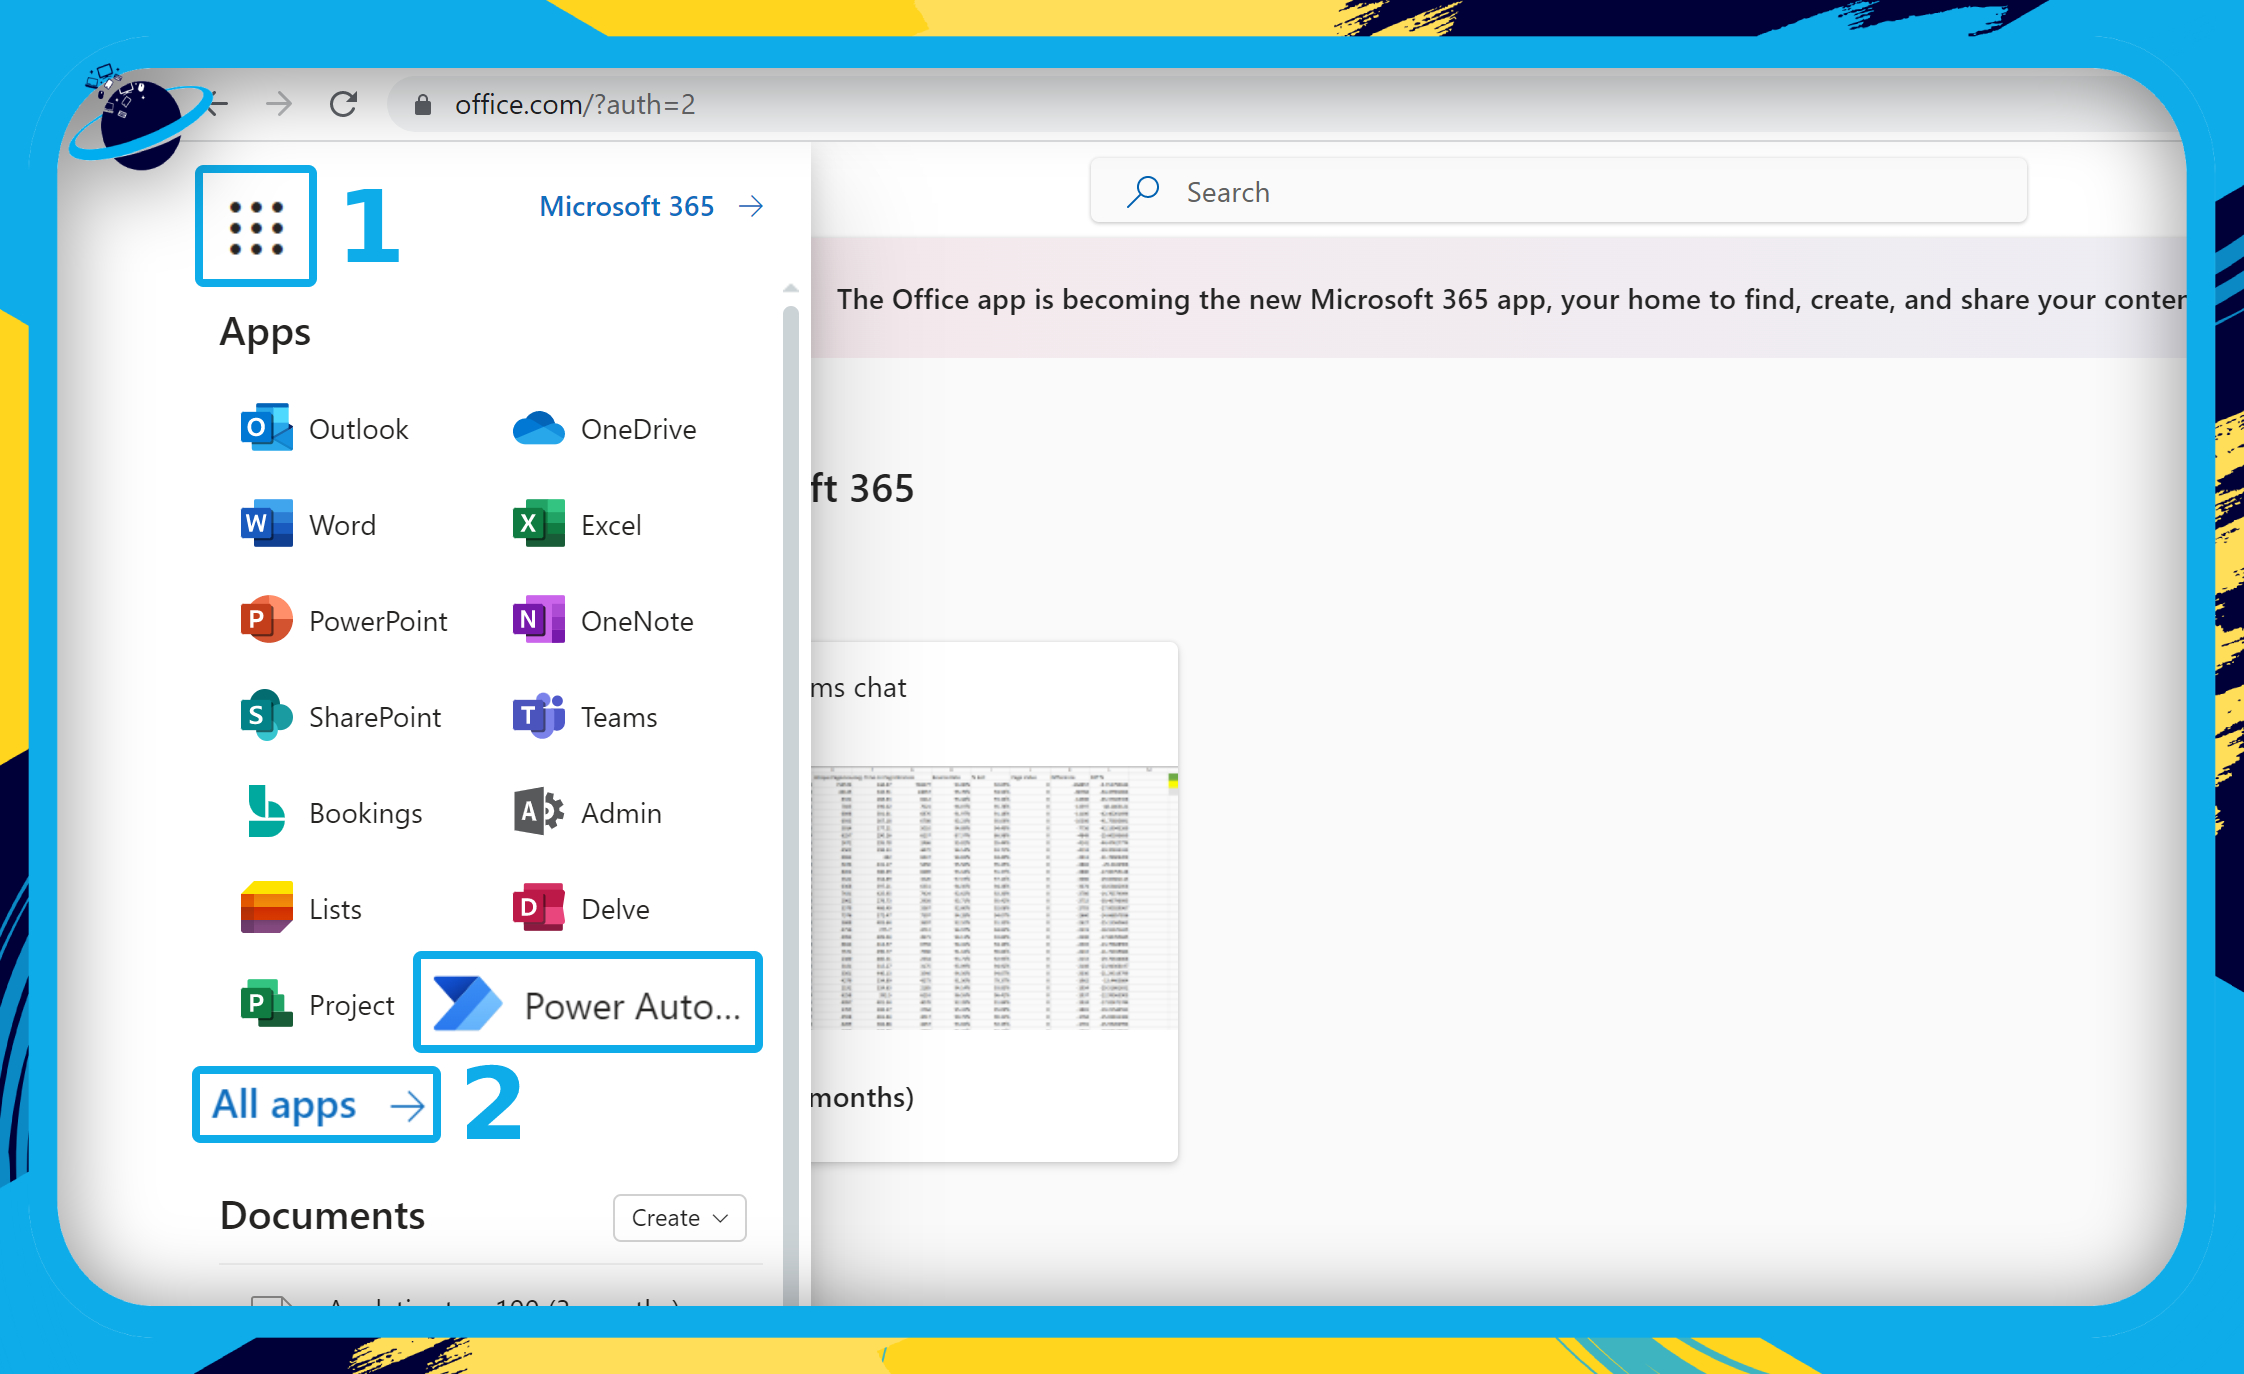
- Click the
 app launcher icon.
 - Then select “Power Automate” from the list of apps.
- If you can’t see Power Automate, click “All apps” and find it there.
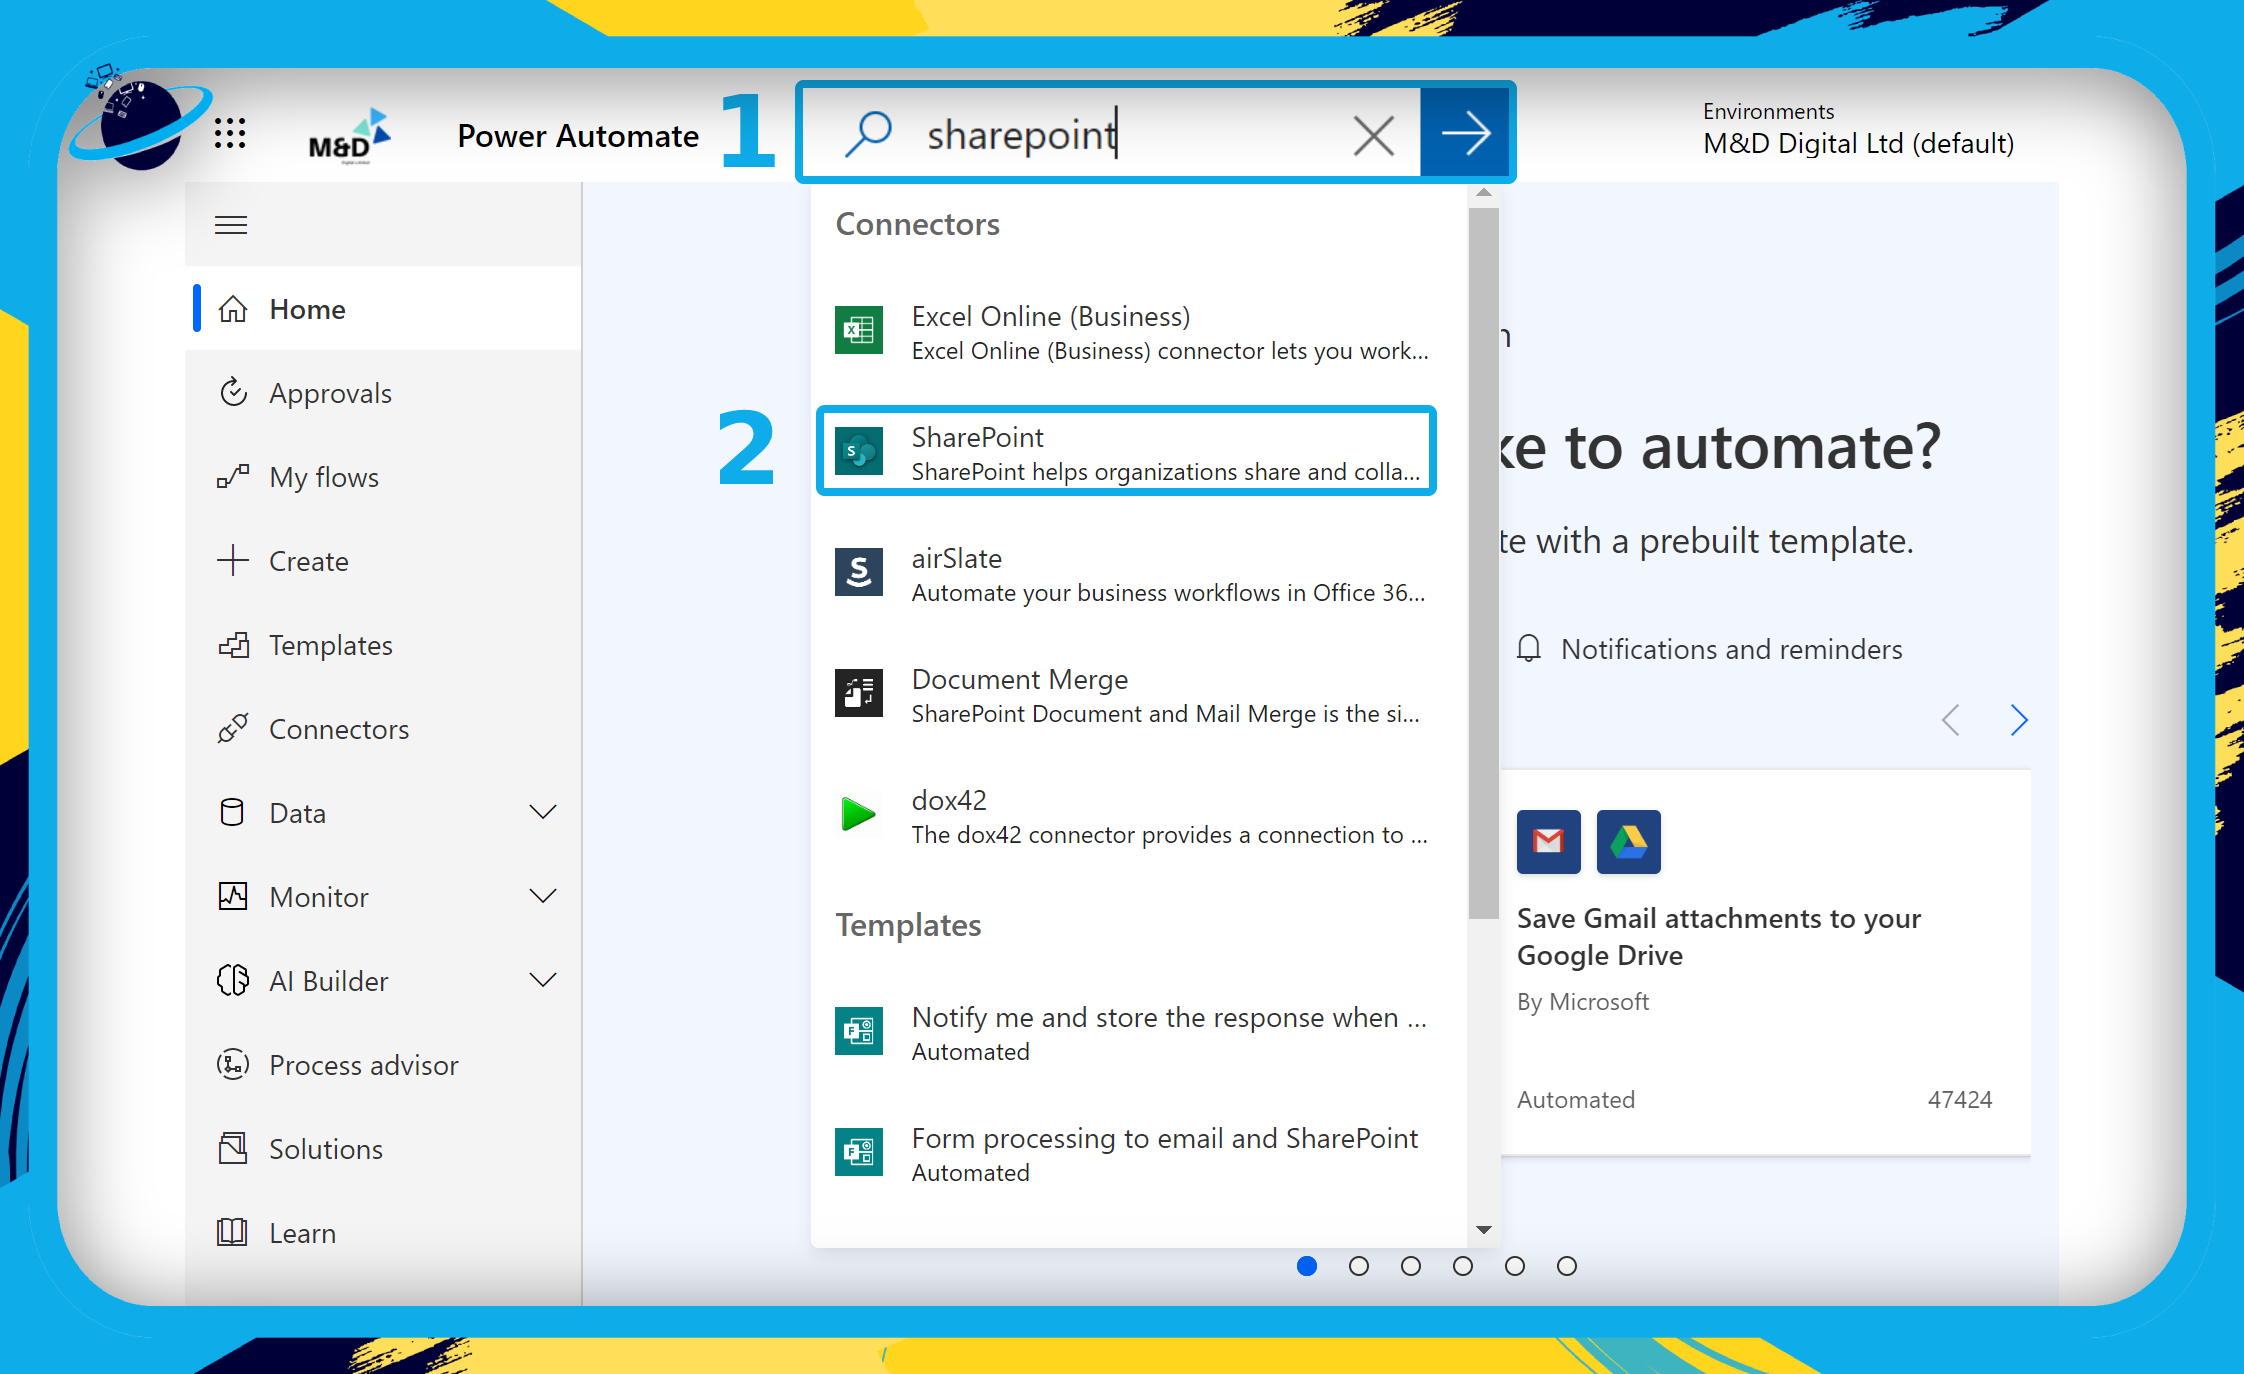
- Type “SharePoint” into the search bar at the top.
- Then select “SharePoint” from the list of connectors.
- Select a trigger that will cause a “copy file” action.
- Click the select box next to “Site Address” and select a SharePoint site.
- Click the file icon in the “Folder Id” box.
- Then select a folder to trigger a “copy file” action.
- Click the “+ New step” button.
- Search for “Copy file” in the “Choose an operation” dialog box.
- Select “Copy file.”
- Enter the required information then click “Save.”
Following the steps above will ensure that the data is copied from the host site to the destination site effectively. The retry policy is essentially used in case the policy fails to work the first time over. You can set it at regular intervals to ensure the common flow has successfully completed the task. However, it can also be successful to automate the process at a much more consistent rate which is something a user may find useful. Ensure that the copy destination does not have a file already present with this name or it may be replaced. You can edit the flow to copy over with a different name or a direct replacement if necessary, however, it will warn you regardless of what setting you to have in place.
We receive the file path via the Get item action, as you can see in the action. You may also utilize the Retrieve file metadata action if you wish to get the file info. In my example, the target path is a library Archive and its root folder.
If you want to copy or move a file to a new site, you should use the Create file action rather than the Copy to action. You will, of course, require the file content in order to generate the file. You may use the Obtain file content action to get the content of a file.
Because the checkout function is enabled, the aforementioned scenario will result in difficulties such as “item is in a locked mode.” The situations listed above will only function if the document is checked in; however, documents will not check-in automatically when you upload or drag them. As a result, when the document is uploaded, the flow will fail, and it will only succeed when the file is checked in.

Why Automate copy files to another SharePoint site
As mentioned before Power Automate is a new corporate solution from Microsoft that allows us to automate the integration and synchronization of all our data analysis and apps in order to boost productivity and business efficiency. Apart from automating procedures and activities in a straightforward and intuitive manner, this online service also allows for the creation of a functioning flow without the need for coding or with a minimum code. Power Automate connects two or more applications Office 365 or third-party and performs actions that automate the most common business operations.
Having an automated process will allow users to be more effective with their time. An automated command will no longer need manual imputing as it can be done once a command is sent at regular intervals over multiple file copy logs. You won’t have to be present during the copy stage as well and you will be informed once a copy has been established. The setting is such that you can categorize information properly without issue.
In depth Step by step process – How to automatically copy files to another SharePoint site
Step by step breakdown:
- First, sign into your Microsoft 365 account.
- Click the app launcher icon.
- Then select “Power Automate” from the list of apps.
- If you can’t see Power Automate, click “All apps” and find it there.
- Type “SharePoint” into the search bar at the top. (1)
- Then select “SharePoint” from the list of connectors. (2)
- Select a trigger that will cause the “copy file” action.
- In this guide, we chose “When a file is created or modified in a folder.”
- Please be aware that above the trigger is now deprecated.

- Click the select box next to “Site Address” and select a SharePoint site. (1)
The site you select should be the location of the folder that creates a “copy file” action when its contents are modified.
- Click the file icon in the “Folder Id” box and select the folder that will cause the “copy file” action when its contents are modified. (2)
- Click the “+ New step” button. (3)

- Search for “Copy file” in the “Choose an operation” dialog box. (1)
- Select “Copy file.” (2)

The information you enter will be different from the image below. However, please use the image as a reference when selecting your own options. When you’ve selected your required options, click the “Save” button.

When the contents of the “Shared Documents” folder are modified, the “Marketing Strategy.docx” file will be copied to the “Shared Documents” folder of a different SharePoint site, called “SharedLibrary.”
Thanks for reading.