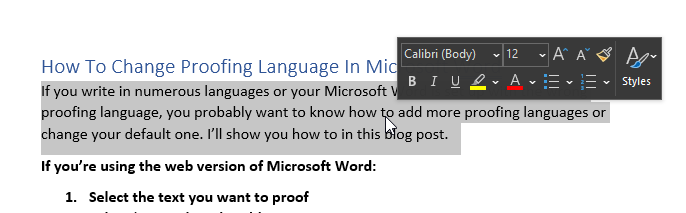
If you write in numerous languages or your Microsoft Word is set up with the wrong proofing language, you probably want to know how to add more proofing languages or change your default one. I’ll show you how to in this blog post.
If you’re using the web version of Microsoft Word:
- Select the text you want to proof
- Select ‘Review’ on the ribbon
- Open the drop-down menu on the ‘Editor’ button
- Select ‘Set Proofing Language…’ and then choose the correct proofing language
If you’re using the desktop Word application:
- Select the text you want to proof
- Select ‘Review’ on the ribbon
- Click ‘Language’
- Click ‘Set Proofing Language…’ and then choose the correct proofing language
The instructions above should help you to change the proofing language easily within Microsoft Word, regardless of the version you are using. Using screenshots and videos, this blog post demonstrates how you change the proofing language.
If you would like to change the language of the document, please read our guide on How to change the language of a Microsoft Word document.
Select the version of Word you’re using below to jump to the step-by-step guide for choosing your proofing language.
Step-by-step Guide to Changing Proofing Language in Microsoft Word Online/Word for Web
Changing the proofing language in Microsoft Word Online/Word for Web is a simple process.
Here’s a step-by-step process for changing your proofing language when you’re using the online version of Microsoft Word:
- Select the text you want to proof
- Select ‘Review’ on the ribbon
- Open the drop-down menu on the ‘Editor’ button
- Select ‘Set Proofing Language…’ and then choose the correct proofing language
To make the process easy to follow, we also created this short video that demonstrates how you change the proofing language in Word for Web/Microsoft Word Online.
In the video below, we’ve changed the proofing language from French (France) to English (UK). As you can see, proofing is almost instant, and errors are quickly highlighted within the text.
If the video’s a bit quick for you to follow, here’s a breakdown with screenshots.
- Select the text you’d like to proof
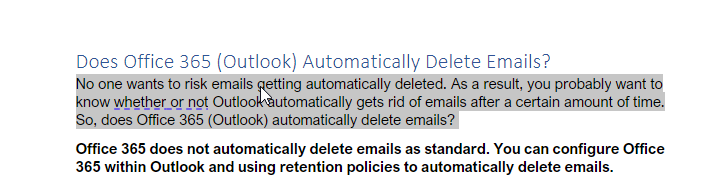
Select the paragraph(s) that you want to proof in a different language from your default. If you’re wanting to proof the entire document, press CTRL + A at the same time to select all.
- Select ‘Review’ on the ribbon
- Open the drop-down menu on the ‘Editor’ button
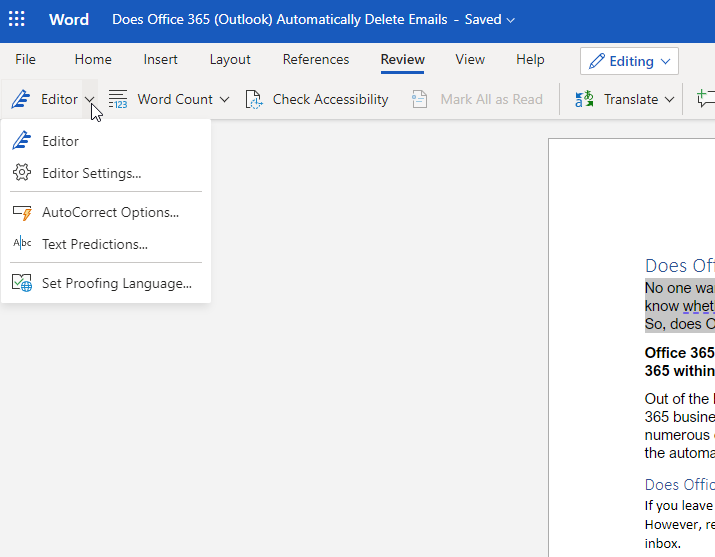
- Select ‘Set Proofing Language…’ and then choose the correct proofing language
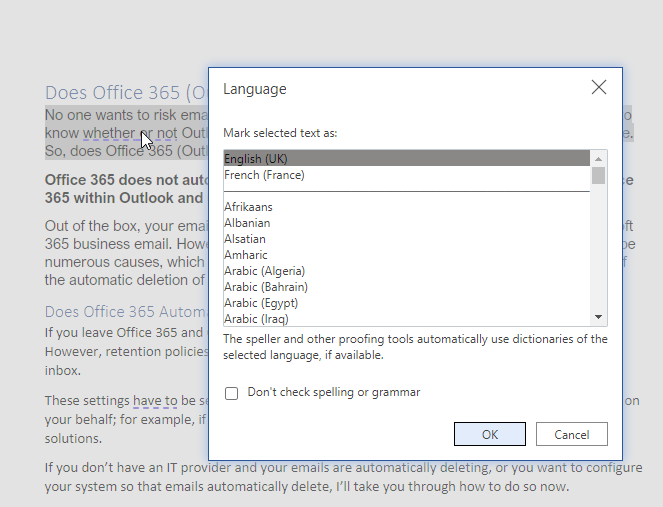
Select the proofing language that you want to use. Word for Web will automatically proof the document, highlighting any errors.

Step-by-step Guide to Changing Proofing Language in the Desktop Word Application
Changing the proofing language in the Word desktop application is a simple process.
Here is a step-by-step guide to changing the proofing language in the Word desktop application:
- Select the text you want to proof
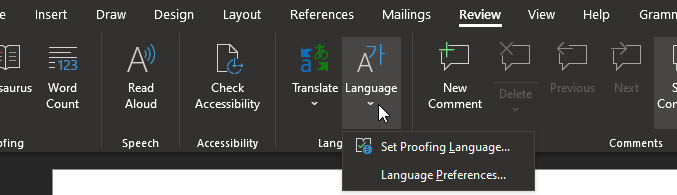
- Select ‘Review’ on the ribbon
- Click ‘Language’
- Click ‘Set Proofing Language…’ and then choose the correct proofing language
The process is very similar to changing the proofing language in Microsoft Word Online/Word for Web, which is very deliberate on Microsoft’s part. It makes moving between the two versions of Word – online and desktop – more seamless regardless of which version you are used to.
We’ve created a small video that demonstrates how you choose the proofing language in Microsoft Word. In the video below, I’ve changed the proofing language from French (France) to English (UK). As you can see, the proofing is almost instant, with errors quickly highlighted within the text.
If the video’s a bit quick for you to follow, here’s a breakdown with screenshots.
- Select the text you’d like to proof
Select the paragraph(s) that you want to proof in a different language from your default. If you’re wanting to proof the entire document, press CTRL + A at the same time to select all.
- Select ‘Review’ on the ribbon

- Open the drop-down menu on the ‘Language’ button

- Select ‘Set Proofing Language…’ and then choose the correct proofing language

Select the proofing language that you want to choose. The desktop Word application will automatically proof the document, highlighting any errors.
Step-by-step Guide to Changing Default Proofing Language in Word
This guide up to now has only covered how to change your proofing language on a document by document basis. If you’re wanting to change your proofing language permanently, here’s how you can change your default proofing language in word.
- Select ‘Review’ on the ribbon
- Click ‘Language’
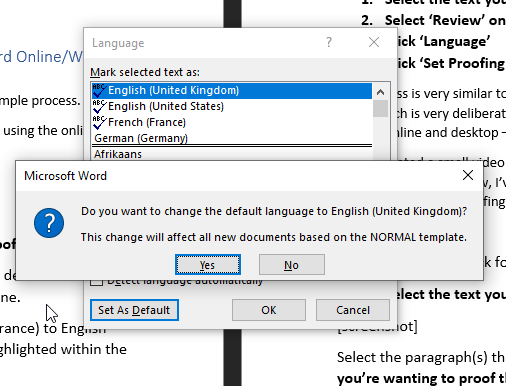
- Click ‘Set Proofing Language…’ and then choose the correct proofing language
- Select ‘Set As Default’ and confirm
The process outlined above is very simple. You follow the steps I’ve outlined previously, with one additional step: highlight the language you want as default, and then select ‘Set As Default’. The video below quickly demonstrates how you do this.
If the video’s a bit quick for you to follow, here’s a breakdown with screenshots.
- Select ‘Review’ on the ribbon

- Open the drop-down menu on the ‘Language’ button
- Select ‘Set Proofing Language…’ and then choose the correct proofing language

- Select ‘Set As Default’ and confirm
Once you set your default proofing language, this will apply to both the existing document and any other documents that you create in the future.
Thanks for reading! I hope this blog post has helped you. If you have any other questions, please feel free to ask in the comments below and I’ll get back to you.