If your display name is incorrect or unsatisfactory, you can change it in Microsoft Teams with admin permissions. There is also no limit on how many times you can change your display name. So please continue reading if you want to learn how to change your name in Microsoft Teams.
Your name, along with other personal information in Office 365, is managed by your IT administrative department. If you have the required admin permissions, you can follow the steps below to change your name in Microsoft Teams:
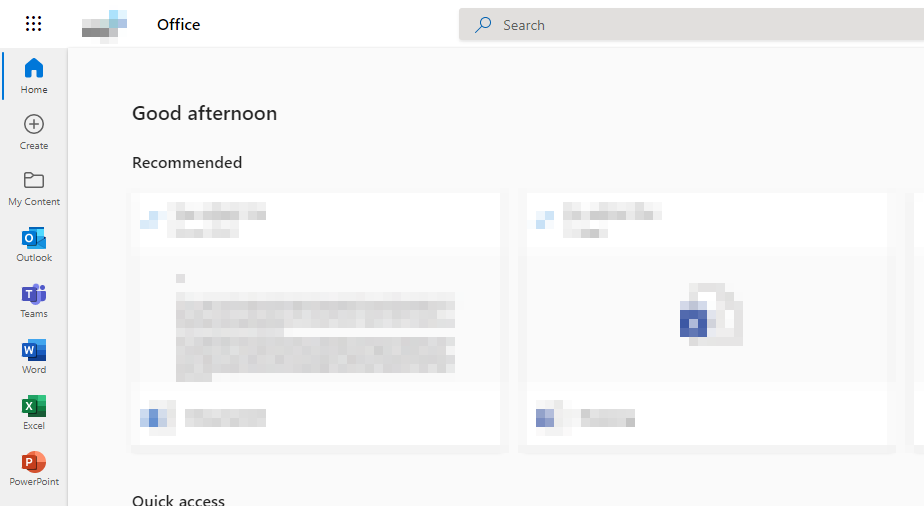
- Firstly, open Office 365.
- After that, you will need to click on the
 app launcher followed by “Admin.”
 - In the admin dashboard, click on “Users.”
- Under the drop-down for “Users,” click on “Active users.”
- Select one of the users.
- Under the Contact information section, click on “Manage contact information.”
- Here you can change the first, last, and display names.
- Click on “Save changes” to complete the process.
Once you have completed the steps, you will have managed to change your name in Microsoft Teams name. If you see that the changes are not immediately on your Microsoft Teams account, even after refreshing the program or clearing the cache, you may need to wait up to 24 hours for the new changes to implement. However, if you find immediate changes, it will affect all your Office 365 accounts, including Microsoft Teams.
If you need to make a change to your Microsoft Teams name, your display name will be the one that needs changing. The display name is the main piece of information that you need to edit to ensure a name change. The display name controls what content is shown as a name on your accounts. Your first and last name in this section refers to your contact information. This includes other information, such as your address and your job role.
An in-depth guide on how to change your name in Microsoft Teams
If you need help with the steps, you can use our in-depth guide to help. The in-depth guide includes resources such as screenshots and an in-depth analysis which you can use to go through the complicated steps in the process. I recommend you go through the in-depth guide for a better understanding of how to complete the steps.
- Firstly, open Office 365.
You will need admin permissions to make changes to your display name or the names of other users. If you don’t have admin permissions, you can ask an admin to change your name or request permissions from a global admin.
Once you have the correct permissions, you can use your admin credentials to sign in to Office 365 and proceed with the steps.
- After that, you will need to click on the app launcher followed by “Admin.”
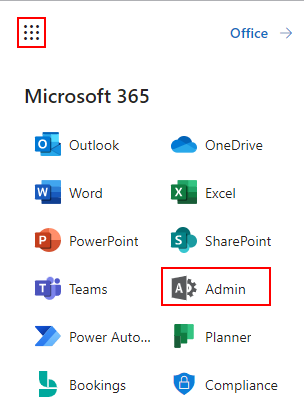
Nine dots illustrate the launcher in the Office 365 dashboard in the left corner. You can’t access admin if you do not have the correct level of permissions enabled. If you try to access the admin panel without permission, you will get an error symbol and restricted access.
- In the admin dashboard, click on “Users.”
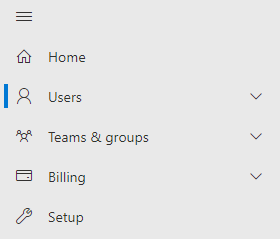
The Office 365 admin dashboard will have options on the left-hand menu. In this section, you will need to click on “Users.”
- Under the drop-down for Users, click on “Active users.”

From the list of different user types, you will need to select the one called “Active users.”
- Select one of the users.
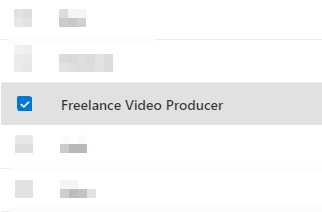
In this example, I have chosen a user who wants to change their Microsoft Teams display name, as the original creates confusion during meetings.
- Under the “Contact information” header, click on “Manage contact information.”

- Here you can change the first, last, and display name.
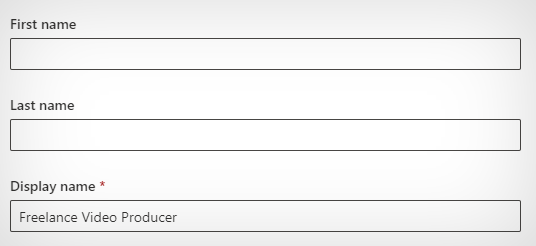
- The different name boxes.
- First name; The first name in Office 365 refers to the primary name used as a form of ID and can be found on forms such as bills or invoices.
- Last name; The last name in Office 365 again uses a form of verification similar to the first name. This name and first name are used for forms such as bills or invoices that can be issued in your name in Office 365.
- Display name; The display name is a mandatory piece of information that you need to add to the contact section. Office 365 uses this information to show users who view your account your name in your profile.
- Click on “Save changes” to complete the process.

Once you have completed the steps, you will have managed to change a user’s name in Microsoft Teams. Changes take up to 24 hours to integrate into all Office 365 programs. However, after this time, as you can see from the screenshots, the name will change in Office 365.
Your first name and last name will not contribute to what is shown on your Office 365 account. The main information that will affect your profile name is the display name. Microsoft will show this name to users and be part of your profile. This information is used for billing and contact forms. Ensure the information is correct; as shown in the screenshots above, there is a small asterisk symbol. The symbol indicates that this is a mandatory field and needs filling; otherwise, you will not be able to implement new changes.

How to change your display name in Microsoft Teams
Microsoft allows personal users to change their display names in both the browser and app versions of Teams. You can use the following steps to change your display name in Teams if you use a personal account. However, if you are using a business account, you must follow the steps in the previous section.
- Firstly, open Teams.
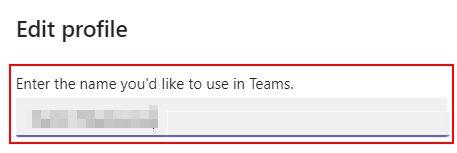
- Now click on your profile picture.
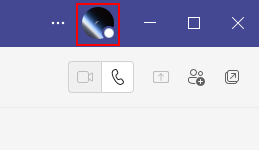
- Now enter a name you would like displayed.
- Click on “Save” to complete the process.
Once you have completed the steps, you will have managed to change the name on your Microsoft Teams account directly from the program. For this process, you do not need admin permissions as you do not need to access the admin dashboard to make the changes to your name. However, if you find that there are restrictions, you will need to use the method above to make the changes to your name.
Conclusion
I have provided the steps to change your name in Microsoft Teams and an in-depth guide in case you do not understand some of the steps in the guide. I have provided some additional information, such as what each of the name boxes in the contact panel means.
You can come back to the admin dashboard and change your name anytime if you find that the current name you have applied on Office 365 is not perfect. If you need help, drop a comment below, and we will address them.