Azure Active Directory is a valuable service that allows businesses to track their devices and store credentials for their users. While connecting a computer to Azure may appear more straightforward, it isn’t so different for users on an iPhone, and this guide will cover how.
This guide will feature a method that works on Apple products as you will be able to register your iPhone/Apple devices to Azure Active Directory. This method involves using Microsoft Company Portal, this method will split later to deal with two setups, but the steps will stay the same after.
Method
- Install the Intune Company App
- Sign in with your work Microsoft account
- Accept notifications
- Start the enrollment
- Choose your own device/business own device
- Choose how the app secures your device
- Download the profile and install it
- Go back to the app
- Follow through the app instructions, add to the list of trusted apps
- The app will show all checks as green
- The device is now enrolled
After you do this, you should be able to find your device on Azure AD’s device list. Continue reading for a guide with screenshots.
Content list – This guide will cover the following.
- How do you connect an iPhone/iPad to Azure AD – With screenshots
- Federated Authentication
- Conclusion
Things you need to do before connecting an iPhone to Azure AD
Before we can begin with this method, you should make sure that;
- Have an iOS device running at iOS 11.0 or later.
- Ensure that you have installed the Intune Company Portal app from the App Store.
- Keep a steady internet connection throughout the guide.
- Make sure that you can access the Safari web browser on the device.
Things that you can expect from the company portal
The company app will want you to authenticate yourself for your business when you start your setup. After doing this, it will tell you if there are any device settings you need to update. An example is that some businesses will set a password character limit requirement that you will need to hit.
Once your device has been accepted and enrolled on the system, the app will keep working to protect your device; it does this by warning you of any apps that come from places the company app doesn’t trust. It has the power to prevent you from accessing company information if this happens and will require you to remove the untrusted application so you can reaccess data.
Once you have enrolled, if your business sets up new security measures, such as MFA (multi-factor authentication), you will receive a notification from the app. Then you will get the opportunity to modify your settings.

How to connect your iPhone to Azure AD
You shouldn’t take breaks when following these steps as it may make the company portal app shut down or end the setup process. Open the app and do it again if this happens.
- Install the Intune Company app if needed, and sign in with your work Microsoft account details.
- You should see a prompt for Company Portal notifications; press ‘Allow’ as this will notify you of important updates and changes that need to happen.
- Once you’re here on the ‘Set up access’ page, press ‘Begin.’
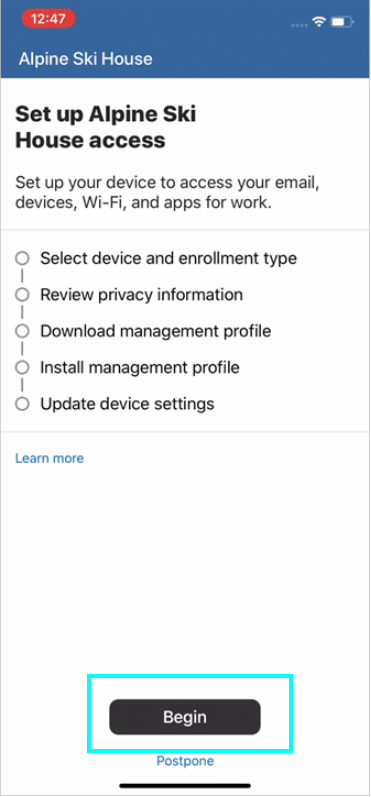
Source – Microsoft docs In this example, the business is “Alpine Ski House,” but it will be your organization’s name for yours.
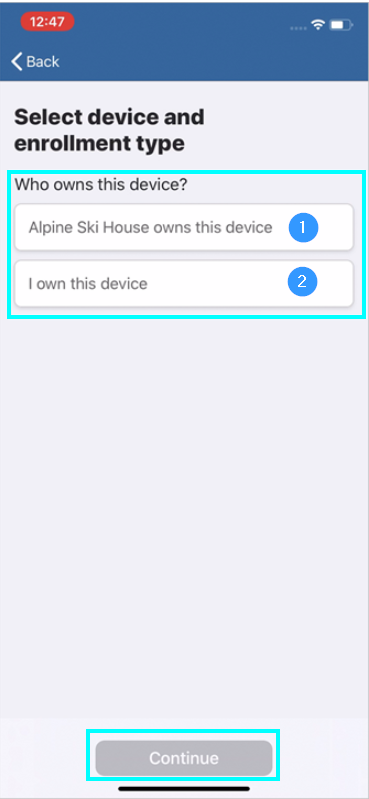
- After this, you will be at the “Select device and enrollment type” page; there are two options for you to pick.
- Press “(Organisation) owns this device” if the business gave you your device, then you can skip to the “Secure entire device” section to finish the setup.
- Press “I own this device” if it is your device, you can then follow the next step.
There is a chance that this section might not appear; if this happens, go the the “Secure entire device section” as it will progress with the setup.
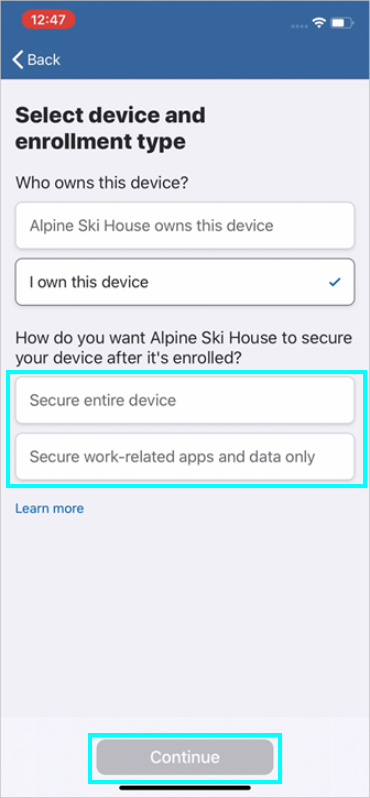
- The company app will then ask you, “how do you want (business) to secure your device after it’s enrolled?” There are two options.
- Press “Secure entire device,” which will protect every app and all data on the device. Go to the “secure entire device” section of this guide to finish the setup.
- Press “Secure work-related app and data only” to secure apps and data you need your work account to access. Then go to the “Secure work-related app and data” section of this guide.
Secure iPhone to connect Azure AD
Step 1 – At this stage, you will be on the “Device Management and Privacy” page; from here, you can see everything your business can and can’t see on your device: then press continue.
It is essential to know that this step can be different based on your iOS version; I will list the steps for different versions of iOS.
Step 2 – The next step is “Download management profile.” When you click continue, the company app will make Safari open the company portal website, where it will then download the “configuration” profile when prompted.
- On iOS 12.1 or earlier – At this point, after the download, it will bring you to the Settings app, then ignore the next step and go to step 4.
- On iOS 12.2 or further – After the download is completed, press close, then follow step 3.
You might hit “ignore” by accident; you’ll need to reload the page; it will then tell you to open the portal app and press “download” once again.
After you have downloaded your profile, you will need to install the profile in the next 8 minutes after the download; otherwise, it will remove the profile, and you will have to restart the enrollment.
Step 3 – If prompted to open the company portal, tap “Open” and read through the “how to install management profile”
Step 4 – Open the “Settings” app and press something along the line of “Enroll in (business)” or “Profile Downloaded.”
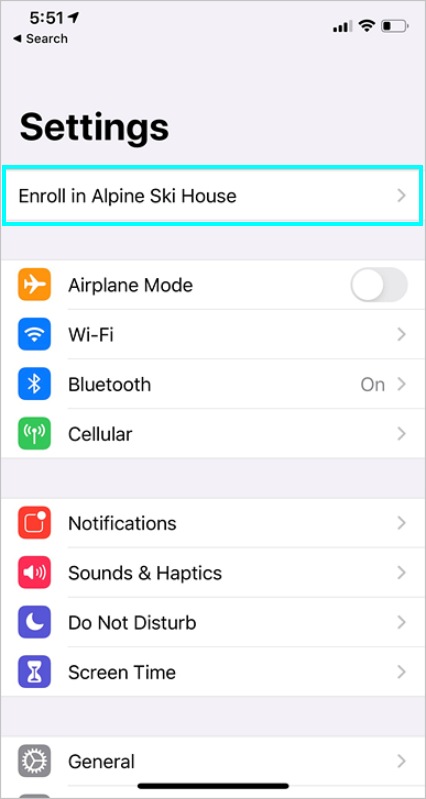
There is a chance that it won’t show this option; if this happens, click on “General” and go to “VPN & device management” to view installed profiles but if you don’t see a profile, download it again.
Step 5 – Press “Install.”
Step 6 – You may have to enter your iOS device passcode, then press “Install” again.
Step 7 – After this, the company portal app will bring up a warning saying it will be added to the list of trusted certificates on the device, read this and press “Install” again. It may bring up a message telling you to trust remote management, in which case press “Trust.”
Step 8 – Once the profile is installed, press “Done.” You can check that the profile has been installed by going to the VPN and device management settings, and it should list the profile under Mobile Device Management.
Step 9 – Go back onto the company portal app; it should sync and let you press “Continue.”
Step 10 – The app may want to check that your device settings meet compliance and security policies; this will take several minutes. It may ask to install some Microsoft apps such as Outlook; if so, press install.
Step 11 – Once all the checks are green, you can finish enrollment and setup by pressing “Done.”
Once everything is done, Intune will show some apps; press “View all apps” to show a list of apps that you can download onto your device, such as Outlook, Edge, Excel, etc., that you can use for work.
That is all the steps for connecting your iPhone to Azure AD; this works by downloading an app connected to Azure onto your device and signing into your company account, then it will be registered on the system.
Secure work-related apps and data to connect an iPhone to Azure AD
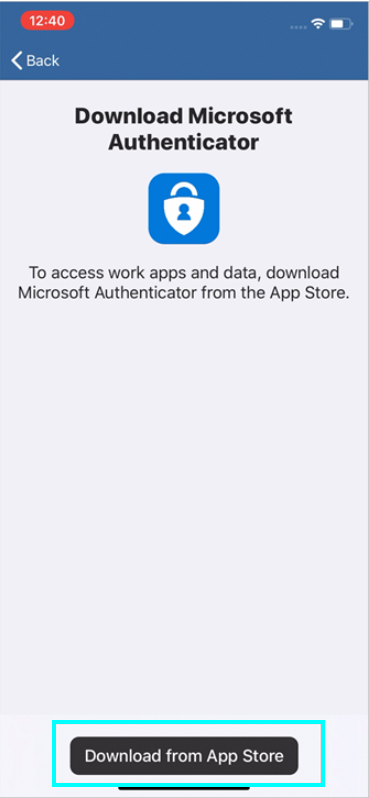
After clicking secure work-related apps and data on the “Select device and enrollment type” page, it might suggest downloading the “Microsoft Authenticator” app; you only need to install it and let it be on your device if prompted in the company portal.
Once installed, return to Intune and click continue. The “Device management and privacy” page shows a list of things your business can and can’t see; from here, hit continue again. After this, follow the steps of the previous guide to download and install the profile.
If it doesn’t say something along the lines of “Enroll in (business)” or “Profile Downloaded,” then you can go to the “General” in settings and choose “VPN & Management” so you can view installed profiles. If it isn’t here, download it again.
There should be a page called “User Enrollment,” You want to press “Enroll my iPhone.”
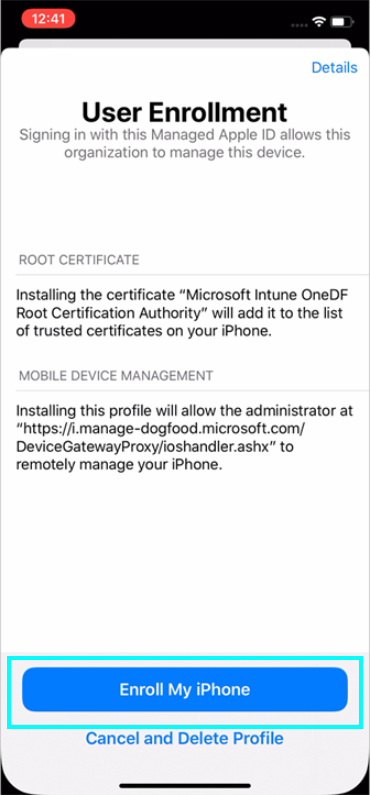
This prompt replaces the “warning” I mentioned earlier; however, it mentions the same line “Installing the certificate Microsoft Intune OneDF Root Certification will add it to the list of trusted certificates on your phone.” You will likely need to enter your iPhone password, then press “install.”
When you are on a screen that asks you to sign in, use the password you have for your managed Apple ID; this should be the same as what you use for your work account unless the business has given you different credentials for it.
Next, sign in, and a success message should appear after the profile has been installed. You can tell it has been installed by checking the VPN & device management settings; it will be listed under “Mobile Device Management.”
Go back to the company portal, and it will sync up with your device. The app may want you to update some device settings, then press continue. Once all the checkmarks are green, the setup has been completed; then, you can press “Done.”
After following all the steps, your business-owned device will enroll in Azure, and you can see your device by going onto the Azure active directory and looking at the devices.
Conclusion
Azure AD is a database that iPhone users can connect their devices to. Once you follow the steps through, you can go to Azure AD and check the device list to see if your IOS device has been uploaded. Azure AD also lets you maintain user login details, and it allows admins to have control over what the other staff can access.
Thank you for taking the time to read through my guide. I hope it has been informative and solved your issue. If you have feedback, you can contact our staff to tell us what you think about it. If you have any other problems or tech concerns, you can check our other guides; there is sure to be one that covers your issues.