Applying retention policies to your Exchange mailboxes can help you comply with regulations and manage your emails in a simpler, automated way. In this blog post, I’m going to demonstrate how you can create retention tags and retention policies in Exchange Online.
Here’s a step-by-step process for creating retention tags in Exchange Online:
- Navigate to Office.com and sign in using your Microsoft 365 credentials
- Open the app launcher and select Admin
- From the admin centers list, click Exchange
- Click retention tags under compliance management
- Click the “+” symbol [New tag] and click applied automatically to entire mailbox
- Choose a name, retention action, and retention period
- Click Save
Once you’ve created the retention tags you need — or if you’re using the default retention tags — here’s a step-by-step process for creating retention policies in Exchange Online:
- Click retention policies
- Click the “+” symbol [new]
- Name the retention policy and add retention tags
- Click Save
- Apply the new retention policy to your mailboxes
I’ll demonstrate step-by-step how you complete each step explained above throughout the remainder of this article. Keep reading or click below to be taken to the walkthrough of your choice:
- Creating retention tags in Exchange Online walkthrough
- Creating retention policies in Exchange Online walkthrough
   |
Step-by-step Guide [With Screenshots]: Creating Retention Tags And Policies In Exchange Online
Creating retention tags and policies in Exchange Online is a very simple process. However, there is one big requirement before you can follow this step-by-step guide.
You must be a Microsoft 365 global admin to make and enforce retention tags and policies. If you aren’t a global admin, you’ll have to ask someone to assign you the appropriate permissions or ask them to make the changes you need.
That’s it, really. Even if you have no experience using the EAC — AKA the Exchange admin center — you can follow this step-by-step guide and safely create and enforce a retention policy.
Step-by-step Guide: How To Create Retention Tags In Exchange Online
Before you can create a retention policy, you need to create retention tags.
A retention tag is the important part that decides what a retention policy actually does. I.e., you might have a retention tag called “Archive After 3 Months” that automatically archives all emails after — you guessed it — 3 months. When the tag is used as part of a retention policy, the action you’ve decided on will take place on any mailboxes you assign the policy to.
Anyway, on with the walkthrough — here are the steps you need to follow to create retention tags in Exchange Online:
- Navigate to Office.com and sign in using your Microsoft 365 credentials
- Open the app launcher and select Admin
- From the admin centers list, click Exchange
- Click retention tags under compliance management
- Click the “+” symbol [New tag] and click applied automatically to entire mailbox
- Choose a name, retention action, and retention period
- Click Save
Remember: you must be a Microsoft 365 global admin to follow this walkthrough and create retention tags.
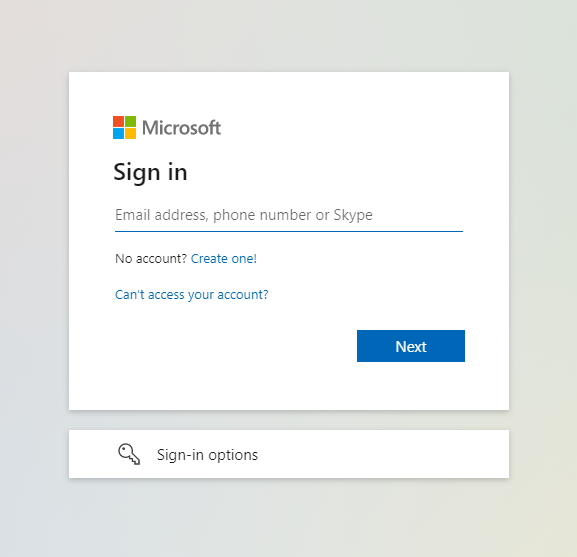
1. Navigate to Office.com and sign in using your Microsoft 365 credentials
2. Open the app launcher and select Admin
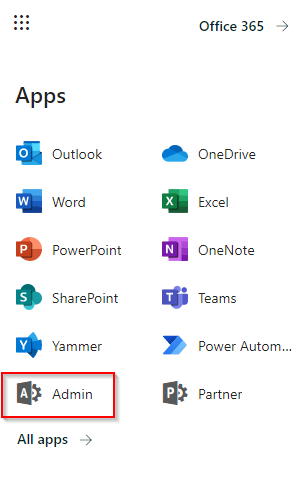
If the Admin application isn’t showing in the app launcher, it means you’re not a Microsoft 365 administrator and you don’t have the appropriate permissions to follow this guide.
If this is the case, contact your M365 admin and ask them to assign you the appropriate permissions.
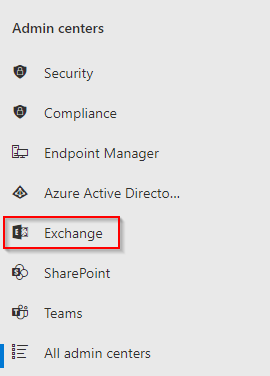
3. From the admin centers list, click Exchange
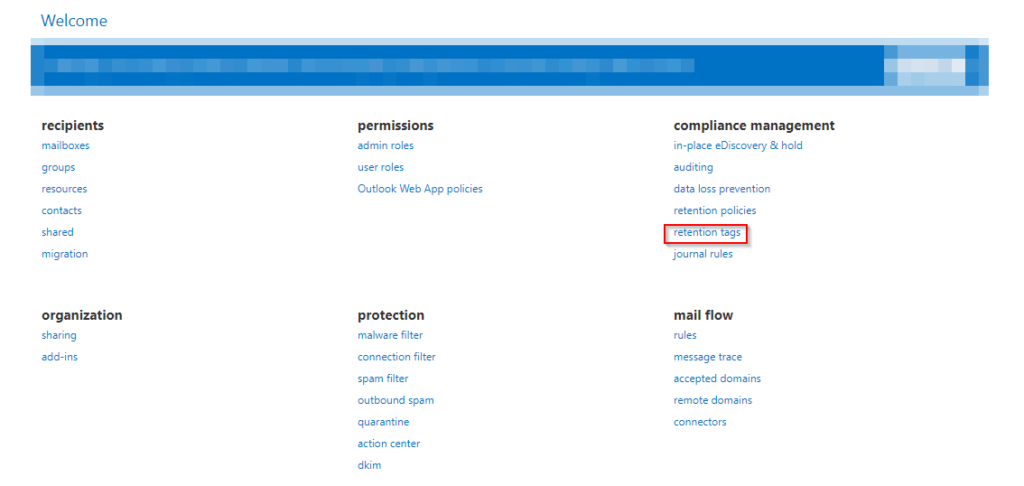
4. Click retention tags under compliance management
5. Click the “+” symbol [New tag] and click applied automatically to entire mailbox
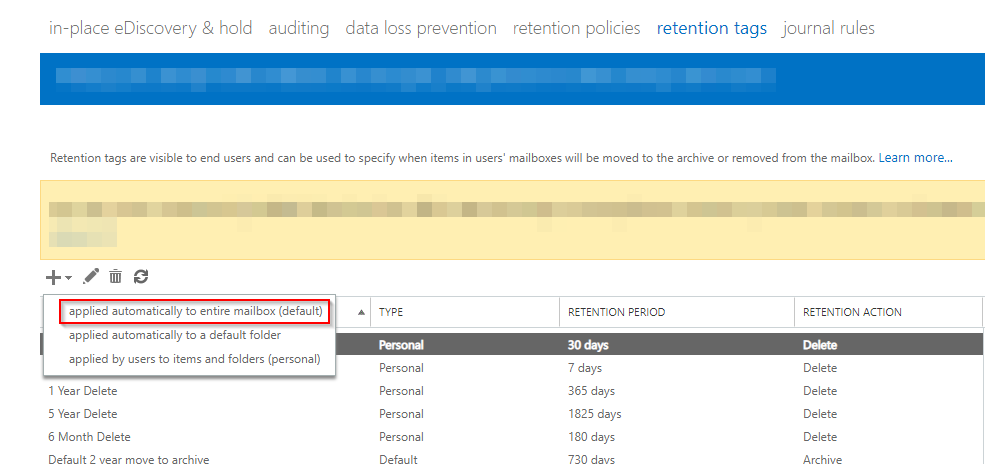
6. Choose a name, retention action, and retention period
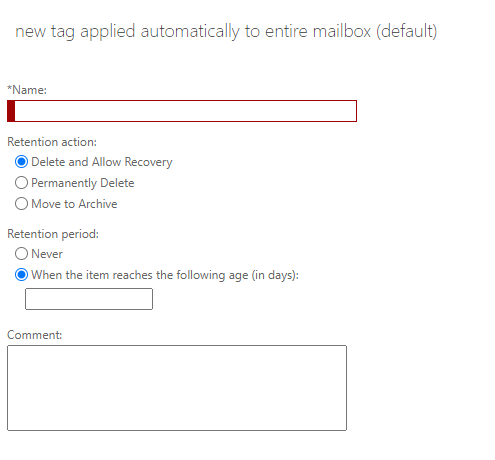
After deciding which type of tag you want to make, there are certain variables you can configure.
Firstly, you can choose a name for the tag. This will help you easily identify it when it comes to creating the retention policy later on.
You can also choose the retention action from a range of options, such as:
- Delete and Allow Recovery
- Permanently Delete
- Move to Archive
The right retention action for you depends on your requirements. I normally select “Delete and Allow Recovery”. However, one of the different actions might make sense — particularly if you’re setting up retention policies to follow certain regulations etc.
Another variable you can configure is the retention period. This lets you decide when the retention action you choose takes place; when the “item” — i.e., the email — is deleted or archived. When the email reaches the date you specify (in days), the action will take place.
There is also a comment box. You don’t need to use the comment box, but it can help your colleagues determine the purpose of the retention tag if they ever have to access the Exchange admin center and make any changes to retention tags/policies.
7. Click Save
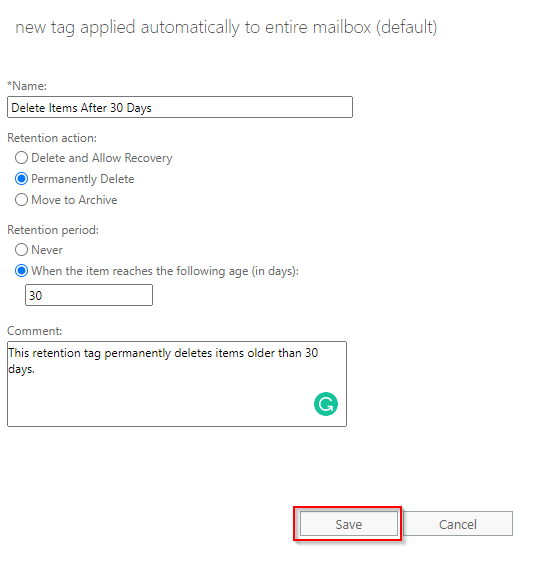
Once you’ve configured the features to your satisfaction, click Save. This new tag will then show in your retention tags list.
Repeat the process outlined above step 5 onwards to keep creating new tags.
Once you’ve created all the tags you need, move onto the next section of this walkthrough: step-by-step guide to creating a retention policy in Exchange Online.
   |
Step-by-step Guide: How To Create Retention Policies In Exchange Online
Once you’ve created the retention tags that you need, it’s time to create retention policies. The guide below demonstrates step-by-step how you can create retention policies in the Exchange admin center.
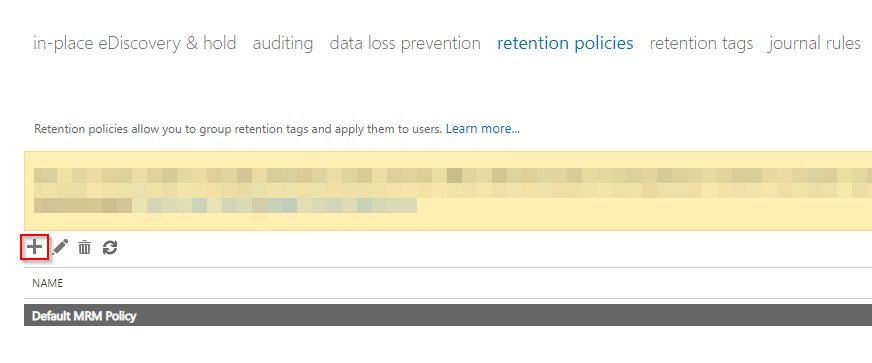
- Click retention policies
- Click the “+” symbol [new]
- Name the retention policy and add retention tags
- Click Save
- Apply the new retention policy to your mailboxes
Here’s a walkthrough [with screenshots] of each step.
1. Click retention policies

2. Click the “+” symbol [new]
3. Name the retention policy and add retention tags
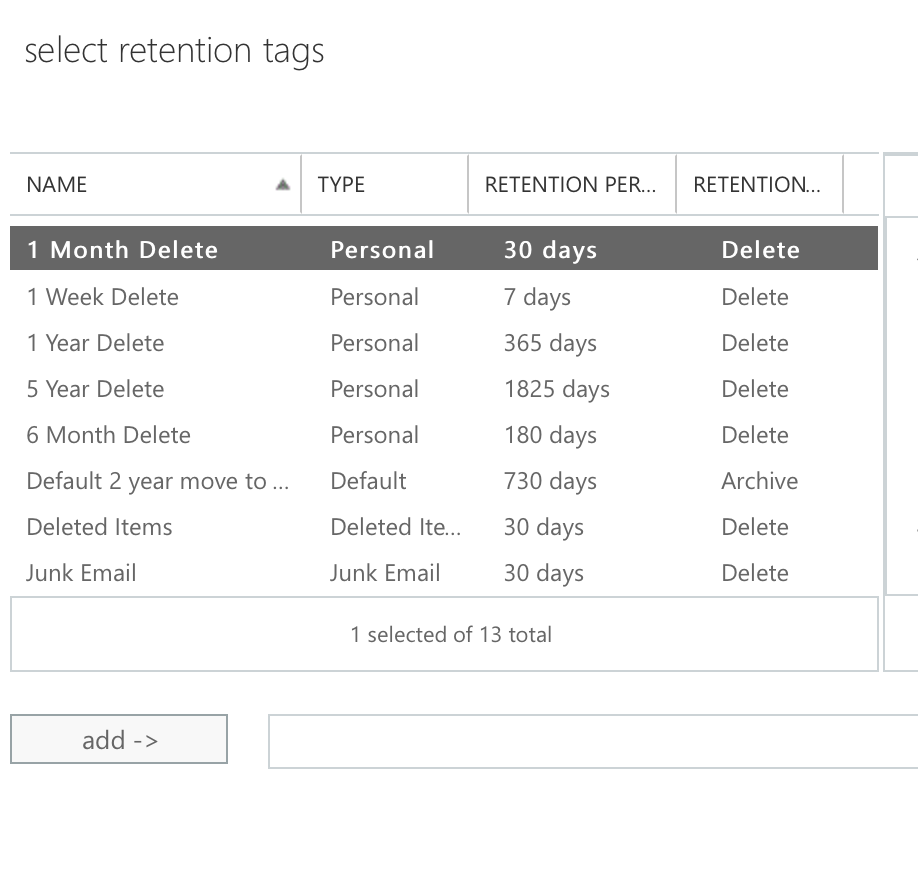
Choose a recognizable name for the retention policy, because you’ll need to assign this policy to mailboxes soon.
The tags you created in the previous walkthough will appear. Select them from the list, then click add.
4. Click Save
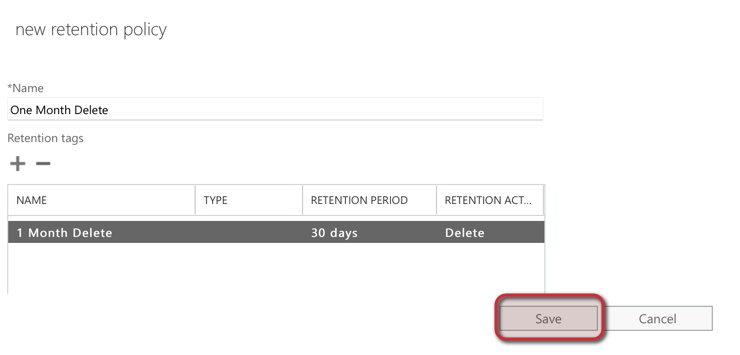
Once you’ve named the retention policy and added the retention tags, click Save.
5. Apply the new retention policy to your mailboxes
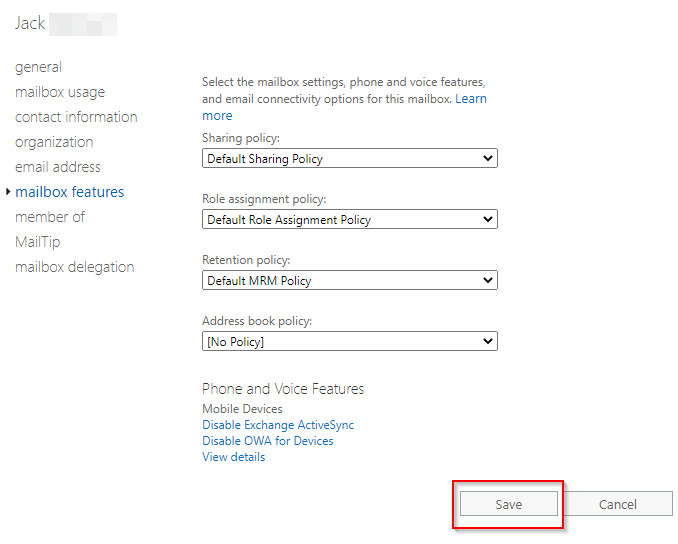
Once you’ve created the policy, you need to assign it to mailboxes.
Assigning retention policies to mailboxes in bulk — or individually — is a simple process. If you need some guidance on how to do it, you can read my blog post How to apply retention policies to mailboxes Office/Microsoft 365 by clicking here.
Thanks for reading! We hope you’ve found our blog post useful. If you need any help, feel free to leave a comment below.