Microsoft Planner is one of several tools available to project managers and their teams. Microsoft Planner is a program that assists you in gathering project-based activities and creating a project plan to help structure the content. The program also allows you to customize email notifications making it easier for you to monitor the inbox content from Microsoft Planner. Read through our content and see how you can customize or disable Microsoft Planner notifications.
Below is a guide on disabling and or customizing Microsoft Planner notifications. The settings to achieve this are directly within the program, so it’s all locally manageable if you follow the steps below. The steps illustrated below will work for both the browser version of the planner application and the desktop versions.
- Firstly, open Microsoft Planner.
- Now select a plan.
- Click on “More,” illustrated by three dots.
- From there, “Plan Settings.”
- Select “Notifications.”
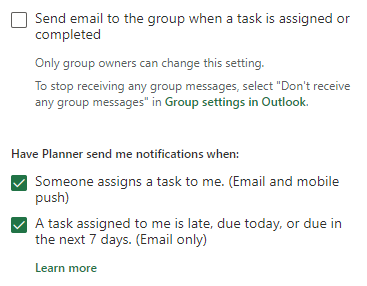
- To disable notifications, simply uncheck the boxes.
- Then press “Save.”
- Finally, close the panel.
That’s it; once the steps above have been completed, you will have successfully managed notifications on the Planner application. The process above will work for both the browser version of the Planner program and the desktop application. The Planner application notifications can only be managed for each Team plan you set; this cannot be managed for the Planner application. Each plan can be assigned its own set of delegated assignments; this requires more flexibility and customization on how notifications are managed.
In-depth step-by-step process – How to customise and disable Microsoft Planner email notifications.
Below is an in-depth guide on how you can customize notifications and disable them in Microsoft Teams. The guide includes the visual context in the form of screenshots to help illustrate the shapes in more detail by visually showing you what they are. If you encounter any issues when following the guide illustrated above, you can use the in-depth guide below to help resolve those issues.
- Firstly, open Microsoft Planner.
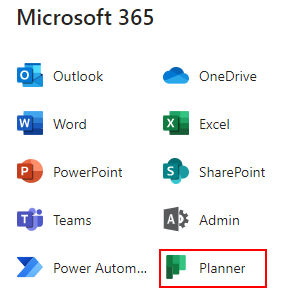
Microsoft Planner can be accessed from both the desktop and browser clients; for the browser client, you simply use Office 365 and access the program from there. Once you have successfully opened Office 365, you can use the navigation panel on the left to find the Planner app. Once the Planner app is open, you can proceed with the steps illustrated below.
For the desktop client, you will need the application downloaded locally; once this is complete, you will now be able to access the Planner application and proceed with the steps illustrated below. Visually in the UI, both the desktop and the browser versions are identical; the steps below will work for either.
- Now select a plan.
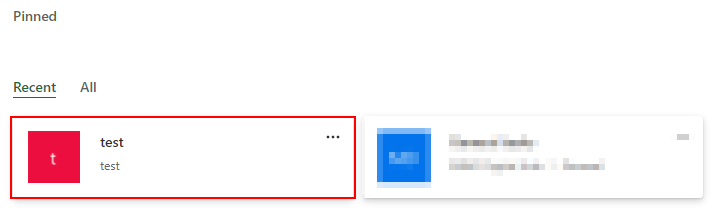
You need to assign email notification preferences to each individual task you set, as they mandate their own set of preferences— this is because each task has a different set of preferences that need to be managed individually. There is no preference panel to set email notification customization or disabling for the program.
- Click on “More,” illustrated by three dots.
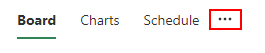
There will be some options and three dots on the plan you have selected towards the top of the menu. To access the steps ahead, you need to click on the three dots; this will bring up the panel where you can start to edit the notification.
- From there, “Plan Settings.”
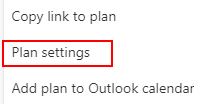
From the list of options available to you, Make sure you click the one that illustrates “plan settings.” once you have selected plan settings, you will now be able to proceed with the steps ahead.
- Select “Notifications.”
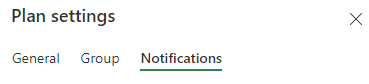
This section is where you can manage all your notifications in relation to the plan, which includes email notifications. A new panel on the right will open with a list of options running horizontally; from these options, select the one that says “notifications.” From there, you can proceed with the steps illustrated below.
- To disable notifications, simply uncheck the boxes.
- Then press “Save.”

- Finally, close the panel.

That’s it; once you’ve completed the steps illustrated above, you’ll be able to handle notifications in the Planner program. Both the browser version and the desktop application of the Planner program will operate using the procedure outlined above. Notifications in the Planner application can only be managed for each Team plan you create; the Planner application cannot be managed. Each plan might have its own set of delegated tasks, requiring more flexibility and customization in terms of notification management.

Why customize or disable email notifications in Microsoft Planner.
You may be wondering what the need is for you to disable and or customize notifications in the planner. Can it serve you a purpose and help in any way. There are some positives and negatives that are associated with disabling notifications in the Planner program. The positive approach is that the inbox will not be overloaded with planner notifications which could potentially mask important email messages. The negative is that you may miss important planner-based notifications that could impact your progress in a project; for instance, important updates of the project requirements could be missed if your notifications are disabled.
You may keep notifications for emails customized for this particular reason; if there is an instance where you find that notifications are overloading your email inbox, you can use the steps illustrated above to customize them and ensure you only get the ones you require.
You may also choose to disable notifications if you have multiple plans on the program. There may be an instance where notifications on specific plans may not be necessary. Therefore, disabling the notifications may provide better use of notification management.
Conclusion
That’s it for the blog; thank you for reading through our content on how to customize or disable email notifications on Microsoft planner. We hope the content above has answered your question concerning the topic illustrated above. The steps above illustrate both how to customize the notifications by selecting the options that apply to you and disabling the options by unchecking all the boxes. If you are still having issues feel free to add a comment, and we will address any issues you may have with the content shown above.