With an increase in workplaces allowing workers to work from home, digital conference tools such as Teams’ meetings are becoming more popular. However, this has also led to increased critiques and questions. One such question is how the attendance of a meeting can easily be assessed — with minimal delay to work. As luck would have it, this can be done within Microsoft Teams via the attendee list provided for each meeting. An attendee list or attendance report is simply a list of users who were logged as present at any point during the call. You could also describe it as being like a register from school, except automated.
In this post, we will be providing a step-by-step guide with images, intended to instruct you on downloading a copy of your meeting’s attendance report. If you require any support beyond our brief explanation or aren’t the most acquainted with a computer, we highly recommend reading ahead for our more comprehensive guide.
Contents:
Downloading the attendee report for a meeting in Microsoft Teams
Step 1 – Open Microsoft Teams
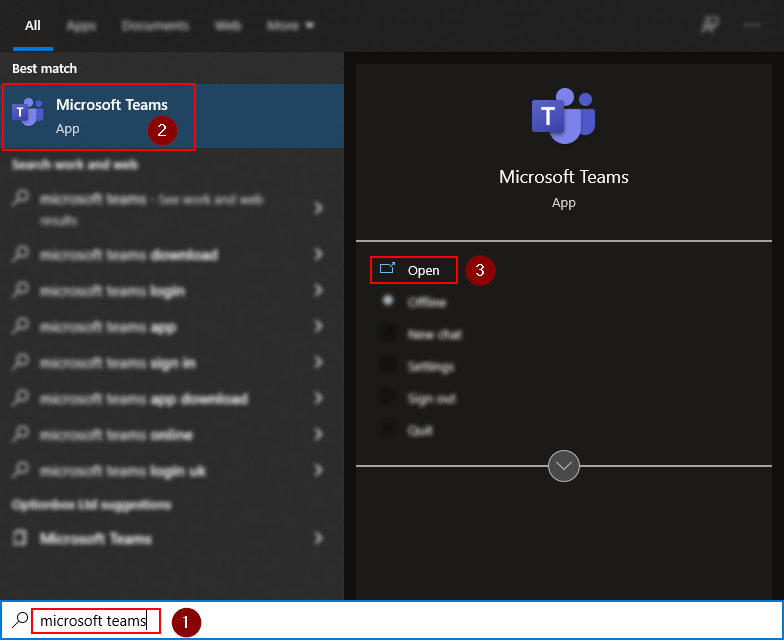
To begin, press the start/windows key and type Microsoft Teams. When your application is found, open it, by clicking the app’s icon within the result bar, or selecting open from the application card on the right of the search space.
Step 2 – Start a meeting
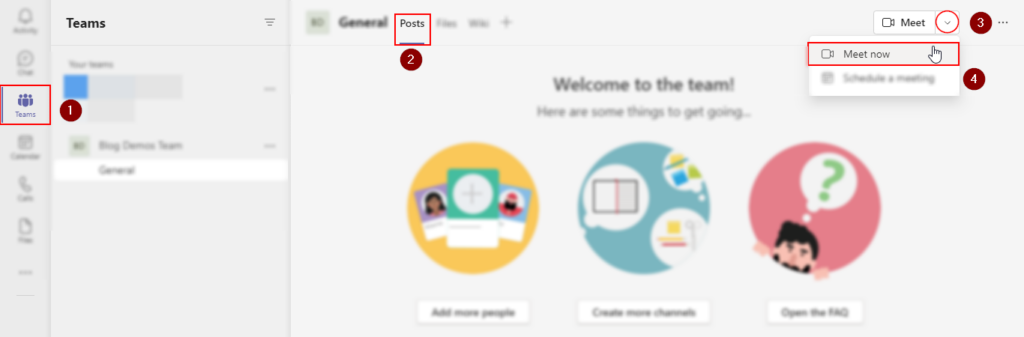
While it’s not required to start an unscheduled meeting, we’ve decided to use one in our demonstration to save time. To follow, open the Teams page for Microsoft Teams and access the Posts tab for a team you are a member of. Open the Meet dropdown via the upper right of the page and select Meet now.
Step 3 – Setup your meeting
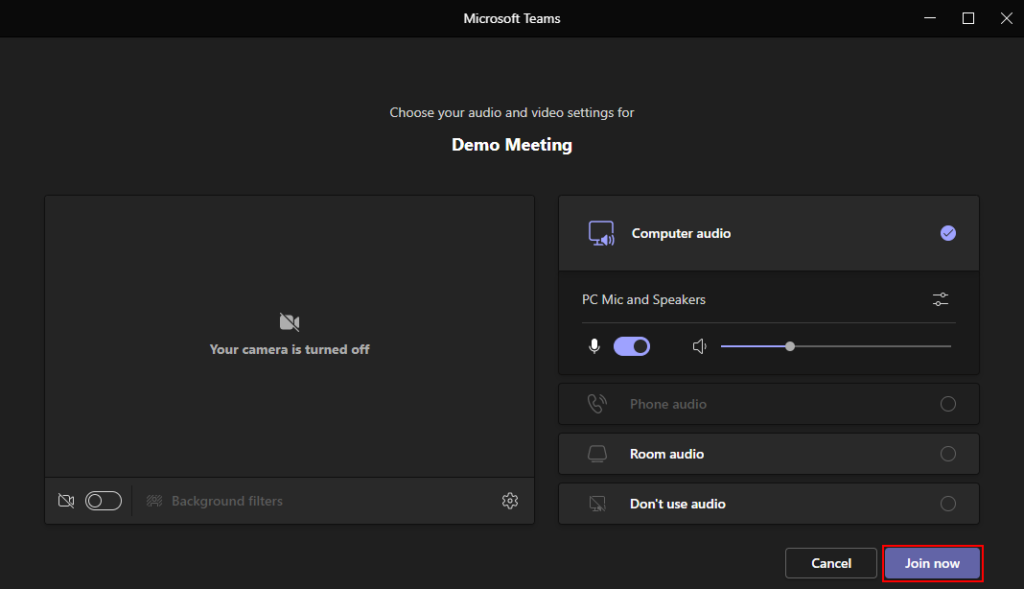
Normally, you’d use this stage to configure things like your video output to colleagues, and what audio input devices you’d like to use to both speak to and hear colleagues. If you’re just looking to understand attendee lists, then feel free to skip any configuration and instead select Join now.
Step 4 – Download your meetings’ attendance list
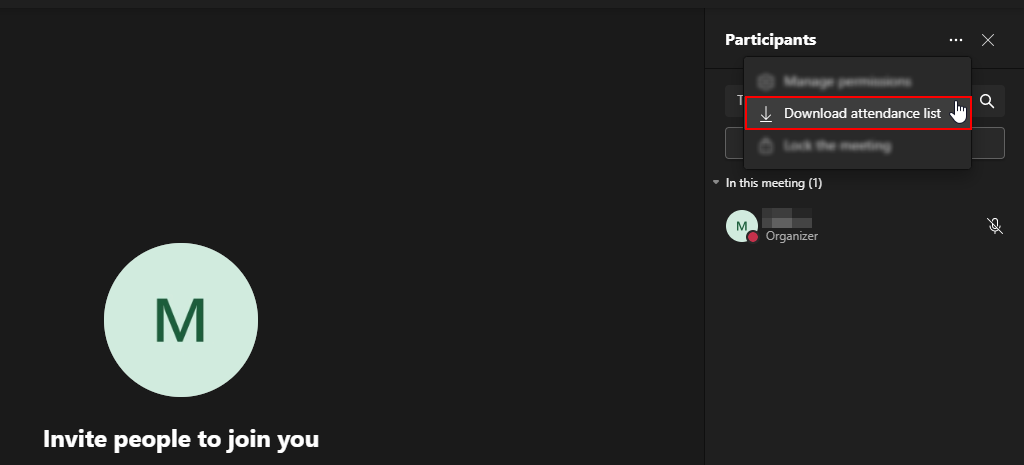
Within the meeting, access the context menu. This is located to the right of the Participants header on the sidebar and represented via the … icon.
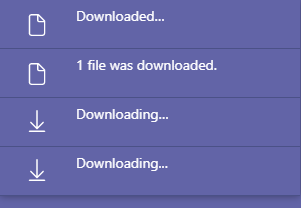
Step 5 – Wait for the download complete
While the download process is often notably fast, we thought it was worth mentioning you’ll be prompted with the progress of the download in the bottom right of your window. Indicators such as 1 file was downloaded and Downloaded will be generated upon the download’s completion.
Step 6 – Access your attendee list
To access your attendance list, we’ll need to open the default download location for Teams (assuming yours is unchanged). To reach your download folder, open the file explorer with the Control E shortcut (Command N on Mac) and navigate to the Downloads folder. Within, you will find meetingAttendanceList.csv. Double click it to open it in Excel.

Step 7 – Check attendance
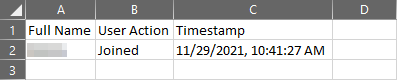
Within Excel, you’ll spot a table (that in my opinion can only be described as barebones). It should read in the following order: Full name, User Action, and Timestamp. The user action refers to actions made by users, such as joining and leaving the meeting, while the timestamp refers to the time at which the recorded action occurred.

End note
Recap
Attendee lists in Microsoft Teams serve as an automated means of tracking who joined a meeting and when they left a meeting. It is possible to download this list during the meeting, albeit we recommend doing so just before you end the meeting. This way you’ll have a good record of attendance throughout the entirety of the meeting.
Farewell
As usual, this section is dedicated to thanking readers for their support. We’d be pleased to know you found this post useful and/or informative. If you have any more Office 365 related queries, please consult our related articles (listed below). However, if you have other queries, consider looking at the rest of the site. We’re frequently posting new stuff each week and may just have the guide or troubleshooting tips you need. Regardless, we wish you a good day/night. Farewell readers.
Our related articles:
- How to use pop out chat in Microsoft Teams – Microsoft Teams servers as the general communications platform provided by their Office 365 Suite. One of its most useful smaller features is the ability to minimise chats and “pop” them out of the application window. This is primarily utilised for multi-taking, or chatting and working simultaneously. Have a read of this post to learn how to use it. If you have any trouble, feel free to follow along for an image aided walkthrough below. Once we’ve got a pop-out chat, we’ll demonstrate how you can view two pop-out chats at once.
- How to prevent employees downloading the Microsoft Teams app on mobile devices – Communication and accessibility with cloud services comes with a magnitude of benefits, despite this, they also bring a number of risks. One such risk is mobile devices which can easily be lost, compromised or stolen as opposed to company property which is on-site at all times. In this post, we’ll show you how you can meek employees from downloading Microsoft Teams’ mobile app.
- A complete troubleshooting guide for Microsoft Teams not letting you change your status – Your status is important— managers and colleagues alike use it to tell what you’re doing. If you can’t set it correctly, you cause some degree of confusion or misunderstanding. Fortunatenly, I have some solutions for you.
- How to let users bypass the lobby: Microsoft Teams – Being a communication platform, Microsoft Teams offers a series of useful communication features, such as event planning, chats, groups and what we will be discussing today, meetings. Often times when joining a meeting you may have found yourself stuck within the “lobby” space- forced to wait (potentially unoticed) for another meeting attendant to grant you access to the meeting. We will be helping you permit meeting attendants to bypass this lobby phase of the meeting. As such we request you refer to our guide below, where you will find step-by-step instructions on what to do, as well as a number of images to provide additional support.