OneNote enables you to store several notes in one place, which is a double-edged sword. On the one hand, all your notes exist in one accessible location. On the other hand, if you’ve put too many notes on one page, you might struggle to separate personal notes from work notes.
Filtering a search with tags is a valuable technique in Onenote. However, while the method (illustrated below) is reasonably simple, it could be made easier (on Microsoft’s part). If you run into issues, please refer to the more detailed guide later in the post.
- Launch your OneNote client
- Open the desired notebook
- Open the “Home” tab on the ribbon
- Select “Find Tags” on the “Tags” category
- Close categories you want to exclude
- Open categories you want to include
- Click “Create a summary page”
If your notebook has become cumbersome and hard to navigate, you should filter its content. Filtering a notebook enables you to view a more limited selection of notes. Hence, you will find it extremely useful for disorganized pages. In the post, we’ll discuss how you can create a tag, apply a tag, and filter by tags. If you get stuck at any point, try using the screenshots underneath each step. Otherwise, you can post a comment at the end of the post.
Below, you can access a list of hyperlinks. Each one links to a different part of this post. If you’re only interested in a specific part, click its respective post. Your web browser will reveal the relevant part of the page.
- How to create a OneNote tag
- How to tag a OneNote section
- How to filter by tags in OneNote
- Blog post recap
How to create a OneNote tag
You might struggle with this part of the post if you don’t know about tags. Tags are akin to labels in the sense that they group several ‘things’ under an informative icon. In short, they allow us to categorize and (loosely) define our content.
Step 1 — Launch the OneNote application
You can’t create OneNote tags outside of OneNote, so you must launch the application. We’ll start by hitting the “Start” key and typing “OneNote” into the text field. After (if you installed the application), you will spot it under “Best match.” If so, click on the result or hit the “Enter” key.

Step 2 — Launch the tag summary pane
With a book open, find and open the “Find Tags” button under the “Tags” category on the “Home” page. You will find that the button resides on the far right of the OneNote ribbon.

Step 3 — Launch the “Customize Tags” interface
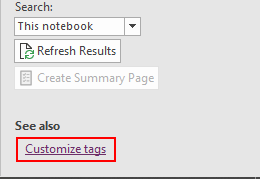
After selecting the “Find Tags” button, you will gain access to a new panel: Tags summary. This panel stores each tagged note and ensures they’re accessible. However, that’s not the panel’s only purpose. At the bottom, you will find a link stating, “Customize tags.” Please, click it.
Step 4 — Create a new tag
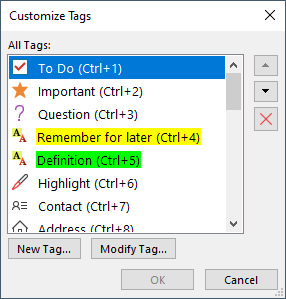
In the “Customize Tags” window, we can access (and modify) each existing tag. But, that’s not our objective today. Instead, draw your attention toward the lower buttons. Select “New Tag.” We want to create our own tags.
Step 5 — Configure your tag
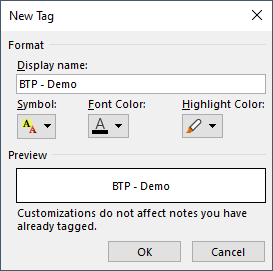
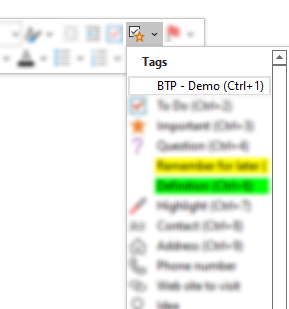
By technicality, that’s all: the tag exists, albeit without purpose. So, we need to change that. Apply a “display name” to separate your tag from others. The display name should correlate with the content you will use it on. For example, you might tag work notes with your organization’s name or “business.” But, a personal or private note may feature the tag “personal.” In the example below, I named by tag “BTP – demo.” While you are not required to, you can also set an icon, font color, and highlight for your tag. I have neglected to do so.

How to tag a OneNote section
By creating tags, we increase the accuracy of our labels. To be specific, tags can be more precise, nuanced, or general. You could argue this gives you more freedom for customization. But it’s dependent on the quality of your tags. Regardless, creating tags means very little if we don’t use them (or the existing ones).
What to do
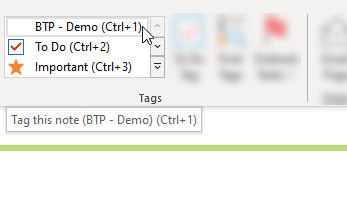
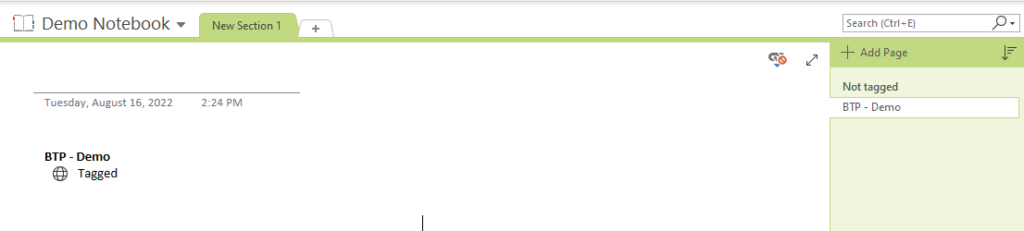
First, head to the “Home” tab. Look for the “Tags” category, wherein you will find a list contained within a scrollable box. Then, in the list, find and select your desired tag. I’ll be using the tag we created in the previous section. But that doesn’t mean you can’t select a different tag. After, you will find a new note awaiting your content.
While this method does the job, it’s not the only way. If you dislike the process provided, you can try the following one instead. To start, right-click in a blank space on the page. Then, in the resulting context menu, find the “Tags” menu (displayed below) and select your tag. If you want to apply a tag to an existing note, you can use this strategy to achieve that goal.
How to filter by tags in OneNote
Once you begin tagging notes, you can start filtering them. But why? A tag filter lets you see posts under specific tags, excluding irrelevant notes from view. In short, tag-based filters clear up your book— promoting readability and management.
Step 1 — Launch the tag summary pane
To start, launch the tags summary page. You can do this by clicking “Find Tags” on the Home page’s “Tags” category. Afterward, you will find the tags summary pane on either side of your screen.
Step 2 — Open each category you’d like to search/filter for
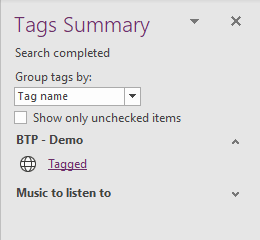
The tags summary will detail a selection of your notes, grouped by their respective tags. You can close groups you don’t need to see. To do so, click the upward arrow icon (^) next to it. In contrast, selecting the inverted version on a closed category will open it. In the example below, I close the “Music to listen to” category and leave the “BTP – Demo” group open. In short, close every group you don’t wish to see.

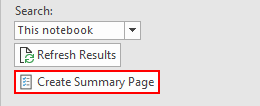
Step 3 — Generate a summary page
Toward the bottom of the panel, you can find a button labeled “Create Summary Page.” Please click on the button. In doing so, you will create an extra page for your notebook. The page will contain each note tagged with your open groups’ names.
How to filter by tags in OneNote for Windows 10
This method only works in OneNote for Windows 10. I have created a list of names with different tags next to them. I only want to return the name “Misha” if there is a “To Do” tag next to the name.
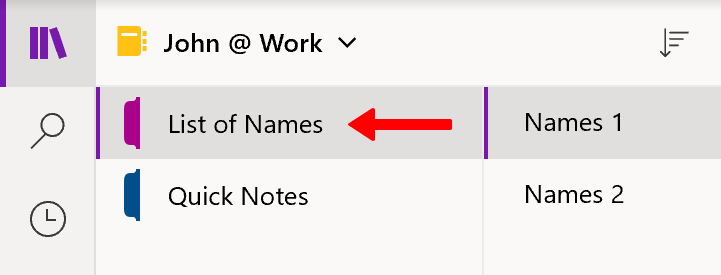
- First, click on the library icon and select a section to search in.
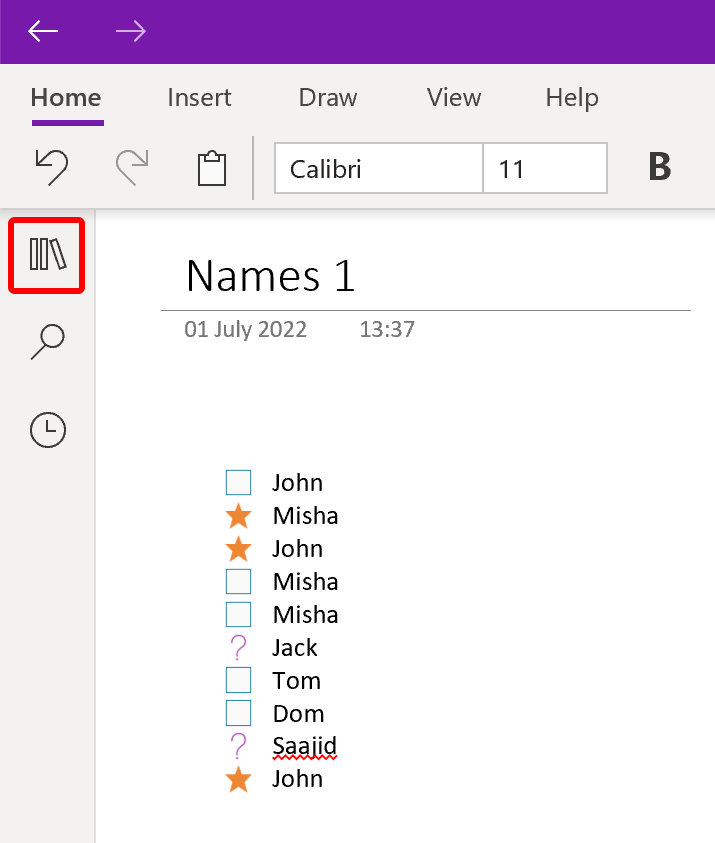
- Next, select a section to search in.
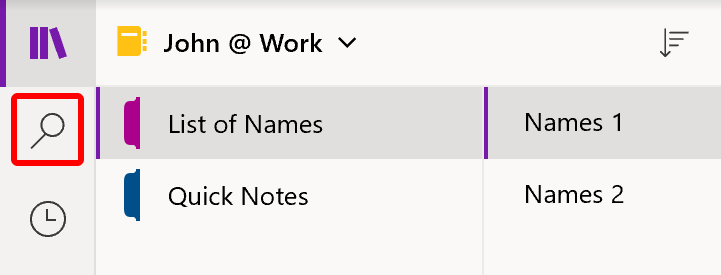
- Click on the Search icon.
- To search for a name and a tag, type in “To do” followed by the name into the search bar. You can type the name of the tag before or after the keyword. In this example the keyword is “Misha” and the tag is called “To do.”
- Press the Enter button on your keyboard after you’ve entered the search term.

- Next, click on “Tags.”
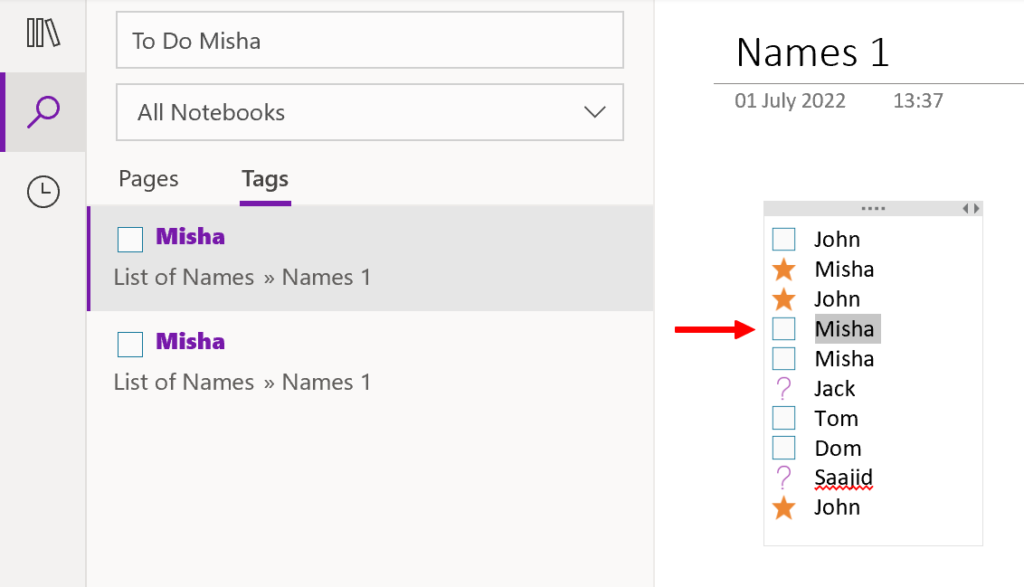
- Under “Tags” you will now see two results that correspond to the two occurrences of “Misha” with a “To Do” tag next to the name.
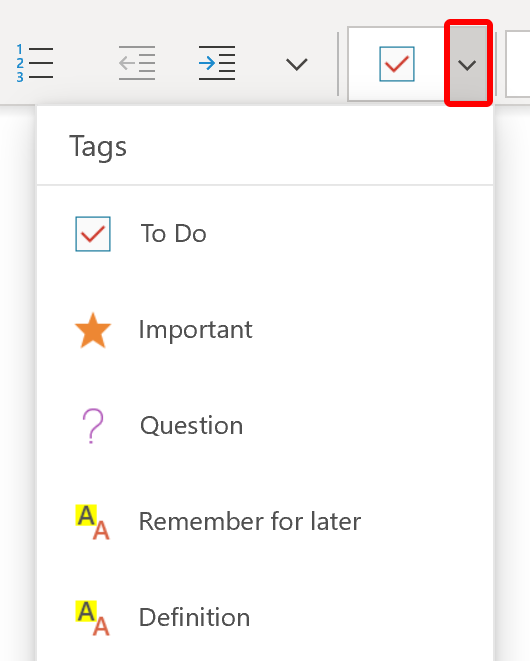
To search for different tags, enter the name of the tag into the search bar along side your keyword. To find the name of the tags, click the down arrow on the tag icon on the top menu.
Blog post recap
Tags are (usually) unique identifiers that group one or more related subjects. In OneNote, our subjects would be our notes, and their relationship would be the note’s context. For example, the subjects “Check inventory” and “Train staff” might share the context “Retail job.” In this regard, tags are a powerful grouping and searching tool. Especially when we integrate the tags summary page to generate filtered pages for individual (or several) tagged note groups.
Thanks for letting us show you “How to filter a search with tags in OneNote.” If we helped answer your question or fix a problem, consider reviewing some more of our solutions.