Users can access multiple emails at the same time in Microsoft Outlook. Whilst generally a benefit to the user, sometimes, sent items may not appear in the ‘sent items’ section of Outlook. Usually, this is due to an issue of conflict between the shared emails, and this is probably why you’re here.
Thankfully, the issue is a fairly simple one to resolve. In order to edit your shared Outlook mailbox, you must access the ‘Groups’ tab of Microsoft Admin, click on the email you wish to edit the settings of, and tick one, or both, of the options you wish to enable.
Now, if this isn’t enough information to work with, then don’t worry. Not only will there be an initial step-by-step guide, but there will then be a more detailed, thorough walkthrough of the process.
![]() Important: In order to follow this walkthrough, you will need to have access to Microsoft Admin, which is only accessible to administrators. If you aren’t an admin, then the quickest way to try and resolve this is to get in contact with your admin team.
Important: In order to follow this walkthrough, you will need to have access to Microsoft Admin, which is only accessible to administrators. If you aren’t an admin, then the quickest way to try and resolve this is to get in contact with your admin team.
How to fix an Outlook shared inbox not showing sent items:
- First,
 go to Microsoft Outlook.
 - Access Microsoft Admin via the app launcher on Outlook.
- Click the ‘Teams & Groups’ tab of options to see the dropdown menu.
- From here, click ‘Shared mailboxes’.
- In the resulting menu, click the mailbox you wish to edit.
- On the submenu that pops up, look for the ‘Sent Items’ sub-option.
- Click ‘Edit’.
- Tick either one, or both, of the boxes, whichever best suits your individual needs.
Again, don’t worry if this isn’t enough detail for you to work with. Now, this blog will explore a more in-depth analysis of the process, with accompanying screenshots to help emphasise the information and guide you throughout.
we’ve also created a video to help guide you through the process:
How to fix an Outlook shared inbox not showing sent items (step-by-step)
So, your first step will be to ![]() open Microsoft Outlook. Once here, you will want to launch Microsoft Admin, which can be found in the application launcher of Outlook or, indeed, any Microsoft application.
open Microsoft Outlook. Once here, you will want to launch Microsoft Admin, which can be found in the application launcher of Outlook or, indeed, any Microsoft application.
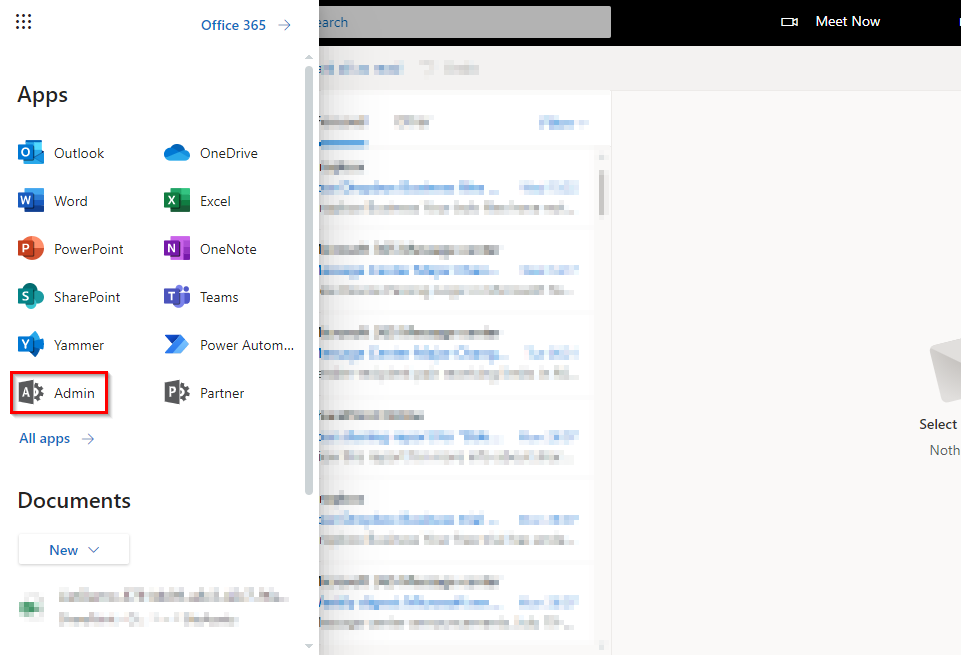
Once you have opened Admin, you will be greeted by the Admin menu. From here, you will want to look to the left of the screen, where there is a list of all subcategories within Microsoft Admin. Of these options, you should click ‘Groups’, which has been highlighted in the screenshot below.
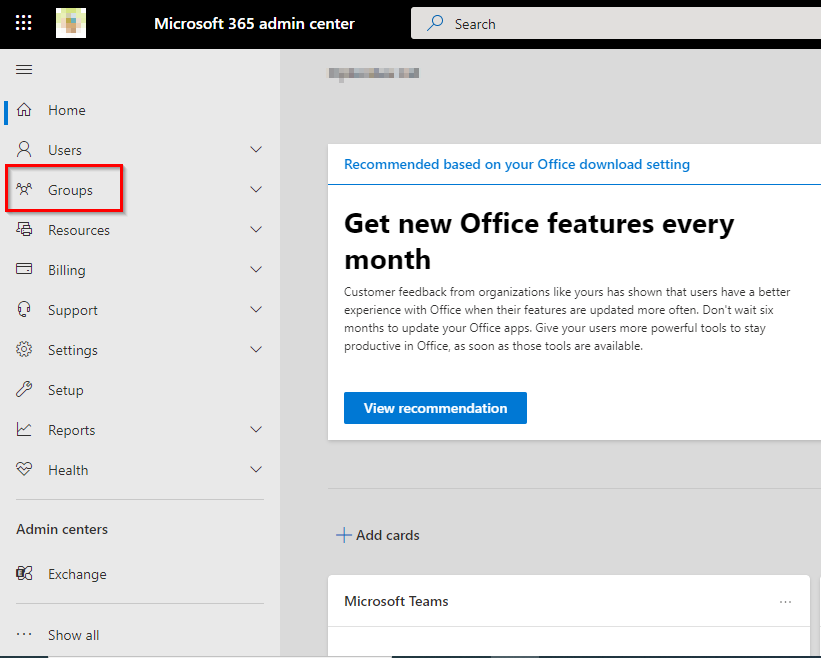
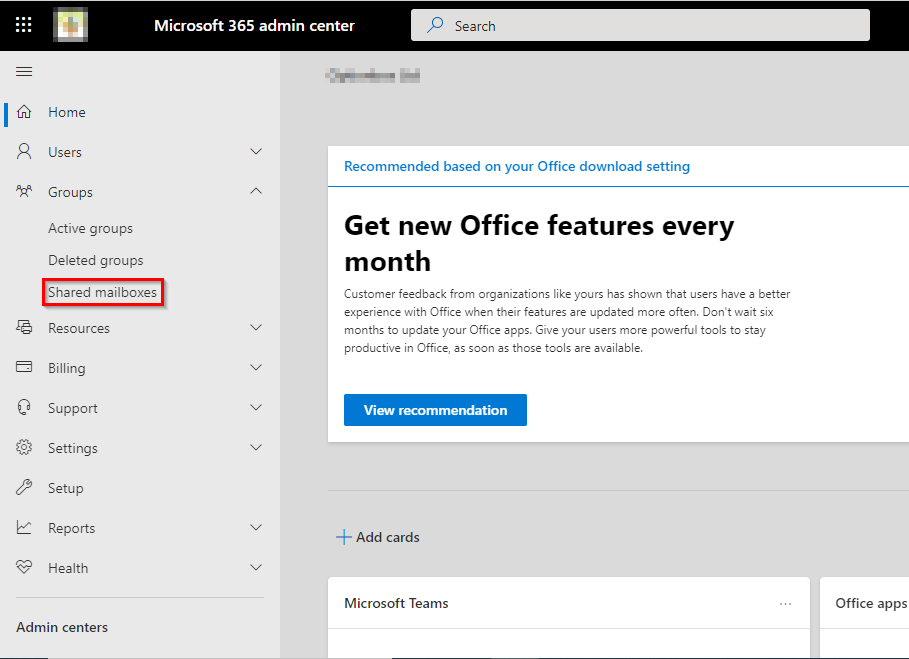
Clicking Groups will present you with three more sub-sectors of Microsoft Admin. Of these three options offered, you will want to click the last of the trio, titled ‘Shared mailboxes’.
Clicking ‘shared mailboxes’ will bring you to a list of all mailboxes currently within your usage. From these options, you should click the one whose mail settings you wish to alter. In this example, the email name is simply ‘Admin’, but of course, this might not be the case for you.
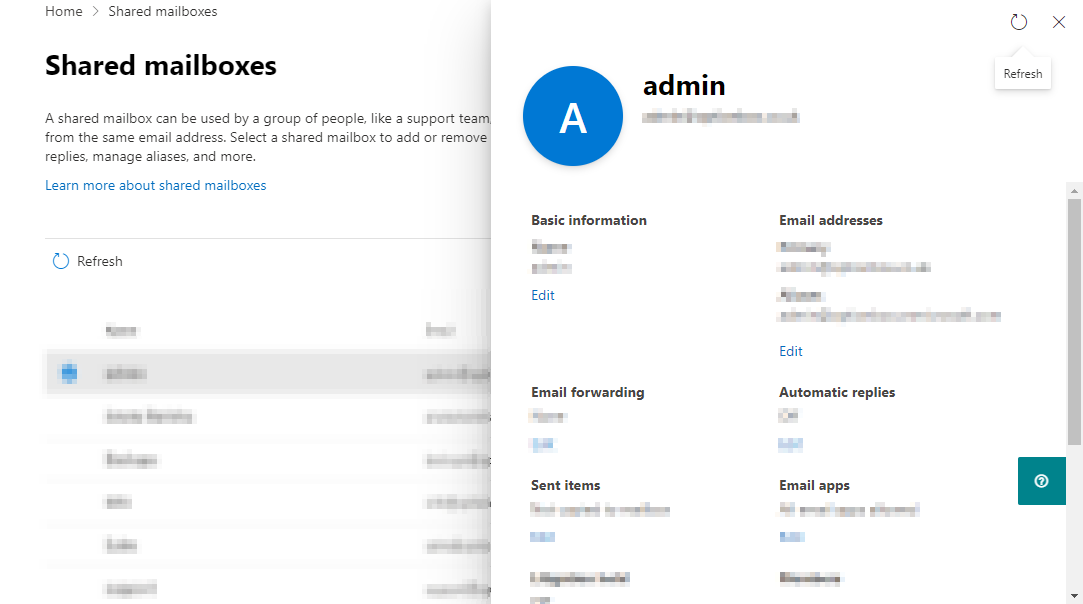
Double clicking the shared mailbox you want to edit will open a menu like this one, a new menu on the right side of your screen.
Yet again, you are presented with an array of options even here, which can easily become very confusing, very quickly. Navigating this menu, you should look for the ‘Sent Items’ heading, and under that, click ‘Edit’, which is highlighted in blue text by Microsoft Admin. In the below image, though, Edit has been highlighted in yellow, whilst the red box helps show you where on your screen you should look for the setting.

Clicking edit will open the final menu that you’ll need to access. In the edit section of your options, you will be presented with two tick boxes that sit underneath a passage of text from Microsoft, explaining their purpose.
Of these two boxes, you can click on one or both of them, entirely depending on your preference. It may be worth, however, selecting both options, as this may put you in the best stead to avoid this issue becoming a recurring one. The boxes have been highlighted in the below screenshot, with both options ticked.
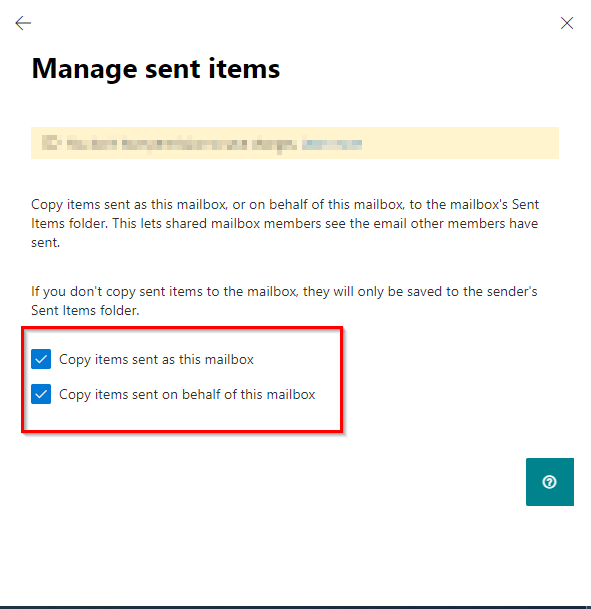
These settings will save automatically, hence why there is no OK button to make these changes permanent as there is with many Microsoft processes. Once these boxes have been ticked, then you should have successfully fixed the issue of Microsoft Outlook shared mailboxes not showing sent items!
Thank you for taking the time to read this blog, I hope you found it as helpful as you wanted it to be! As always, if you run into any issues following this process, or simply wish to let us know your thoughts and/or results of the method, then please do not hesitate to get in touch with a member of our team.
Listed below, with a very brief explanation for each, are some links to other blogs published on the site that have been written about a similar topic. They may prove useful to you if this blog hasn’t quite resolved any issues you have been having.
   |
How to set up an automatic reply for a shared mailbox: Outlook 365 – Business Tech Planet
(This article discusses setting up automatic replies within a shared inbox via automatic replies in options).
How to fix shared mailbox emails disappearing: Outlook – Business Tech Planet
(Spoken of in this article is how to prevent emails disappearing via the Recipients settings in Exchange).
Prevent admin accessing all mailboxes Microsoft 365 – Business Tech Planet
(Here, preventing admin access through Outlook general settings is written about).
How to give read-only access to a shared mailbox Microsoft 365? – Business Tech Planet
(Finally, this article looks as introducing read-only access to a shared mailbox via permissions after clicking ‘open another mailbox‘).