When using Microsoft OneDrive, you may encounter an error message that reads, “we couldn’t merge the changes”. Of course, any error is particularly annoying, but this is one particular issue that you may be unsure of when it comes to trying to resolve it. Chances are, if you are, that is why you are here today, reading this article.
Thankfully, there are several avenues you can take in order to try and fix this particular OneDrive error, and that is what we will be discussing today. So, we will first list to you the ways by which you can attempt to resolve the issue, before then delving deeper into each method with a step by step process, followed by a complete, in depth analysis, with accompanying screenshots to best aid you.
So, the potential resolutions we will be discussing are as follows:
- Resetting the OneDrive application.
- Disable the autosave feature.
As you will have gathered by the first listed option, we will initially discuss resetting the OneDrive application, which can be done by running a certain line of code to reset your OneDrive.
Now, if this sounds fairly convoluted, then don’t worry, that’s completely understandable, especially if you have limited experience with technology. The process, though, is fairly simple. As was aforementioned, we will first show the piece to you in a step-by-step, before then breaking it down further.
Step by step: How to fix (and avoid) the OneDrive “we couldn’t merge the changes” error
- Open a run window on your computer.
- In case you’re unsure on how to do this, press the Windows and R key simultaneously. Doing this will open a run window.
- In this window, you will want to enter a passage that reads:
%localappdata%\Microsoft\OneDrive\onedrive.exe /reset - Enter this and click ‘OK’ to run a reset of your Microsoft OneDrive application.
- Wait for a couple of minutes for the run to complete. After waiting, check to see if the OneDrive icon is apparent in your navigation bar.
- If not, you will just need to launch the application manually.
Hopefully, this will have served to clarify the process at least somewhat. Now though, we will delve deeper, analysing the process in full.
So, your first step, as was mentioned in the steps above, will be to open a run window on your computer. In order to open the run window, you will have to simultaneously press the Windows and R key on your keyboard. You’ve probably guessed by now that this tutorial is being completed on a Windows computer.
Doing so successfully will open your run window, which will look like this:
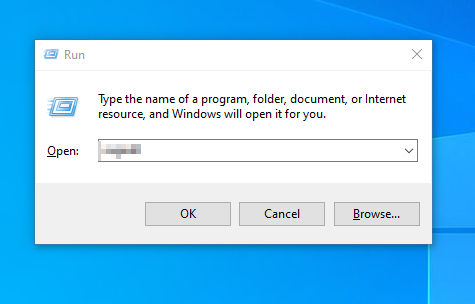
It may open with something already in the ‘Open’ box in which you type, but this is nothing of concern. Simply erase whatever it is that occupies the box (if anything), and in its place enter the following line of code;
%localappdata%\Microsoft\OneDrive\onedrive.exe /reset
Course, it would be incredibly unfair if you had to type this. Thankfully, copying and pasting the code works absolutely fine. Copy the above line of code, return to your run window and in the empty text box, paste this line. After doing this, select the option titled ‘OK’ to run the reset of your Microsoft OneDrive.

After clicking ‘OK’, allow the run window two to three minutes to complete the process. Course, it may take slightly longer, but that is definitely a solid benchmark to work with. After the time has elapsed, you will need to check and ensure that OneDrive has returned to operation. Look towards the bottom of your screen, near the date and time, and see if the OneCloud cloud has returned to where it usually rests.

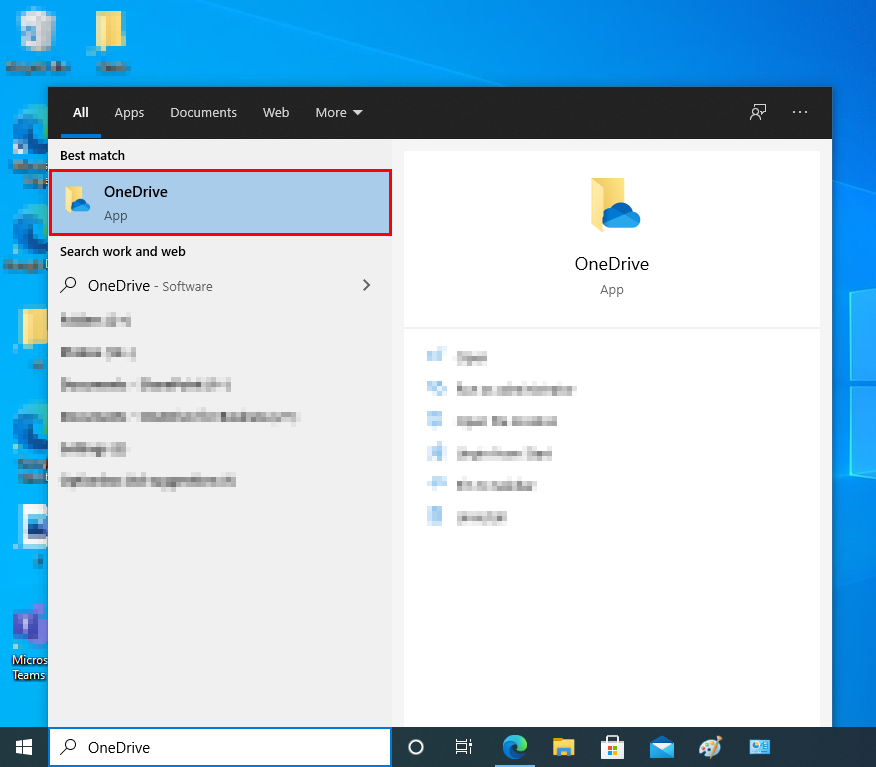
If the cloud isn’t there, then that is fine, it just means you will need to search for OneDrive manually. Course, this is slightly more tedious, but it won’t take you long at all. Your best option will be to search for it in the search bar that sits at the bottom of your screen, as part of your navigation bar. Simply search ‘OneDrive’, and it should be the first option that appears to you.
So, that is one way you can try and resolve the “we couldn’t merge the changes” error that has been affecting you. It is not the only way though. Now, we will look at disabling the Autosave feature, to see if that makes any sort of difference. In order to do this, you have to disable the Autosave features that are defaultly enabled on Microsoft applications.
Again, do not worry if this alone is not enough detail for you. Similar to the last process we discussed, we will show to you a step by step guide of the process, before then breaking it down further and going into far more detail in what will be a deeper analysis, once more complete with accompanying screenshots in order to further benefit you, the reader.
STEP-BY-STEP: DISABLING THE AUTOSAVE FEATURE.
- Open a Microsoft application. In this instance, we will use Word.
- Make sure you are opening the desktop version of Word.
- When you have entered Word, look to the top of your screen and click ‘File’.
- This will bring you to the settings menu. Look towards the bottom of the screen.
- Looking to the left-sided menu, click the option titled ‘Options’.
- From here, a new menu should open.
- Of all options presented to you, click the subheading titled ‘Save’.
- In this subsection will be an option that reads, “Autosave OneDrive and Sharepoint Online files by default in Word”.
- Untick this option, and click ‘OK’ to save your changes.
So, as you will have gathered by the steps, your first move will be to open a Microsoft application. We will be using Word, but the walkthrough should be fine regardless of what application you choose. Now, you can obviously find the application manually, but for our walkthrough, we have used the navigation bar to find it, which is another option available for you if you need it (if you are using a Microsoft computer).
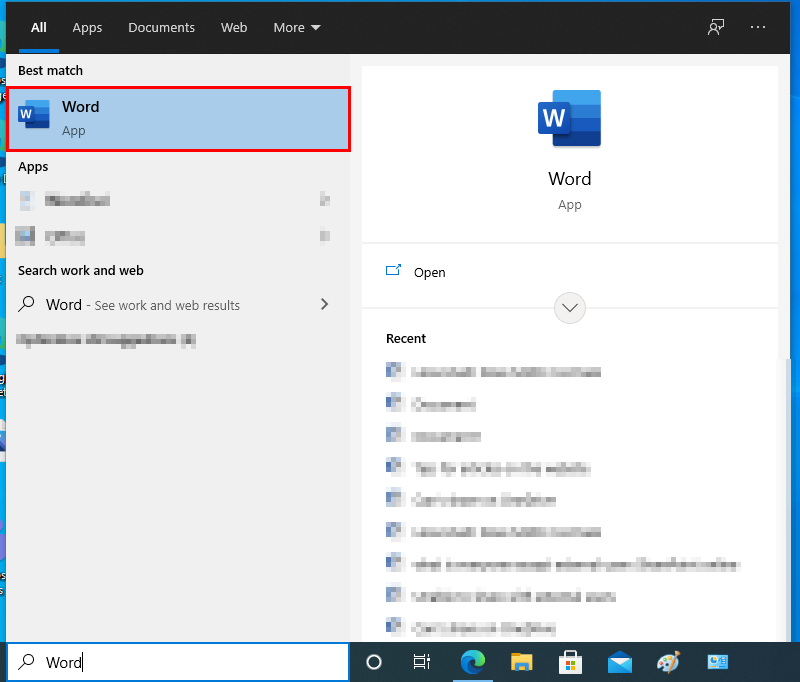
Again, for the purpose of this tutorial, it is important that you are using the desktop version of Microsoft Word. Once you have opened the application, you will be greeted with a blank document, a standard expectation at this stage. Here, look to the top of your screen, where there will be a tab called ‘File’. Click this.

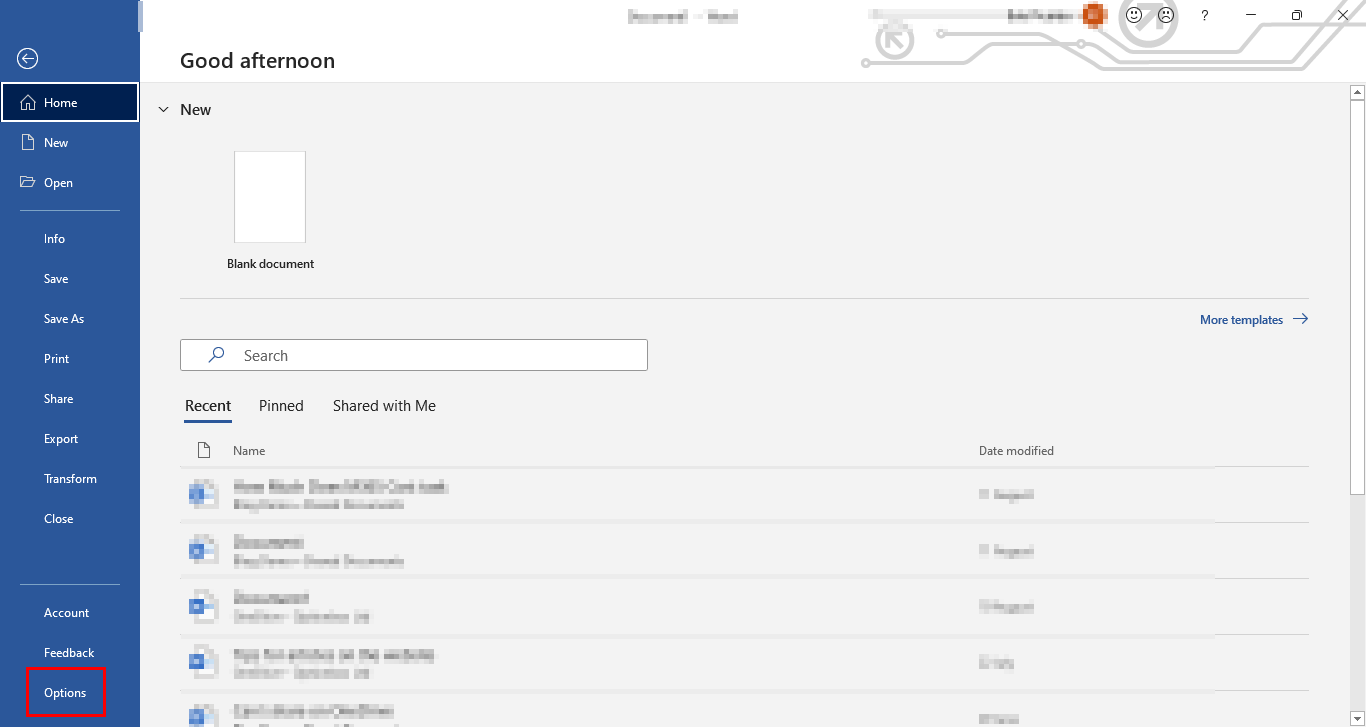
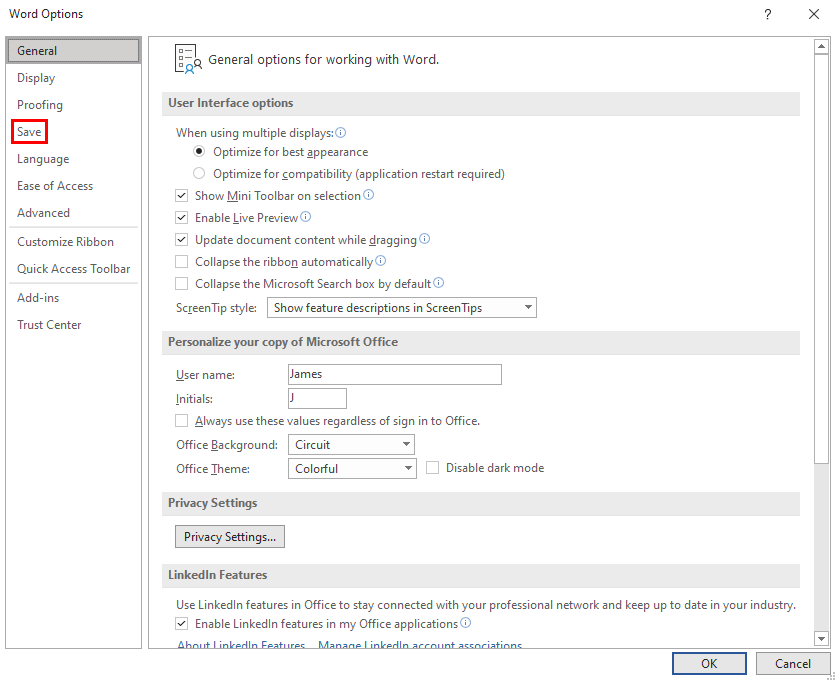
Clicking ‘File’ will open the settings menu, from which you will need to choose the ‘Options’ heading. Options is located at the bottom of the listing menu to your left, but in case you need further clarity, it has been highlighted in the screenshot below.
Clicking ‘Options’ will open a new pop-up menu, which will be populated by numerous settings that you can alter. There will be a subheading titled ‘Save’, and it is this you will want to click.
It is here you will be able to disable the Autosave feature. As was aforementioned, there will be a box that, by default, is ticked. The box will read, “Autosave OneDrive and Sharepoint Online files by default in Word”. It has been highlighted in the below image.
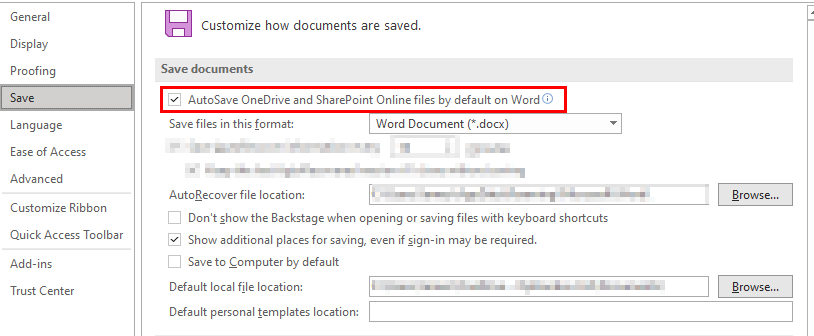
Make sure this box is unticked, and then click ‘OK’ in order to save your changes.
So, whilst running a OneDrive reset and/or disabling the Microsoft Autosave feature could, and should, prevent you from receiving the “we couldn’t merge the changes” error, there are ways to somewhat police the issue and stop it from happening again.
If you can, try and avoid having one document edited by multiple users at a time. The congestion here can contribute to the error message in discussion. As well as that, manually save your Office changes as opposed to flooding them all through OneDrive.
Thank you for taking the time to read this blog, I hope you found it as helpful as you wanted it to be! As is the case with everything we write, if you encounter any issues whilst following the walkthrough, or simply wish to share your thoughts with us, then please do not hesitate to get in touch with a member of our team.