Your presence status in Microsoft Teams allows you to see if your colleagues are available. However, one issue that many users have noticed is that their presence status is not always correct and sometimes gets stuck on the same status without changing for long periods. So, in this guide, we will show you how to fix an incorrect presence status.
How to fix an incorrect Teams presence status:
- The first method is to manually change your status. Although you will see an immediate result, it will not fix any underlying issues.
- The second method is to check for any updates to your Teams desktop app.
- The third method is to enter a test meeting. Some Teams users claim that doing so has fixed their presence or status error.
- The fourth method is to clear your Teams cache.
- The fifth method is to run a self-diagnostic tool.
This blog post will demonstrate all of these solutions with detailed step-by-step guides.
Presence status on Teams
As briefly explained above, the presence status on Teams was introduced to allow users to see which colleagues are available and which are busy. It also allows users to change their presence status, which can come in handy when they have a lot of work to do and don’t want to be disturbed, as they can change their status to ‘Do not disturb.’
This feature works by monitoring your activity. If you are currently on Teams, you will show up as ‘Available‘ to your colleagues. However, if you are online but are on a different app or are using your browser, you’ll be displayed as ‘Away.’ Similarly, if you are in a meeting that takes place over Teams, you’ll be shown as ‘In a meeting.’ Once you are back on Teams, your status will change to ‘Available‘ again. The table below shows the different status settings.
| User Configured | App Configured |
|---|---|
One issue many users have with this feature is that it is not as accurate as it should be. Sometimes they are displayed as busy when they are available and vice versa. Microsoft has explained that they are working on a more accurate presence status on Teams, allowing the user more control.
Microsoft has recently introduced a new feature where users can set specific durations for their presence status. For example, you can set your status as ‘Busy‘ for 30 minutes or even set it to ‘Out of Office‘ for a week. The user now has much more control over the accuracy of the presence status feature.

Possible solutions to fix Microsoft Teams incorrect presence status
If your Teams status keeps showing the wrong presence status, there are several different solutions you can try to fix this issue. This section of the blog post will offer some possible solutions and detailed step-by-step guides on how to do this. Click on the solution you want to try first to be taken to the relevant information.
- Change status manually
- Check for updates
- Enter a meeting
- Clear Teams cache
- Run a self-diagnostic tool
Change status manually
1. Go to your profile picture.

On the top right-hand side of the screen, click on your profile picture.
2. Click on your presence status.
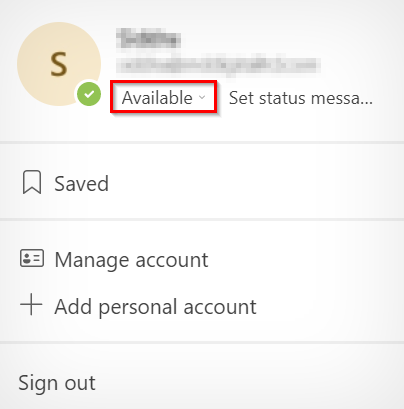
Underneath your name and email address, click on your status.
3. Select the status you want to change to.
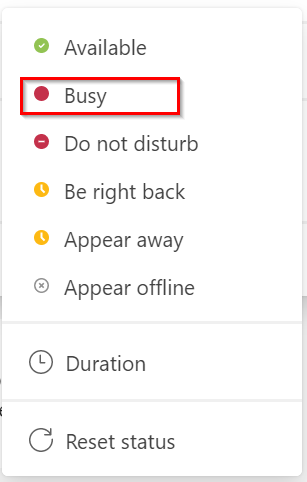
A list of status options will appear. Click on the one you want to change to.
4. If you want to reset your status, you can click ‘Reset status.’
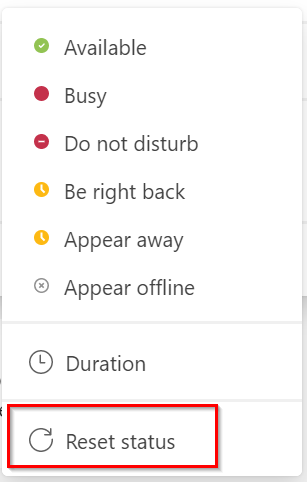
If your status is showing up incorrectly, the solution may be as simple as resetting the status. Click on ‘Reset status.’ If it is still incorrect, move on to the next solution.
Check for updates
- Click on the three dots.

Click on the three dots at the top of the page next to your profile picture to view more options.
2. Select ‘Check for updates.’
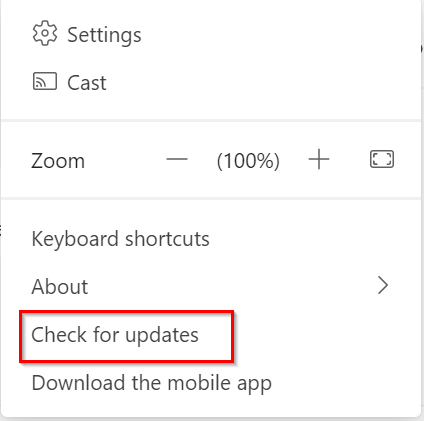
When the drop-down menu appears, click on ‘Check for updates.’ If there are any updates, Teams will ask you if you want to update them. Click on ‘Yes‘ to begin the update.
Enter a meeting
Some users who have experienced this issue with Teams have said that the solution that seemed to work for them was to enter a meeting briefly. They found that their Presence status had been fixed when they left their meeting. To try this method, you will need to find a colleague who has a minute or two to spare and ask them to go into a Teams meeting with you. Then open your Teams chat with that college and click on the camera icon at the top of the chat, as shown in the screenshot below. This will begin the meeting.

Clear Teams cache
- Click on the small arrow in the taskbar and right-click on Teams.
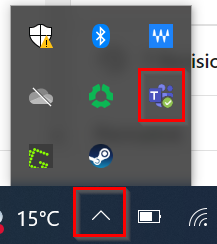
From the taskbar at the bottom of your screen, click on the small upwards-facing arrow. Then right-click on the Teams logo.
2. Select ‘Quit.’
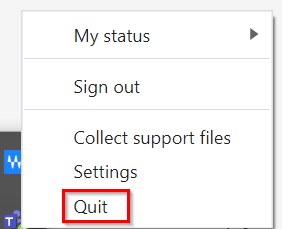
Click on ‘Quit‘ from the list of options that appears.
3. Go to File Explorer.

Once you have completely closed Teams, go to your File Explorer.
4. Type %appdata%/Microsoft/Teams into the search bar.
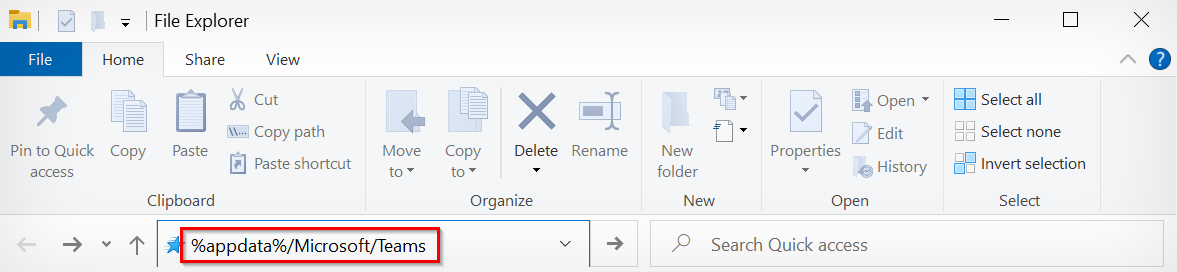
In the search bar at the top of the window, type in %appdata%/Microsoft/Teams.
5. Double-click on the ‘Cache‘ folder.
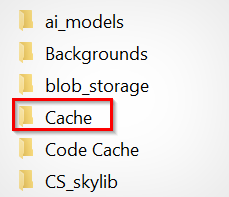
Double-click on the ‘Cache‘ folder from the list of folders that appear.
6. Highlight all the files in the folder.
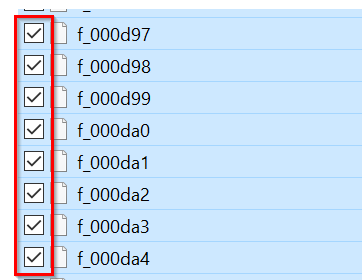
Highlight everything that appears in the folder by clicking and dragging your mouse from top to bottom.
7. Right-click and ‘Delete‘ everything.
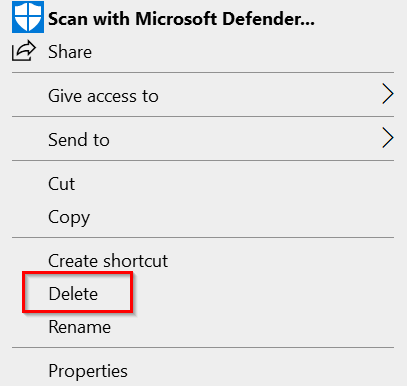
When all the files are selected, right-click and select ‘Delete.’ Then you can relaunch Teams, and your Presence status should now be accurate.
To learn more about clearing Teams cache, read our blog post How to clear cache in Microsoft Teams.
Run a self-diagnostic tool
If none of the solutions above work for you, it’s best to run a self-diagnostic tool that will enable you to identify what the issue is. However, you must be an admin to use the Microsoft 365 diagnostics tool. Doing so will highlight any possible issues affecting Teams’ user presence status.
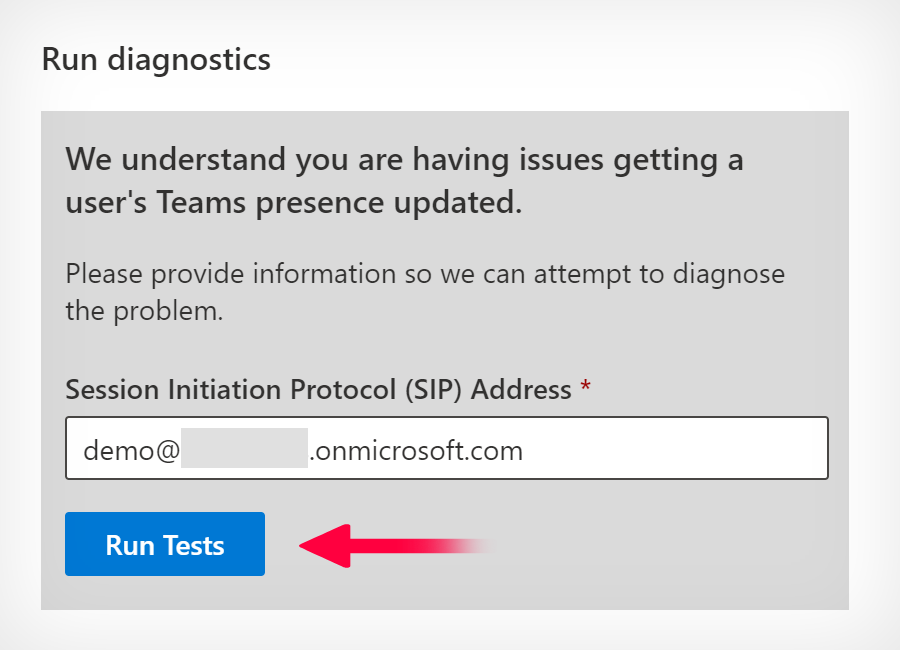
- Click the following link for the Microsoft 365 self-diagnostic tool.
- Enter your account email address.
- Then click the “Run Tests” button.
One thing to note about this self-diagnostic tool is that it is not available for Microsoft 365 Government, Microsoft 365 operated by 21Vianet, or Microsoft 365 Germany.
Conclusion
Although the presence status feature on Teams can be beneficial, it does have some accuracy issues. Many users have experienced Teams displaying an incorrect status on their activity. There are several solutions to this, all of which have been discussed in this blog post, with detailed guides to follow.
Thank you for reading this blog post. If you have any further questions about Teams, feel free to comment below, and we’ll be sure to get back to you.