Within Microsoft Outlook, the user may often encounter certain issues that are of some challenge to resolve. One of these issues is the error code, 0x800ccc0e, which is presented to the user if, when trying to send an email, Outlook can not authenticate your account. Therefore, your message is rejected by the outgoing mail server. Thankfully, this issue is one that’s fairly simple to resolve, and there is a set of straight-forward means by which this can be done. This blog will not only present a step-by-step for the process, but will follow up with a more thorough, more detailed walkthrough, complete with annotated screenshots to assist you throughout the blog.
So, the way by which you can resolve the authentication issue within Outlook is to do so by editing the settings within the Control Panel. Like aforementioned, don’t worry if this isn’t enough detail for you to work with. Below is the step-by-step guide of the process, and following that will be the more detailed breakdown.
Step by step: How to fix the Outlook 0x800ccc0e Error via control panel
- Access your Control Panel by searching for it in your windows search bar.
- Click ‘Programs’.
- From there, click ‘Programs and Features’.
- Find the option that says ‘Microsoft 365’. Click it.
- After clicking this, click ‘Change’, an option that will appear at the top of the menu.
- On the following window, click ‘Repair’.
- Choose whether you want to do a quick, or lengthier, repair and follow the steps.
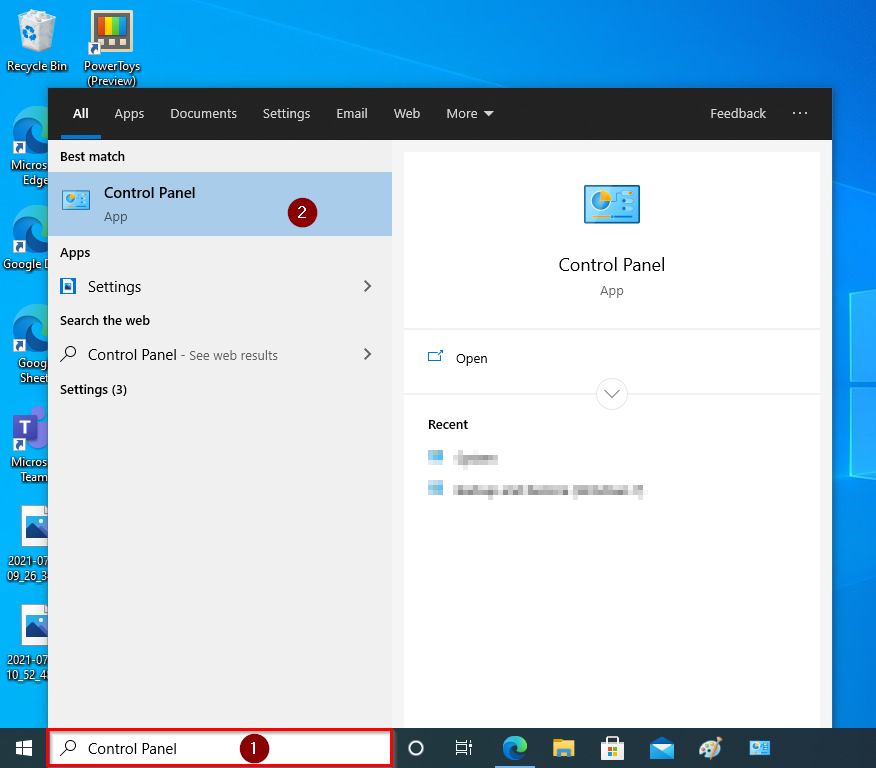
So, your first step in this process is to access your computer’s control panel. Whilst you can navigate your menus and search for this manually, it would be much quicker for you to simply search for it in the search bar of your computer. By this, we mean the bar located next to your Windows icon at the bottom of your screen, that by default reads, ‘Type here to search’.
After searching for ‘Control Panel’ here, it should be the top option that you are presented with. In the below screenshot, the red rectangle annotated at the number 1, is where you search for the Control Panel. The number 2 is what you should click to advance to the next stage of this walkthrough.
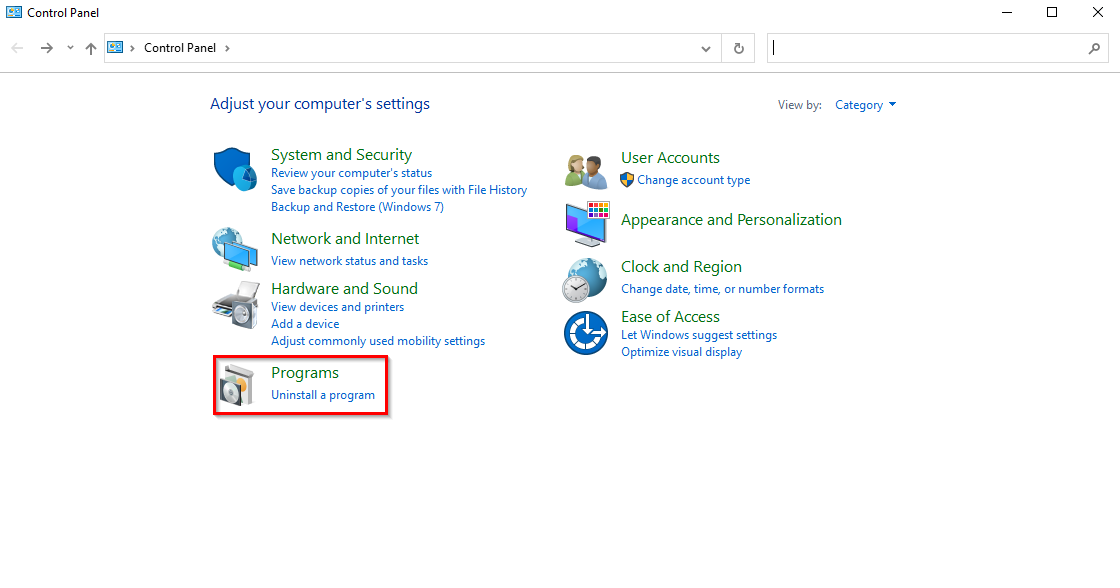
After opening your Control Panel, you will be greeted with a menu that will provide you with an array of options. From here, you will want to select the heading titled ‘Programs’, which has been highlighted in the below screenshot. It is important to note that you simply want to click ‘Programs’, the heading, here, not the option below the initial title.
Clicking Programs will, once more, bring you to a new menu. From here, you will want to seek out the heading titled, ‘Programs and Features‘.
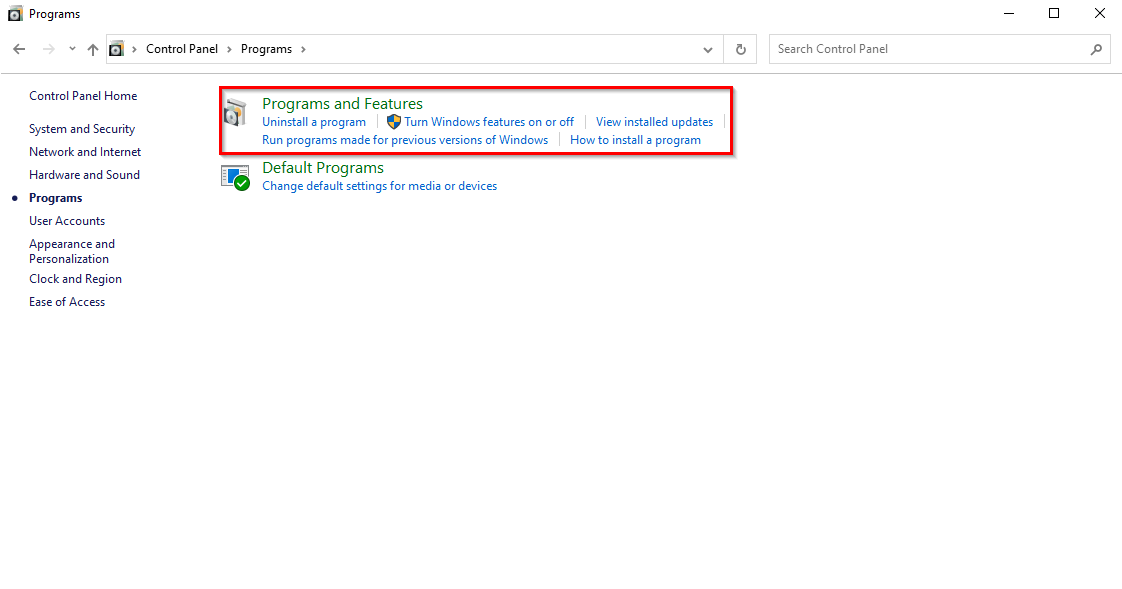
Once more, it is important to note that you only need to click the green heading, not any of the below options. Clicking the heading will take you to the full menu of options, where you can browse everything available to you, as opposed to clicking one of the blue underheadings, which will take you only to a specific section of options.
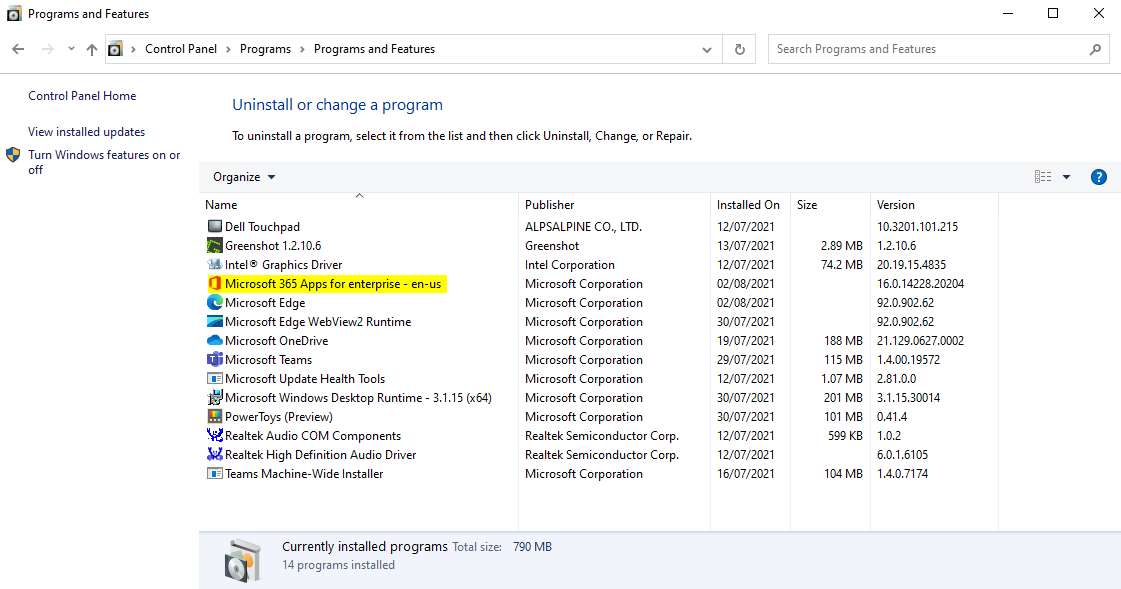
Clicking this will present you with a new menu, from which you will be able to scan for and resolve any issues you may be having with your Outlook application. After opening the menu, you will be presented with a list of your applications that you can uninstall or otherwise change.
From here, you will want to find the ‘Microsoft 365’ application option, which should resemble the highlighted text in the screenshot below.
After highlighting the Microsoft 365 application by clicking on it once, a small sub-menu will present itself at the top of your screen. Of all the new options offered to you, you should look to click ‘Change’, the last of your new options. It has been emphasised below by the red rectangle.
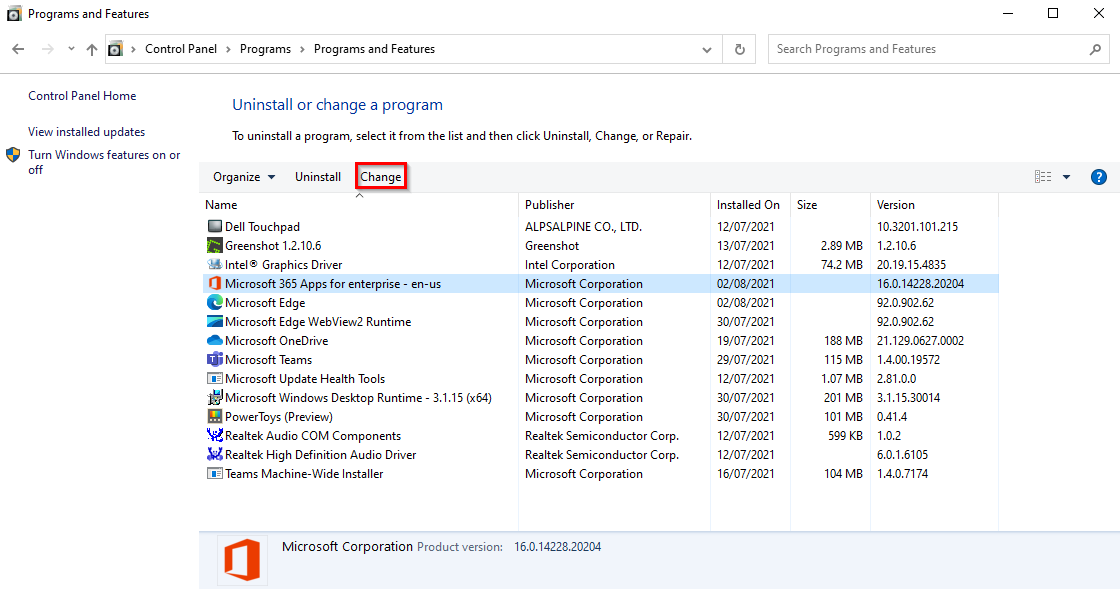
Clicking ‘Change’ is the first step to fixing your Outlook error. You may be asked if you wish for changes to be made to your device if this is your first venture into editing programs. Allow this permission, and then you will be shown a new menu, asking if you would prefer a ‘Quick’ or ‘Online’ repair.
A quick repair is, as the name would suggest, the quickest of the two options, and something that is doable without access to the internet, which may better befit some users depending when and where they are completing this process.
The online repair, whilst longer, is a more thorough process in which any potential anomalies are further analysed, resulting in a greater yield of repair and presumably ensuring your device is far more secure from falling foul to the same issue in the near future.
Once you have decided which process you wish to follow, make sure you have selected the appropriate option, and continue with the process by clicking ‘Repair’.
After clicking this, simply follow through with the presented steps within the set-up wizard of the repair. Once this is completed, your issue should be resolved. Of course, it’s always worth checking in Outlook. Regardless, you should have now successfully solved your ‘0x800ccc0e’ error in Microsoft Outlook!
Thank you for taking the time to read this blog, I hope you found it as helpful as you wanted it to be! As always, if you run into any issues at all with the process, or simply wish to let us know how you found the walkthrough, then please do not hesitate to get into contact with a member of our team.