Neither Microsoft Teams nor macOS will always prompt you to share your camera, microphone, or screen. That means Teams won’t be able to use the camera or microphone, and they won’t be able to share their screen. If you don’t have these rights, your Mac may show a spinning wheel in Teams and won’t load the necessary functionality. You may grant access to Teams by following the steps below.
Below is the process on how to grant Teams access to various different functions within Microsoft Teams, follow through for more information on how you can achieve this.
- Give Teams access to the Microphone in Mac
- Grant camera access to Microsoft Teams for Mac
- How to grant screen recording access for Teams on Mac
Follow through for more information below on how to give access to the features mentioned above.
Give Teams access to the Microphone in Mac
The mic is the essential part of a communication setup, you require its assistance to both communicate to the audience and relay a message across. You will need to give access to the microphone if you want to communicate with an audience. Follow through for more information on how you can achieve this.
- Firstly, select “System Preferences” from the app drawer.
- Select “Security & Privacy” from the option.
- Select “Privacy” from the menu bar at the top.
- To make changes, click the “padlock icon” in the lower-left corner of the window.
- Enter the administrator login and password for your Mac.
- Select the microphone option.
- Now select the Teams option.
Once the settings have been approved, you will have now successfully granted Teams access to the microphone. Teams requires access to the microphone natively if you have privacy enabled so if you see Teams not getting access despite clearly giving access in Teams, don’t worry — you may have simply overlooked the fact that privacy is enabled and Teams has simply not been granted access to the microphone from your main privacy page.
In-depth guide [with screenshots] – Give Teams access to the Microphone in Mac
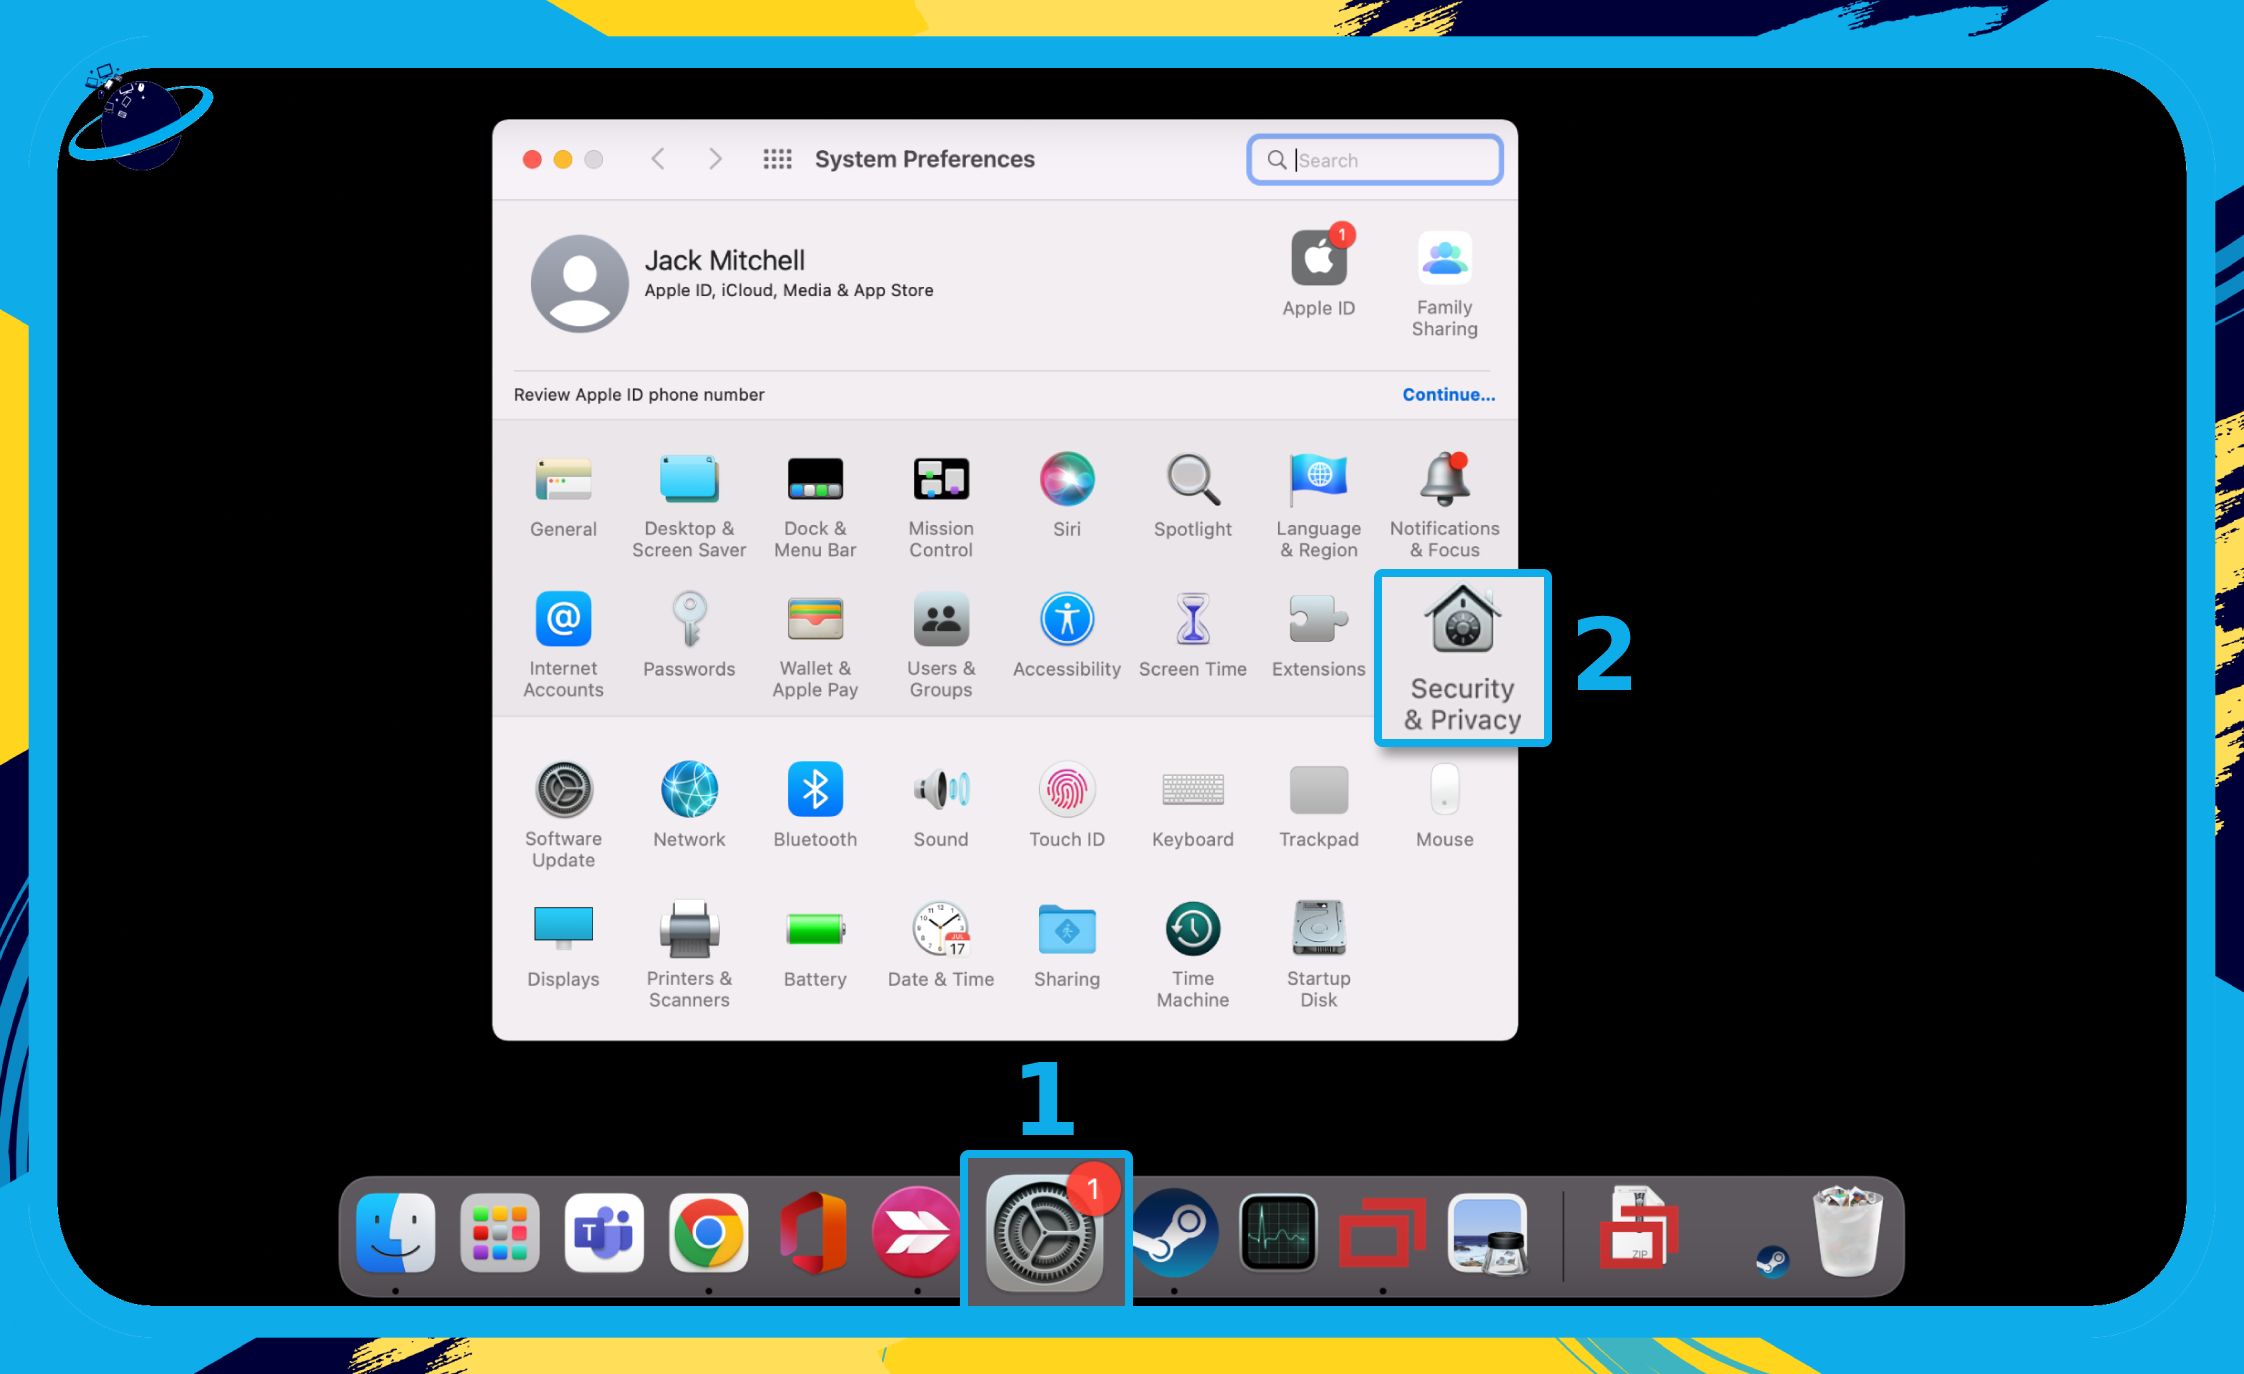
- Firstly, select “System Preferences” from the dock or launcher. (1)
- Then select “Security & Privacy.” (2)
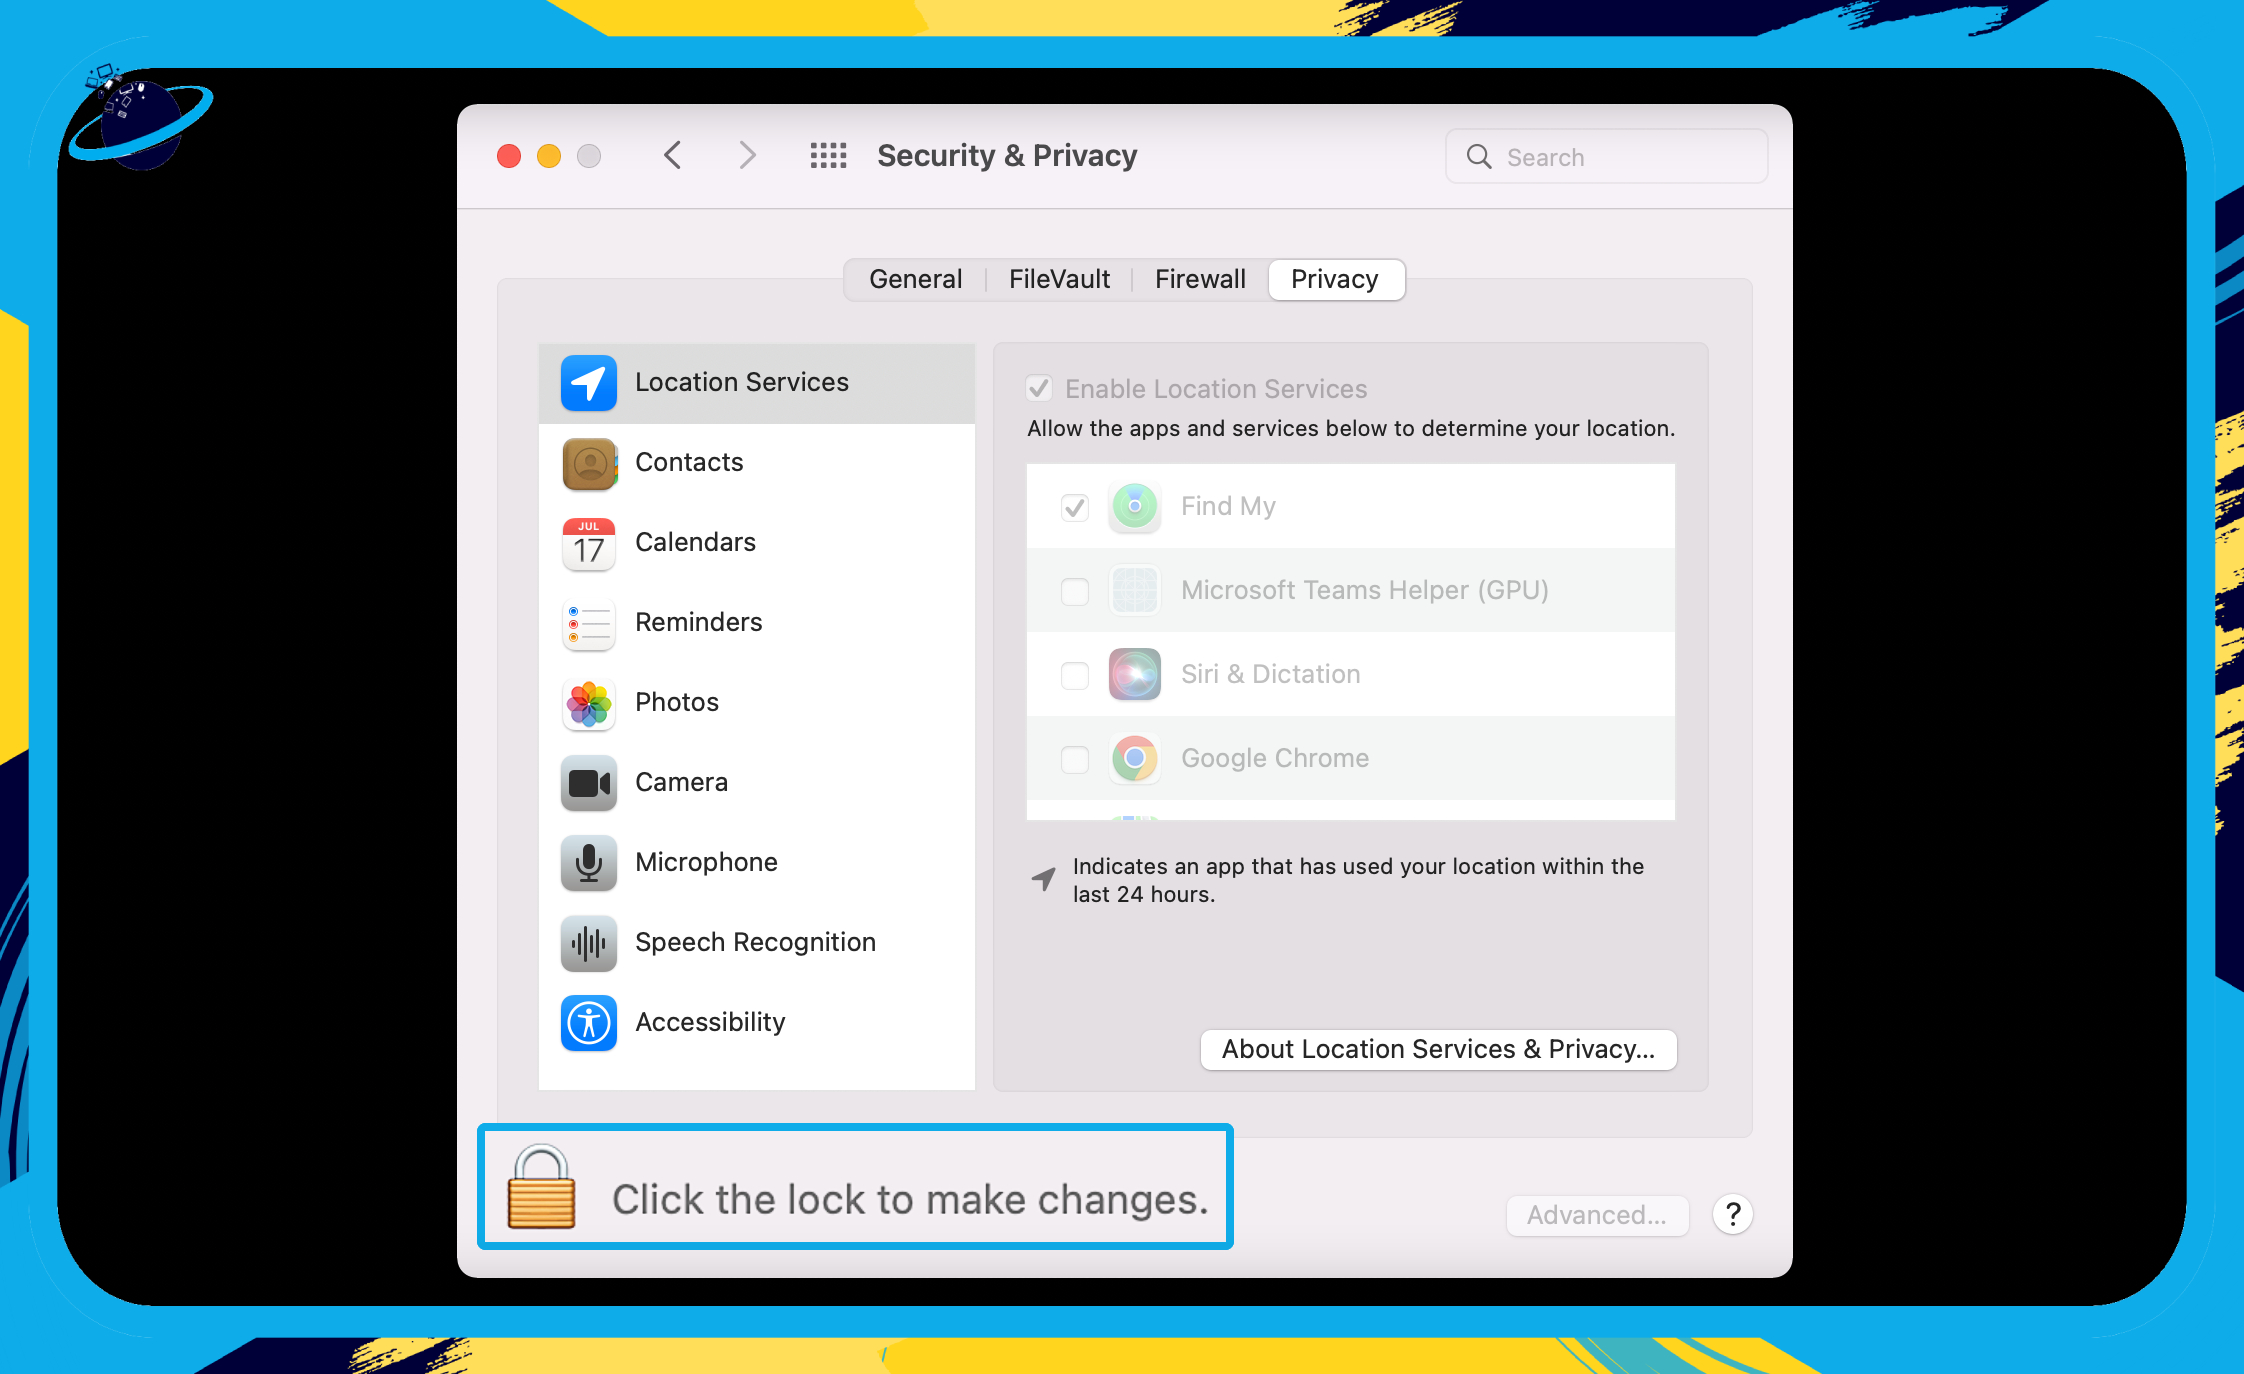
- Click the padlock icon in the bottom-left corner of the dialog box.
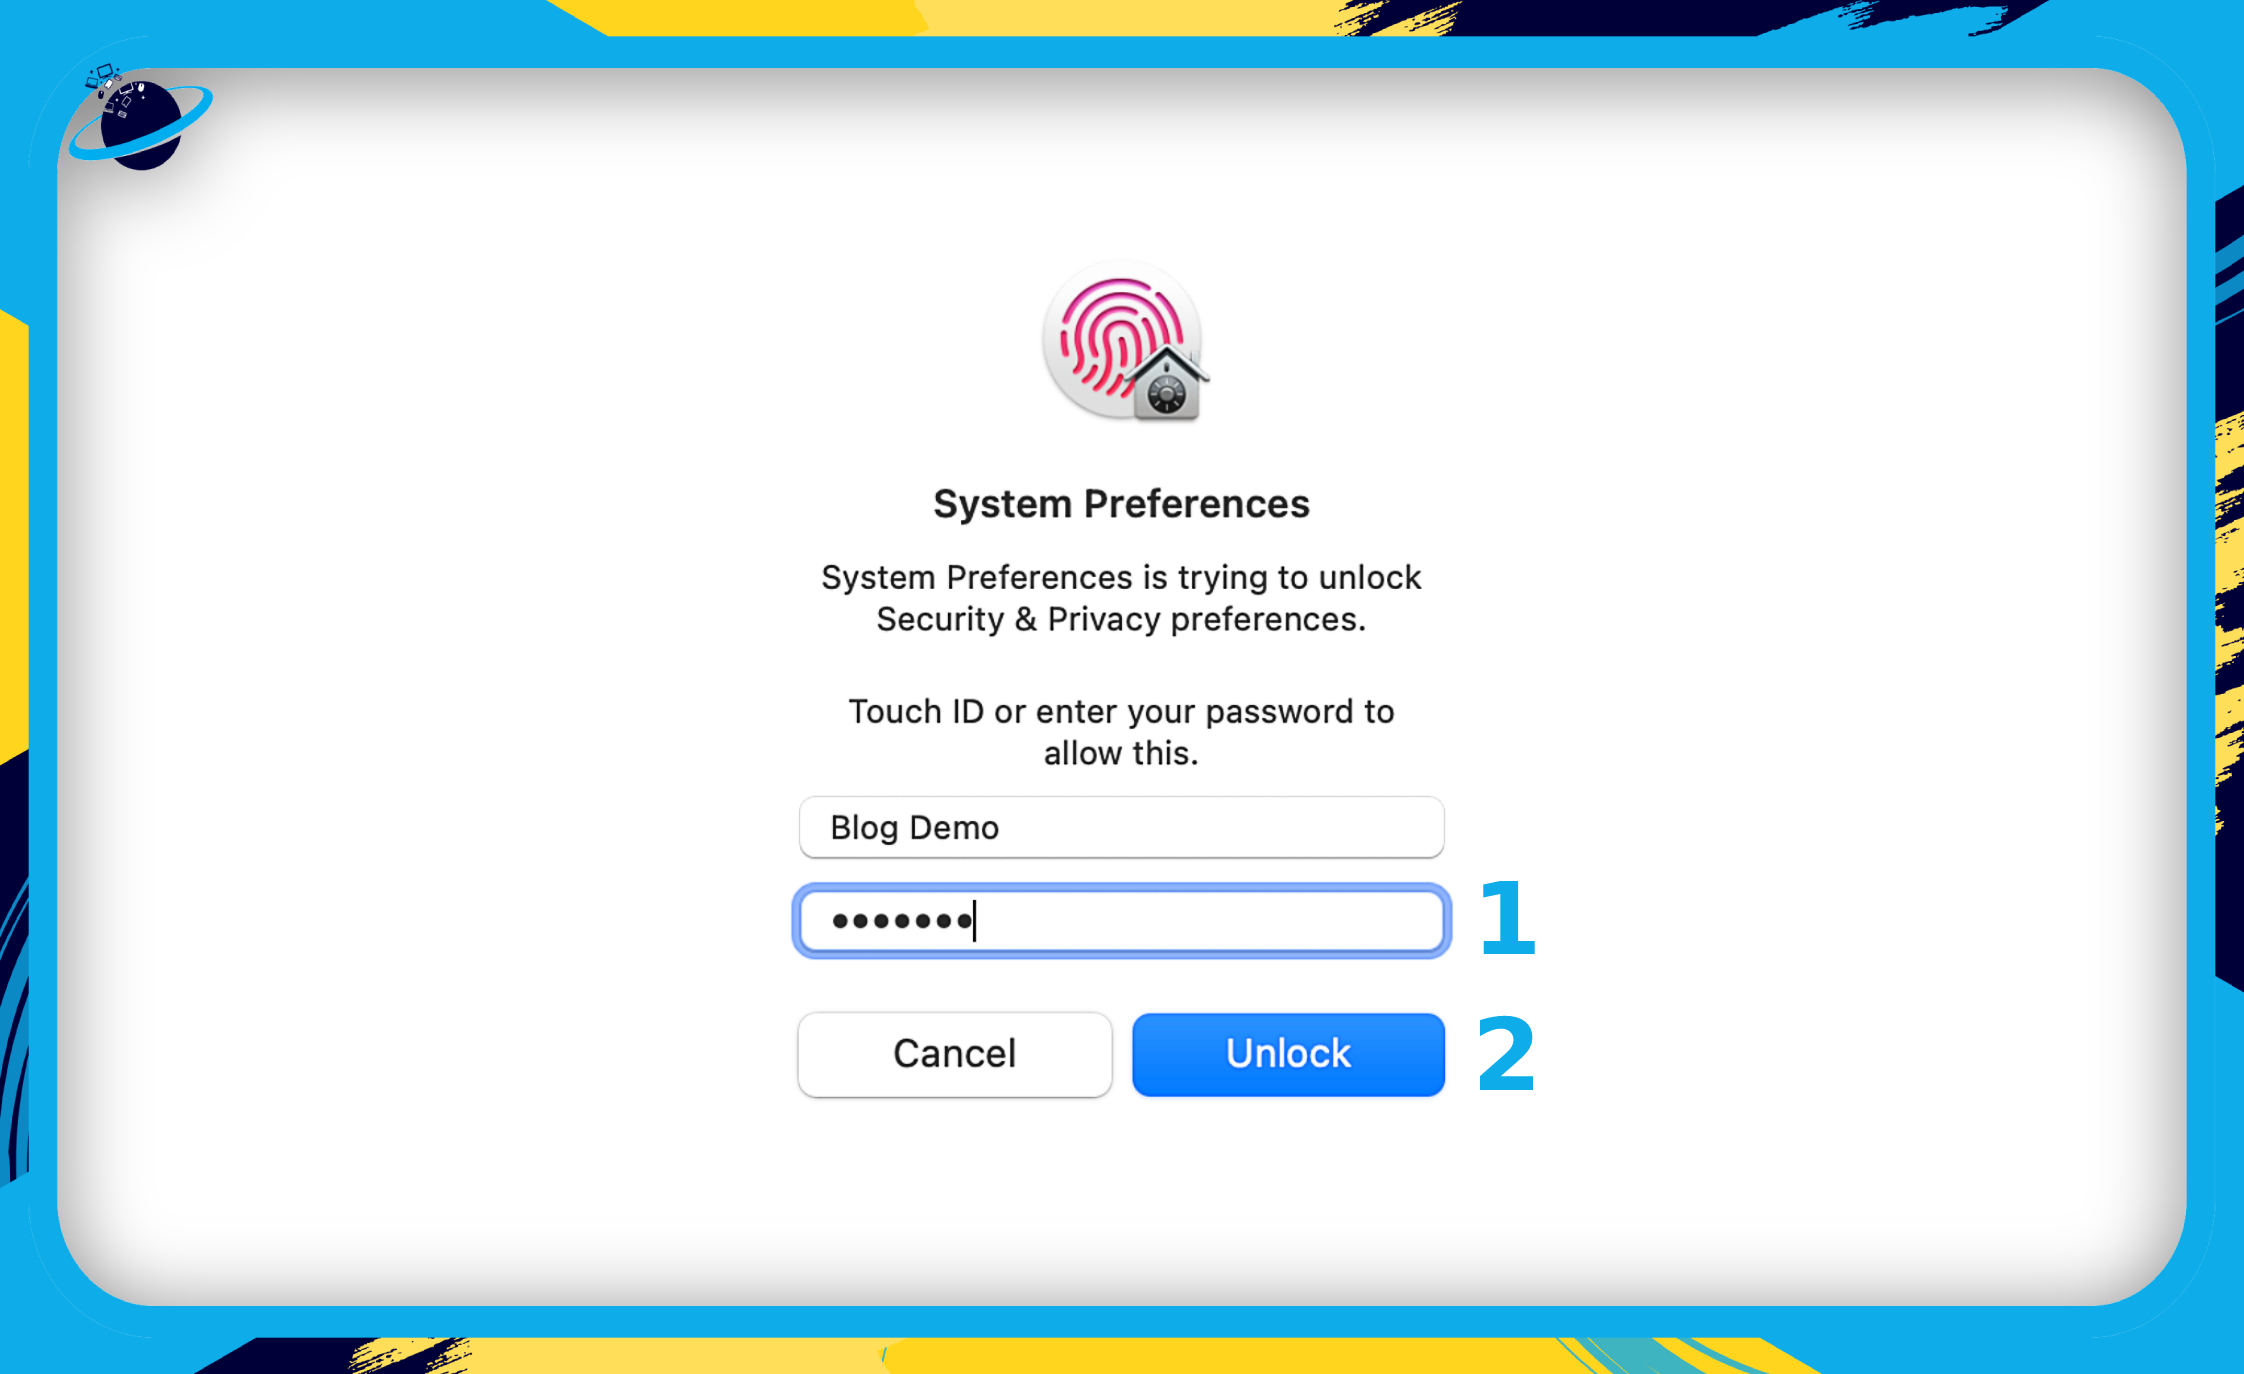
- Enter the administrator password for your device. (1)
- Then click the “Unlock” button. (2)
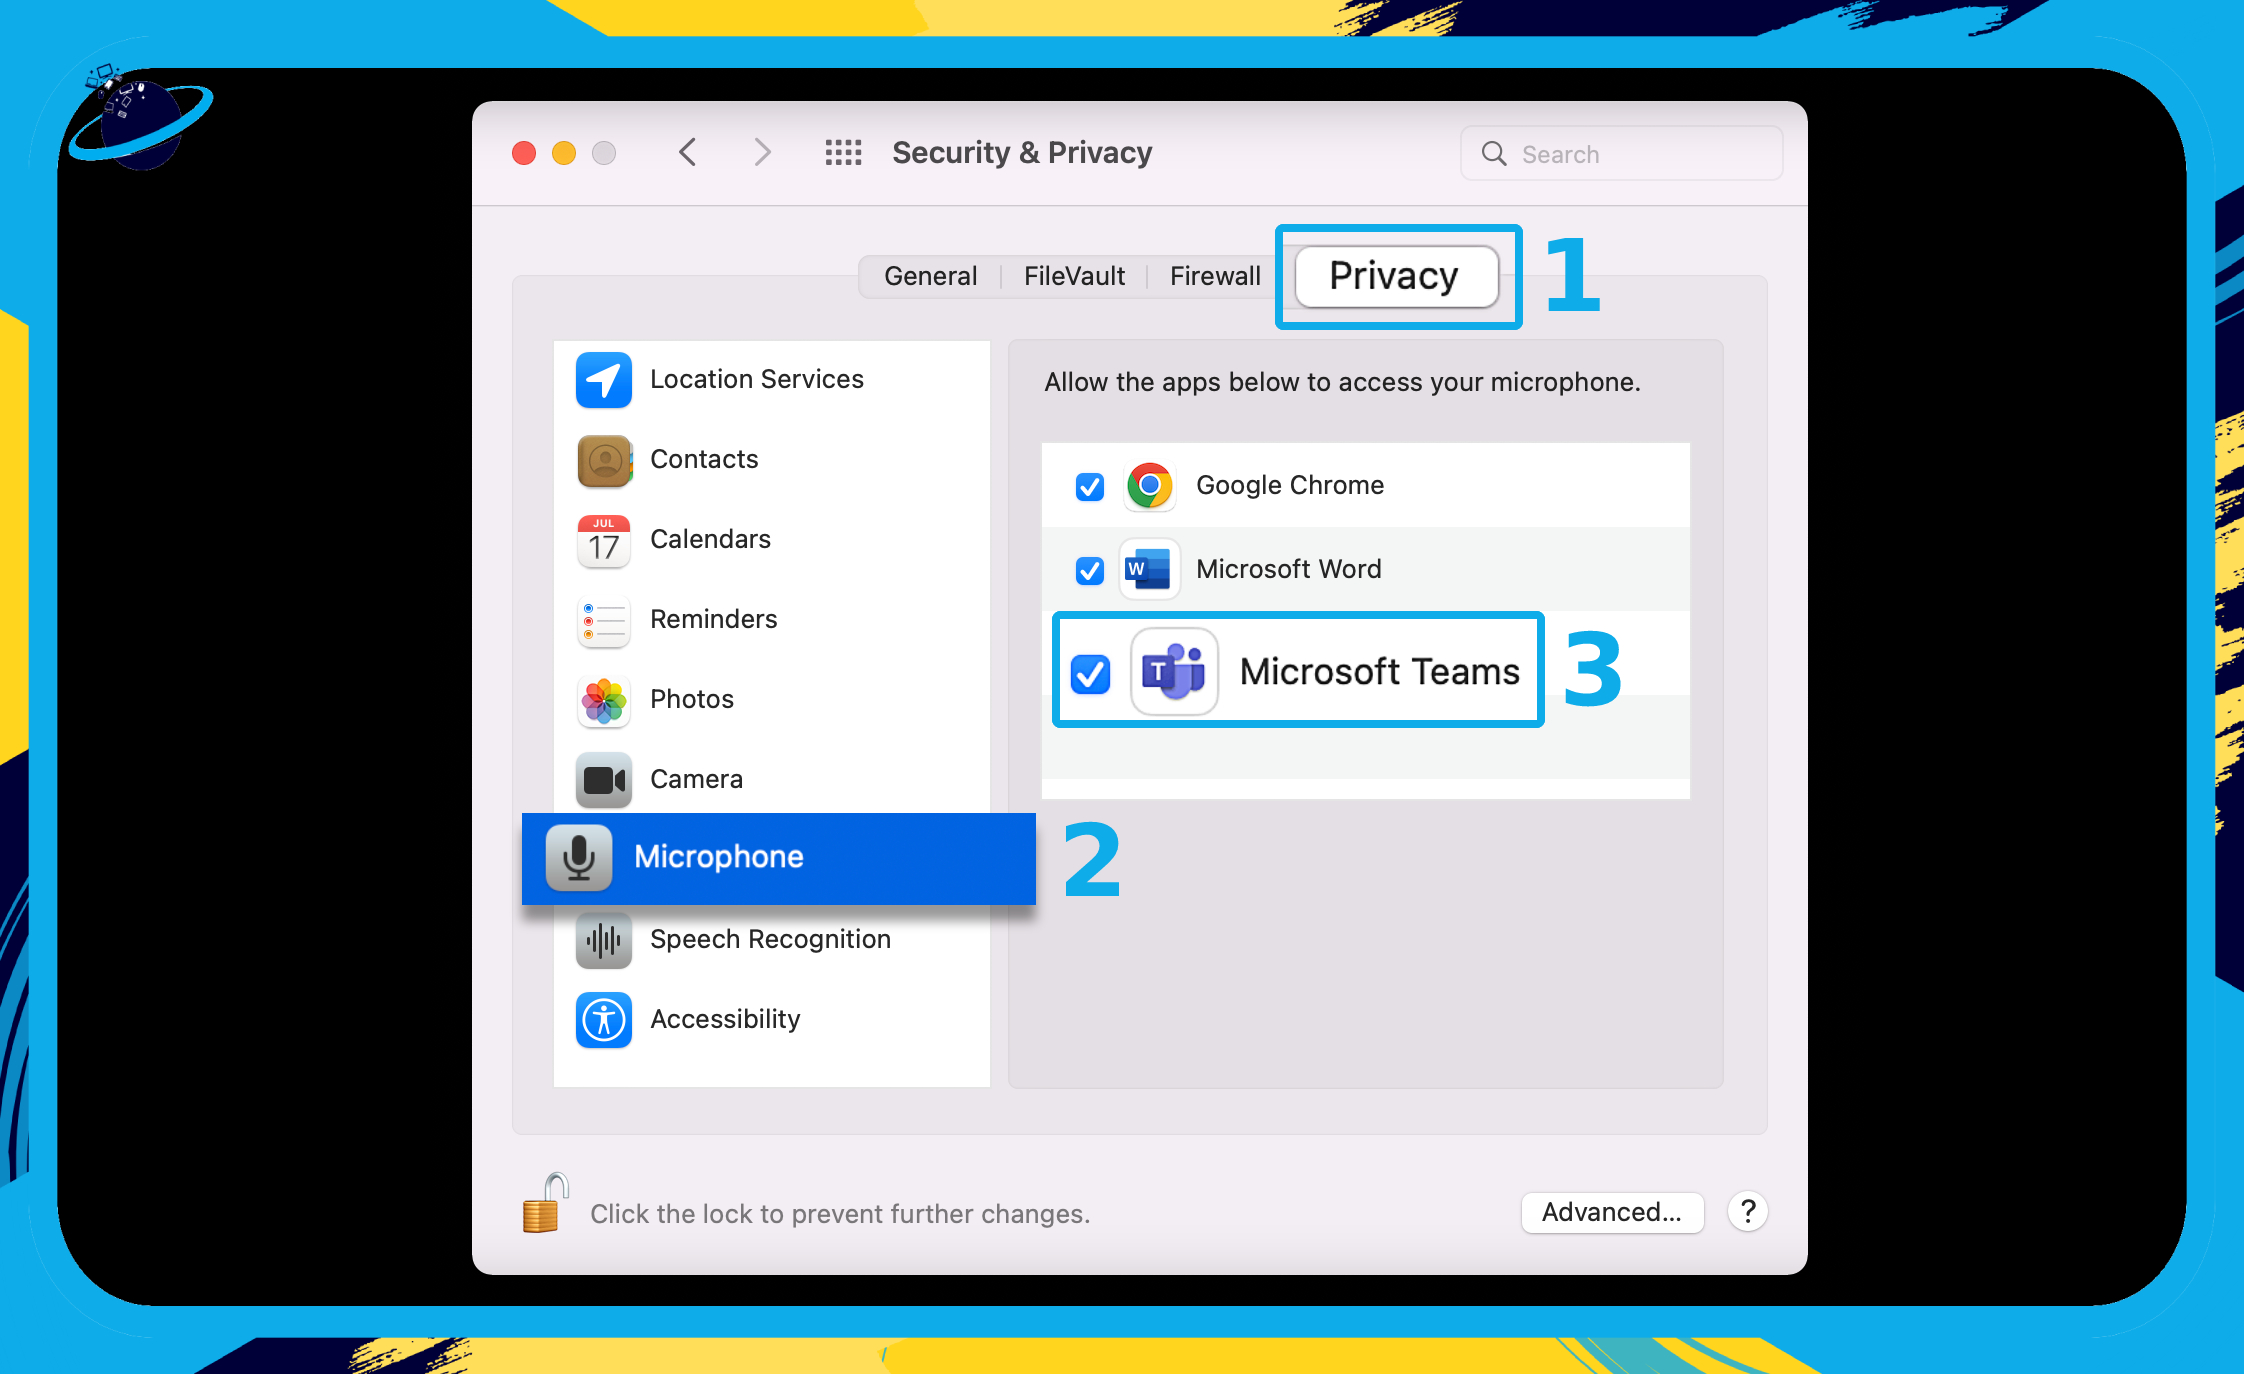
- Go to the “Privacy” tab at the top. (1)
- Click on “Microphone” in the left menu. (2)
- Then check the box next to “Microsoft Teams.” (3)
You will have successfully granted Teams access to the microphone once the settings have been approved. Teams require access to the microphone natively if you have privacy enabled, so if Teams isn’t getting access despite clearly giving access in Teams, don’t worry. You may have simply overlooked the fact that privacy is enabled and Teams hasn’t been granted access to the microphone from your main privacy page.

Grant camera access to Microsoft Teams for Mac
Along with the microphone, the camera is an important component of any communication setup; if you need it to visually connect with the audience as well as deliver a message you’ll most likely want Teams to access your webcam. If you wish to visually connect with an audience, you’ll need to allow the camera access. Continue reading to learn more about how you may accomplish this.
- Firstly, select “System Preferences” from the app drawer.
- Select “Security & Privacy” from the option.
- Select “Privacy” from the menu bar at the top.
- To make changes, click the “padlock icon” in the lower-left corner of the window.
- Enter the administrator login and password for your Mac.
- Select the Camera option.
- Now select the Teams option.
Once the settings have been accepted, you will have successfully provided Teams access to the camera. If you have privacy enabled, Teams need native access to the camera, thus don’t be concerned if Teams isn’t receiving access despite explicitly granting it in Teams. It’s possible that you just missed the fact that privacy is on and Teams hasn’t been allowed access to the camera from your main privacy page.
In-depth guide [with screenshots] – Grant camera access to Microsoft Teams for Mac
- Firstly, select “System Preferences” from the dock or launcher. (1)
- Then select “Security & Privacy.” (2)
- Click the padlock icon in the bottom-left corner of the dialog box.
- Enter the administrator password for your device. (1)
- Then click the “Unlock” button. (2)
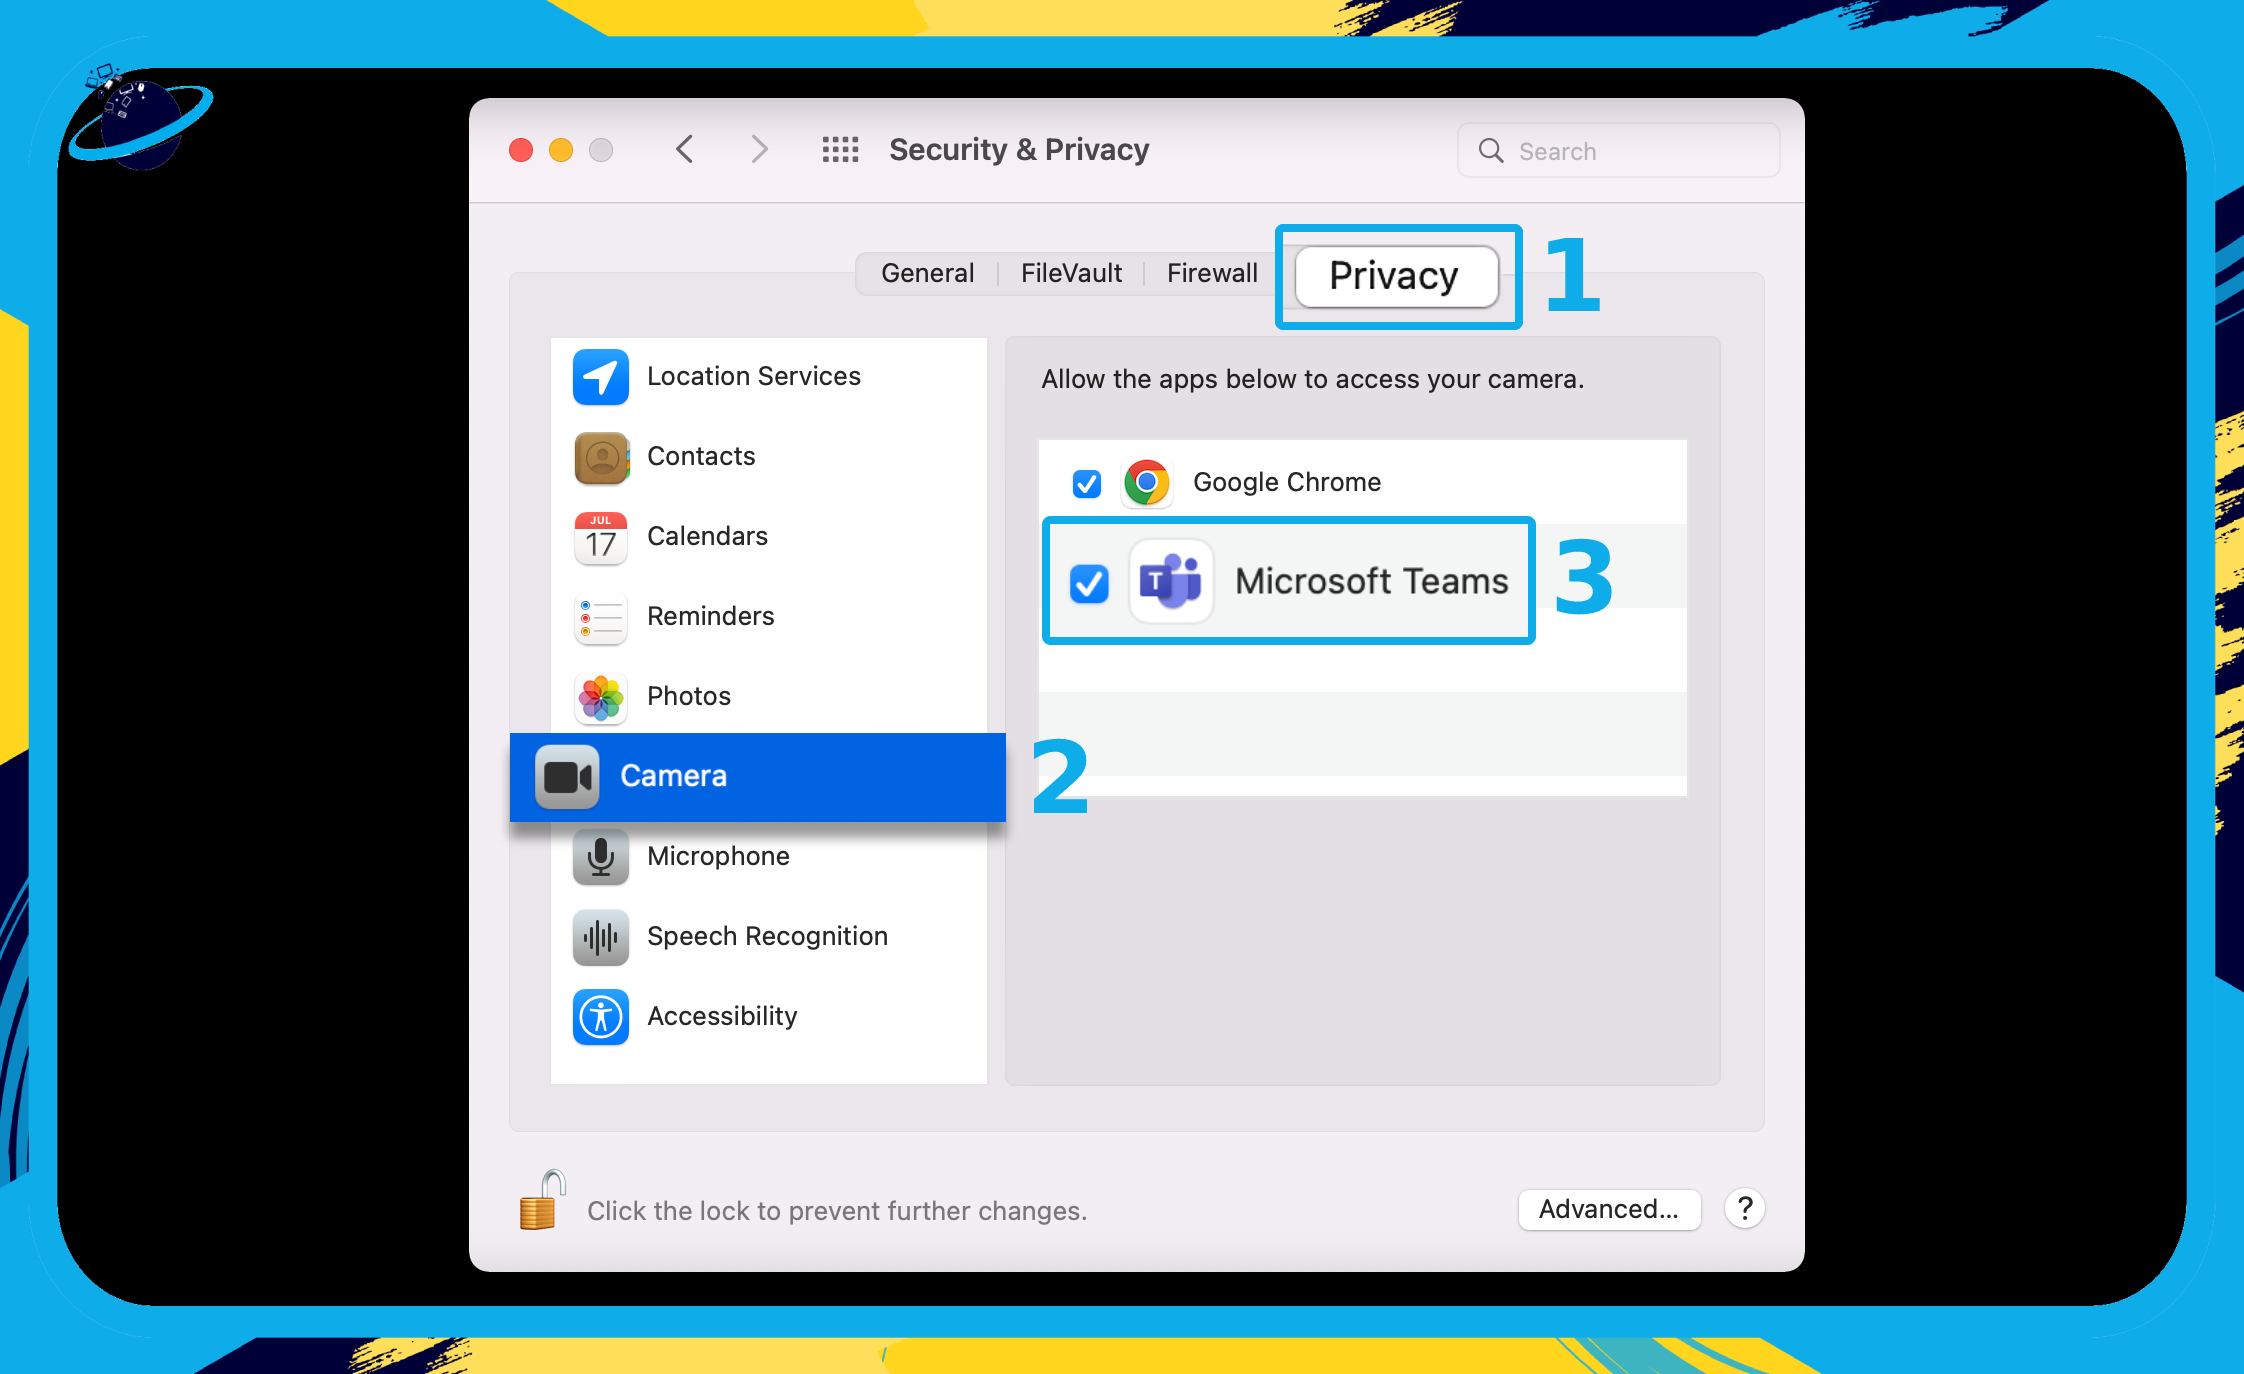
- Go to the “Privacy” tab at the top. (1)
- Click on “Camera” in the left menu. (2)
- Then check the box next to “Microsoft Teams.” (3)
After accepting the settings, you will have successfully granted Teams access to the camera. If you have privacy enabled, Teams need native access to the camera; therefore, don’t be alarmed if Teams isn’t receiving access despite expressly providing it in Teams. It’s likely that you just overlooked the fact that privacy is enabled and Teams has not been granted access to the camera from your main privacy page.
How to grant screen recording access for Teams on Mac
The third necessary component in a communication setup is accessible to screen recording; you will need it to convey media-based material such as a video. It is useful for presentations because, in many cases, visual communication may convey a message more effectively than verbal communication. If you wish to communicate with an audience, you will need to grant access to the screen recording in the same way that the previous two essential accesses were granted. Continue reading for more details on how to accomplish this.
In-depth guide [with screenshots] – How to grant screen recording access for Teams on Mac
- Firstly, select “System Preferences” from the dock or launcher. (1)
- Then select “Security & Privacy.” (2)
- Click the padlock icon in the bottom-left corner of the dialog box.
- Enter the administrator password for your device. (1)
- Then click the “Unlock” button. (2)
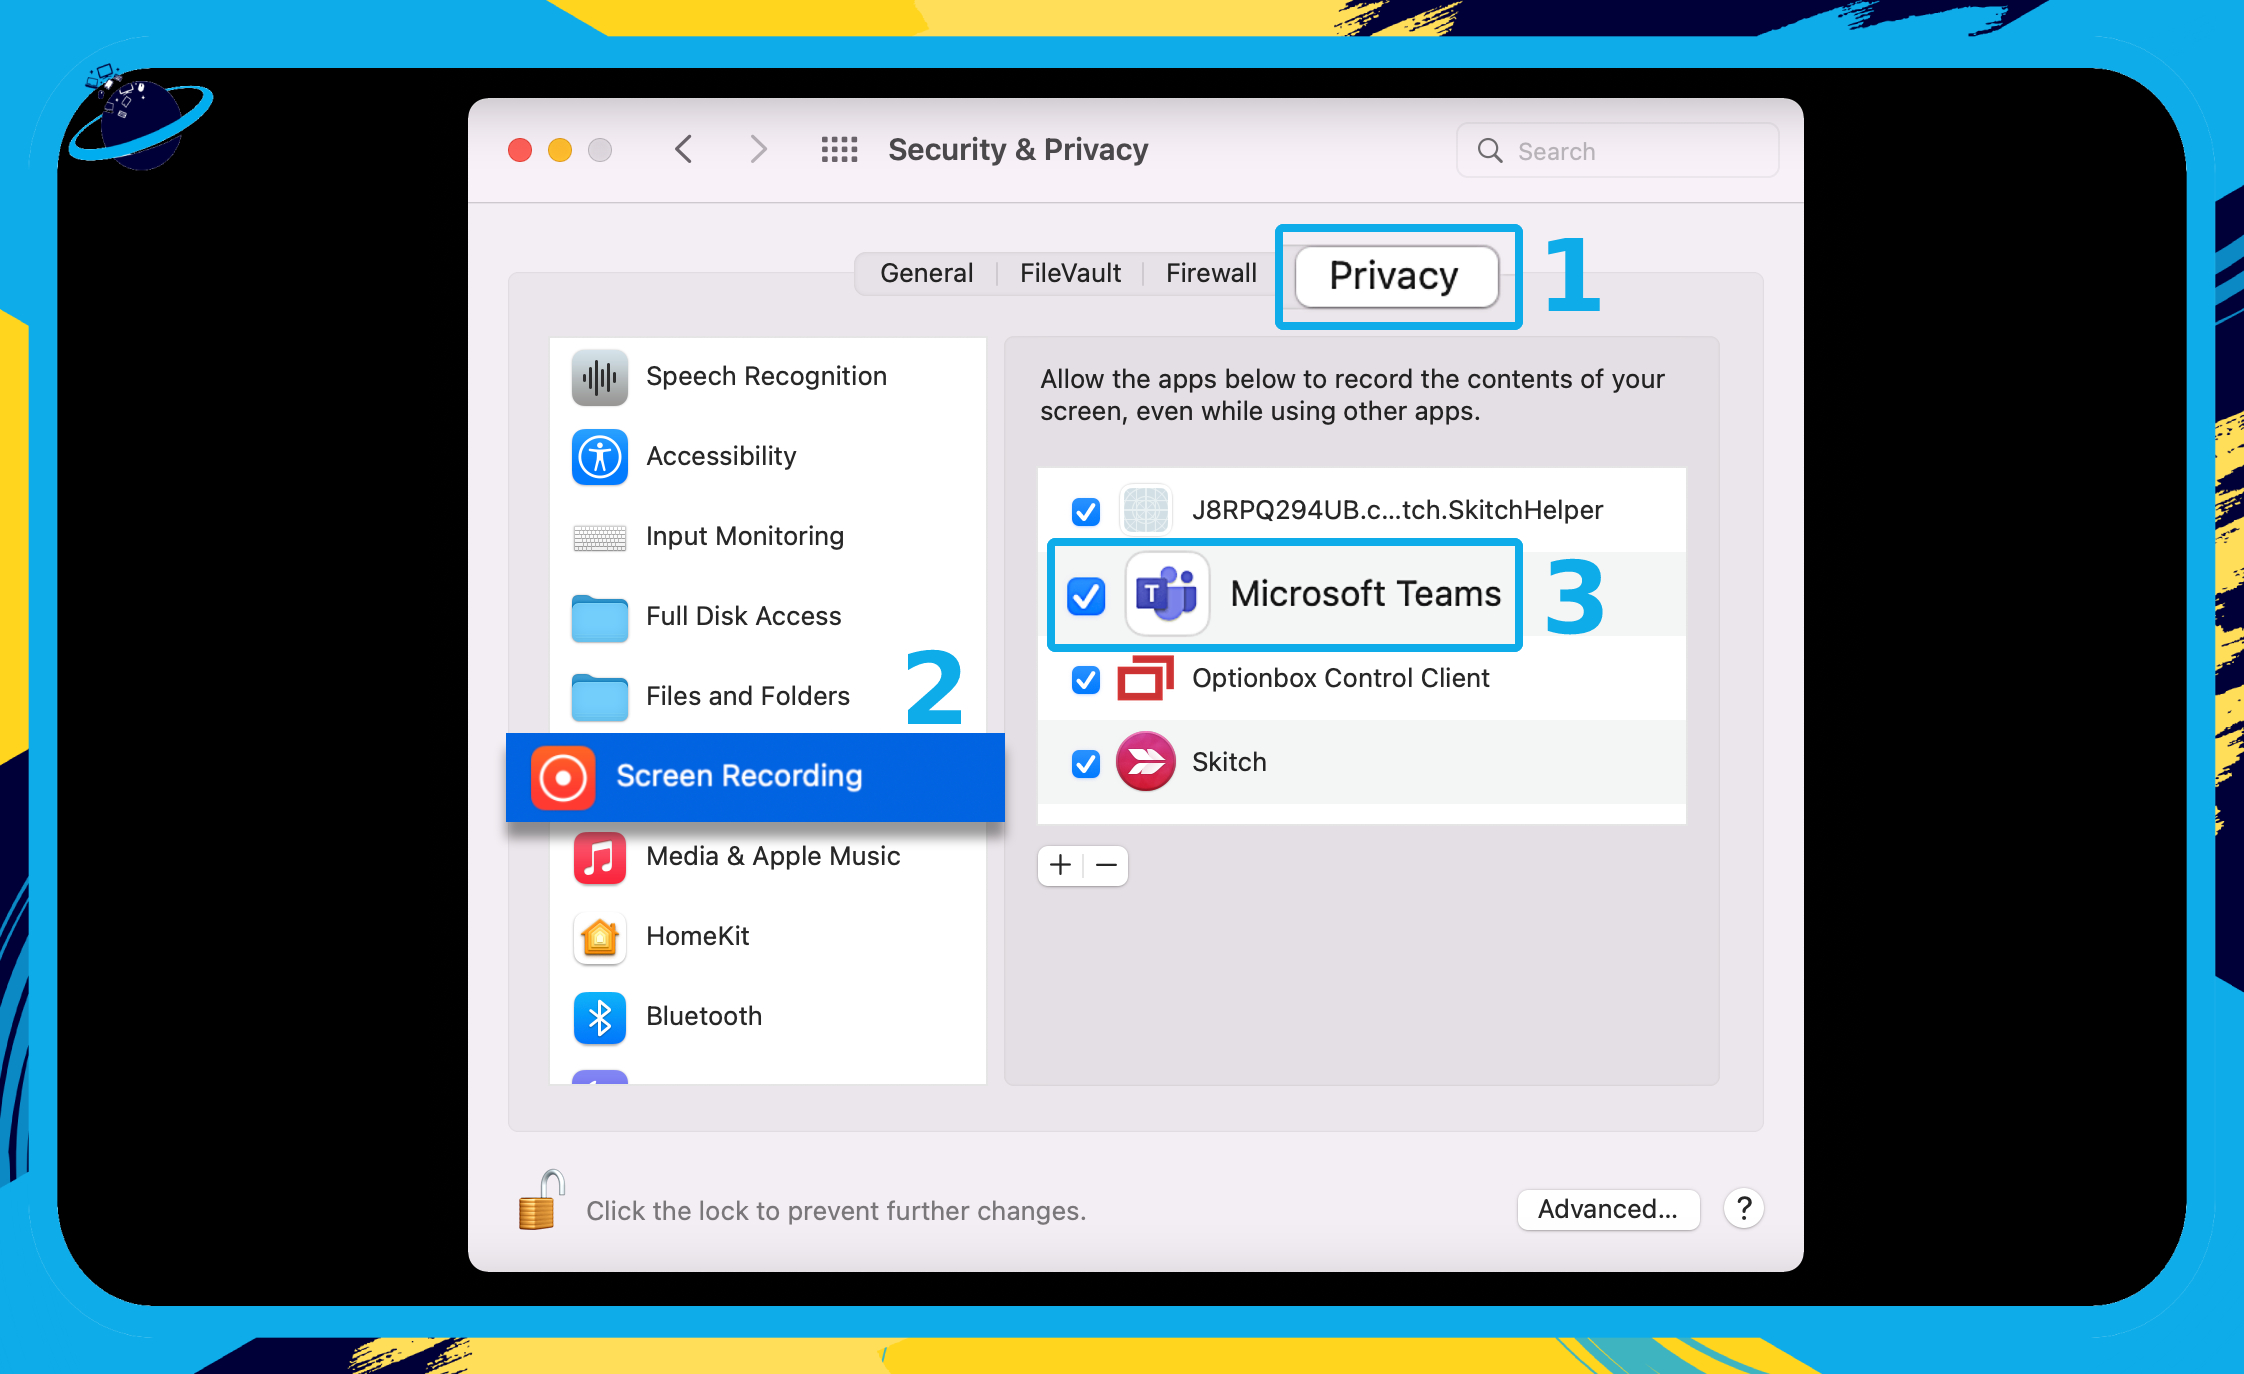
- Go to the “Privacy” tab at the top. (1)
- Scroll down the left menu and click on “Screen Recording.” (2)
- Then check the box next to “Microsoft Teams.” (3)
That concludes this Blog; thank you for taking the time to read our material; please email our Teams to let us know how it went if you followed the instructions or if you have any further questions regarding the topics covered in this Blog.