If you have data in an Excel spreadsheet or saved as a CSV, there may be times where you’d like to import your Excel file into a SharePoint list in order to keep all the elements of a certain project together in the same place. There are a number of ways this can be done depending on 1) if you’d like to import data from a CSV file into a new SharePoint list, 2) If you’d like to import data from a CSV file into an existing SharePoint list, and 3) if you have SharePoint Online Global Admin rights in order to install and use PowerShell PnP library. In this particular blog post, I will be demonstrating how you can import data from a CSV file into a new SharePoint list.
How to import data from a CSV file into a new SharePoint list:
- Highlight the data in your spreadsheet/ CSV file
- Click ‘Home’
- Click on ‘Format as a table’ and select any design of your choice
- In the next window, click ‘OK’
- Then, click in the search box and type ‘export’
- Click on ‘Export data’ and then select ‘Export table to SharePoint list’
- Go to your SharePoint site and copy the link
- Paste the link into ‘Address’
- Give the file a name
- Click ‘Next’
- In the next window, click ‘Finish,‘
- When the small window appears, click ‘OK’
- Open up your SharePoint site, your file should appear inside
Please note that this method only works if you are trying to create a new list from your Excel/ CSV file, not if you are trying to export it into an existing SharePoint list.
We’ve also created a video to help guide you through the process:
- Get Excel for just $6.99 per month from the Microsoft Store!
How to import data from a CSV file into a new SharePoint list (step-by-step)
In this guide, we’ll be using the desktop version of Excel to open and format the CSV file before exporting the data to a SharePoint list.
- Highlight the data in your spreadsheet/ CSV file
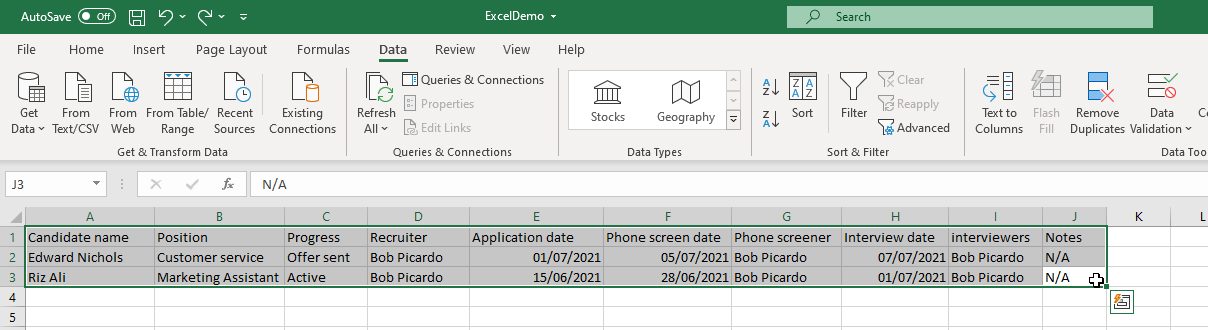
Open up the Excel/ CSV file you want to import into a new SharePoint list and highlight all the data you want to import. For the purpose of this demonstration, I have created an example CSV file called ‘ExcelDemo’
- Click ‘Home’

From the left hand side on the top panel, click on ‘Home’
- Click on ‘Format as a table’ and select any design of your choice

From the panel at the top, select ‘Format as a table’ and choose any design of your choice
- In the next window, click ‘OK’

When the small window appears asking where the data for your table is, click on ‘OK’ at the bottom.
- Then, click in the search box and type ‘export’

While that data in your table is still highlighted, search ‘export’ in the search box in the top panel
- Click on ‘Export data’ and then select ‘Export table to SharePoint list’

When the suggestions appear, Click on ‘Export data’ and then select ‘Export table to SharePoint list’ from the drop down list on the right.
- Go to your SharePoint site and copy the link

Sign into SharePoint if you haven’t already and enter the SharePoint site where you would like the Excel/ CSV file to be imported to. For the purpose of this demonstration, I will be using an example ‘Blog Demo’ site. Copy the link for your site.
- Paste the link into ‘Address’

- Give the file a name

I have named my file ‘exportdemo’ as an example, you may name your file whatever you like
- Click ‘Next’

At the bottom of the window, click on ‘Next’
- In the next window, click ‘Finish’

The next window explains how the column and the data will be displayed once your Excel/ CSV file is imported as a SharePoint list. If you are happy with this, click on ‘Finish’ at the bottom of the window.
- When the small window appears, click ‘OK’

Once this small window appears, it means that your file was successfully imported into your chosen SharePoint site as a new SharePoint list.
- Open up your SharePoint site, your file should appear inside

When you enter your SharePoint site, your exported file can now be found as a SharePoint list

File Uploader – Uploader for SharePoint
Bulk upload files to a SharePoint library or list items!

Error message when importing data from a CSV file into an existing SharePoint list
As mentioned previously, this method is specifically for importing an Excel or CSV file into a new SharePoint file. While doing the tutorial, I tried to copy and paste the link of an existing SharePoint list into the window instead of the link to the SharePoint site, to see if this would result in the data from the CSV file being imported into that existing Sharepoint list. However, this didn’t work and instead, the following error message was displayed on my screen.

If you would like to import the data from an Excel or CSV file into a SharePoint list that already exists, it appears that the way to do this is by having an active subscription to PowerShell and then installing and using the PnP library. It is important to note that in order to do this, you also need to have SharePoint Online Global Admin rights.
Thank you for reading! If you have any further questions about importing data from an Excel or CSV file into a SharePoint list, feel free to leave a comment below and we’ll be happy to help.
   |