If you want to sync a notebook between two different computers, you can achieve that by setting up a shared folder over a local network. This article will guide you through every step of that process and show you some excellent cloud alternatives for sharing your Notebooks.
How to sync Notebooks on different computers:
- Create a shared folder.
- Share the folder with everyone on the local network.
- Enable sharing on another computer on the local network.
- Access the shared folder through ‘Network’ in file explorer.
- Add or edit existing Notebooks in the folder, and the files will sync automatically.
Please continue reading our visual, step-by-step guide on everything you need to know about keeping different computers synced in OneNote.
Create a shared folder to keep computers in sync
The standard way of syncing a OneNote notebook is to upload it to OneDrive and share it with other people from there. However, if you want to share an offline copy on a local network, you must first create a shared folder.
Set up your private network
- Click on the
 Windows Start button and go to
  Settings.
 - Go to Network & Internet.

- Click on Status, then Properties.
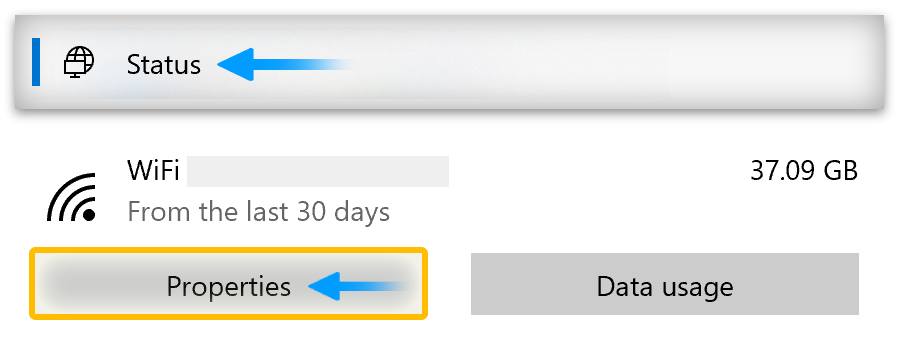
- Select Private under the Network Profile header.

- Go back to Network Status.
- You should now see Private network under the WiFi or Ethernet icon.

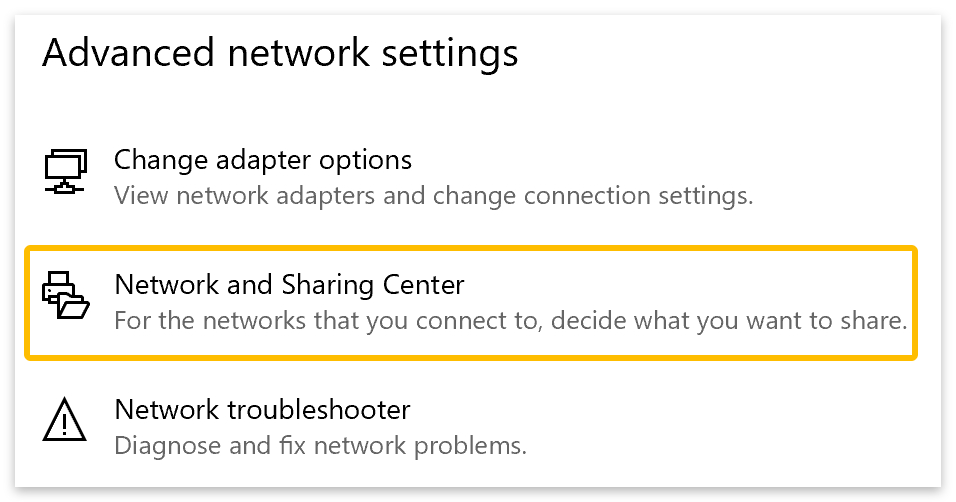
- Next, go to the Advanced Network Settings section and select Network and Sharing Center.
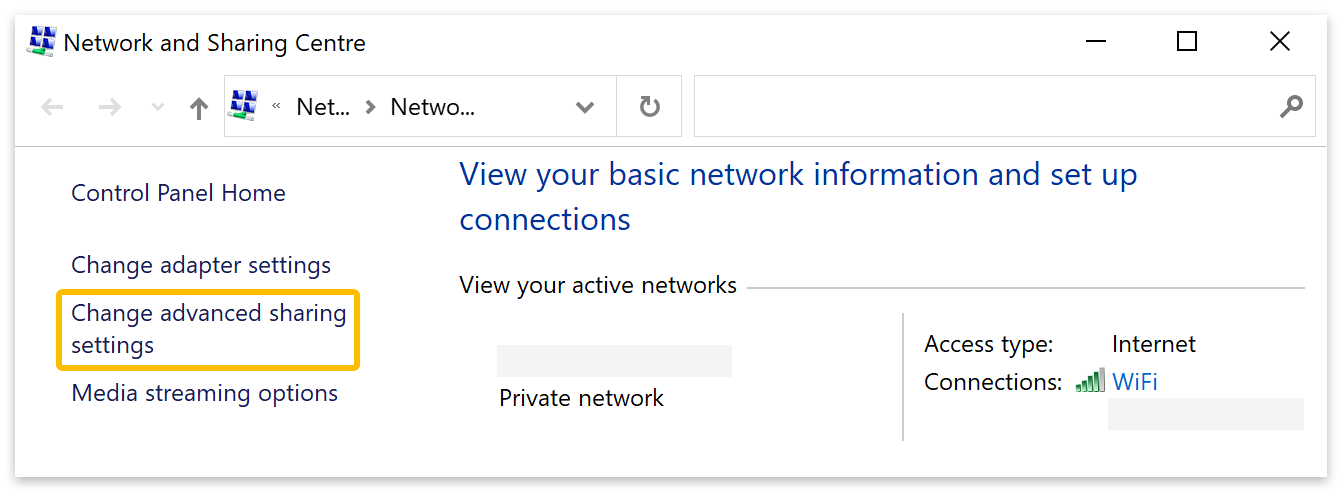
- Go to the left menu in the Network and Sharing Center.
- Click on Change advanced sharing settings.
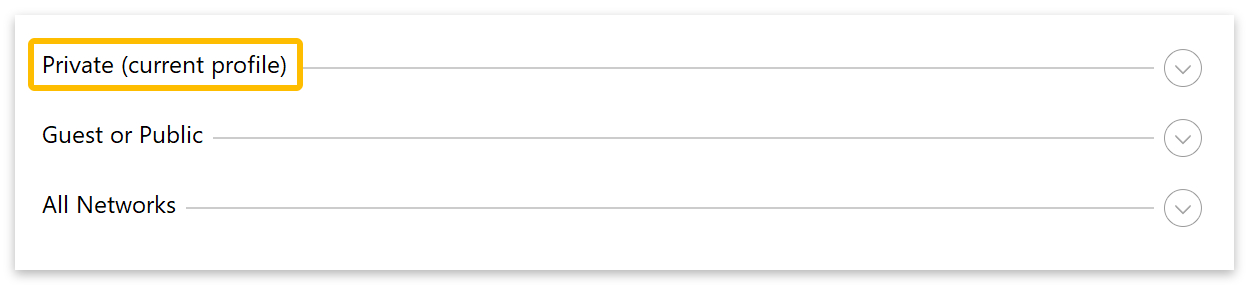
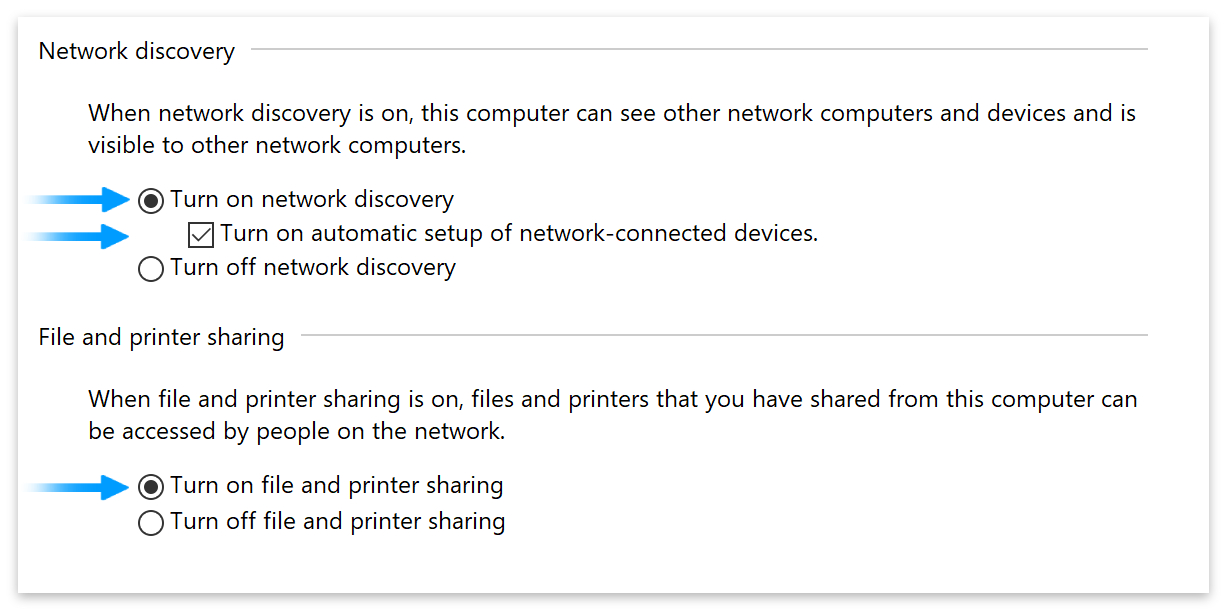
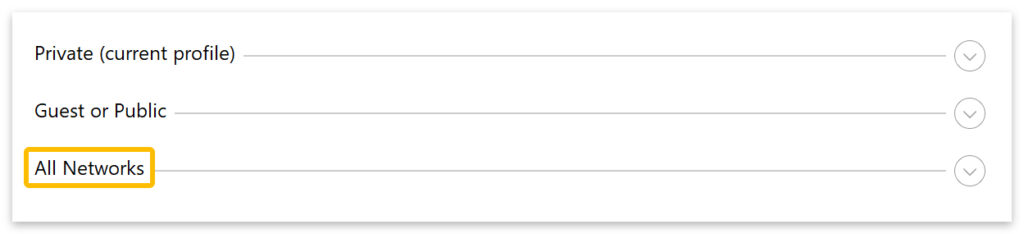
- First, expand the Private (current profile) section.
- Select Turn on network discovery.
- Check the box next to Turn on automatic setup of network-connected devices.
- Select Turn on file and printer sharing.
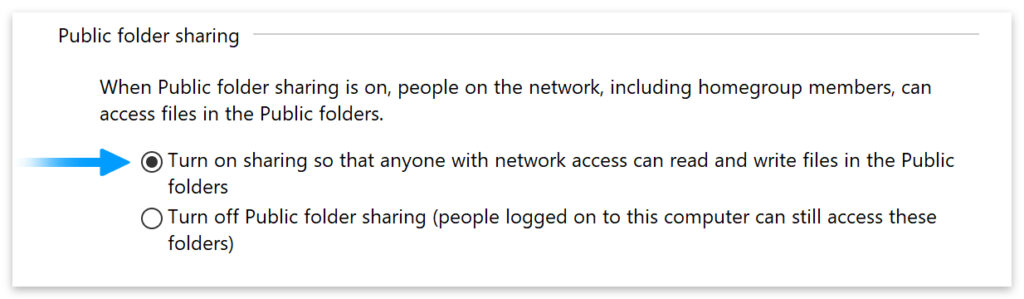
- Next, expand the All networks section.
- Select ‘Turn on sharing…‘ under Public folder sharing.
- Select Turn off password-protected sharing.
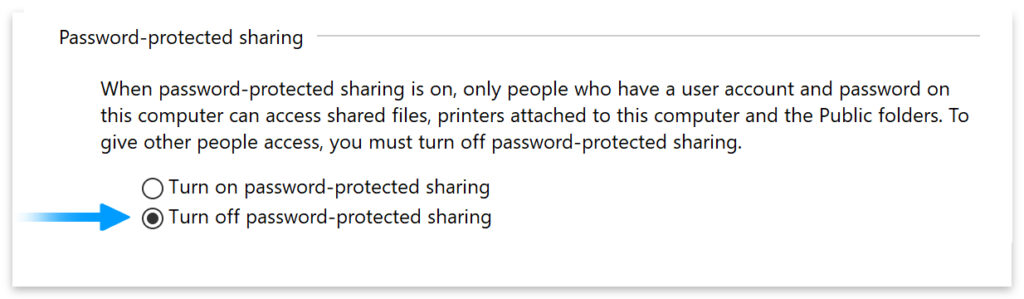
- Then click the Save changes button at the bottom of the window.

Select a folder for sharing
You can share any folder you like. However, if you have notebooks in OneDrive that you frequently open in your desktop app, you may want to consider sharing your OneNote Notebooks folder.
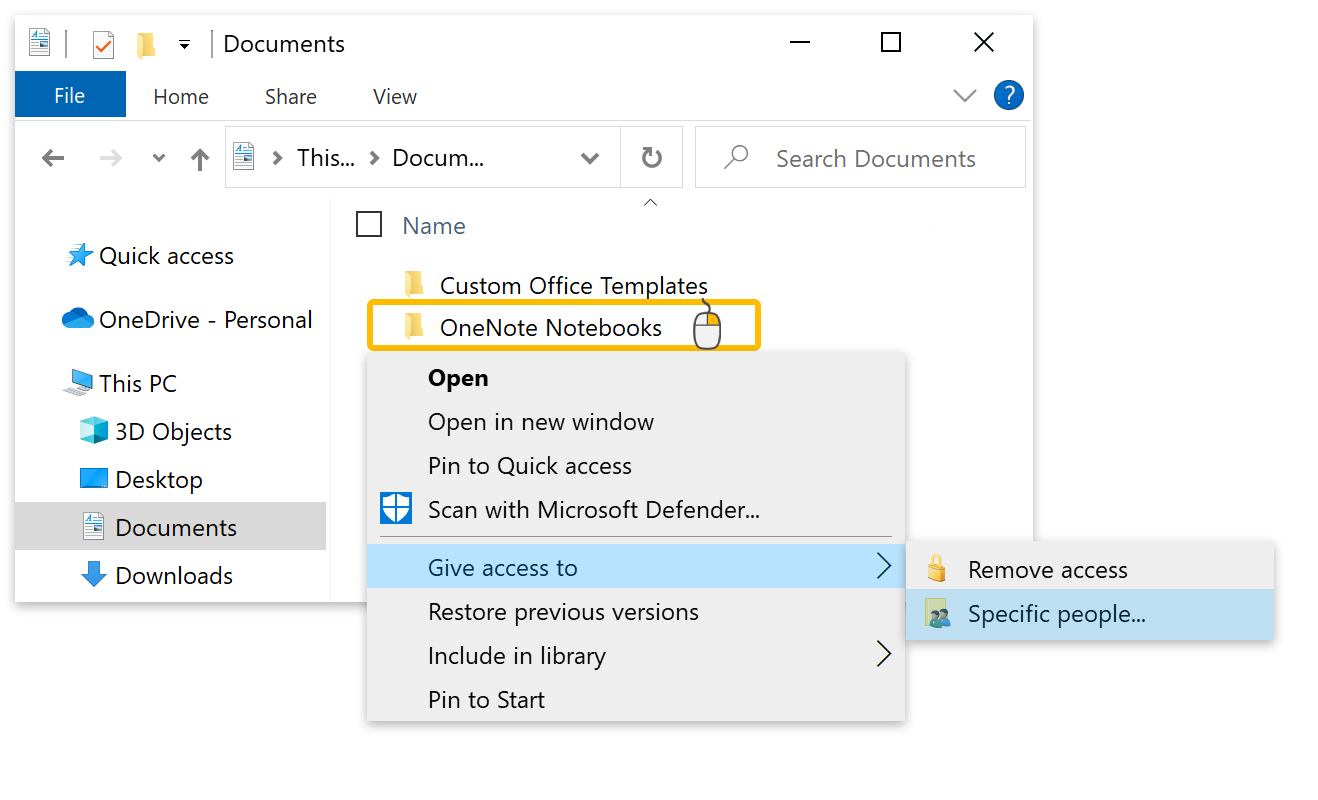
- Open file explorer and go to your Documents folder.
- Right-click on your Notebooks folder.
- Select Give access to from the dropdown menu.
- Then click Specific people.
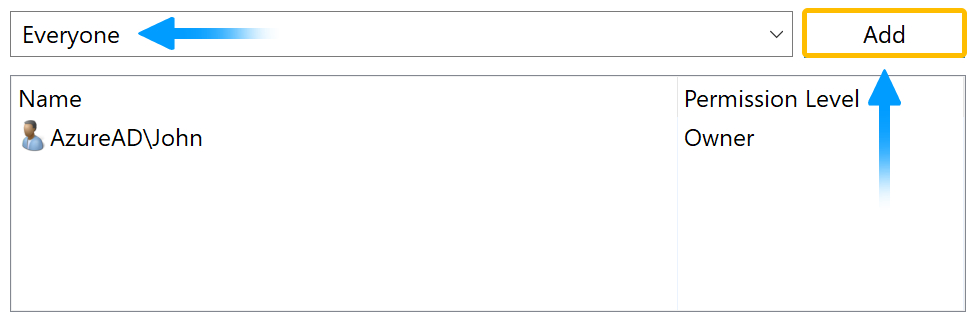
- Click the select bar and choose Everyone from the dropdown list.
- Then click the Add button.
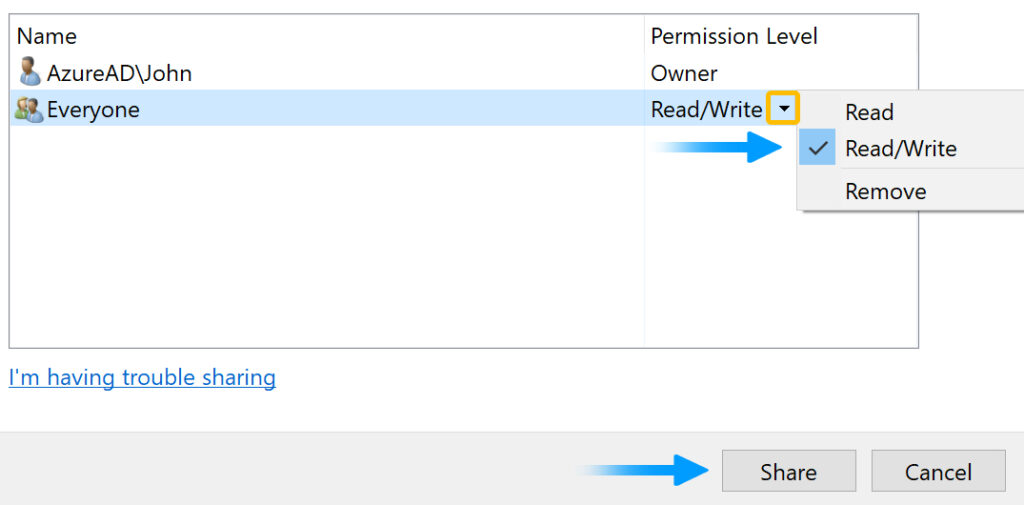
- Go down to Everyone.
- Click the dropdown arrow next to Read and select Read/Write from the popup menu.
- Then click the Share button.
- If you want to copy the link, right-click on the shared folder and select Copy Link.
- Save the link in a text editor or write it down for later use.

- Finally, click Done.


Set up a new computer to share OneNote files with
Follow the steps above to set up another Windows 10 computer. The steps are similar in most other versions of Windows; however, if you can choose between a public, work, or home network, select work or home to create a private network.
| You can access the Network and Sharing Center in Windows 11 by opening your Control Panel and clicking on Network and Internet. |
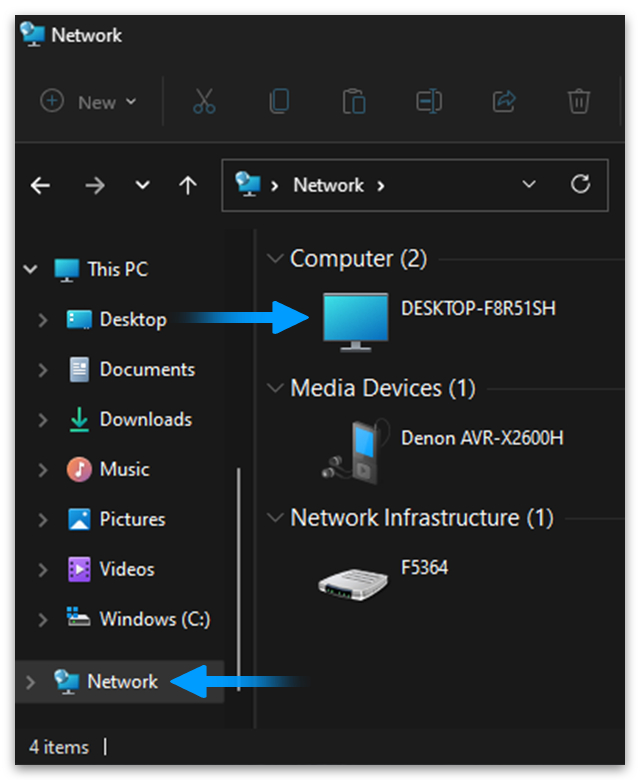
Once you’ve set up your second computer for file sharing, open up file explorer on that computer and type the link you saved earlier into the navigation bar at the top. Alternatively, go to Network, then select the computer in which the shared folder is located.
- Open Users and navigate to your shared folder.
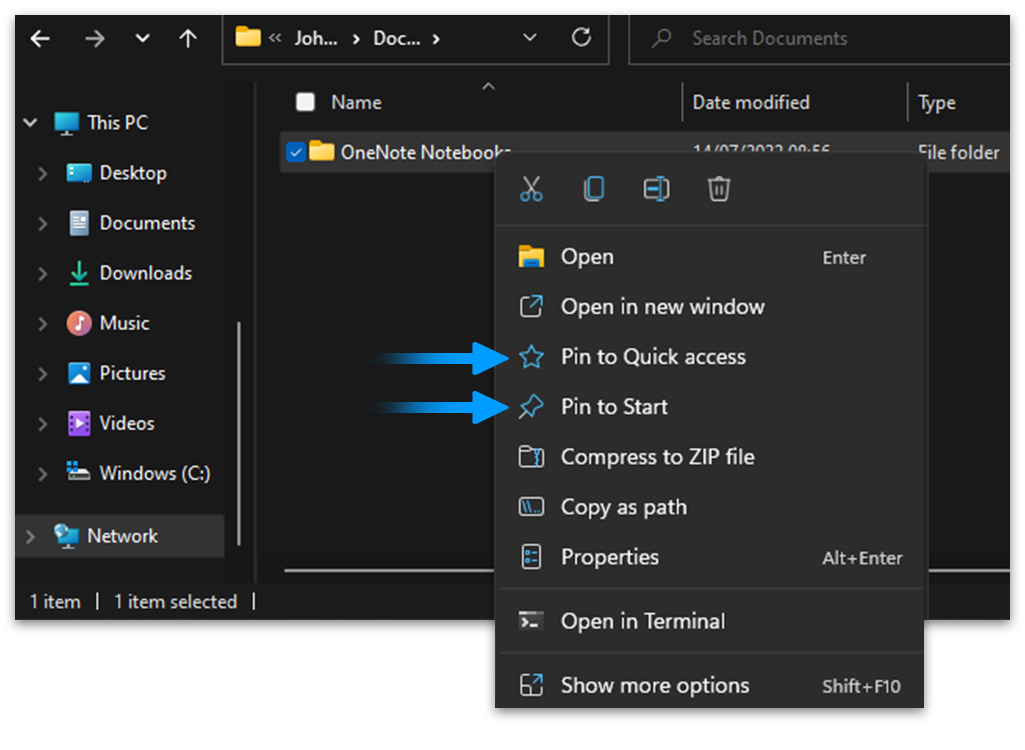
- Right-click the folder and select Pin to Start or Pin to Quick access for ease of use.
- Now you can create a new Notebook or edit an existing one inside the shared folder.
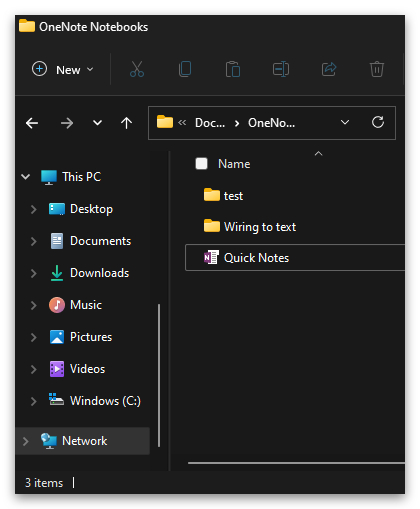
- Let’s open Quick Notes and add a new message.
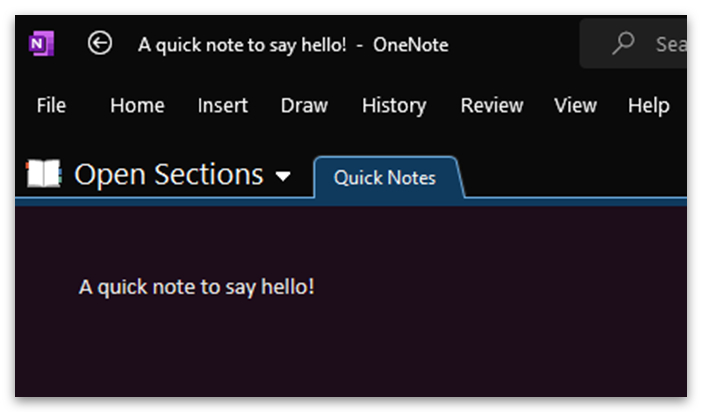
- Now go to your shared folder on the host computer and open Quick Notes.
- Your notebook will now sync automatically, and the new message will appear.

More ways to share OneNote Notebooks
Setting up a local network is just one way of sharing Notebooks. Other solutions out there utilize the cloud to instantly share files wherever you are in the world. Here are some products you can use to do that:
| Host | Storage | Pricing |
|---|---|---|
 Google Drive Google Drive | 15GB – 2TB | FREE or $1.99 – $9.99 / month |
 OneDrive OneDrive | 5GB – 6TB | FREE or $1.99 – $9.99 / month |
 pCloud pCloud | 500GB – 2TB | $4.99 – $9.99 / month |
 Sync Sync | 1TB – Unlimited | $6.00 – $18.00 / month |
 DropBox DropBox | 2TB – Unlimited | $9.99 – $25.00 / month |
Conclusion
Notebooks will automatically sync when shared between computers on a local network. Changes in one document will automatically update inside other documents, even if both are open simultaneously. However, the synchronization is not immediate and may take a few seconds to update.
For a cloud solution to sharing notebooks, we recommend Microsoft OneDrive or Google Drive, both having large suites of additional software to help you share and collaborate online.
Thanks for reading.