OneDrive by Microsoft is a great collaborative platform where users can both manage and share files with other users and domains. However, there may be an instance where a user is no longer part of the organization and therefore requires no access to files and folders that are part of your company. Unfortunately, if users have access to download the data from a OneDrive account and they have, you cannot remotely delete this content as it’s already been established in the user’s private database. You can however take steps to ensure that shared files on OneDrive are no longer accessible to download. Once the synced data is present in OneDrive on users’ devices this is where it will stay, you cannot download the data and you cannot save the data to your personal drive. Once the user departs the company you can restrict access and permanently remove all content from that user’s devices. Follow the steps below to see how you can remotely wipe OneDrive/SharePoint files from a computer.
Step by step process – How to remotely wipe OneDrive and SharePoint files from a computer
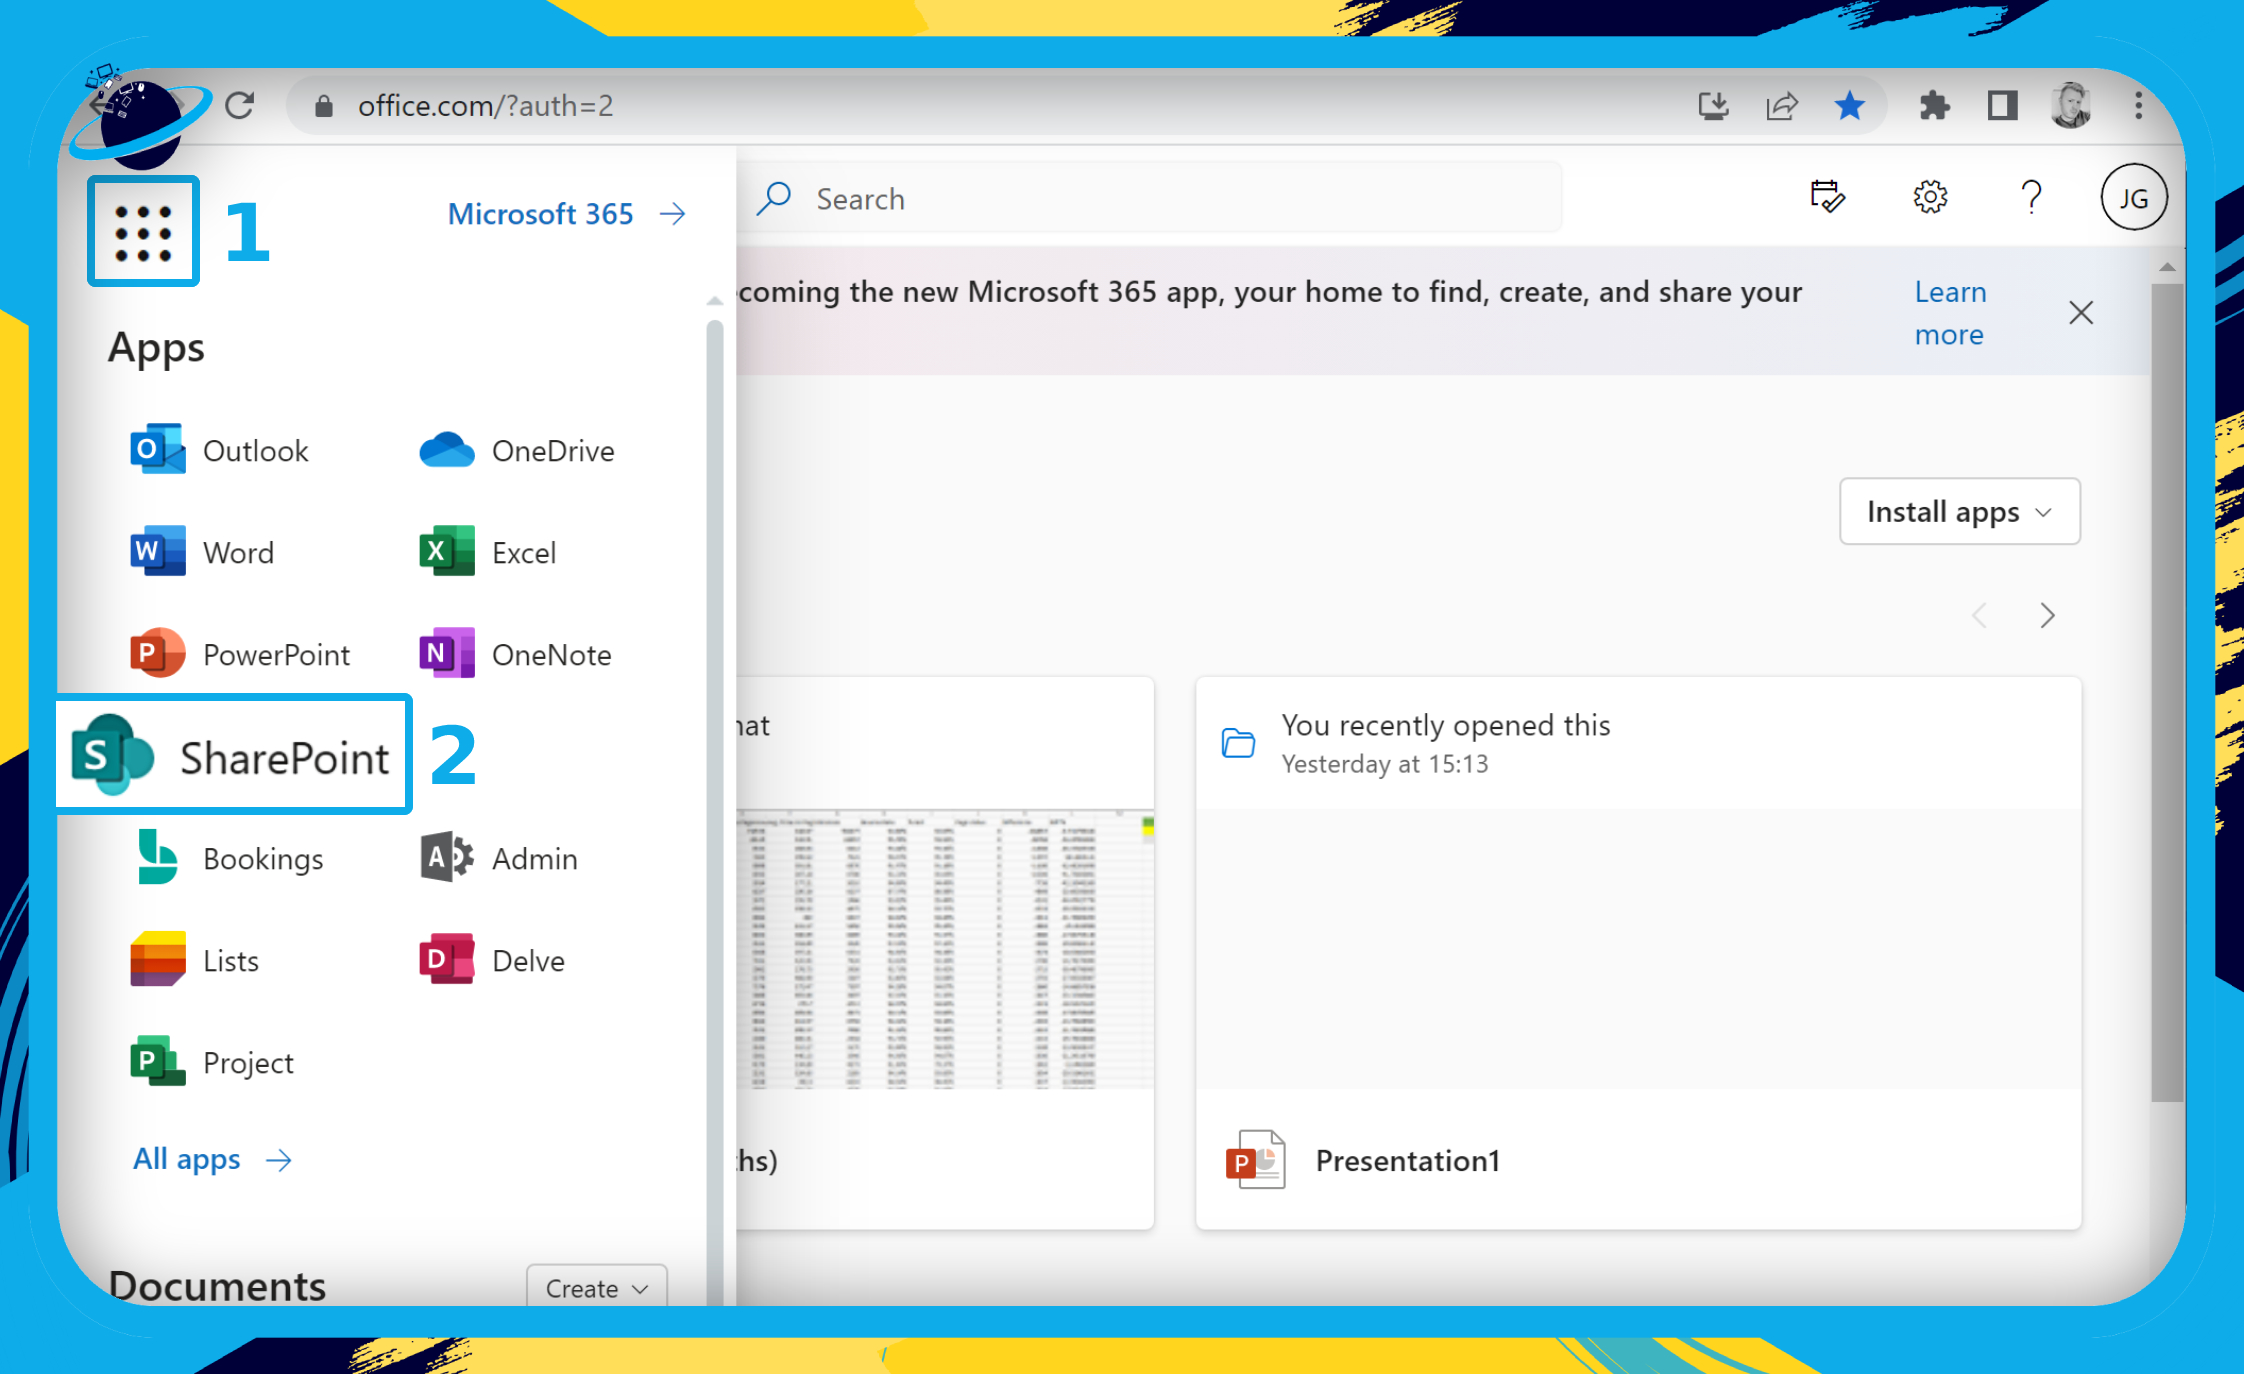
- First, sign into Office 365 using your Microsoft credentials.
- Click the
 app launcher in the top left corner of the window.
 - Then select “SharePoint” from the list of applications.
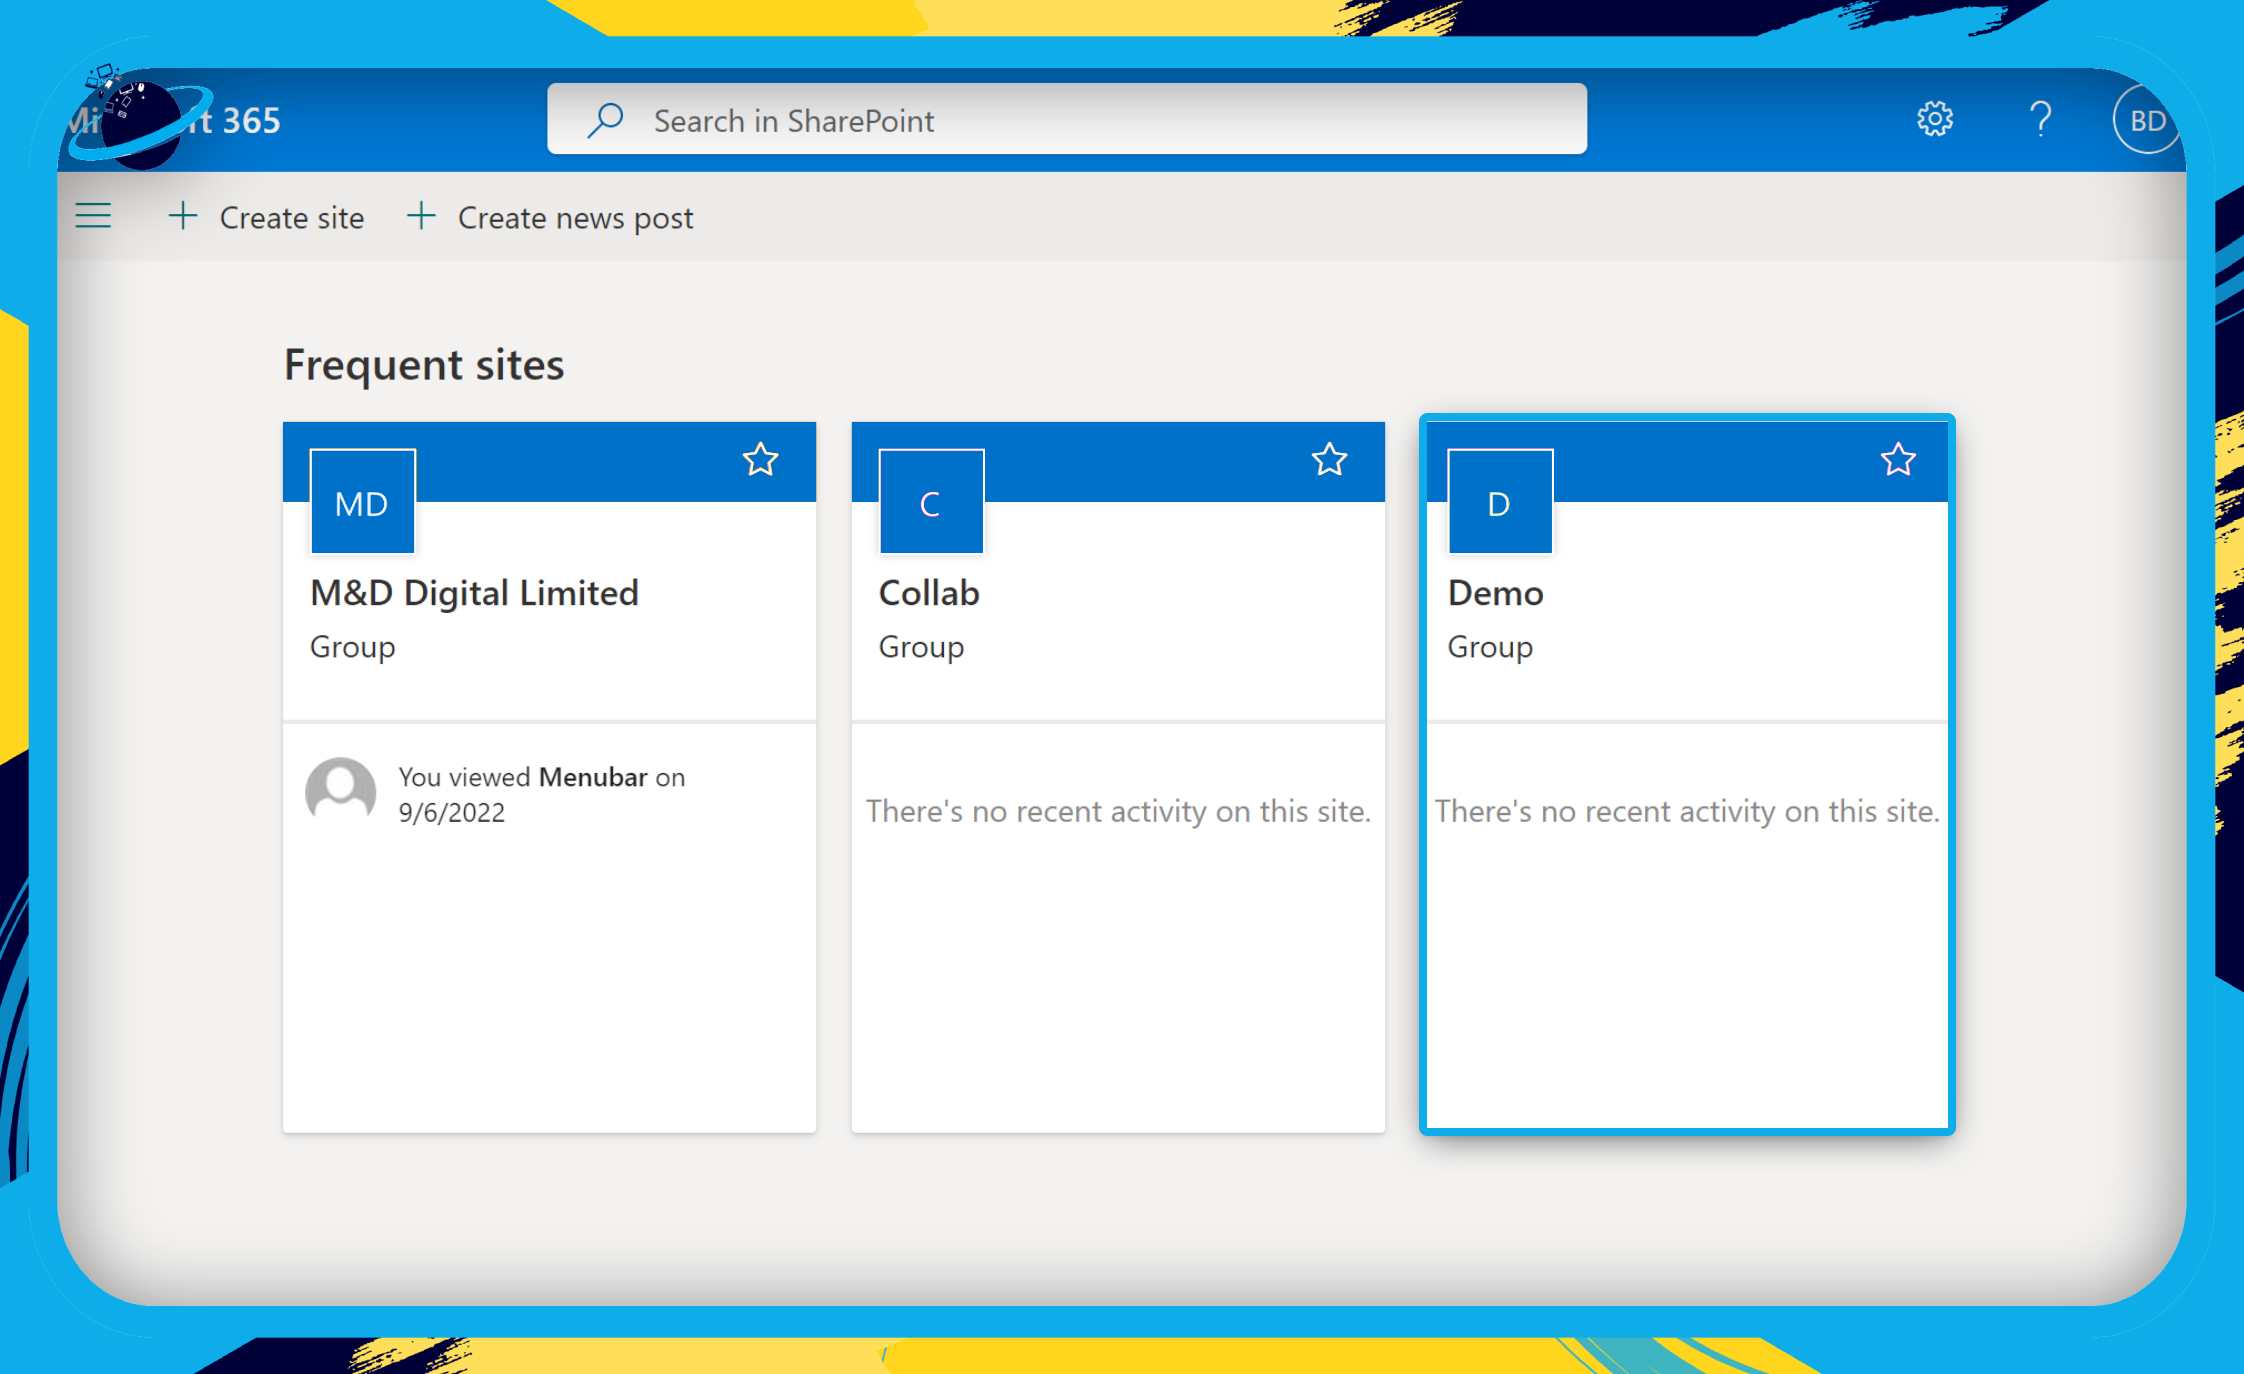
- Now go to the site where your files are located.
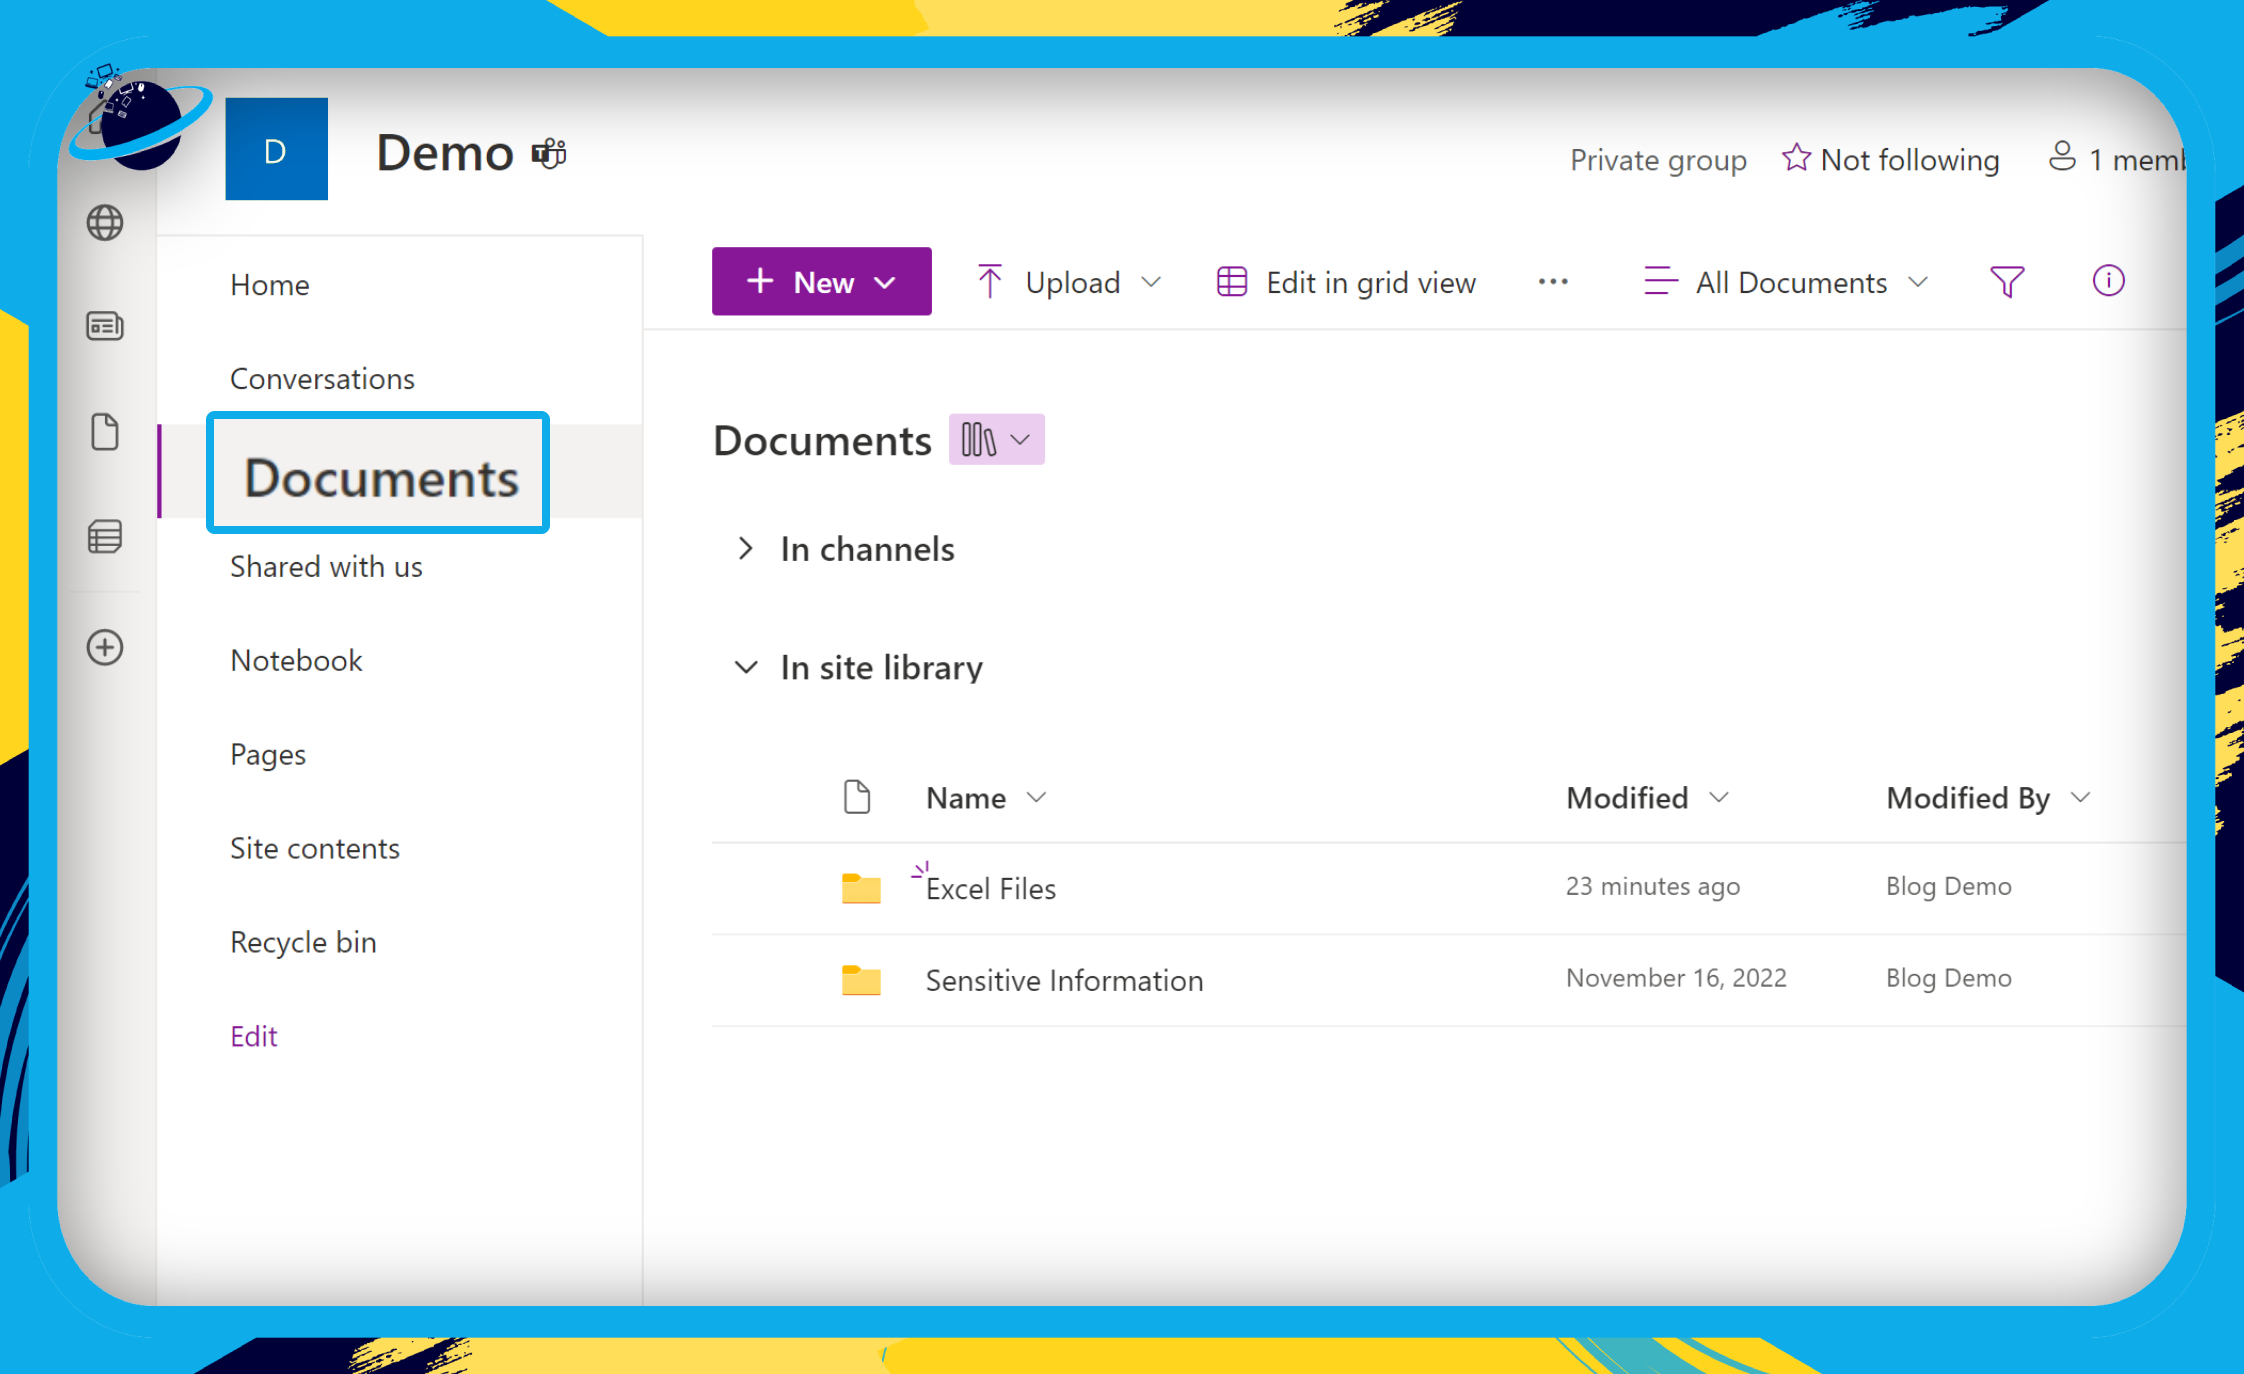
- Open the “Documents” on the left.
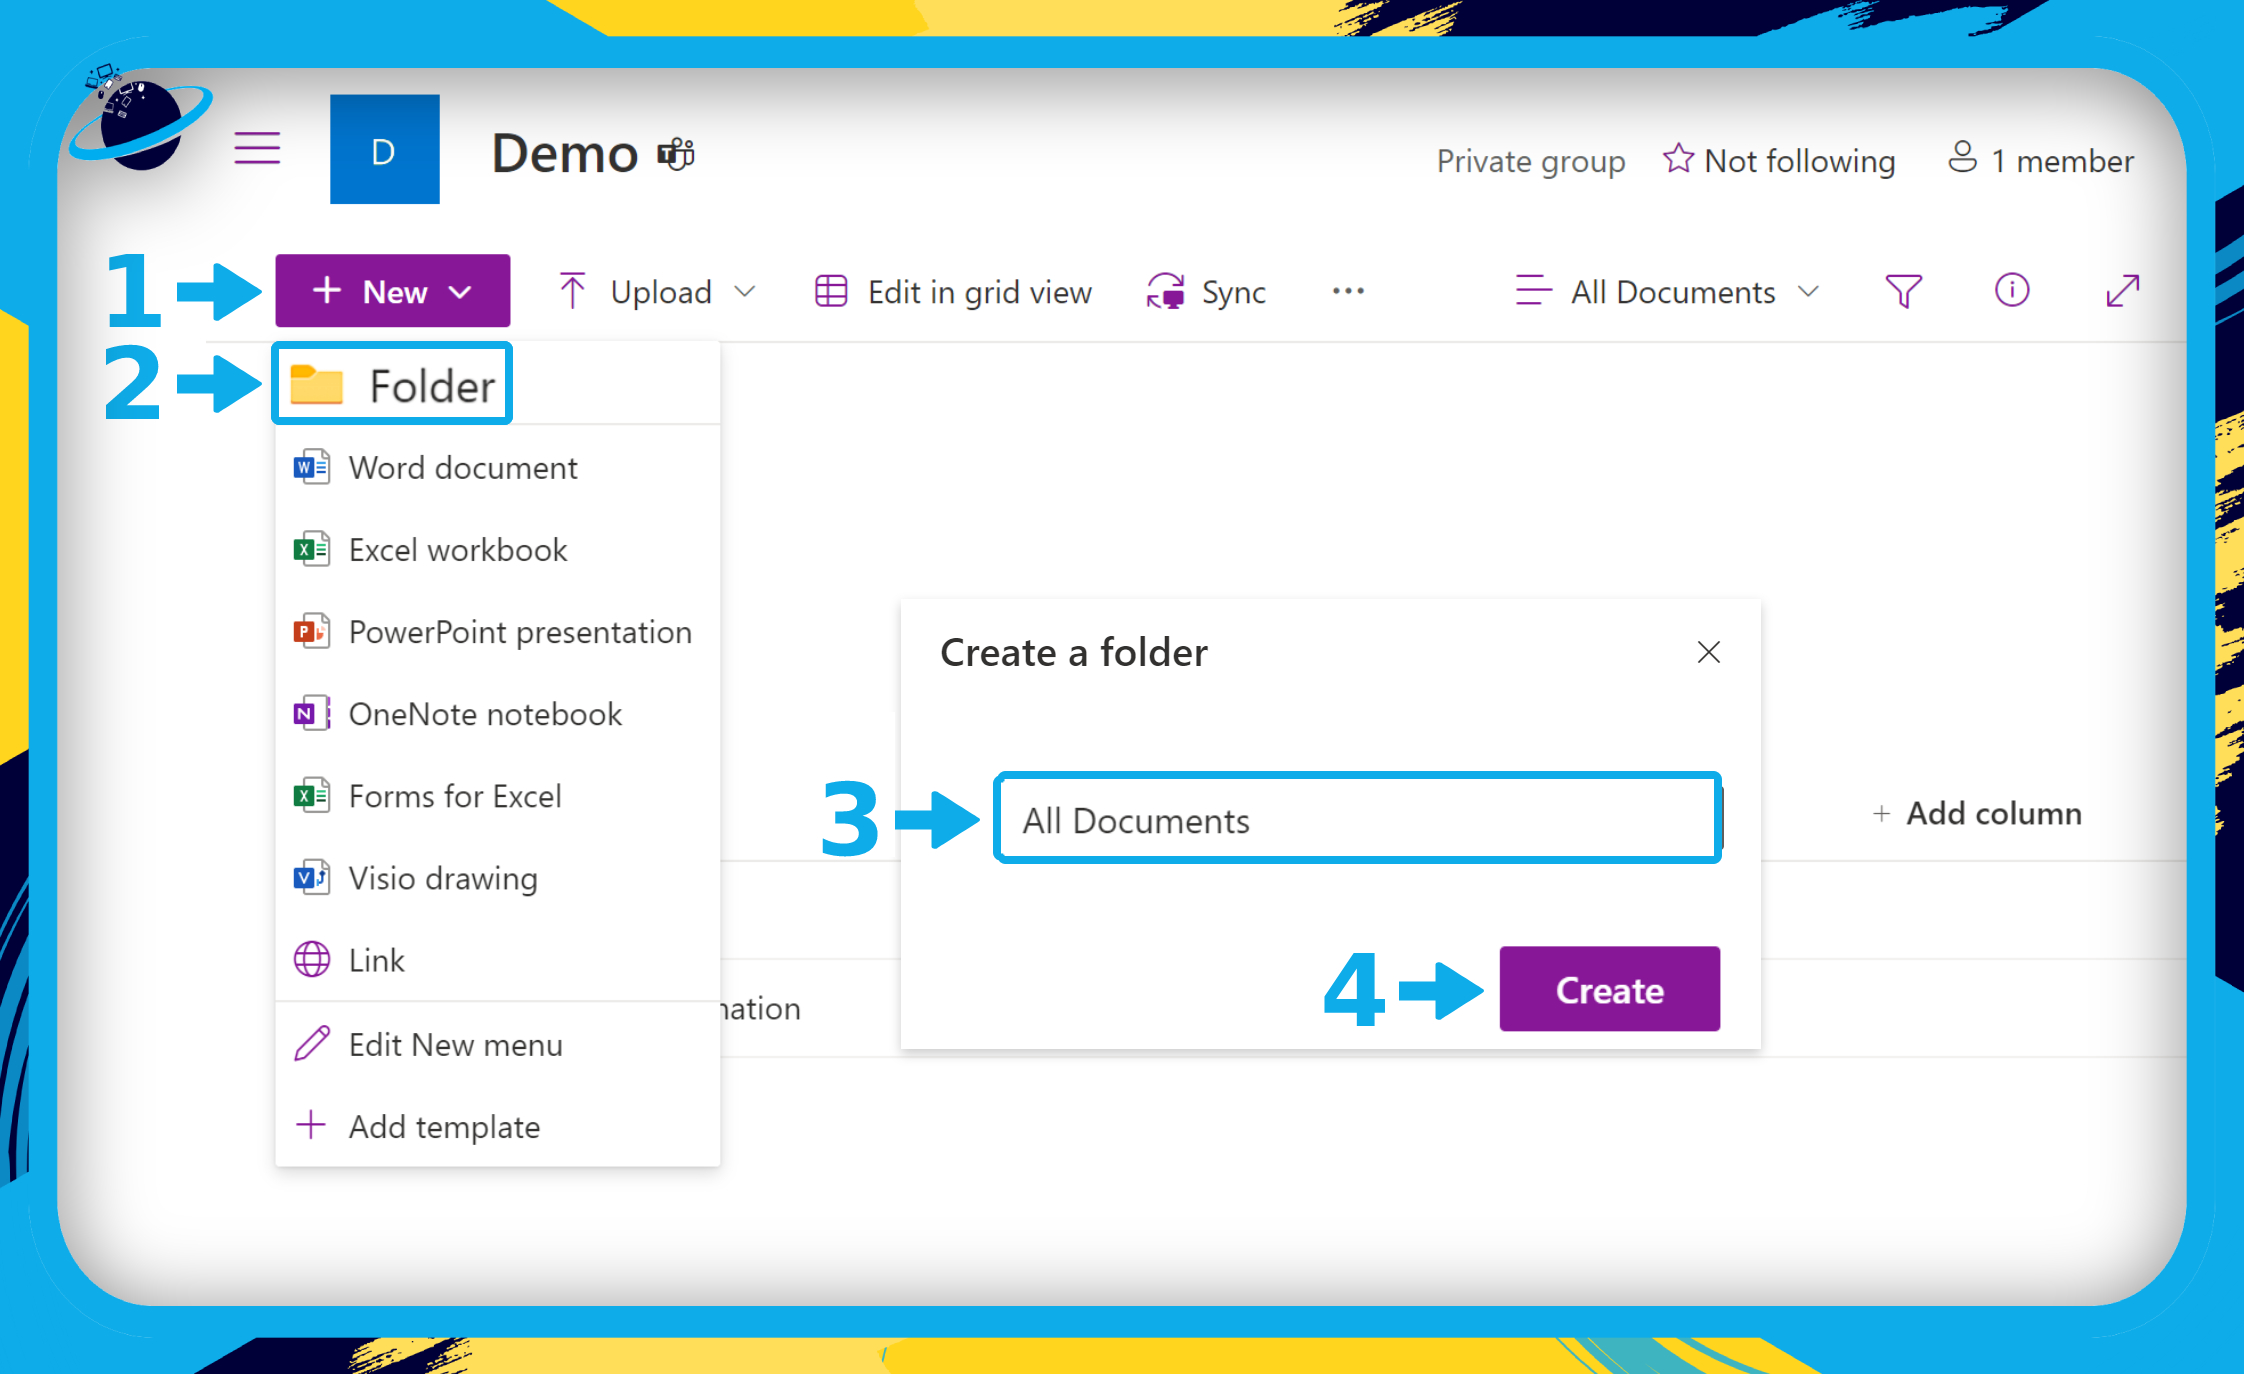
- Click the “+New” button at the top and select “Folder” from the dropdown list.
- Name the new folder then click the “Create” button.
- Now select all the documents except for the new folder.
- Then click and drag the selected documents into the new folder.
- Click the three vertical dots next to the new folder.
- Select “Manage access” from the popup menu.
- Click “Advanced.”
- Check the box next to “Name” to select all user groups.
- Then click on “Edit User Permissions.”
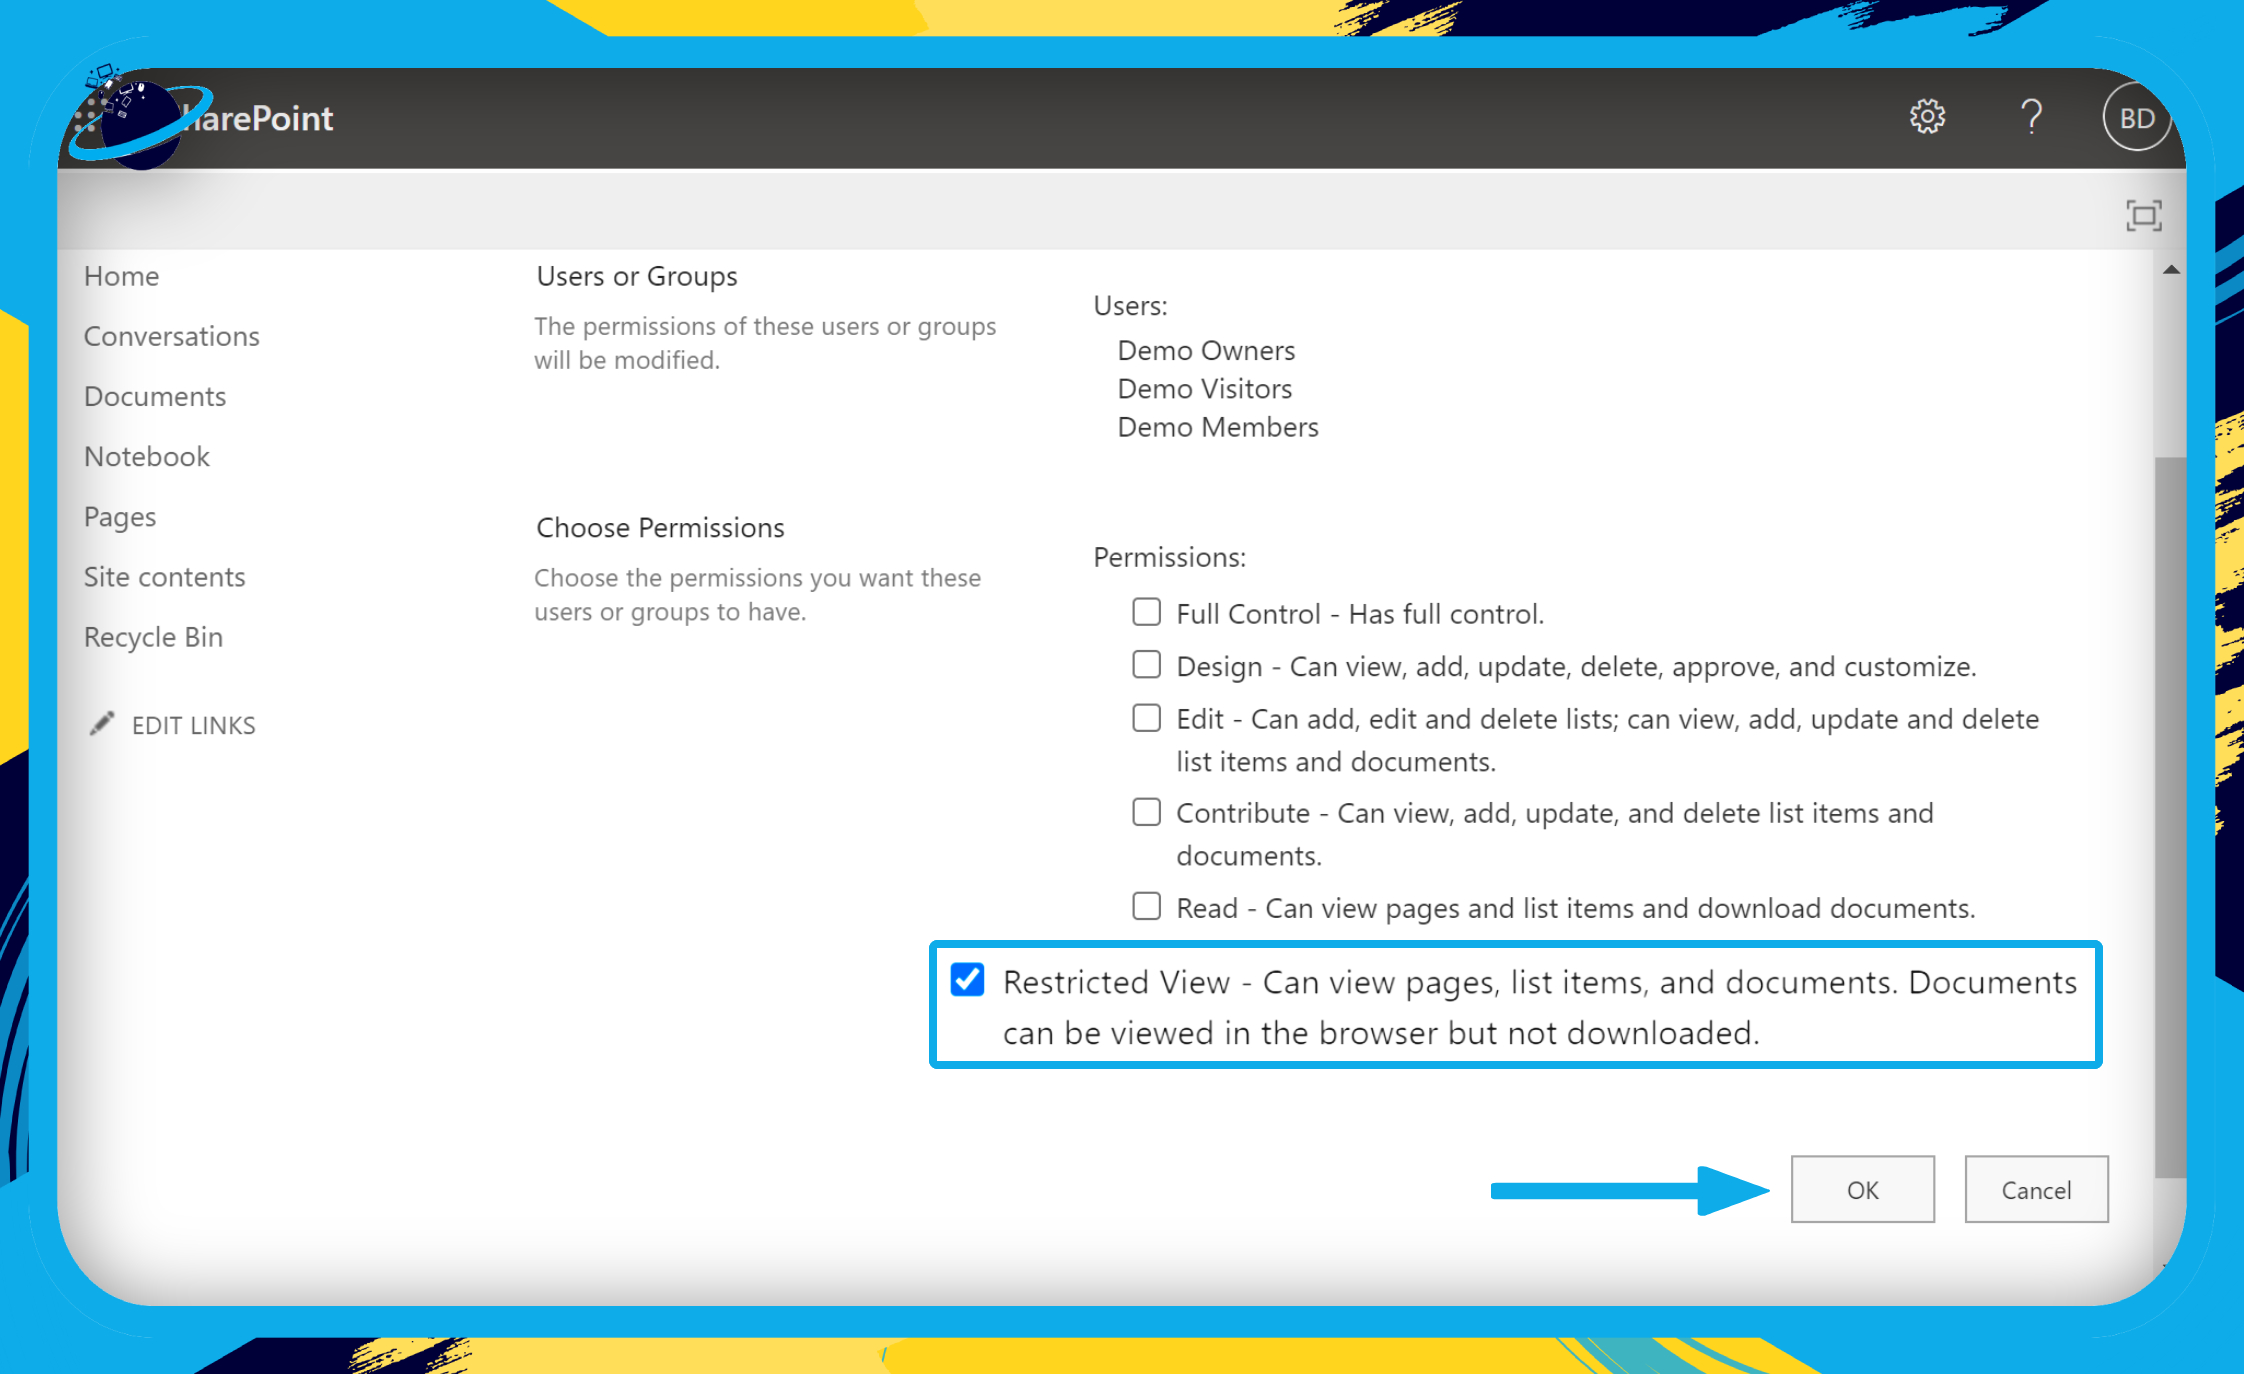
- Finally, check the box next to “Restricted View” and click the “OK” button.
What this will do is prevent access to downloading folders and files to the personal drive, any content on OneDrive and SharePoint will stay on OneDrive. You no longer have to worry about files being downloaded and stored on users no longer part of the organization. If they have access to your Onedrive network they may still be able to download the files so ensuring that permissions are restricted before the users are permanently deleted is a good way to ensure files are not downloaded to their personal device.
Users have pleaded to Microsoft to implement a feature where the files are properly tagged and in this instance, if files are downloaded they can be deleted promptly by the admin user. However, as it stands right you can only prevent files from being downloaded or even viewed. However, you cannot delete content already present on said users’ devices.

Delete a user from Office 365 network to remotely wipe OneDrive/SharePoint files from a computer
Go one step further and delete users from the Office account, use your admin dashboard and delete users if they are no longer part of the organization. User accounts may only be deleted by persons with Microsoft 365 global admin or User management rights for the company or school. Before the user’s data is completely destroyed, you have 30 days to recover the account. Move the user’s OneDrive data to a separate place if you wish to maintain it. You may even transfer the data up to 30 days after the account has been deleted. See Get access to and back up the data of a previous user. You won’t lose access to their SharePoint files if you don’t transfer them. If you’re a global administrator, you may also grant another user access to their email and decide what to do with their OneDrive material when you delete a user.
Delete users from Office account – Step by step process
- Sign into Office 365.
- Navigate to “admin” using the app launcher.
- Now click on “Users” > “Active users”.
- Select the names of the users that you want to delete, select the three dots (more actions), and then choose “Delete user”.
This deletes the uses and prevents them from accessing the content in your network. However, they still have their account for 30 days as a precautionary move in case the deletion was done by accident. How can we address this situation and permanently delete users from the network Office account?
How to Remove Deleted Users from Office 365 for Good
When you remove a user through the Office 365 control panel, they are placed in a recycling bin for 30 days, allowing them to be readily retrieved if the deletion was not intended.
However, PowerShell may be used to permanently erase a removed user in Office 365. You’ll need the Azure Active Directory for PowerShell module installed on your computer to complete this job.
To begin, run Connect-MsolService and provide your admin credentials in the dialogue box that displays to connect to your Azure Active Directory.
| Remove-MsolUser -ObjectId <Guid> [-RemoveFromRecycleBin] [-Force] [-TenantId <Guid>] [<CommonParameters>] |
| Remove-MsolUser [-RemoveFromRecycleBin] [-Force] -UserPrincipalName <String> [-TenantId <Guid>] [<CommonParameters>] |
Run Get-MsolUser with the -ReturnDeletedUsers option to obtain a list of the removed users. Remove-MsolUser and the -RemoveFromRecycleBin option can be used to remove a specific removed user. To prevent being asked for each removal, pipe the Get-MsolUser output to Remove-MsolUser and add the -Force switch.
In depth – Step by step process – How to remotely wipe OneDrive and SharePoint files from a computer
Step by step breakdown:
- First, sign into Office 365 using your Microsoft credentials.
- Click the app launcher in the top left corner of the window. (1)
- Then select “SharePoint” from the list of applications. (2)
- Now go to the site where your files are located.
- In this guide, we selected a site called “Demo.”
- Open the site “Documents” on the left.
- Click the “+New” button at the top. (1)
- Select “Folder” from the dropdown list. (2)
- Name the new folder — we named ours “All Documents.” (3)
- Then click the “Create” button. (4)
We are going to move all our documents into the new folder and restrict access to it, effectively removing access to all the documents inside.
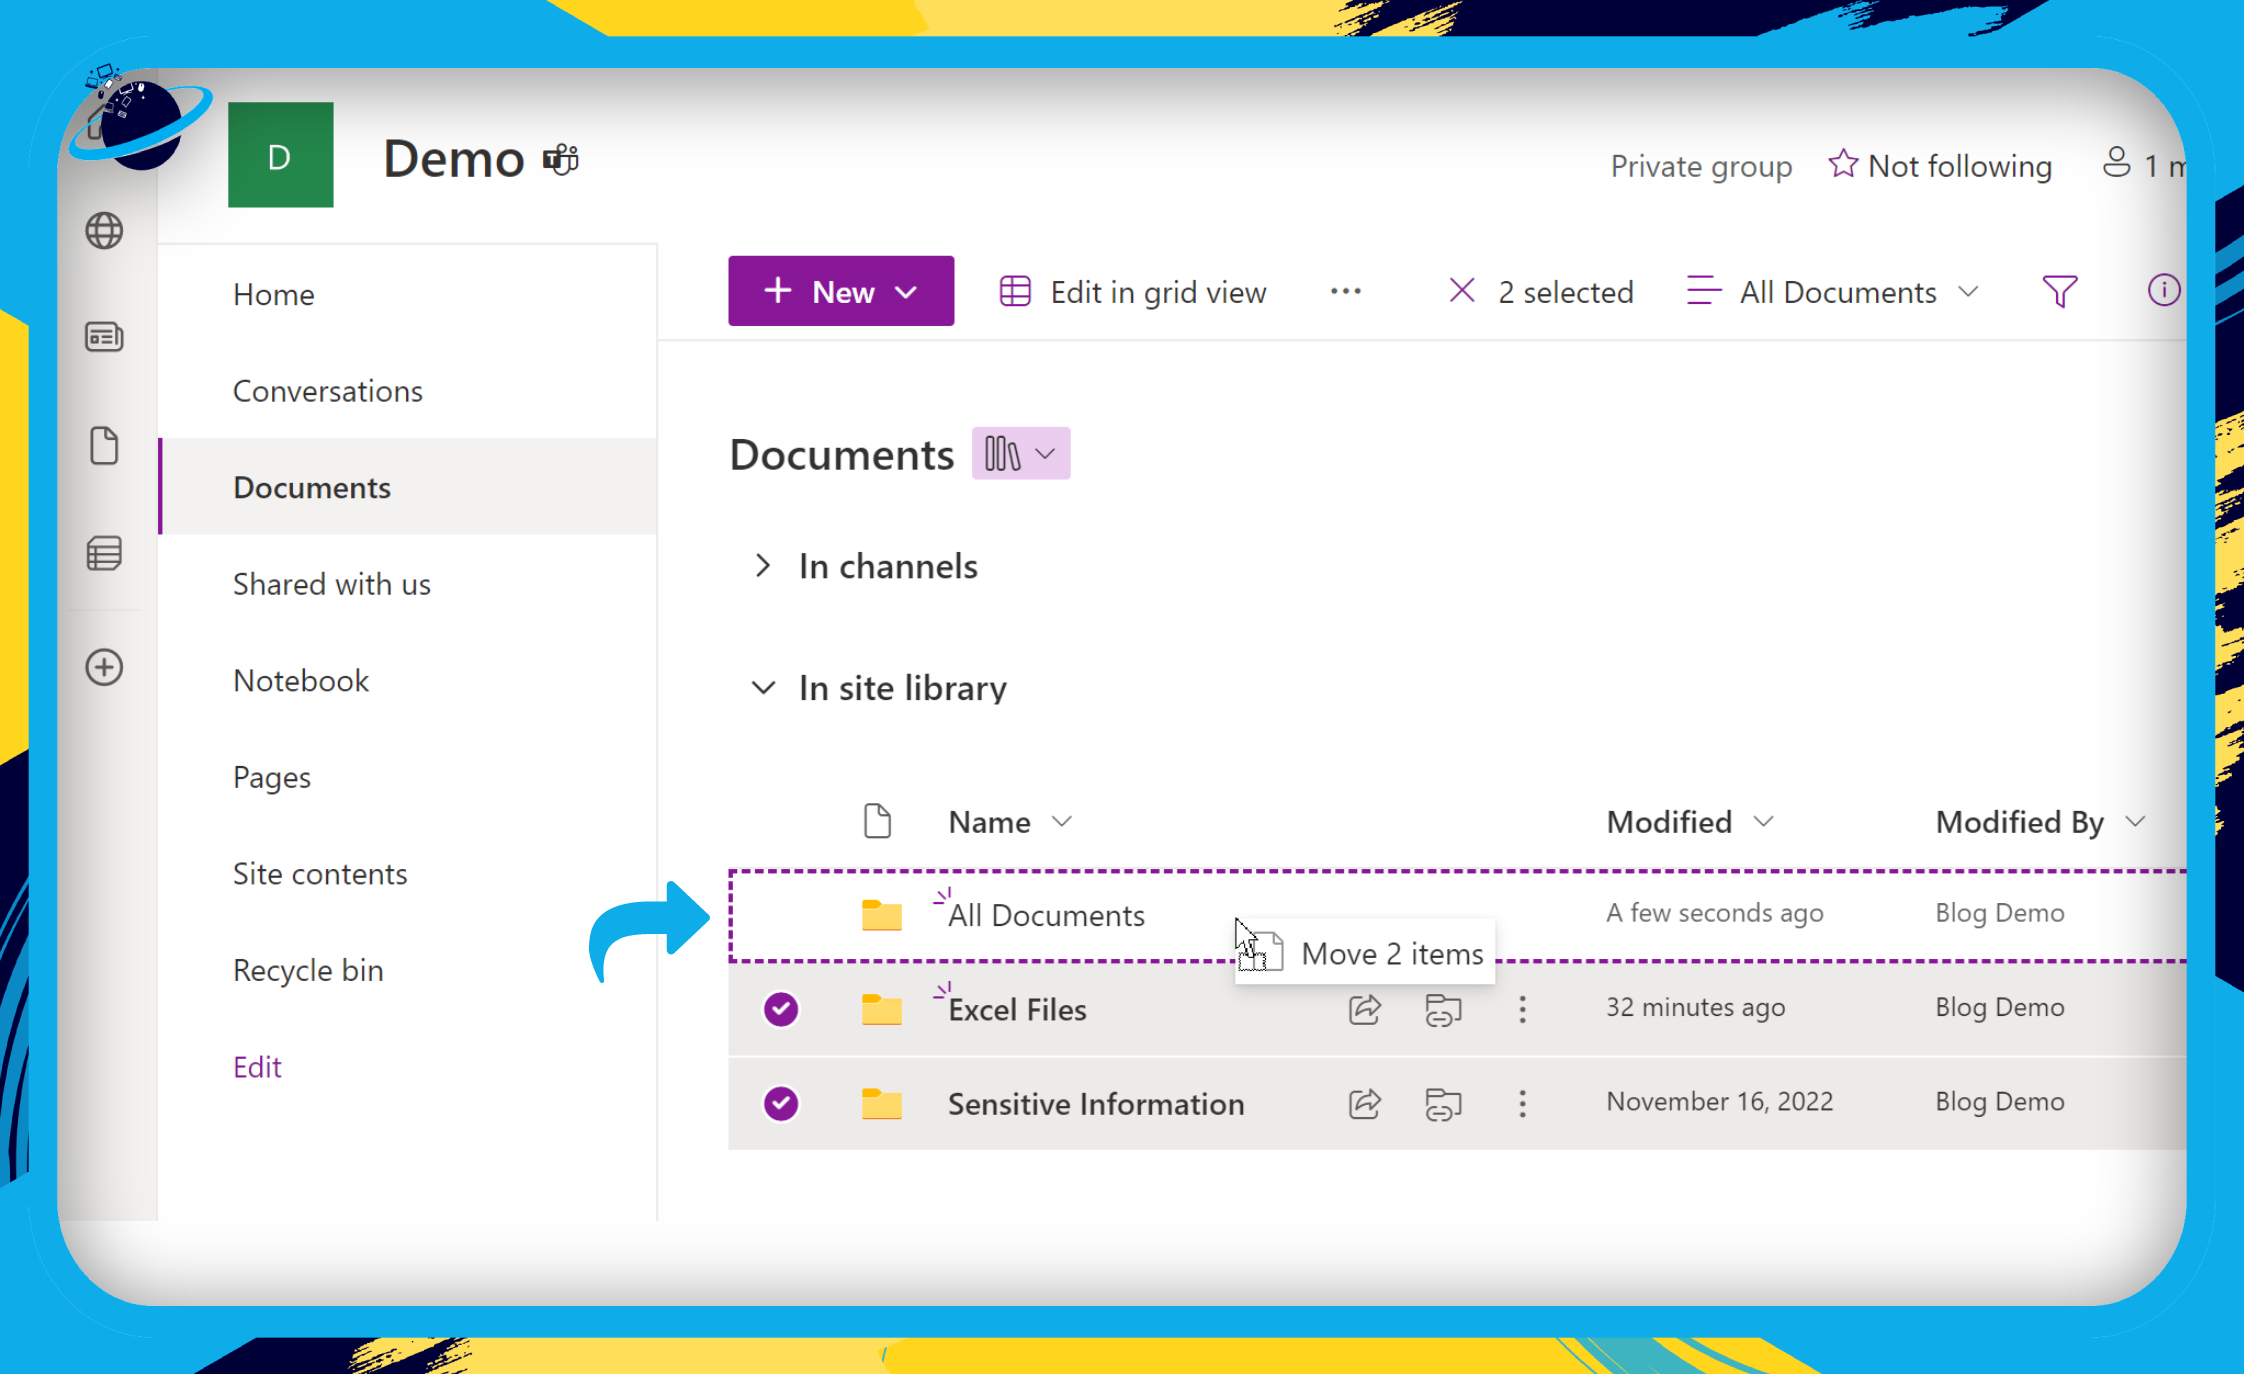
- Now select all the documents except for the new folder.
- Then click and drag the selected documents into the new folder.
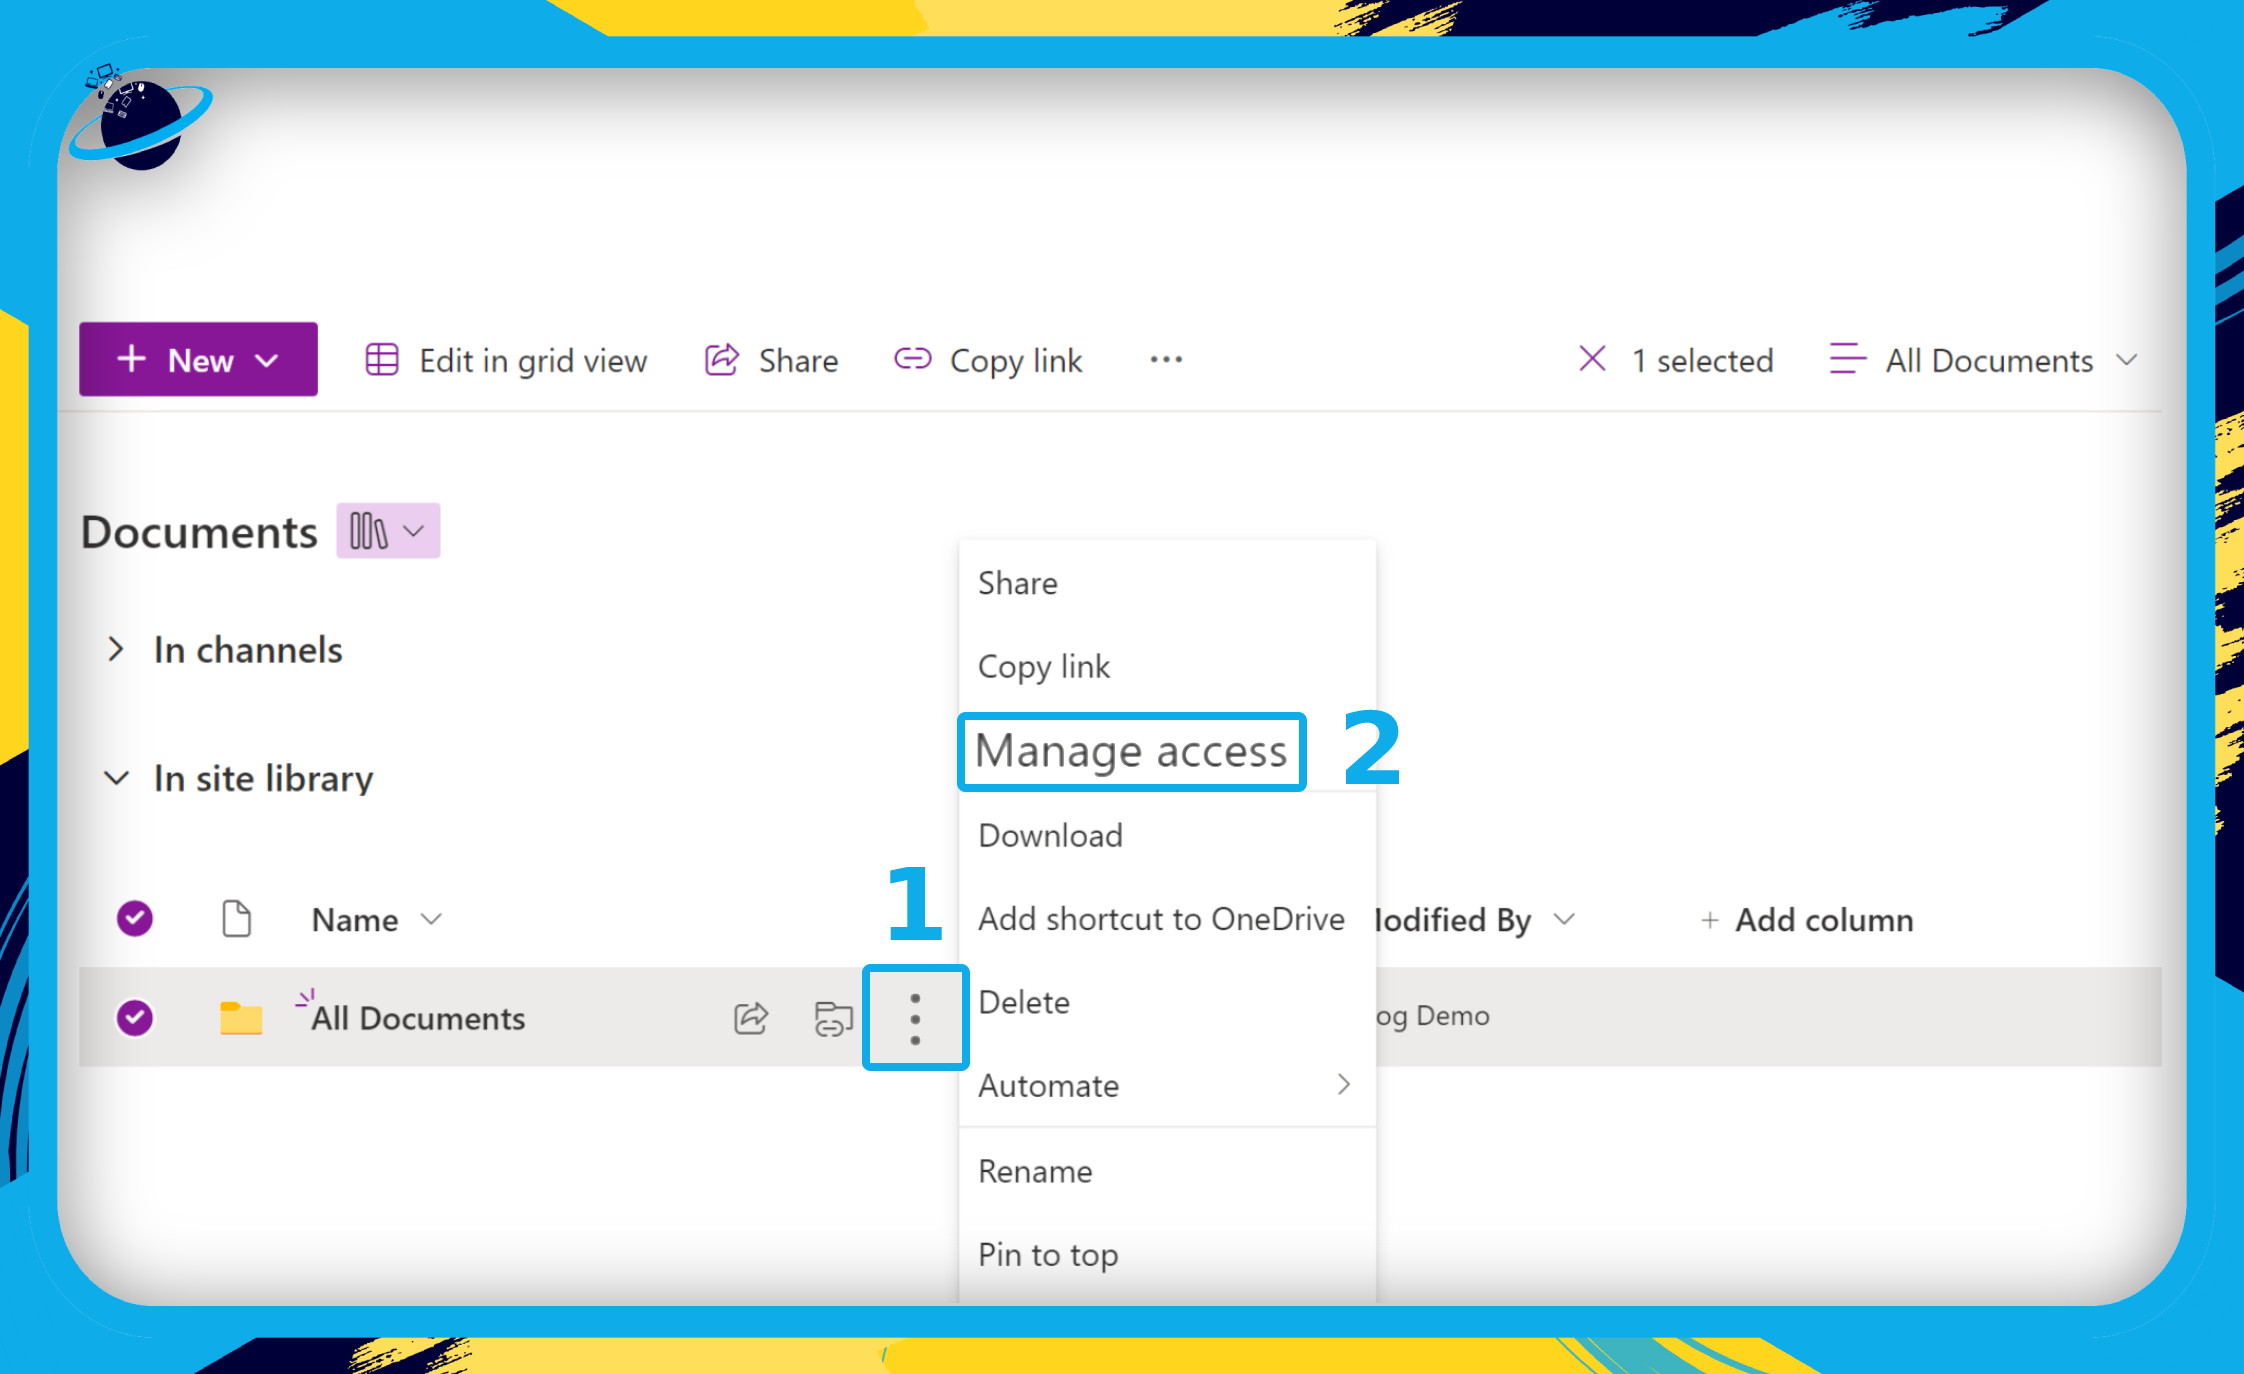
- Click the three vertical dots next to the new folder. (1)
- Select “Manage access” from the popup menu. (2)
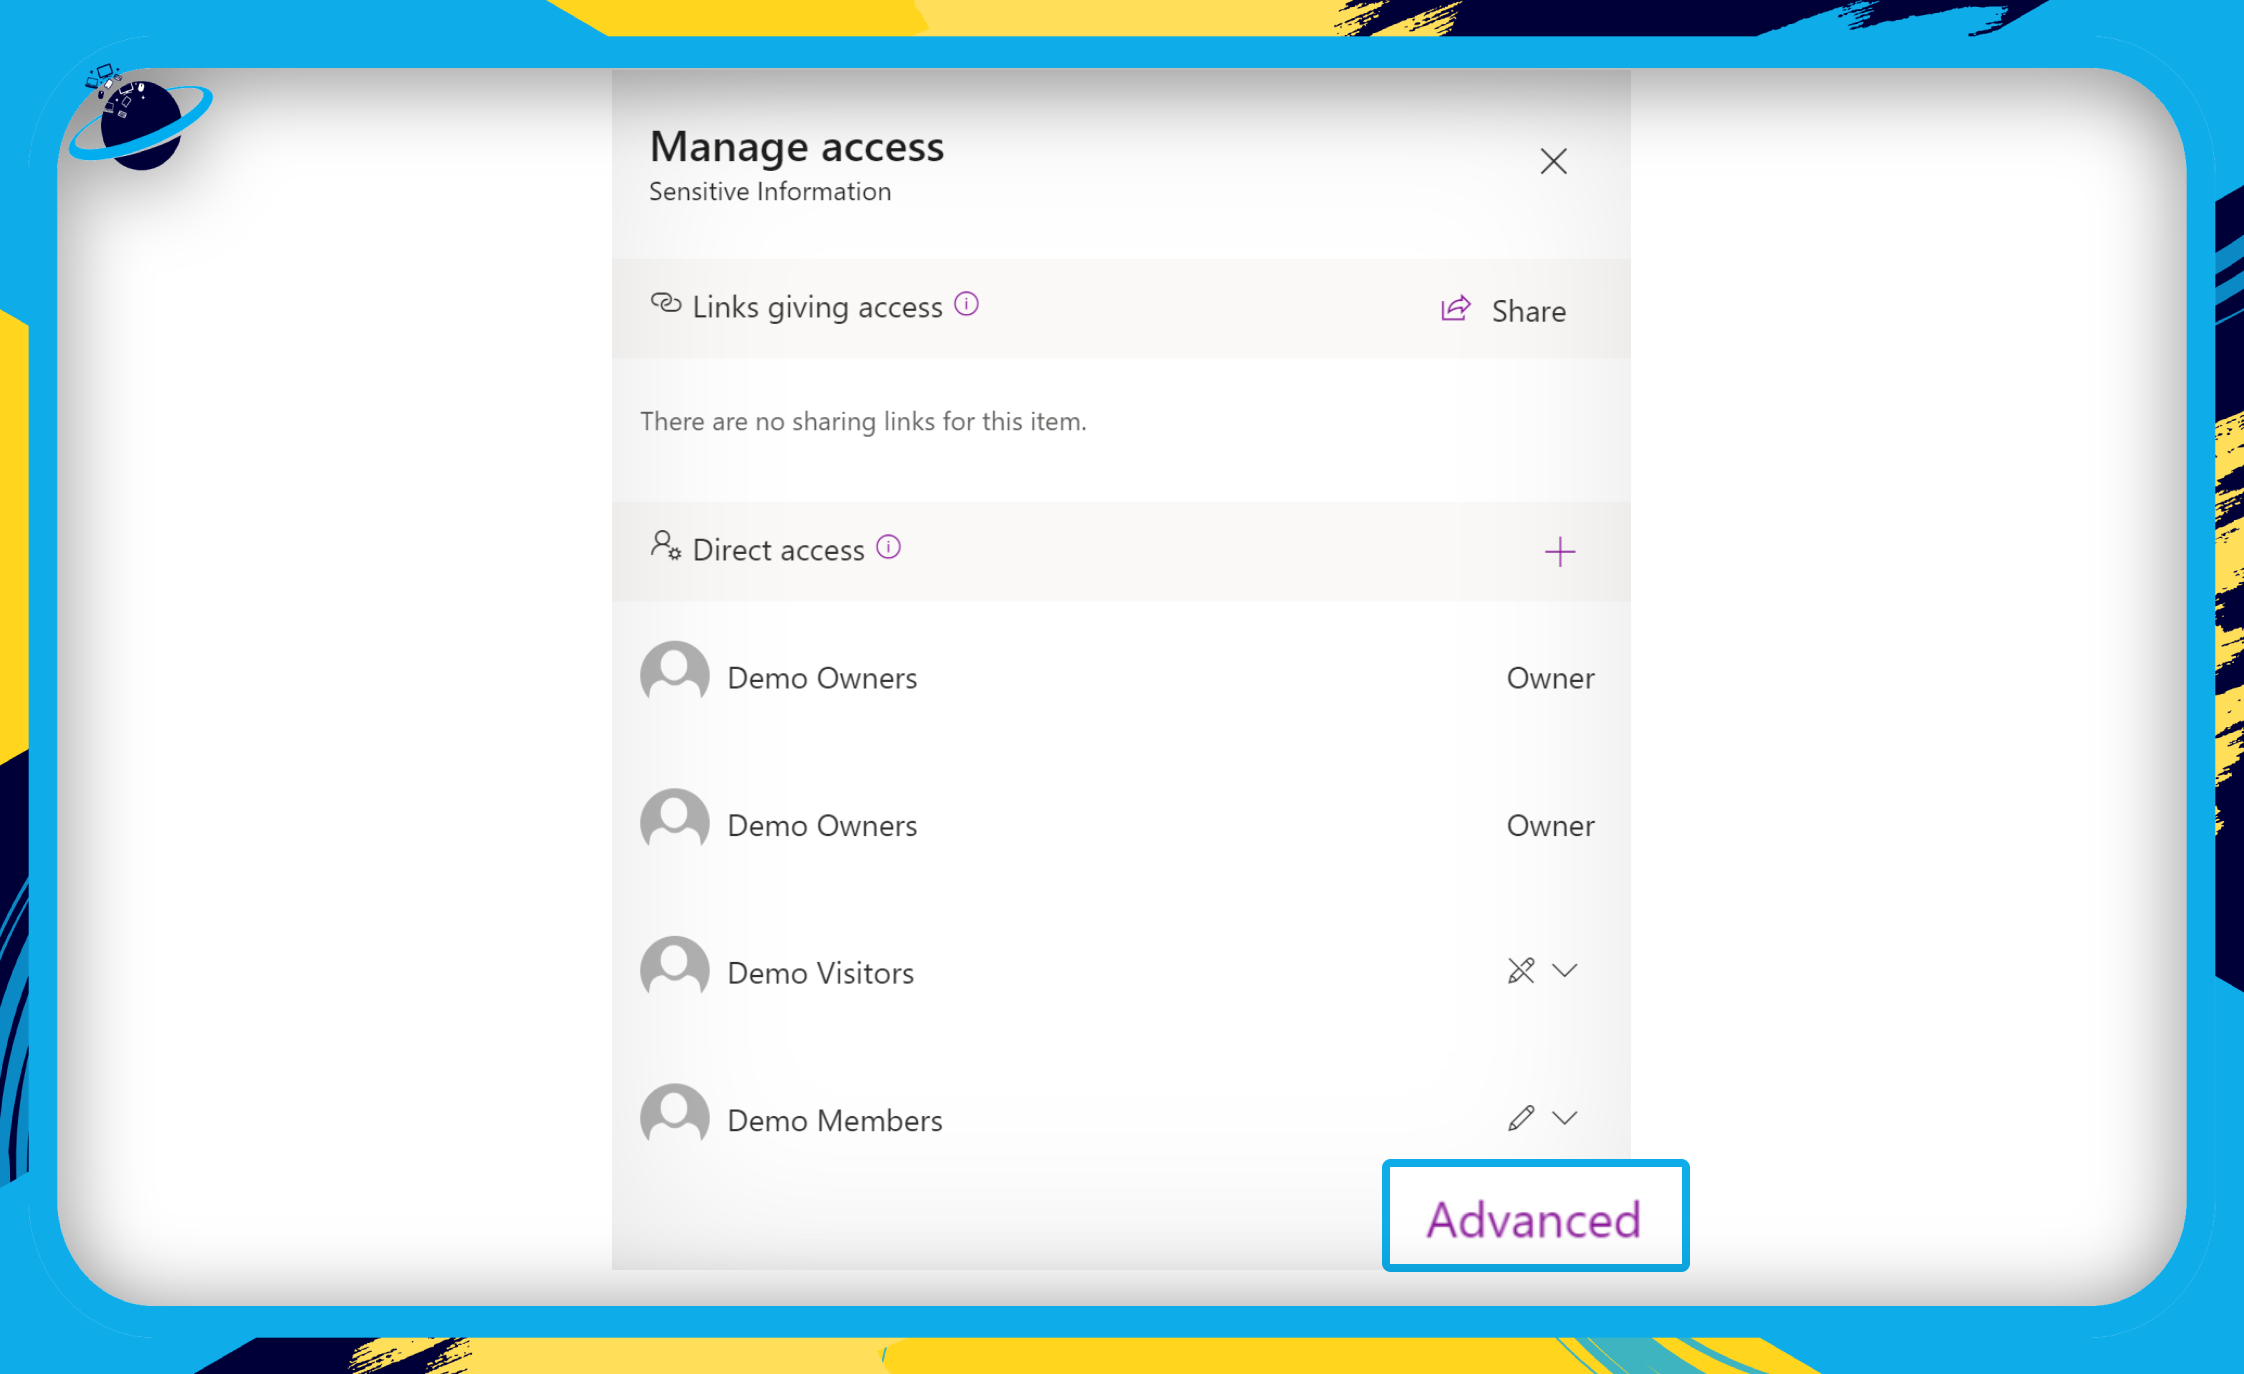
- Click “Advanced.”
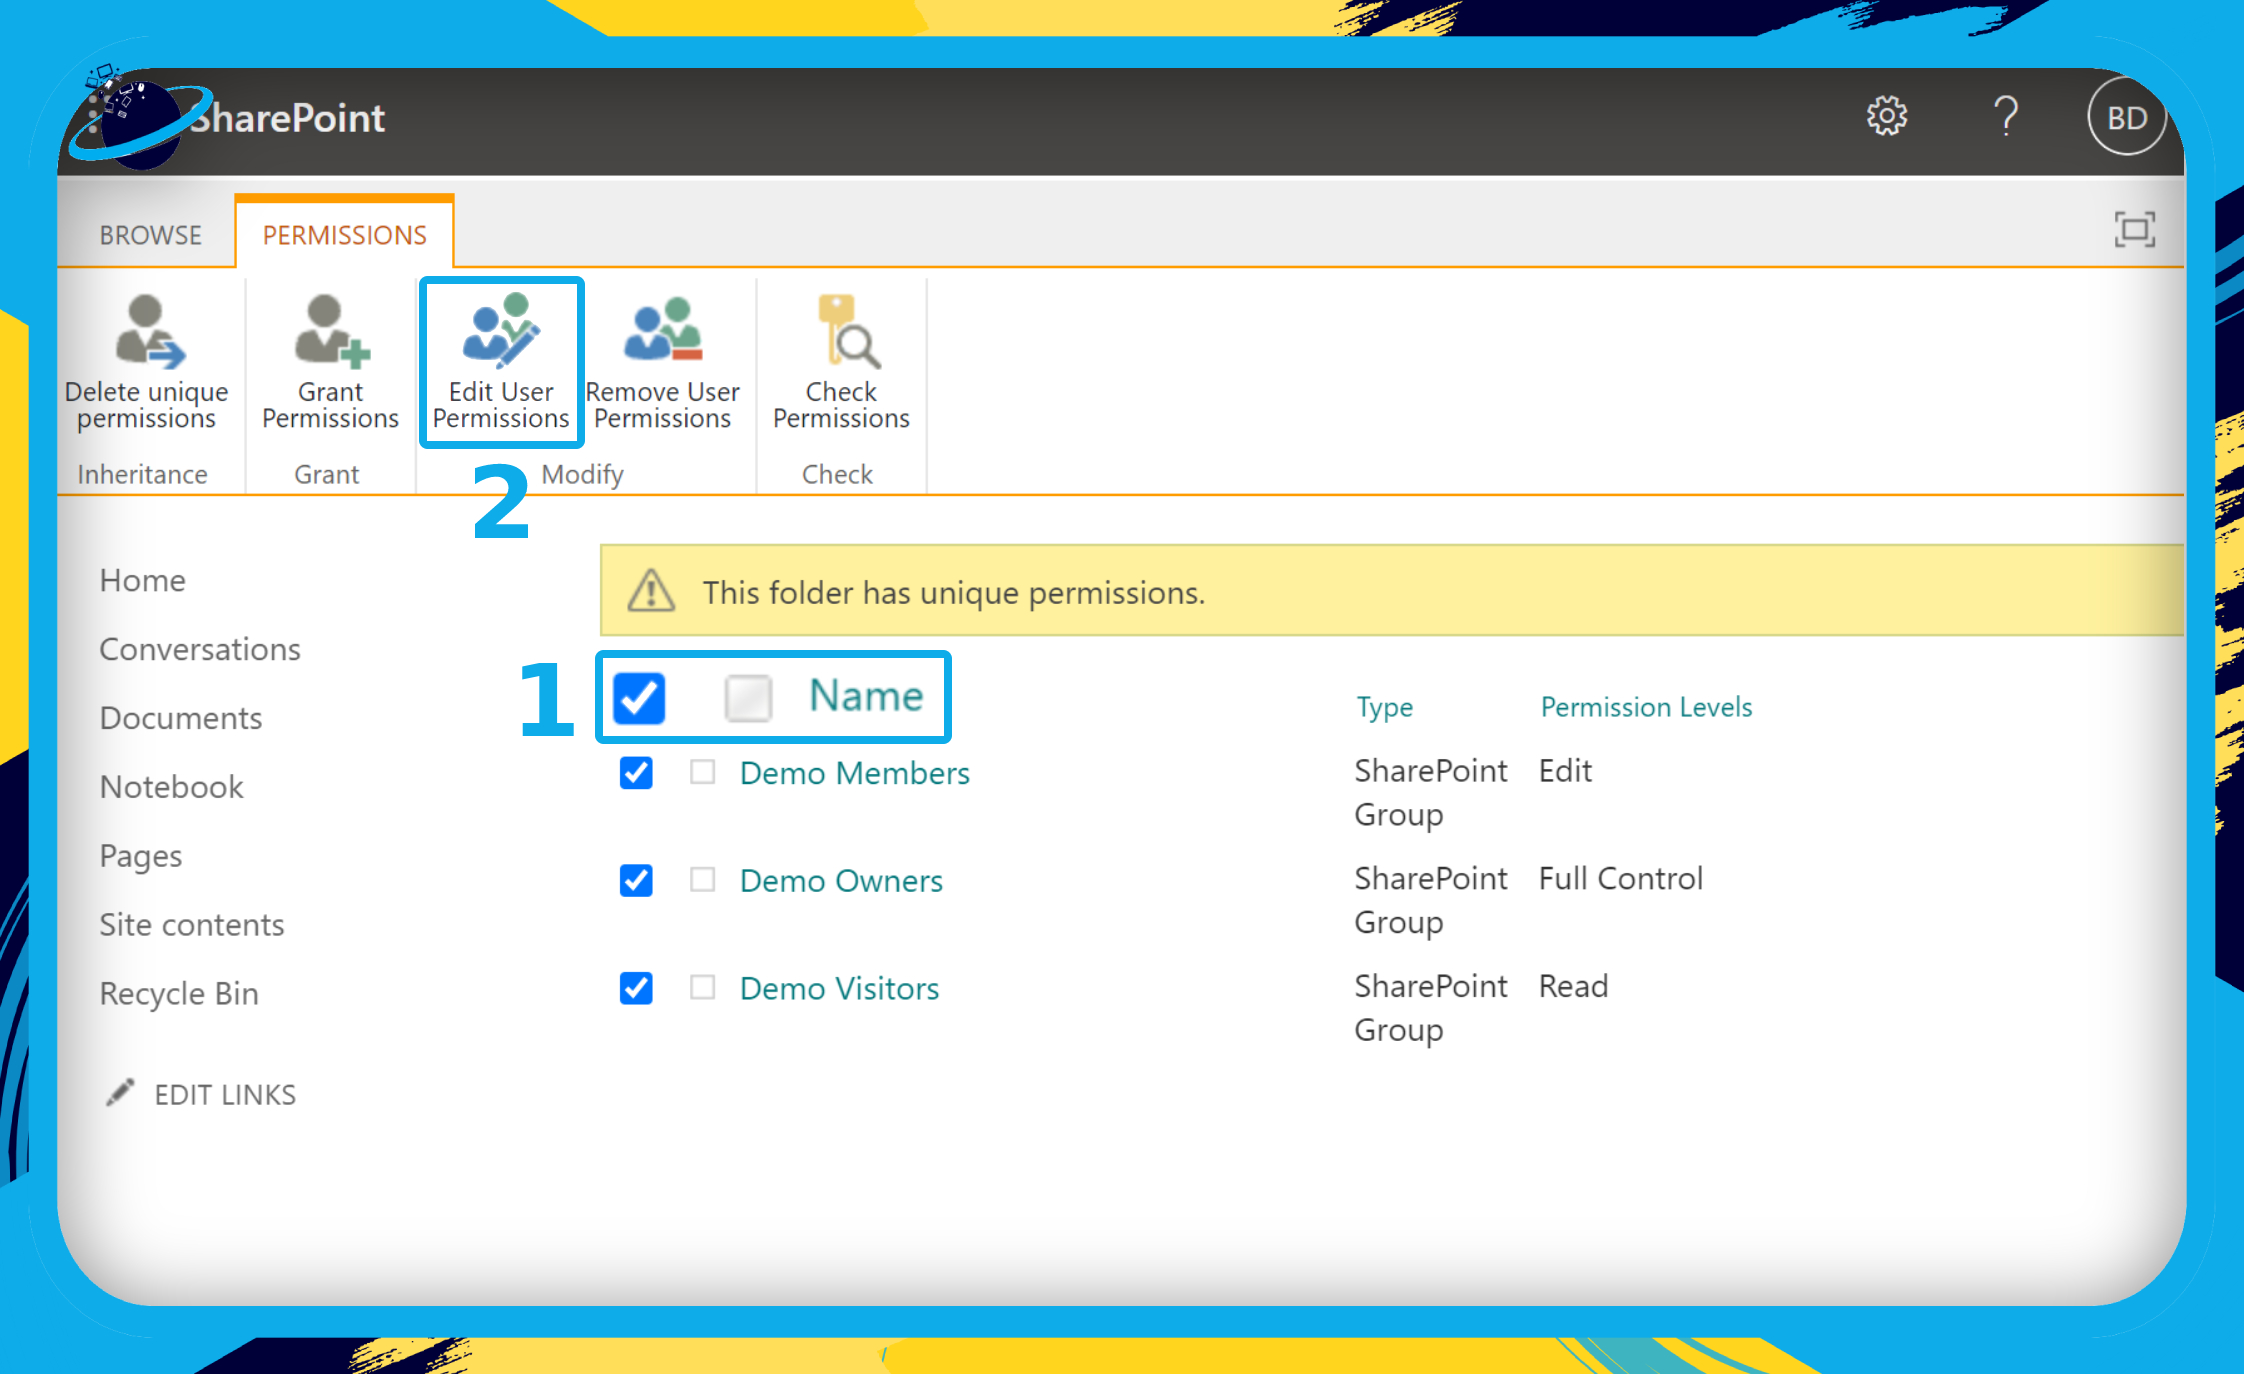
- Check the box next to “Name” to select all user groups. (1)
- Then click on “Edit User Permissions.” (2)
- Check the box next to “Restricted View.”
- Finally, click the “OK” button.
That’s it for this Blog thank you for taking time out to read our content, please feel free to email our team about how it went if you followed the steps or if you need more help with the questions we answered in this Blog.