Information such as comments and author’s names are sometimes kept in the metadata of a Word file. If you want to share the file, you may first want to remove private or unwanted metadata. Fortunately, there are several ways of removing metadata from a Word document, which we have detailed in this guide.
Remove metadata from a Word document:
- Locate the document on your computer.
- Right-click the file and go to ‘Properties.’
- Click on the ‘Details’ tab.
- Then click on ‘Remove properties and personal information.’
- Finally, click the ‘OK’ button to create a copy of the file with properties removed.
Please continue reading our visual, step-by-step guide on removing metadata from a Word document.
Why remove metadata from a Word document?
Word documents store information such as the version history, comments, author’s names, watermarks, and custom XML data. You may want to remove this information before sharing the file if it’s private or personal. All the types of metadata you can remove from a Word document are shown in the table below.
| Removable Metadata | Permanent Metadata |
|---|---|
| Some of the metadata can only be removed using the Document Inspector in the app version of Word. Those metadata have been highlighted in the table above with a magnifying glass |

Add metadata to a Word document
First, we will add some metadata to a Word document to remove it later on in the guide. Please begin by opening a new Word document to follow along with this process.
- Enter some content and then click on File in the menu.
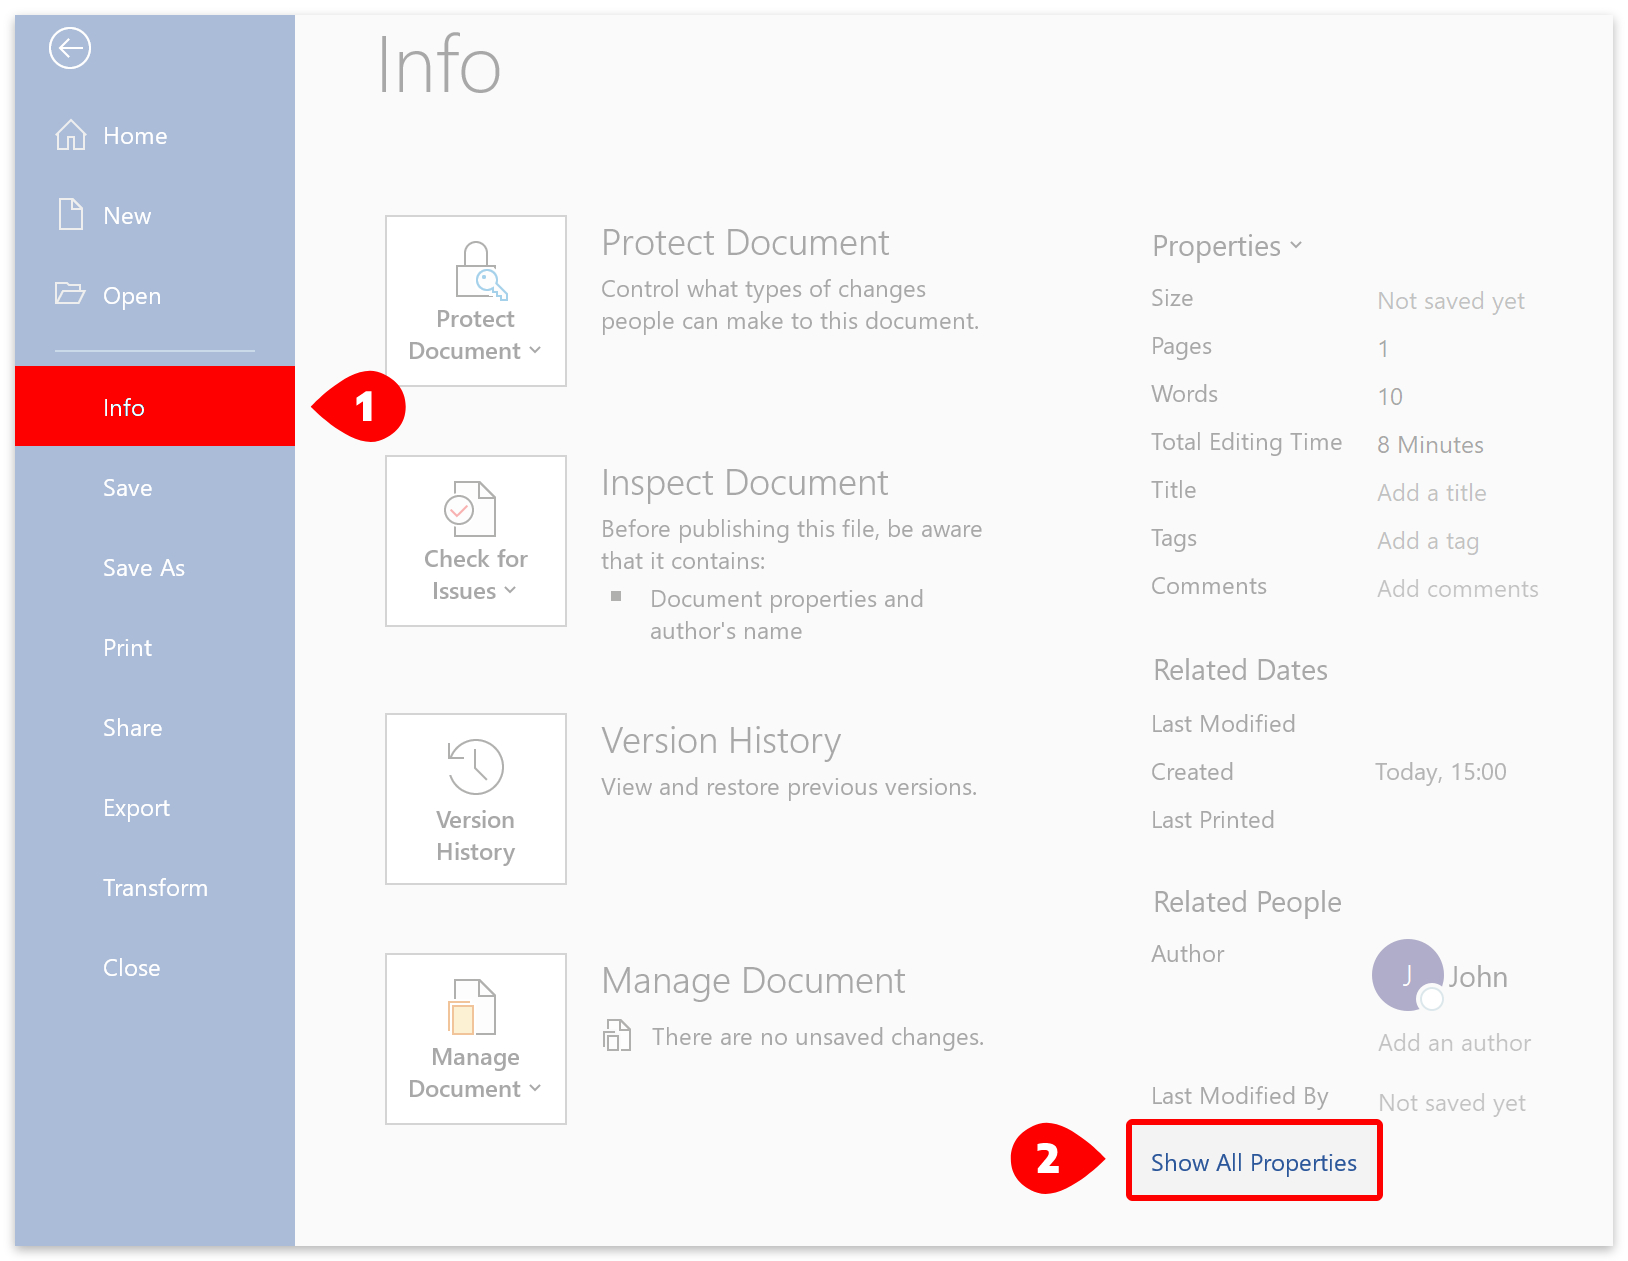
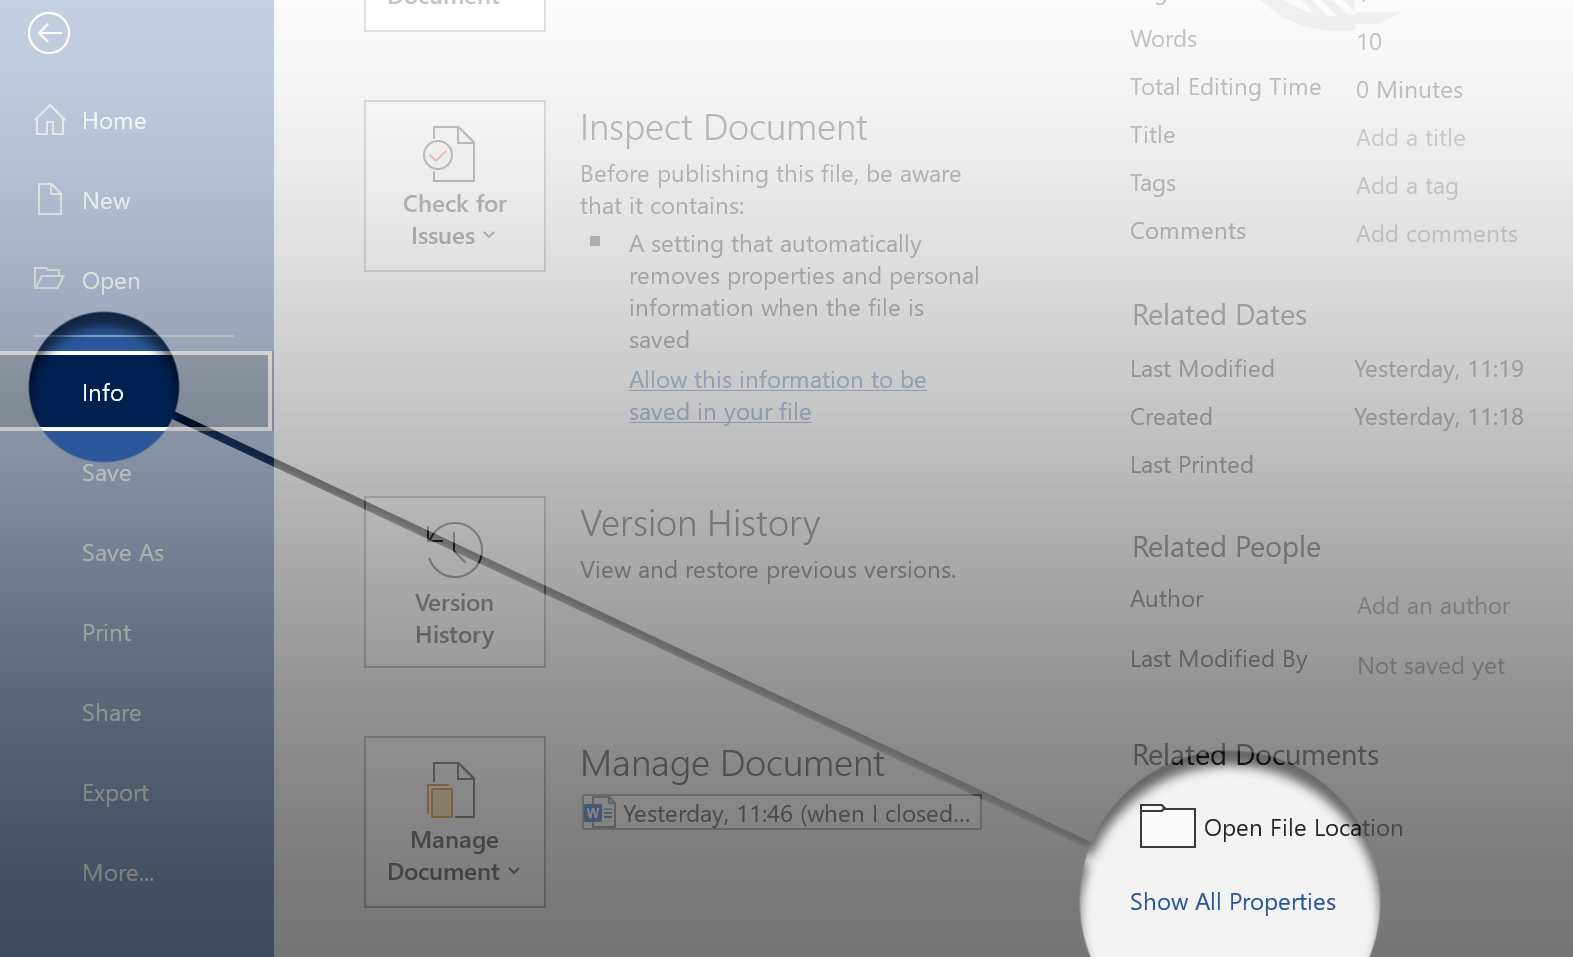
- Click on Info in the flyout menu.
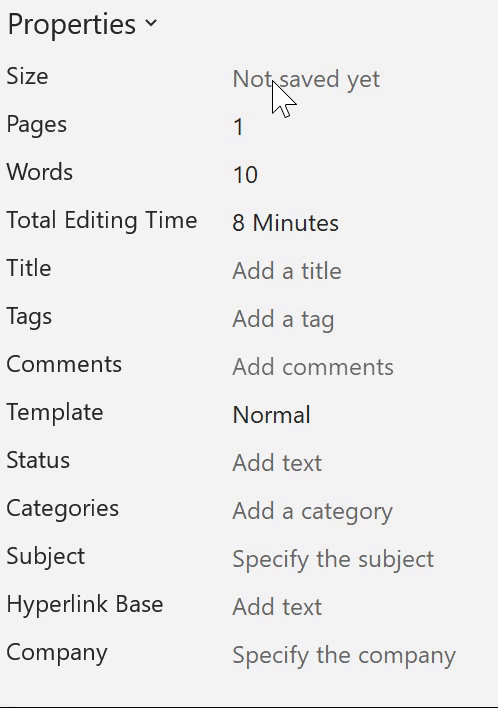
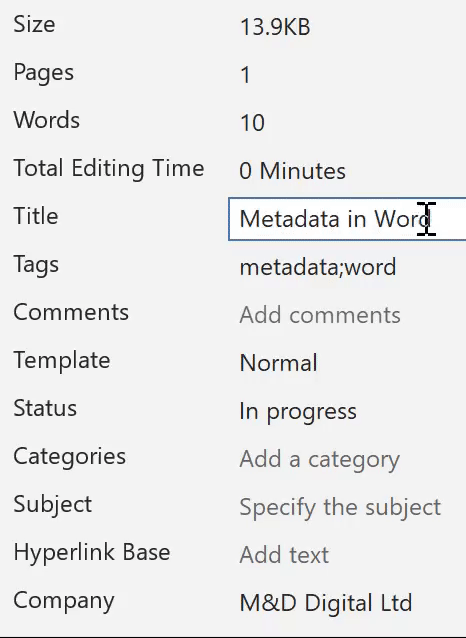
- Then click on Show All Properties.
- Add as much metadata as you like.
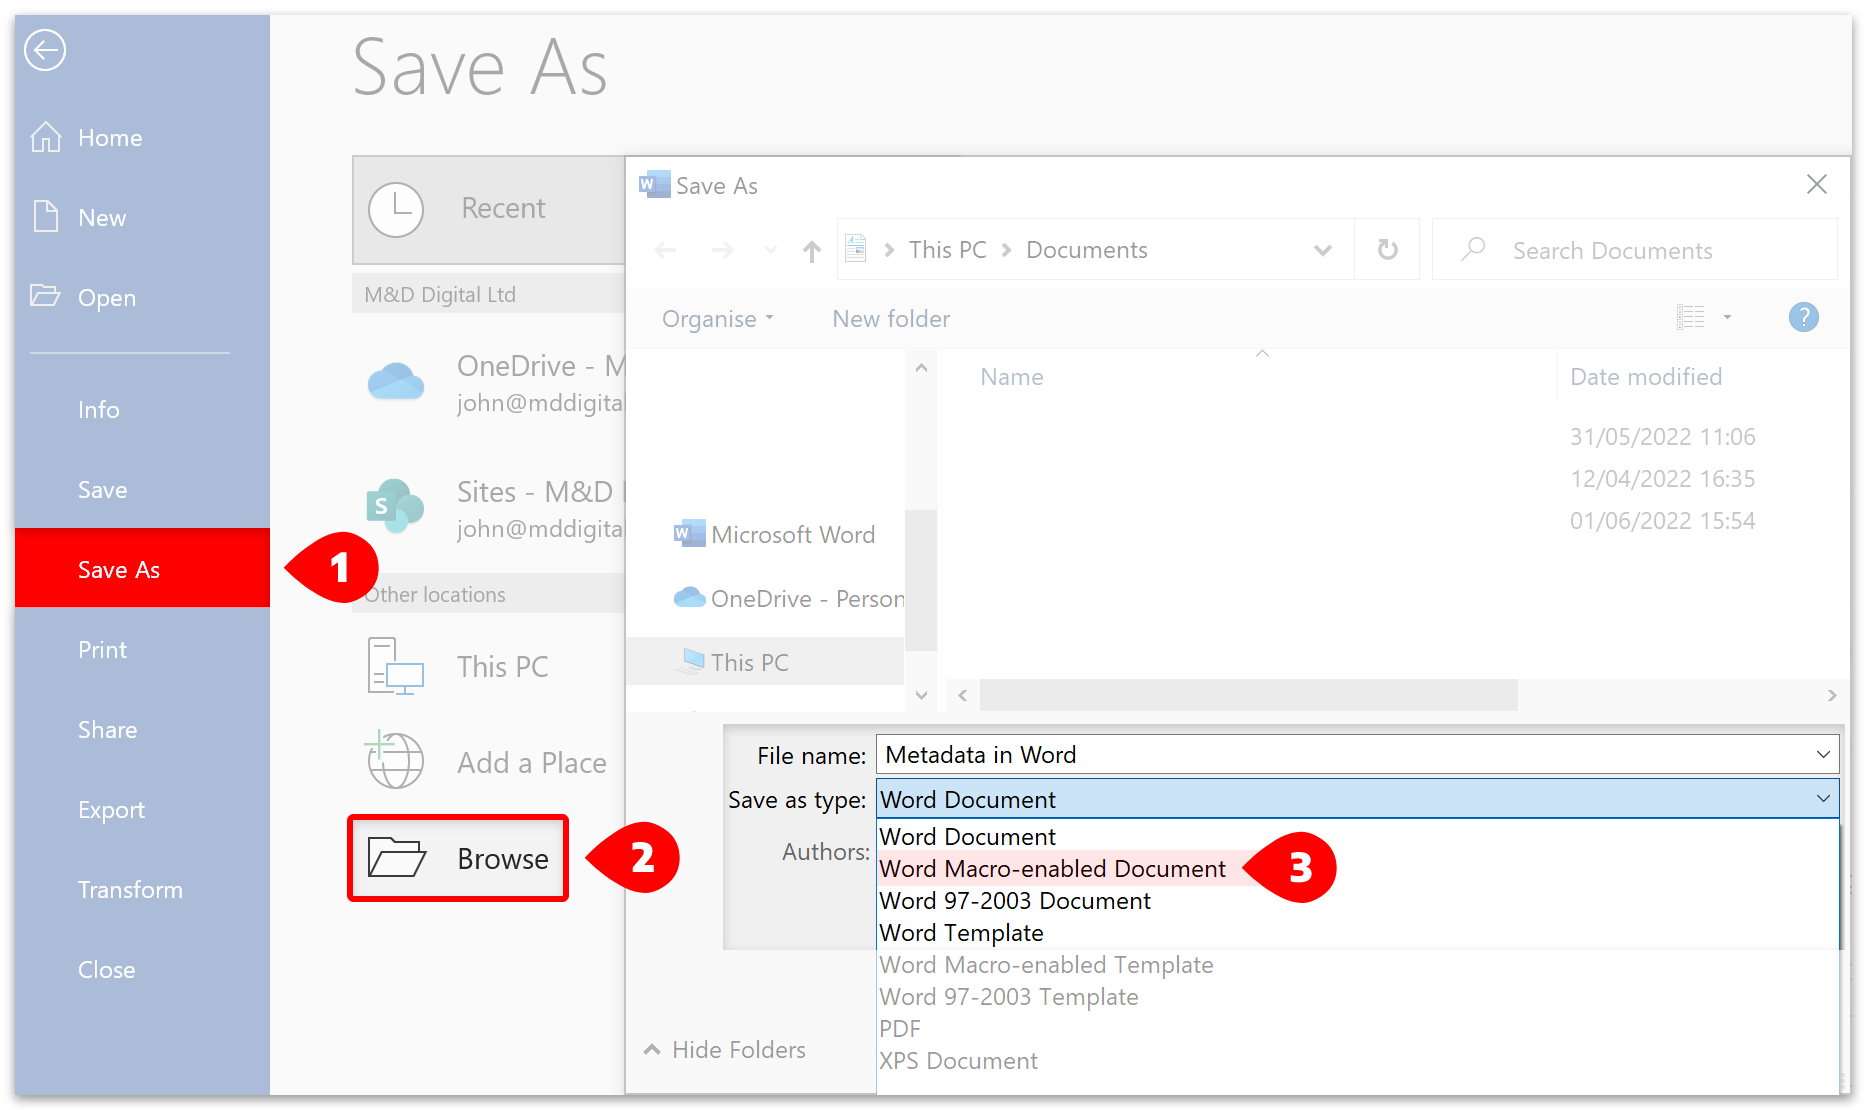
- Go to Save As when you’ve finished adding metadata. (1)
- Click on Browse. (2)
- Then save your file as a Macro-enabled Document (docm). (3)
How to remove metadata from inside Word
You can remove metadata from inside a Word document individually or in bulk. First, we’ll remove metadata in bulk using the Document Inspector.
Remove metadata in bulk
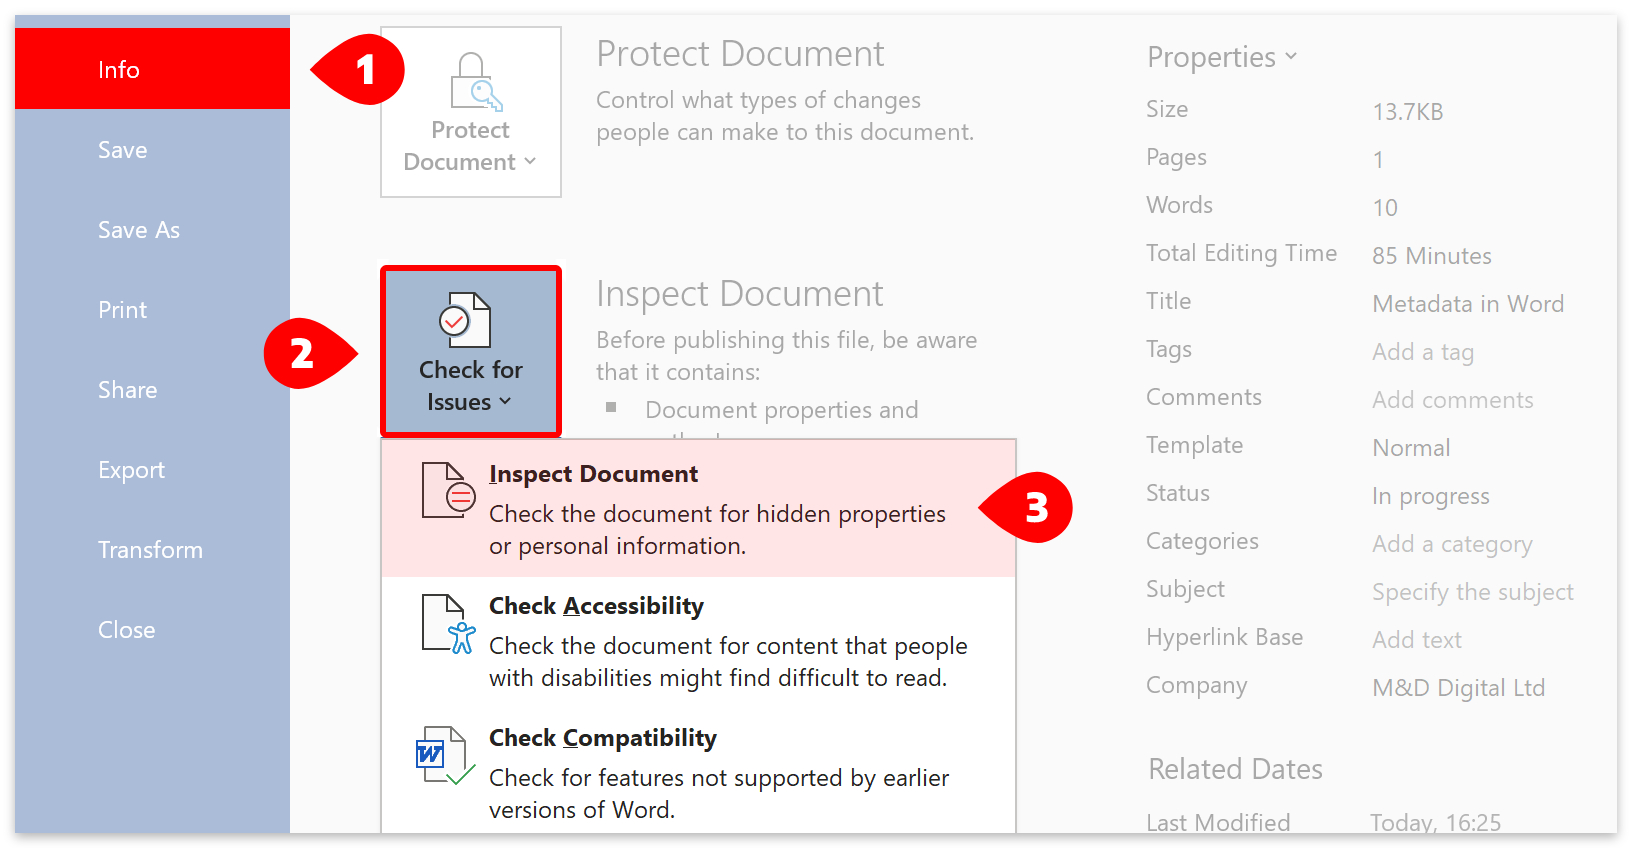
- Go to File > Info. (1)
- Click on Check for issues. (2)
- Then click on Inspect Document on the dropdown menu. (3)
- The Document Inspector box will open.
- Click the Inspect button to continue.
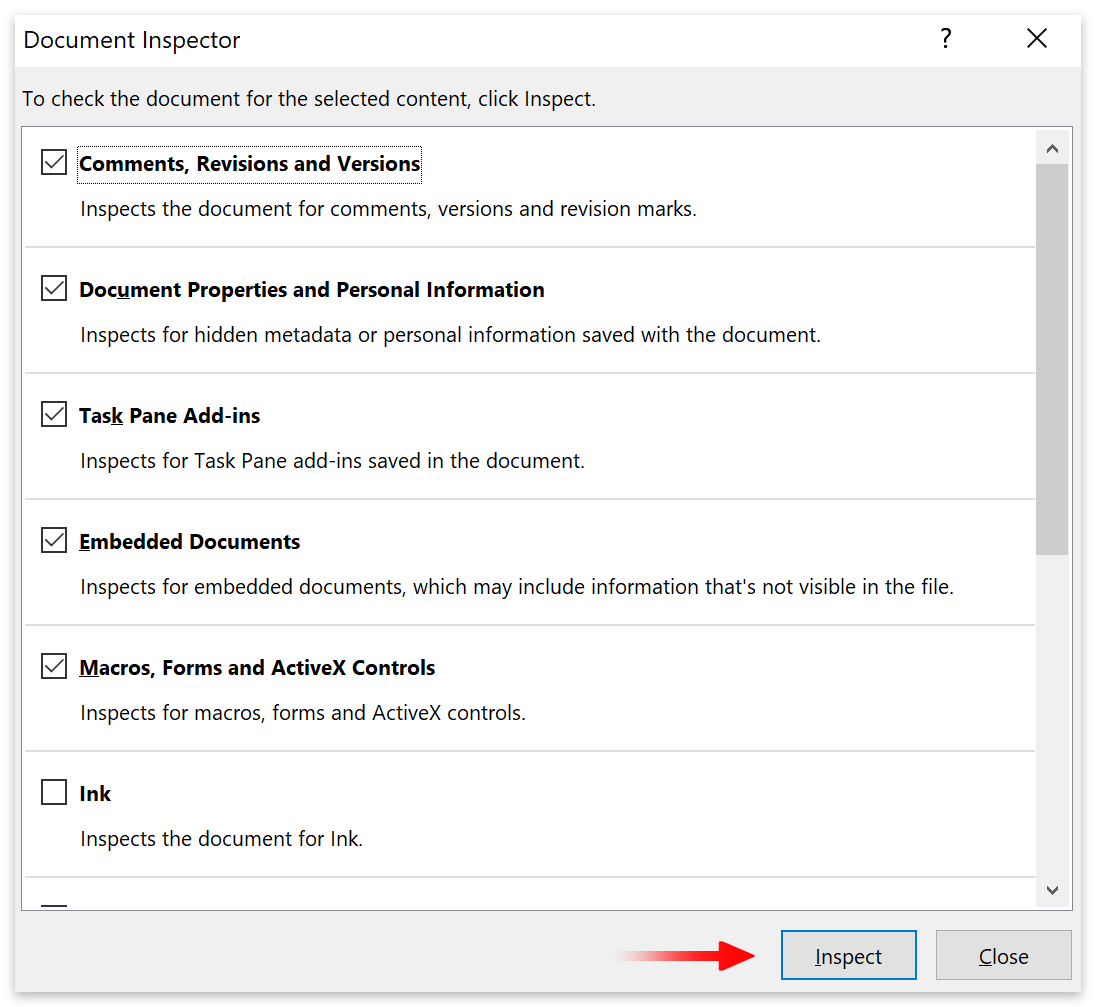
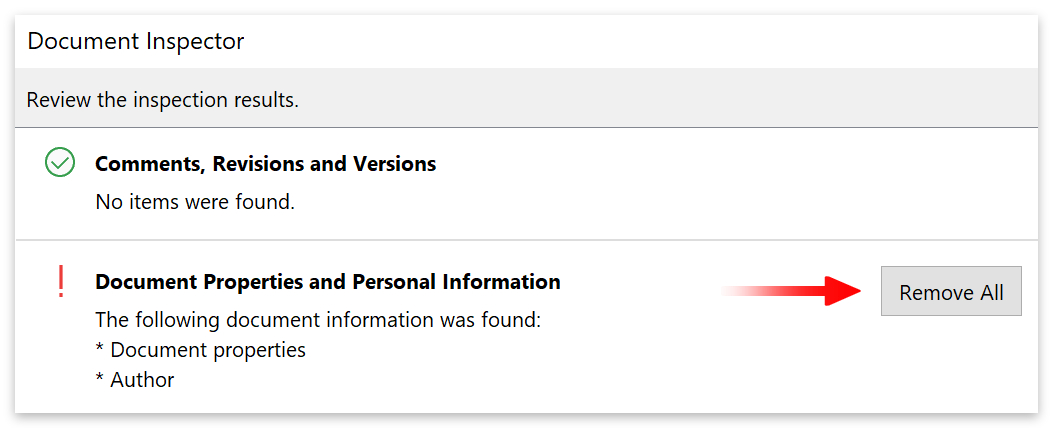
- The Document Inspector will find any removable metadata in the document.
- Click the Remove All button to remove the metadata.
Remove metadata individually
- Go to File > Info.
- Then click on Show All Properties.
- Click the metadata you want to edit and delete or enter new text.
Alternatively:
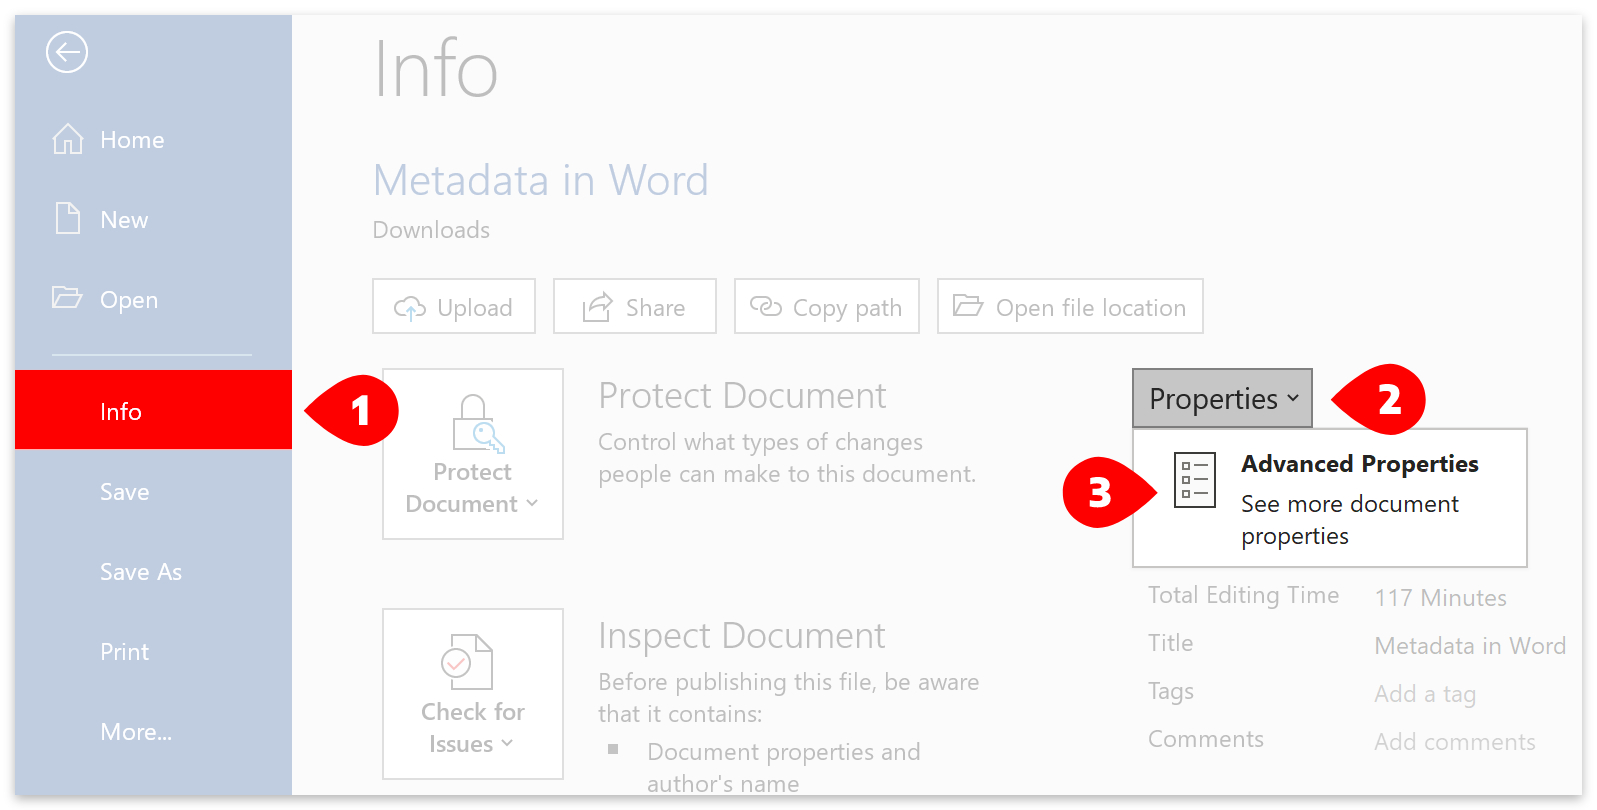
- Go to File > Info. (1)
- Click on Properties. (2)
- Select Advanced Properties in the dropdown box. (3)
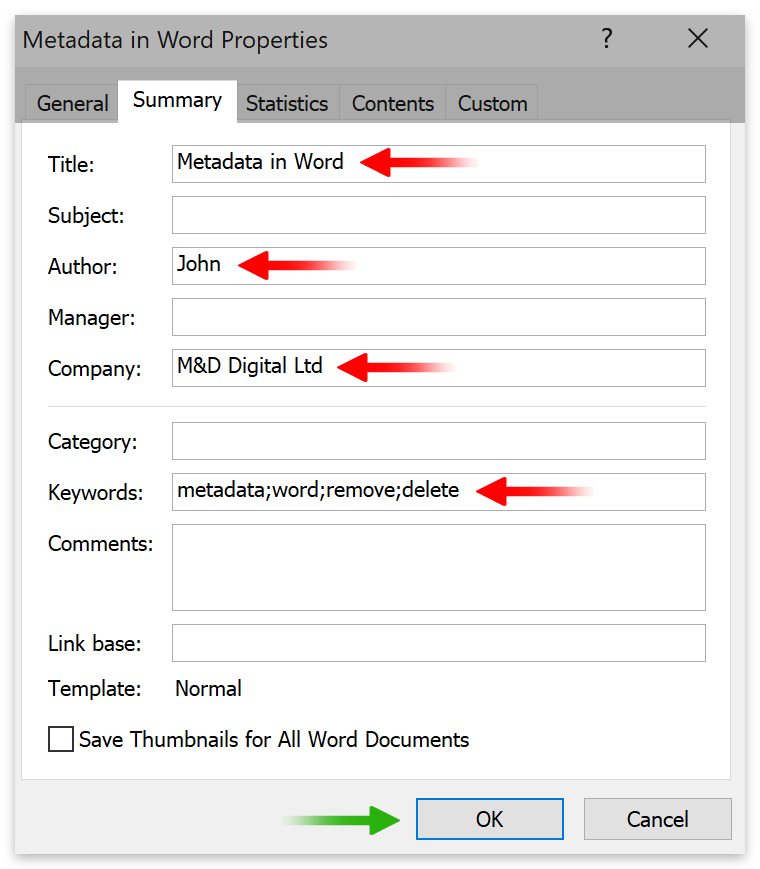
- Then click the Summary tab.
- Change or delete the metadata and click the OK button.
How to remove metadata from outside Word
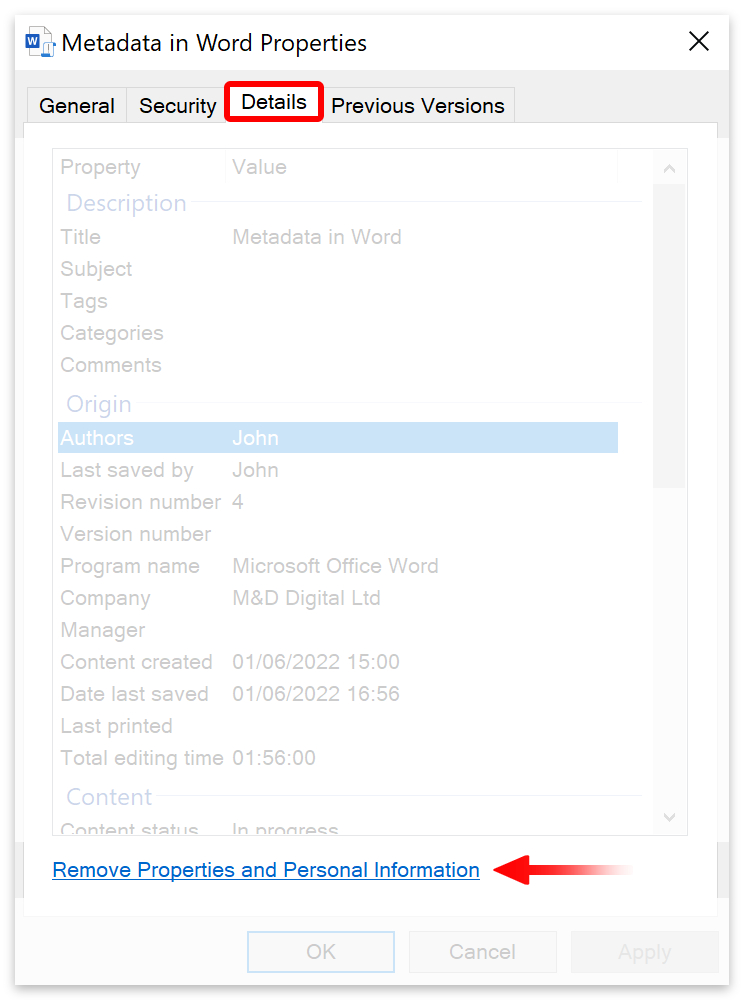
You can remove metadata from a Word document without opening the file. Please use our guide to follow along. Start by locating your Word document on your computer.
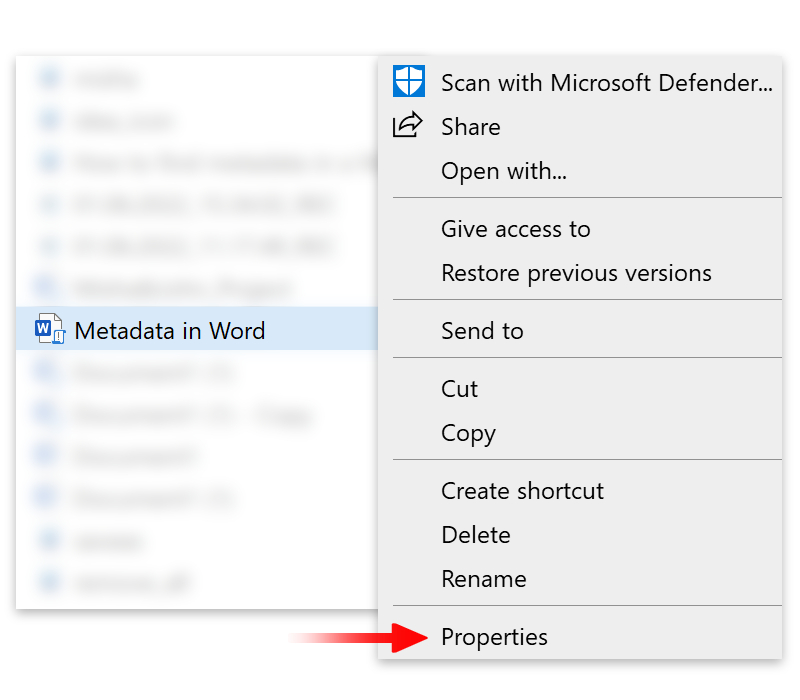
- Right-click your file and select Properties from the popup menu.
- Click on the Details tab.
- Then go down and click Remove properties and personal information.
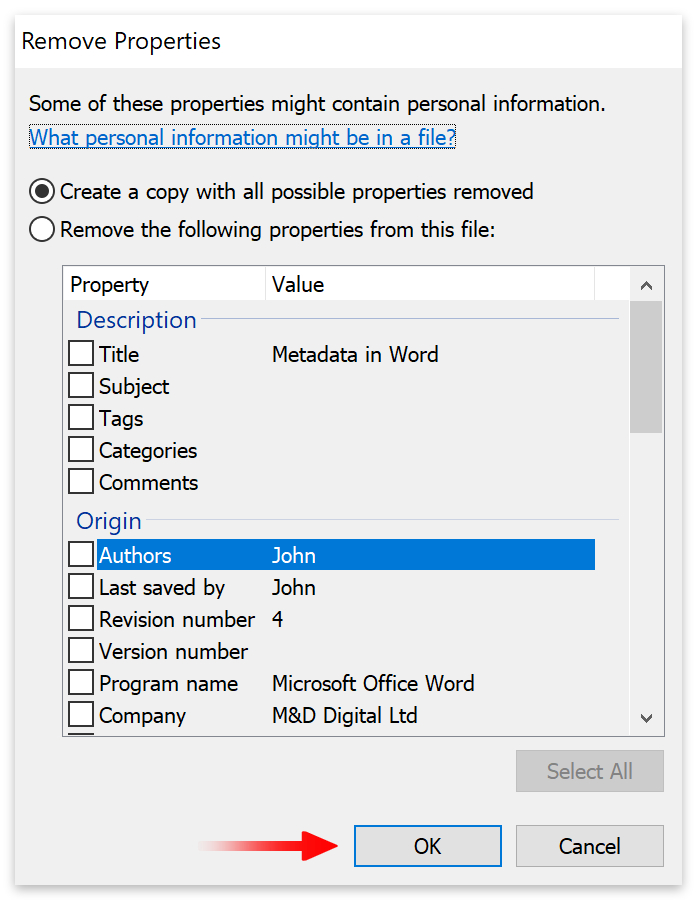
- The Remove Properties box will open.
- You will find two options for removing metadata:
1: Create a copy with all possible properties removed
- This option will be selected by default.
- A new copy of your document will be created with its metadata removed.
- Go down and click the OK button.
2: Remove the following properties from this file
- You can scroll down and manually select which metadata to remove by selecting this option.
- When you’ve finished, go down and click the OK button.
You can use this method to remove metadata from multiple Word documents. Instead, select all the files you want to remove metadata from and right-click any of the files. Follow the same process as above to use the Remove Properties and Personal Information tool.
Add, remove, and modify custom metadata
Adding, removing, and modifying custom metadata must be done manually. To follow this section of the guide, you will need access to the Microsoft Word application. Please start by opening a new or existing Word document.
Add custom metadata in Word
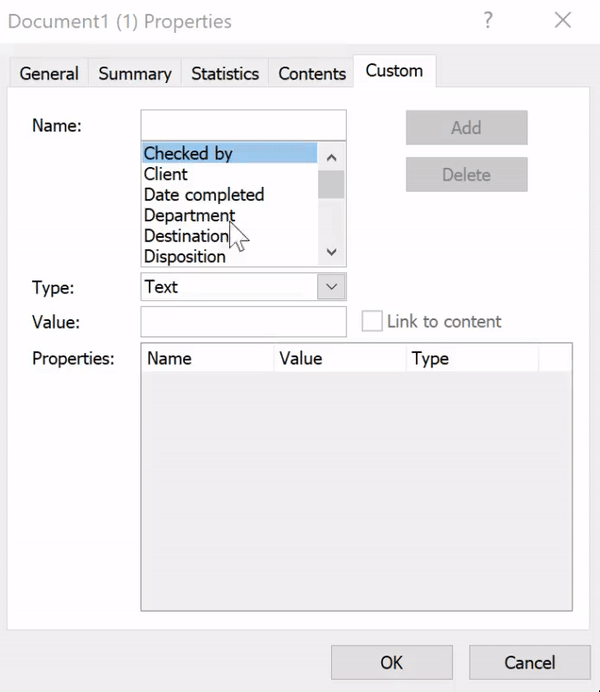
- Go to File > Info. (1)
- Click on Properties. (2)
- Then select Advanced Properties. (3)
- Click the Custom tab on the popup box.
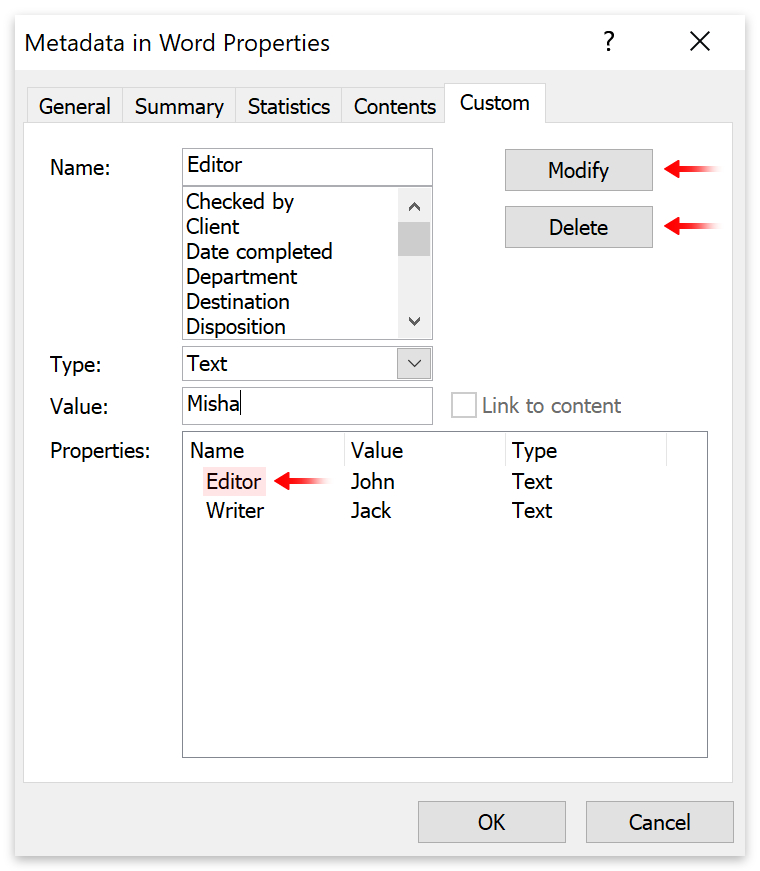
Remove and modify custom metadata in Word
- Select the name of your custom metadata.
- Change the Name, Type, or Value.
- Then click the Modify button or click the Delete button to remove the metadata.
Conclusion
The process you choose to remove metadata from a Word document will depend on what kind of metadata you are trying to remove. For example, if you are trying to remove watermarks, you will have to use the Document Inspector. However, the simplest way to remove personal information is by right-clicking the file on your computer, going to Properties > Details, and using the Remove Properties and Personal Information tool.
The property removal tool is also helpful in removing metadata from multiple Word documents simultaneously. You can do this by selecting all the documents you want to remove metadata from, right-clicking any of the selected files, going to Properties > Details and then clicking on Remove Properties and Personal Information.
Another way of removing metadata is to copy and paste the content of your Word document into a new document. This simple yet effective method works because the metadata is connected to the file, not the content.
Thanks for reading.