If you’re organization switching licenses over, you’ll likely need to remove a series of licenses in one go. Fortunately, this is quite simple. Provided you possess a global admin account.
Solution:
- Access the Office 365 Admin center licences page (linked here)
- Select a licence
- Select users
- Click Unassign licences
This post offers a step-by-step guide on the process you’ll need to follow through with to bulk remove licenses for Microsoft’s Office 365 suite.
Contents:
Bulk liscence removal guide
Step 1 – Open the Office 365 Admin center license page
The Office 365 Admin center can be accessed through Office or this link. As long as you can get to the page, and have the required permissions, you should be able to follow along with us fine.

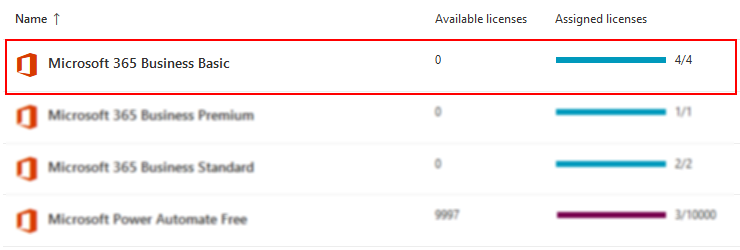
Step 2 – Select a license
To proceed, have a look through the license list. You should be able to find the license you would like to remove. When you do, give it a click.
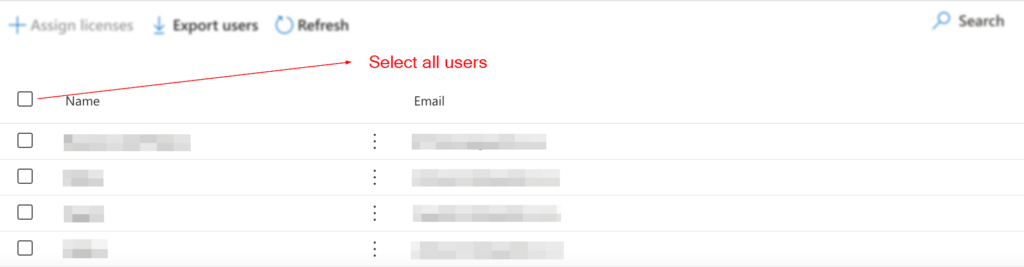
Step 3 – Select a user
To proceed, have a look through the list of users and select the users whose license you’d like to revoke. Check the box by the Name label to bulk select all users, or manually check the box by their name’s to individually select them.
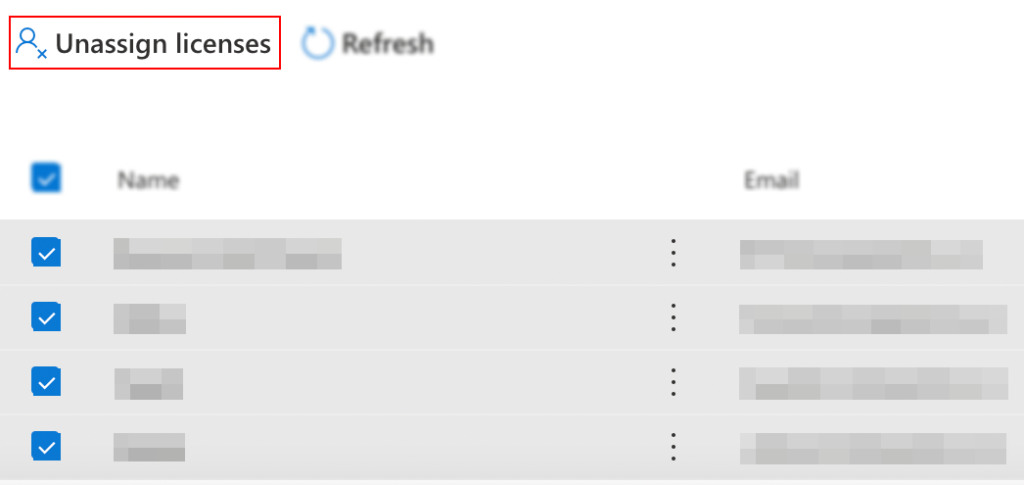
Step 4 – Click Unassign licenses
Finish up by clicking Unassign licenses above the user table.
The process we’ve outlined here is by far the most simple way of removing licences in bulk. There are other methods, but this takes less than 1 minute and is a process anyone can follow.

End note
Recap
Via the Office 365 Admin center, we’re able to view each of our licenses and assign or unassign users from said licenses with ease.
Farewell
As usual, this section is dedicated to thanking readers for their support. We’d be pleased to know you found this post useful and/or informative. If you have any more SharePoint-related queries, please consult our related articles (listed below). However, if you have other queries, consider looking at the rest of the site. We’re frequently posting new stuff each week and may just have the guide or troubleshooting tips you need. Regardless, we wish you a good day/night. Farewell readers.
Our related articles:
- How to unsync SharePoint folder from desktop – When a user uses the OneDrive sync client to synchronize a SharePoint Document library, the whole library of files and folders is transferred to the user’s PC. It is not, however, simply replicated. Between the user’s PC and SharePoint, a two-way relationship is formed. Any changes in one location are immediately reflected in the other. This is unwanted behaviour if you intend to merely copy. As such we’ll be showing you how to unsync SharePoint.
- A guide to checking the size of a folder in SharePoint – If you’re navigating your SharePoint Online site documents often, you’ve more than likely ran into folders frequently. Folders contain files, as well as additional folders. As you’d expect, this causes them to grow in file size. If your site utilises a manually set storage quota, you may wish to clean up folders which are getting too big. Unfortunately, you’ve found you don’t know how best to check. This post, you’ll soon find, is your solution.
- SharePoint: can’t add site members: Causes and fixes – SharePoint servers as a collaborative document manager. As such, the collaboration-based functionality is about as important as the management functionality. Despite that, SharePoint may on occasion run into issues adding site members- in this blog we’ll be running through some causes and discussing fixes.
- What is the simplest way to transfer files from Google Suite to SharePoint? – If you’ve decided on switching from the Google Suite to the Office 365 Suite, you may be a little baffled as to how to go about it. Fortunately for you, we’ve got a better method than re-downloading and uploading everything one-by-one. Have a read to find out more.