OneDrive is a great way to manage files and folders; you can effortlessly move files across without any issues on a cloud network. However, you may want to remove OneDrive from your device because you no longer use it or have another account; you can remove OneDrive however, how can you remove OneDrive from your Mac without deleting files? From that account. Read through and see how you can remove OneDrive from your Mac without deleting files.
Below is a guide on removing OneDrive from your Mac without deleting files; the guide includes a step-by-step process of the individual steps required to complete the process and removing OneDrive from your Mac without deleting files. You will need to first move the content over to a local folder and then delete OneDrive.
- Firstly, on your local drive, create a new folder.
- Now open Finder and go to your OneDrive folder.
- Select all content within the folder (use Command + A).
- Press the Option key and move the content into that new folder.
- After that, go back to Finder.
- Go to “Application.”
- Now find and right-click “OneDrive.”
- Click on “Move to the bin.”
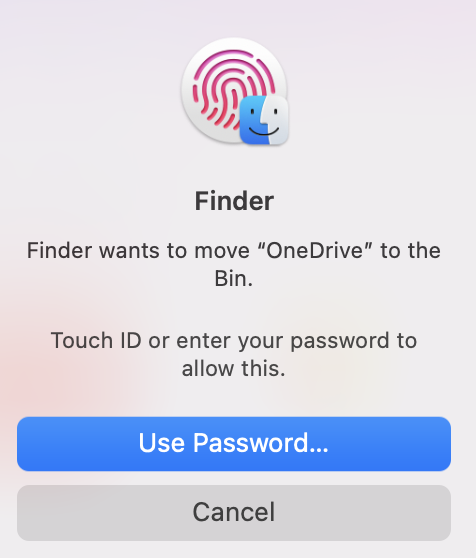
- Input a password or use your fingerprint to complete deletion.
- Finally, go to the bin and empty it.
Once the steps above have been completed, you will have successfully deleted OneDrive without deleting files within that folder. The files will now be stored locally and ready for use even if OneDrive is deleted. The files are still on the cloud, and any changes you make to them on your desktop will be reflected across your whole OneDrive network. You need to use the option to make a copy rather than move the files; otherwise, the files will disappear from the whole network. Once the files have been safely copied to local space, you may proceed with the second part of the process and delete the OneDrive application itself.
In-depth step by step guide [with screenshots] – How to remove OneDrive from your Mac without deleting files
Here is an in-depth guide on removing OneDrive from your Mac without deleting files; this guide includes a series of screenshots to help you navigate across the UI if you are struggling to find the corresponding functions to the steps shown above. The steps may also include an in-depth breakdown to help assess each point better, so you know what the step is trying to accomplish in the process.
- Firstly, on your local drive, create a new folder.

You can create this folder anywhere on your desktop; right-click and click on “New folder” however, make sure your folder is in a location with adequate storage space.
- Now open Finder and go to your OneDrive folder.

In Finder, open your OneDrive folder and proceed with the steps from there; if you have more than one account, select the one where you need to keep the data.
- Select all content within the folder (use Command + A).
You can use your mouse or trackpad to select all the content within the colder. However, pressing the command key and pressing the A key simultaneously will allow you to select everything within that folder easily.
- Press the Option key and move the content into that new folder.
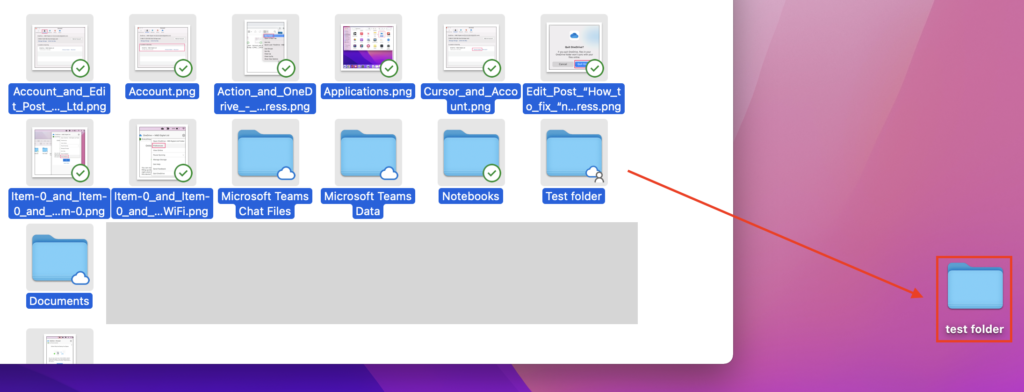
Pressing the option key is very important as it will allow you to move the content by copying it over rather than simply moving the content, which may delete all those files from your cloud network.
- After that, go back to Finder.

- Go to “Application.”

- Now find and right-click “OneDrive.”

- Click on “Move to the bin.”

- Input a password or use your fingerprint to complete deletion.
- Finally, go to the bin and empty it.

When you have completed the steps shown above, OneDrive will be erased without deleting any folders from it on your desktop. Files will still be available for use despite the program now no longer existing on your desktop. Simply moving the files will not work as the files will be removed from the whole network; you need to instead copy them over using the method shown above. Because the files are still in the cloud, any changes you make on your desktop will be mirrored throughout your whole OneDrive network. After the data have been safely moved to a local storage location, you may go on to the next step and remove the OneDrive program.

Why may you want to remove OneDrive from your Mac without deleting files?
There are a few reasons you may want to remove OneDrive from your Mac account without deleting files; in this section, we will cover some of the more prominent reasons you may want to delete OneDrive without deleting files.
You may want to remove OneDrive from your Mac without deleting files because you may need to keep a copy of OneDrive files on your local disk before you delete your account. Keeping a local copy allows you to keep evidence of work you have done and even keep reference material for tasks you may have completed. However, make sure you are authorized to keep a copy of that work if it belongs to a group you are part of or a company.
You may also want to remove OneDrive from your Mac without deleting files if you need those files at a later stage but not right now. If you delete OneDrive and then realize that you need a file or folder from there, then you may not be able to recover that content at a later stage. So, therefore, downloading that content on a local drive will allow you to keep a reference copy on hand.
Conclusion
For this blog, we hope the solutions to removing OneDrive from your Mac without deleting the files illustrated above have worked well to assist you. You will need to, as stated before, move the content over to a local folder and then delete OneDrive. If you cannot answer the question properly with the guide provided above, you can drop a message below, and we will aim to answer your questions as quickly as possible.