When users are terminated or kids graduate from school, there are numerous instances in which we need to Add / Remove Site Collection Admin or Secondary Site Collection Owner in SharePoint to obtain access to data saved in their OneDrive for Business. Admin must add Secondary Site Collection admin or Secondary Site Collection Owner to a large number of users in this case. As a result, when a user is designated for deletion, the secondary Admin / Owner will be allowed access to that OneDrive. In such cases, adding them one by one is quite difficult, and PowerShell, as usual, comes to the rescue. In this blog, we will be looking at solutions to help users remove owners from a OneDrive file and find possible solutions to help prevent the error from occurring again. We will also address some of the reasons why users may want to remove admins from a folder or file. Follow the step-by-step process below to see how you can remove the owner from a OneDrive file.
Step by step process – How to remove owner from a OneDrive file
- First sign into Office 365.
- Use the app launcher and navigate to “SharePoint”, and click on it.
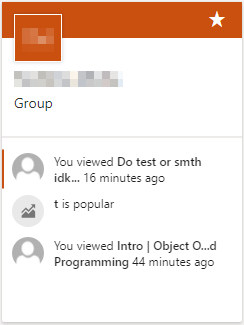
- In SharePoint go to the Site where your files are located.
- In the menu bar click on “Documents”.
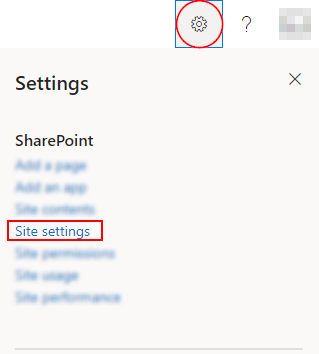
- Click on “Settings”, gear icon.
- Then click on “Site settings”.
- Now click on “Site collection administrators”.
- Finally, remove the owner from the file.
You can access the same section from both OneDrive and SharePoint, however, navigating through Sharepoint will be able to refine the files better as you can navigate to the site file much easier. Regardless of the approach you take, you will find the site collection administration page where you can remove select owners from a site if necessary.

File ownership transfer
Files and folders are assigned to the owner that posted the content, however, Office 365 gives users the privilege to transfer the files across to other users. Follow the step-by-step process below to see how you can transfer file ownership across to another user.
Step by step process – File ownership transfer
- First sign into Office 365.
- Use the app launcher and navigate to “OneDrive”, and click on it.
- Then select Folder from the drop-down menu.
- After that, click Create and give the folder a name.
- Click the permission setting in the “Sharing” column beside the folder, and then click Advanced in the box that opens.
- Click “Stop Inheriting Permissions” if it appears at the top, then OK. Then, under Show Options, click Grant Permissions.
- Enter the username of the current owner of the file or folder being transferred in the “Enter names or email addresses” box, and then pick the right user from the drop-down.
- Set at least Contribute under “Select a permission level,” then click Share.
- After selecting the file or folder, click Download.
- It will be downloaded as a ZIP file if it is a folder. Navigate to the following folder on your computer and extract it:
- Right-click the ZIP file on Windows and select Extract All….
- To extract the ZIP file on macOS, double-click it.
- To access shared objects in OneDrive, click Shared.
- To open the folder established by the new owner, choose the name of the folder.
- Click Upload, then Files or Folders, depending on what you’re transferring, and then the file or folder you want to upload to the shared folder.
Reasons to transfer file ownership from the current owner
There are several reasons why you may want to transfer file ownership from one user to another. For instance, the user who is the current owner of the file may want to delegate the file to another individual who may find more use for that file. The permission to allow for users to easily access files and folders may be necessary in a company to maintain productivity so a file ownership transfer may be necessary to elect a better candidate for file management.
Another reason for this is that if the user decides to depart from a company and their access to files are necessary for the company, this produces another reason to transfer the files to that user’s name. You can do this stage after the user has left however, taking preliminary steps to ensure all files are correctly managed by the correct user is essential.
In depth – Step by step process – How to remove owner from a OneDrive file
Step by step breakdown:
- First sign into Office 365.
Use your account details or if you have a current Skype account with the Office account in question, you can use this.
- Use the app launcher and navigate to “SharePoint”, and click on it.
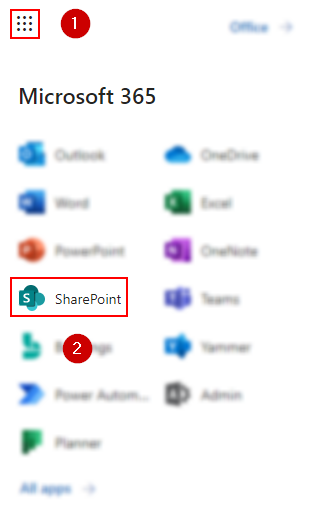
You can access the SharePoint application however this is for individuals who only have a SharePoint plan, A larger group of individuals have SharePoint in Office 365.
- In SharePoint go to the Site where your files are located.
- In the menu bar click on “Documents”.
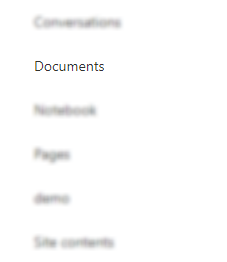
A document library is a safe storage location for files that you and your coworkers can quickly locate, collaborate on, and access from any device at any time. For example, a document library on a SharePoint site can be used to hold all materials relevant to a given project or customer.
- Click on “Settings”, gear icon.
I’m a site collection admin, and I’ve noticed that the Gear icon has various options and a different UI, yet it works well with a Read-Only user account.
- Then click on “Site settings”.
- Now click on “Site collection administrators”.

This will be located under the user permission category.
- Finally, remove the owner from the file.

That’s it for this Blog thank you for taking time out to read our content, please feel free to email our team about how it went if you followed the steps or if you need more help with the questions we answered in this Blog.