Microsoft Teams offers status symbols to indicate your availability on the program; if you are in a call or a meeting, it will display a red symbol that indicates that the user is in a meeting or call and cannot be disturbed. However, when the meeting is finished, that user’s status will turn to “Available.” This could be frustrating as those users may be involved with other tasks after the meeting is complete and cannot be set to available because it could disturb the process. So in this blog, we will cover the steps on how you can automatically restrict Microsoft Teams from changing status.
Here is a step-by-step guide on stopping Microsoft Teams from changing status automatically; the process includes setting a duration for a status that does not change as you either progress with a meeting or progress being “Available” when you are idle in the program. You can set this duration to be either the options provided by Teams or a custom option.
- Firstly open Microsoft Teams.
- From there, click on your profile picture.
- Then click on the dropdown next to your status.
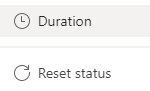
- After that, click on “Duration.”
- Set the “Status” to what you require.
- Now click on the “dropdown for “Reset status after.”
- Then, set your duration.
- Finally, click on “Done.”
You will have successfully stopped Microsoft Teams from automatically changing the status when you have applied the steps above. Whether you go into a meeting or leave it and go idle for a certain length of time, your status will not change until the duration has ended. You can set a custom duration for as long as you want; you make your status appear stagnant indefinitely by setting the custom durations for 100 years if you want.
In-depth step by step guide on How to restrict Microsoft Teams changing status automatically [with screenshots]
If you need more assistance with the steps illustrated above, you can use this guide to help. The in-depth guide includes screenshots to give you more visual context on steps you may not properly understand. Some of the more complex steps will also have further information to outline their purposes in the process illustrated. If you find that those steps are not easy to follow, you can read the in-depth context, which will help you proceed with the steps without any issues.
- Firstly open Microsoft Teams.
For this process, you can use both the desktop version of Microsoft Teams of the browser version; simply log in with your credentials on the browser version or open the app on the desktop to proceed with the steps illustrated ahead.
- From there, click on your profile picture.
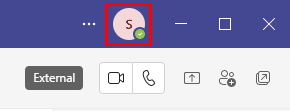
Your profile picture is located in the top corner of the display; simply click on it to expand the panel, including settings, preferences, and status. Instead of having multiple buttons at the top of the page, Microsoft decided to add those features like a collapsible menu box behind the profile picture.
- Then click on the dropdown next to your status.
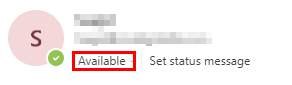
Your status, whether you are available or you are out of the office, will be next to the dropdown; you can either change this as a quick and easy way to update your status; however, doing so will mean the status will change back when you proceed with another task.
- After that, click on “Duration.”
- Set the “Status” to what you require.
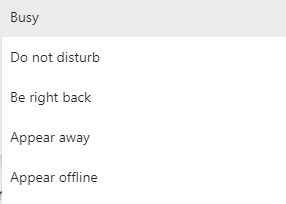
- Available – When you’re active in Teams and have nothing on your calendar, you’re available; this status is applied when you have no calls or meetings.
- Busy – When you are busy, you want to concentrate on something and don’t want alerts to interrupt you; this option will be perfect. It shows users within your organization that you are busy and cannot be disturbed.
- Do not disturb – When you want to focus or display your screen and don’t want alerts to pop up, use do not disturb.
- Be right back – When you want to say you’ll be returning soon, say “be right back.” It is never automatically configured.
- Appear away – When you need to work without answering right away, you should appear away.
- Appear offline – When you appear offline, you indicate that you’re not logged in to Teams and won’t be replying until you are. If someone messages you, you’ll still get alerts.
- Now click on the “dropdown for “Reset status after.”
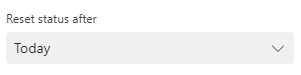
- Then, set your duration.

- Finally, click on “Done.”

Once the steps have been completed, Microsoft Teams will stop automatically changing your current status. If you proceed with a meeting and then leave or end the meeting, the status will change accordingly, and you can leave with a status that doesn’t currently reflect what you are doing. The guide here allows you to have a more customized approach to setting a status. You can set a duration on those status updates and ensure you have a status that won’t affect your progress. You can set the duration for any length of time; with a custom duration, you can set a duration that appears infinite if needed.

Why may you want to restrict Microsoft Teams from changing status automatically?
There are a few reasons why you may want to stop Microsoft Teams from changing status automatically; if you are an individual who proceeds after meeting tasks, there is a good chance you may not want to be disturbed when you are proceeding with those tasks. A situation like this is perfect for setting a duration on how long you want a specific availability status to remain.
You may also want to restrict Microsoft Teams from changing status automatically if you are an individual who has meetings scheduled on platforms external to Microsoft Teams; for instance, you have a meeting set on Zoom or a phone call. Microsoft Teams will not reflect this as those calls and meetings from external platforms are not monitored by Teams. You can set a duration to cover the meeting you have on Teams and the duration of the meeting you have externally.
Administrative users could track idle time in Teams
Imagine being deeply engrossed in a task away from your screen, only for Teams to suggest you’re idle. It can give the wrong impression to your colleagues or superiors. There are third-party tools that can assist administrative users in keeping an accurate tab on idle time in Teams. If you’re looking for a way to stop Teams from prematurely changing your status, tweaking those settings could be your golden ticket.
Conclusion
As we have established in the content above, you can restrict Microsoft Teams from automatically changing your status within the program. If you set a duration for a specific status, you will be able to overcome the automatic status change. We have covered the steps on how you can stop Microsoft Teams from changing status automatically and what scenarios you can use the methods illustrated above to restrict Microsoft Teams from changing status. If you find that you struggle to follow the content illustrated above, simply drop a comment below, and we will address those issues as soon as we can.