Sometimes organizations need to respond to legal matters and investigations. That’s why it’s essential to keep records of communications within the workspace. Fortunately, Microsoft has created the eDiscovery feature that produces data to meet regulatory requirements. The ability to see the edit history of Teams messages is just one of the options available in eDiscovery.
Run an eDiscovery search:
- Sign in to your compliance portal.
- Go to ‘eDiscovery’ > ‘User data search.’
- Create a case.
- Select the case, then ‘Open case’ and ‘View results.’
- Chat messages are labeled with ‘Type: IM.’
- You may need to create an eDiscovery manager via the ‘Permissions’ link on the left menu before you can view the results.
Please continue reading for our visual, step-by-step guide on how to find the edit history of a Teams meeting.
Requirements for using eDiscovery to see edit history
Before running an eDiscovery search, you must have access to the compliance portal. You can access the compliance portal in the three ways:
| Requirements (one of the following): | Price |
| Advanced Compliance add on | $10.00 user/month |
| Microsoft 365 E5 Compliance license | $12.00 user/month |
| Office 365 Enterprise E5 subscription | $38.00 user/month |

What is an eDiscovery investigation?
Companies are sometimes required to submit Electronically Stored Information (ESI). Microsoft Teams content is part of the ESI and is therefore searchable using eDiscovery. Here’s what can and cannot be discovered using eDiscovery:
| Discoverable Teams content | Non-discoverable Teams content |
| Card content | Audio recordings |
| Chat links | Code snippets |
| Chat messages | Feed notifications |
| Edited messages | Chat reactions |
| Emojis and images | |
| Loop components | |
| Instant and private messages | |
| Metadata from meetings | |
| Channel name and subjects | |
| Quotes | |
| Tables |
STEP 1 – Set up an eDiscovery manager
If you’re unable to view the search results, try assigning yourself as the eDiscovery manager. Please follow the steps below to create an eDiscovery manager:
- Head over to your compliance portal.
- Click ‘Permissions‘ on the left menu.
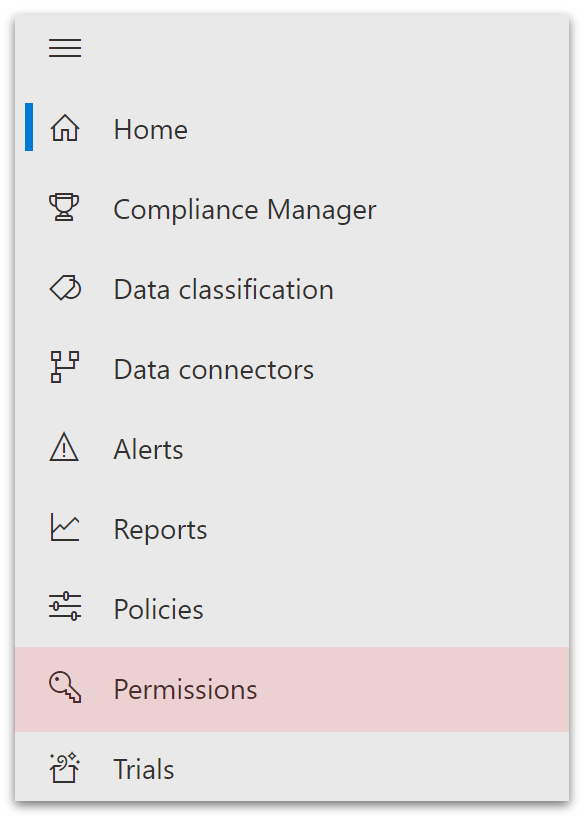
- The permissions page will open.
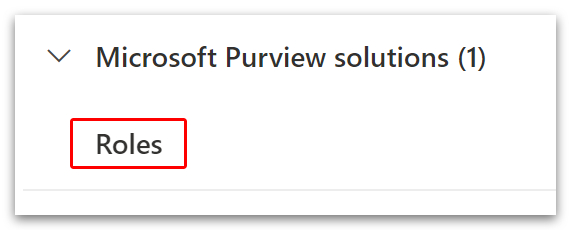
- Head down to ‘Microsoft Purview solutions‘ and click ‘Roles.’
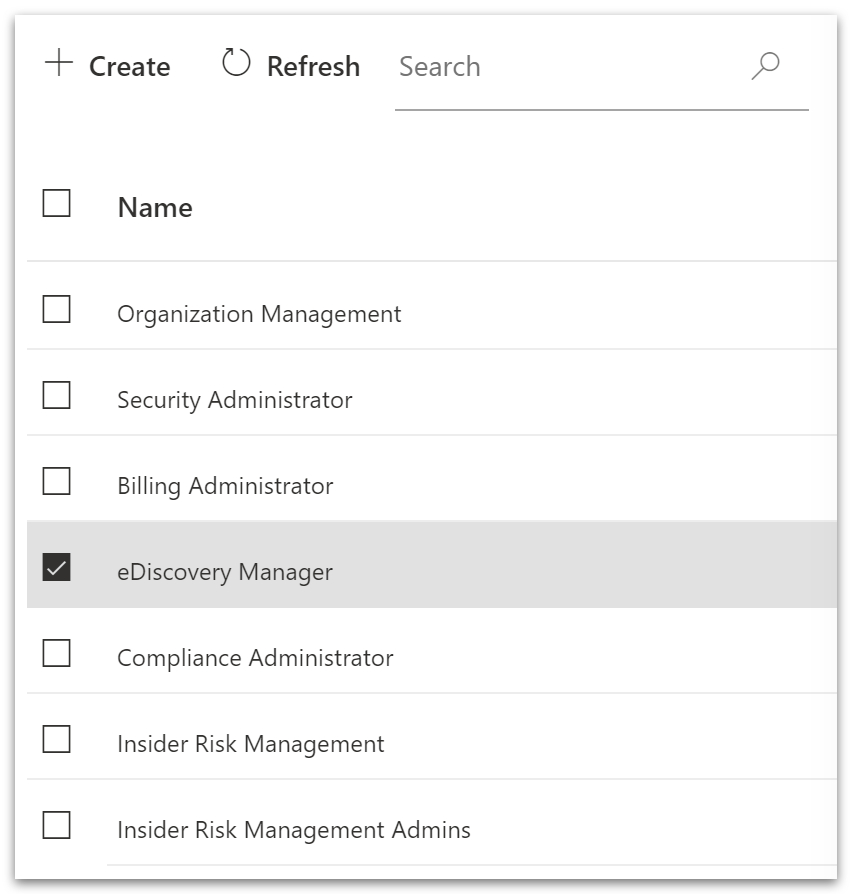
- On the next page, head down and check the box next to ‘eDiscovery manager.’
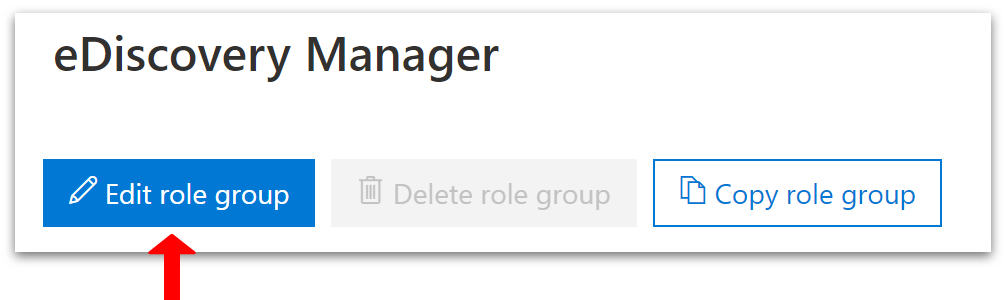
- A box will appear on the right side of the screen.
- There, click the ‘Edit role group‘ button.
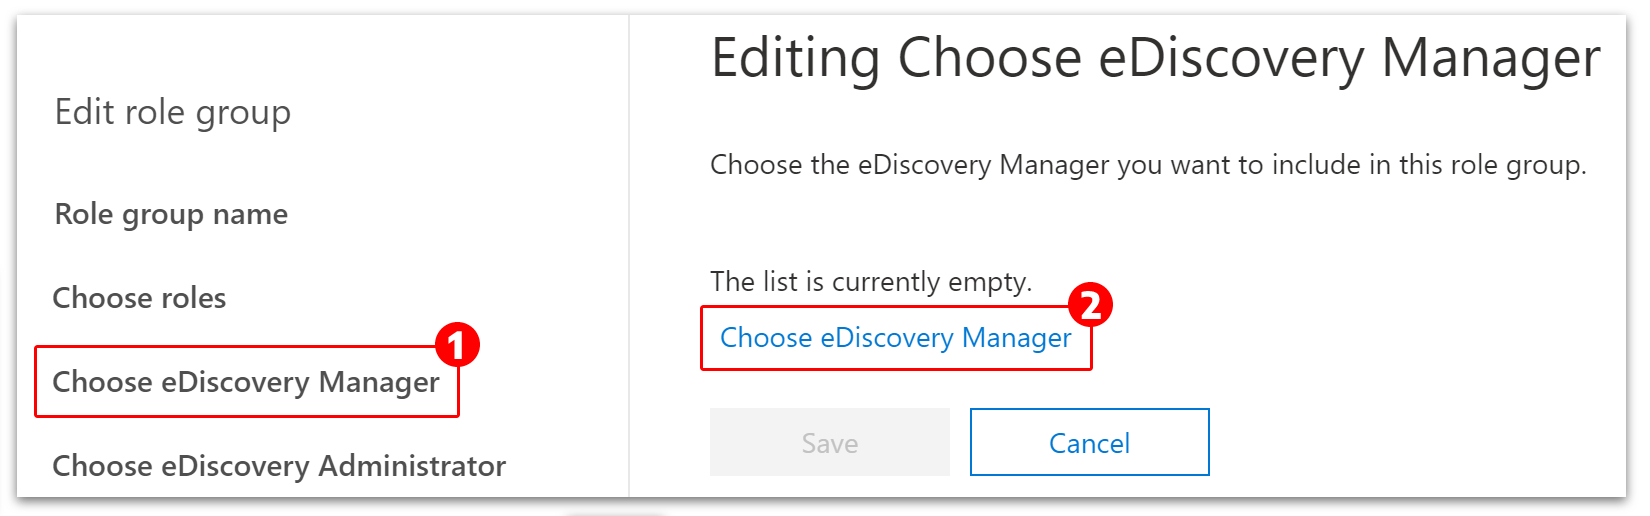
- Head over to the left menu on the next page and click ‘Choose eDiscovery manager.’
- A page titled ‘Editing Choose eDiscovery Manager‘ will appear.
- Click ‘Choose eDiscovery manager‘ below to access the add/remove options.
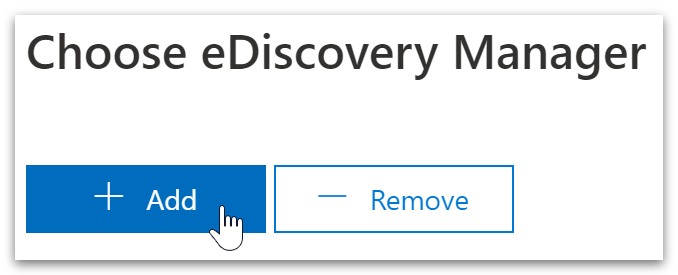
- To add a new manager, click the ‘+ Add‘ button at the top.
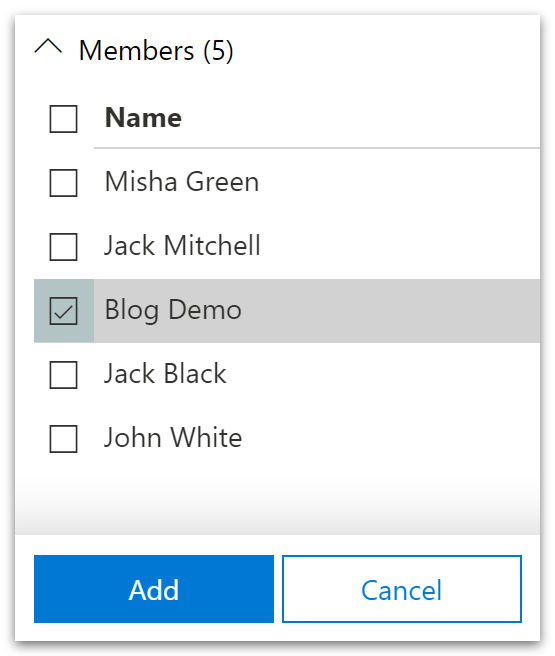
- A list of users will now appear at the bottom of the next page.
- Select a user (yourself) and then click ‘Add.’
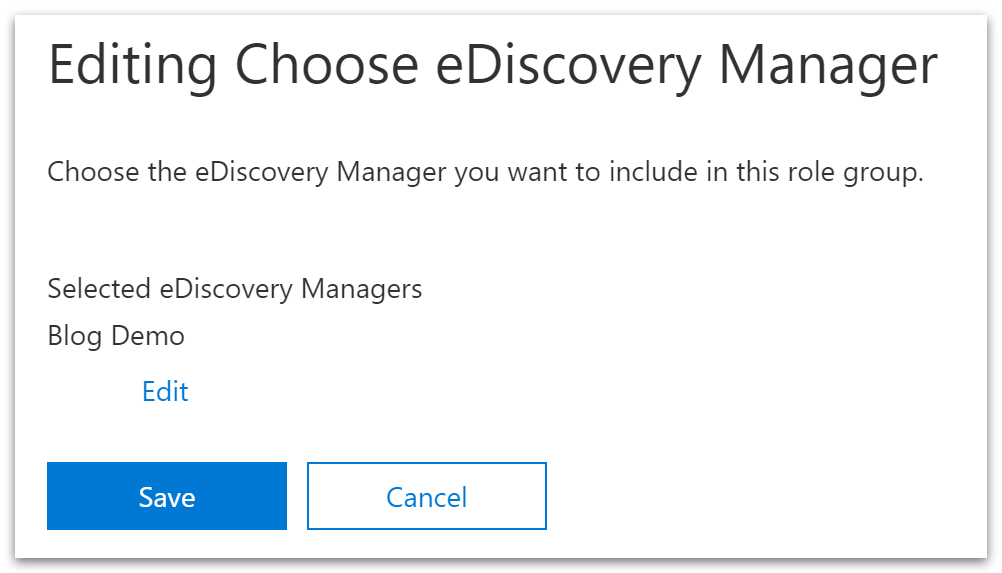
- Head down to the bottom of the page and click ‘Done.’

- Finally, click ‘Save‘ and continue with Step 2.
STEP 2 – Create some test data
Create your test data by starting a new Teams meeting and editing a message in the meeting’s chatbox. It doesn’t matter who edits the message because the system will record the chat history for all authors.
| Note: Please skip this section and head down to Step 3 if you already have data to work with. |
- Start a Teams meeting.
- Click on ‘Chat‘ on the top menu.
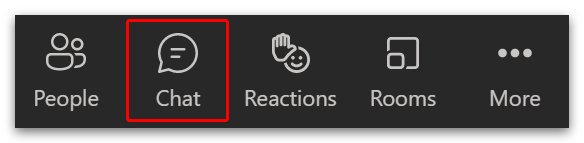
- Enter a test message.
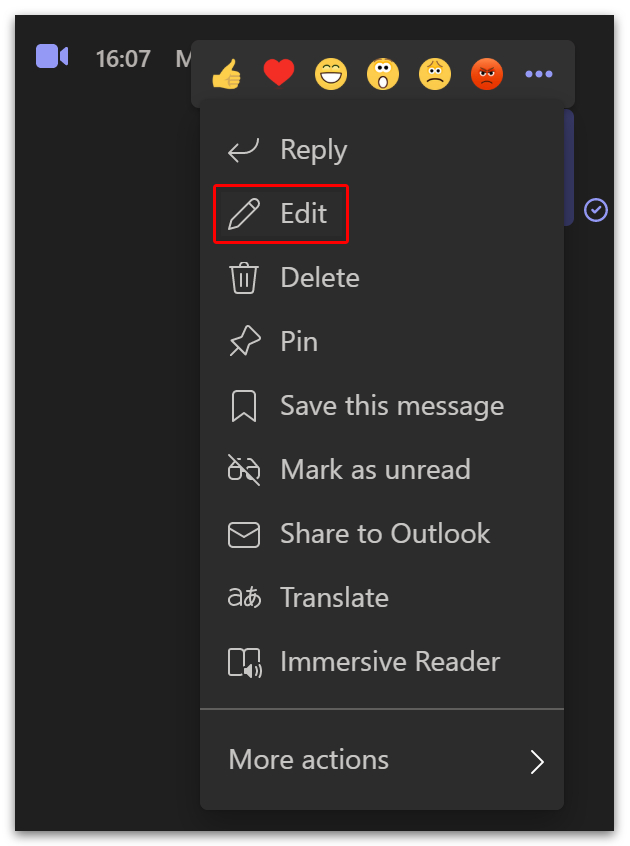
- Hover over the test message and click the three dots.
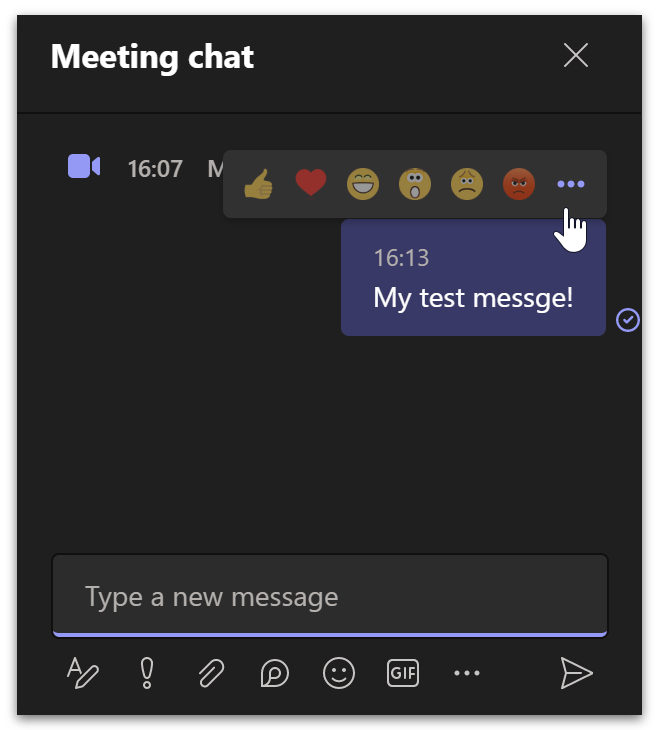
- Select ‘Edit’ from the drop-down menu.
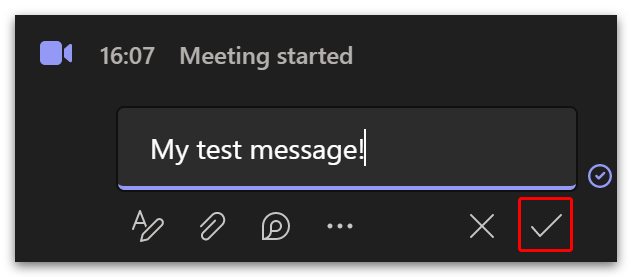
- Edit your message and click the tick button.
STEP 3 – Run an eDiscovery search
Now that you’ve created some test data and assigned yourself as an eDiscovery manager, you can head back to the left menu of your compliance portal. Here, you can access the eDiscovery tool.
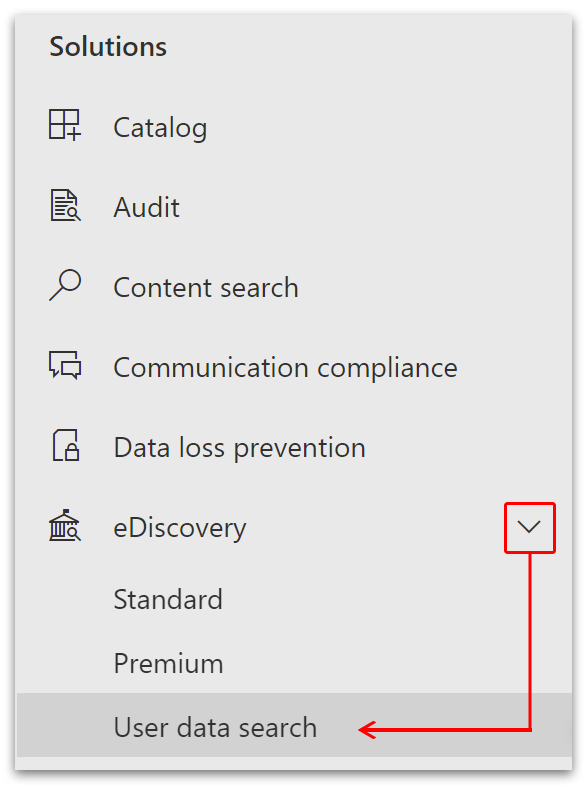
- Head to the ‘Solutions‘ heading on the left menu of your compliance portal.
- Click the drop-down arrow next to ‘eDiscovery.’
- Then select ‘User data search‘ from the menu.
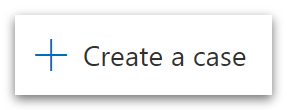
- A page titled ‘User data search‘ will open.
- From there, click ‘Create a case.’
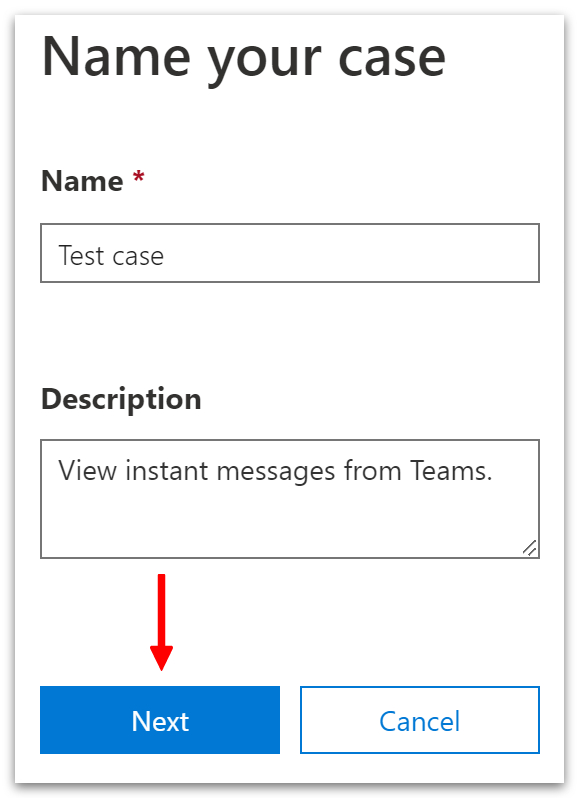
- The first step is to ‘Name your case.’
- Enter a ‘Name‘ for your case.
- You can also add a ‘Description‘ (optional).
- Then click ‘Next.’
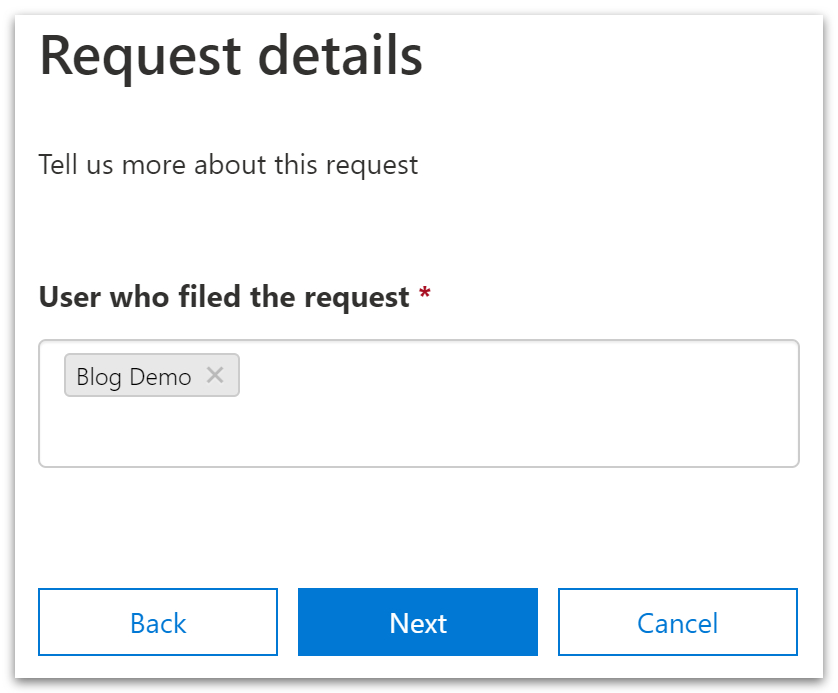
- The second step is ‘Request details.’
- Click on the input box under ‘User who filed the request.’
- Then select your name from the drop-down menu.
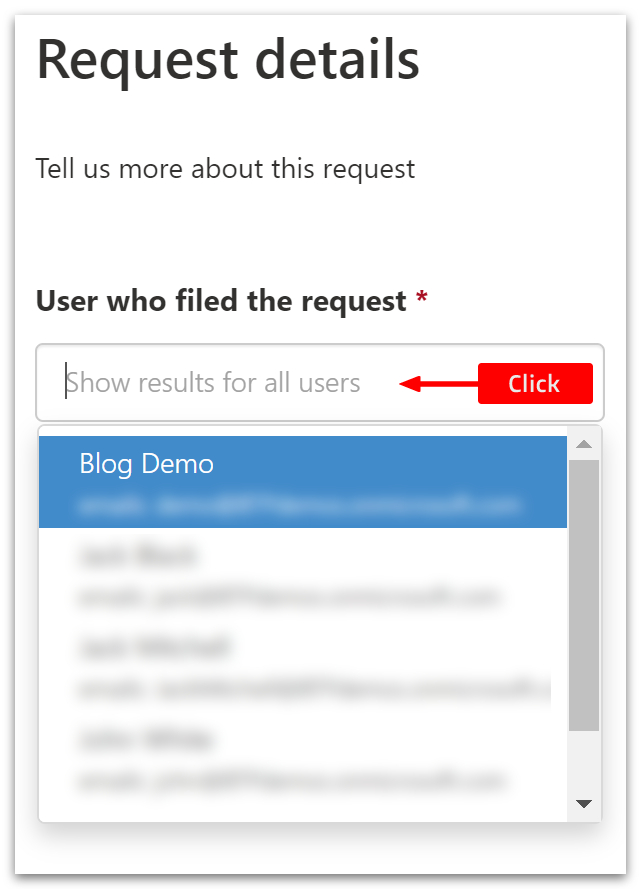
- Click ‘Next‘ to move on to the last step.
- The third step is to ‘Confirm your case settings.’
- Click ‘Save.’
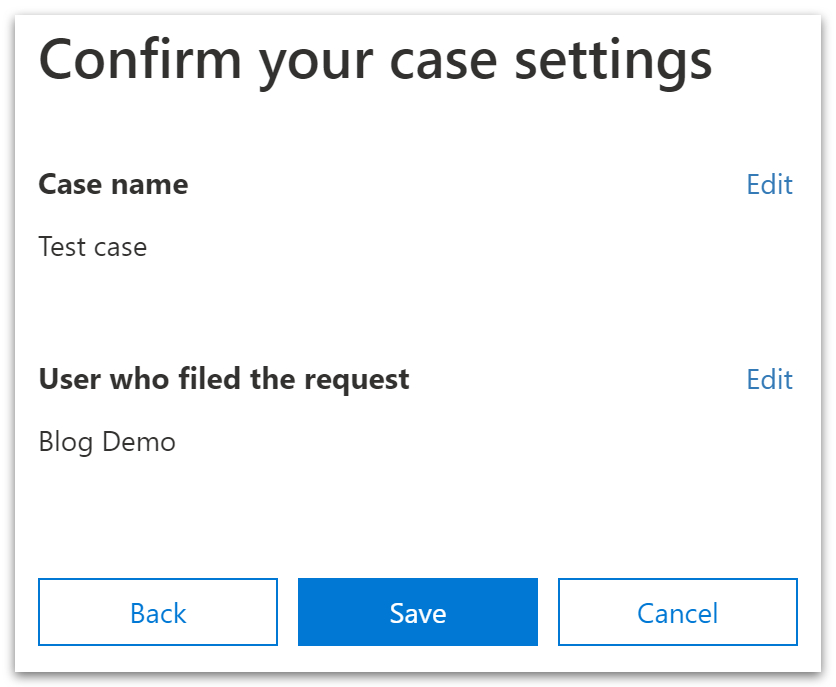
- The new user data search (UDS) case has now been successfully created.
- Click on the ‘Show me search results‘ button.
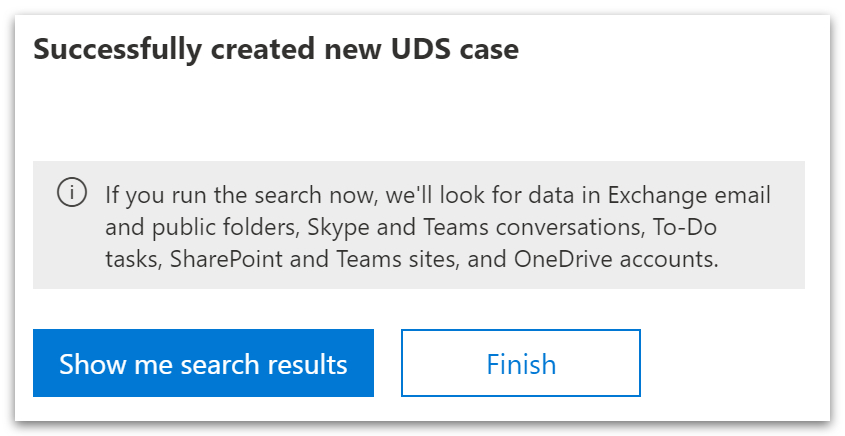
- If you clicked ‘Finish,’ select your new case and then click ‘Open case.’
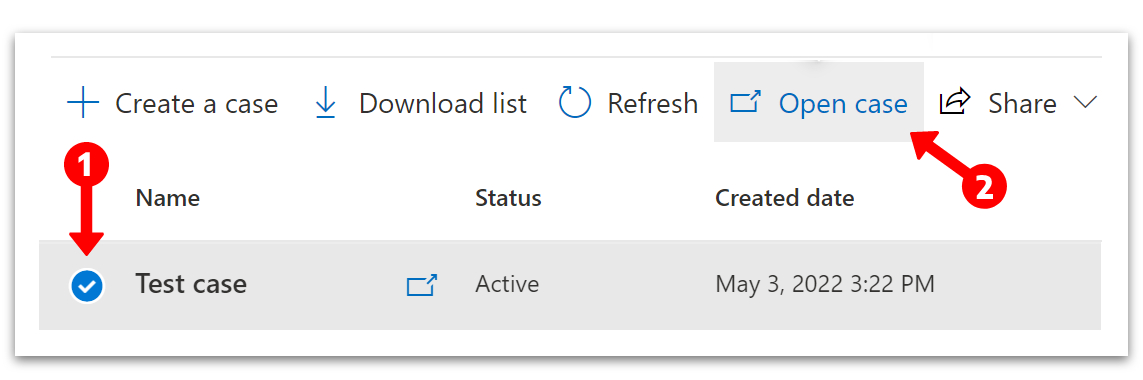
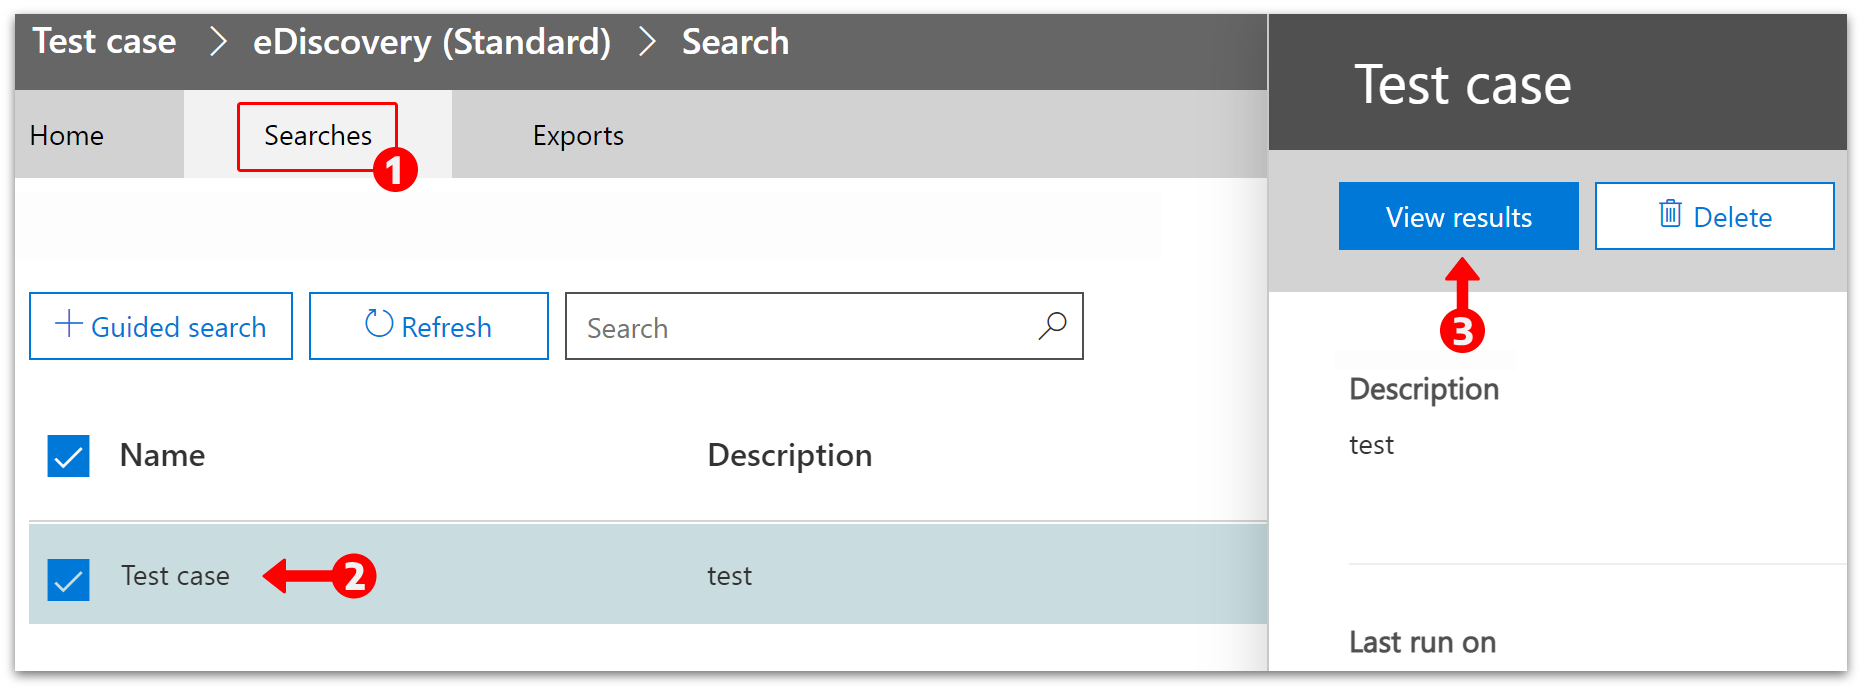
- Next, click on ‘Searches‘ at the top.
- Then select your test case.
- Finally, click the ‘View results‘ button in the pop-up window.
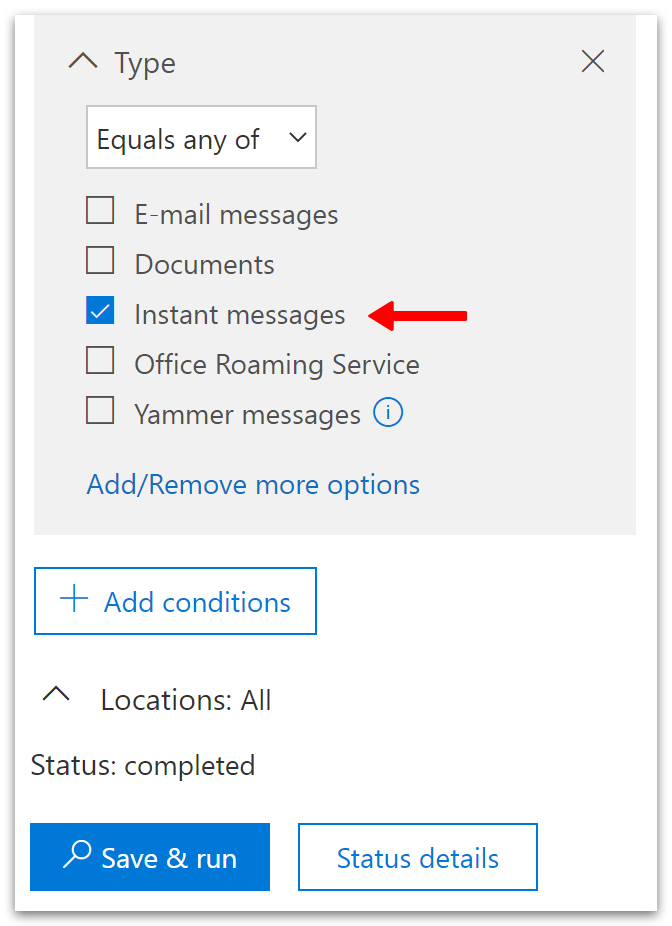
| Note: To focus on instant messages, do the following: |
- Scroll down the left menu under ‘Search query.’
- De-select ‘E-mail messages‘ and ‘Documents.’
- Click the ‘Save & run‘ button at the bottom.
Viewing the eDiscovery results to see edit history
It may take a few moments for the search to complete. Once the data has been collected, the results will be displayed in a format similar to the image below. To see the details on the right menu, make sure your window is fully expanded.
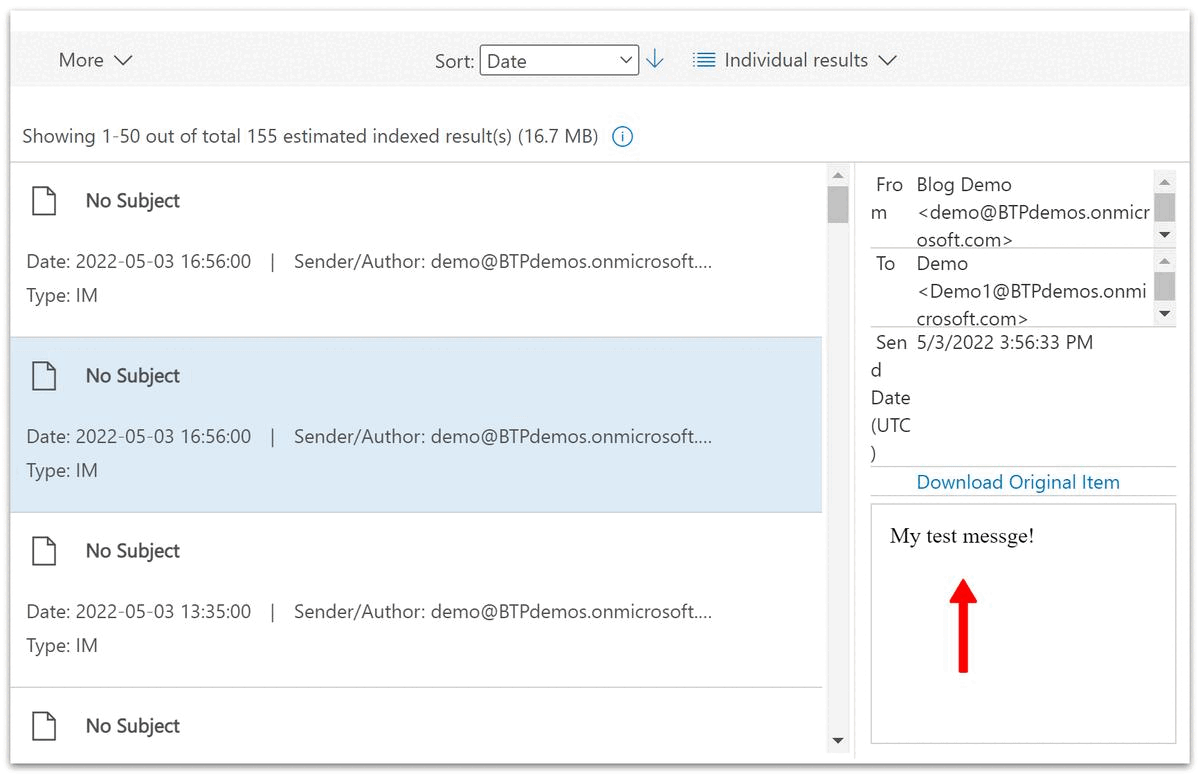
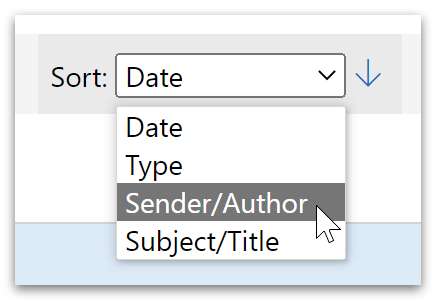
Results are ordered by Date, showing the newest results at the top. To find results for specific users, head up to ‘Sort‘ at the top and select ‘Sender/Author‘ from the drop-down menu.
Export eDiscovery data
The eDiscovery data can be exported as a .csv file. The file can be opened and viewed using Excel. To export your data, please follow the steps below:
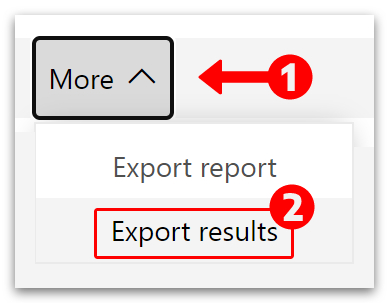
- Click ‘More‘ on the results page.
- Then select ‘Export results‘ from the drop-down menu.
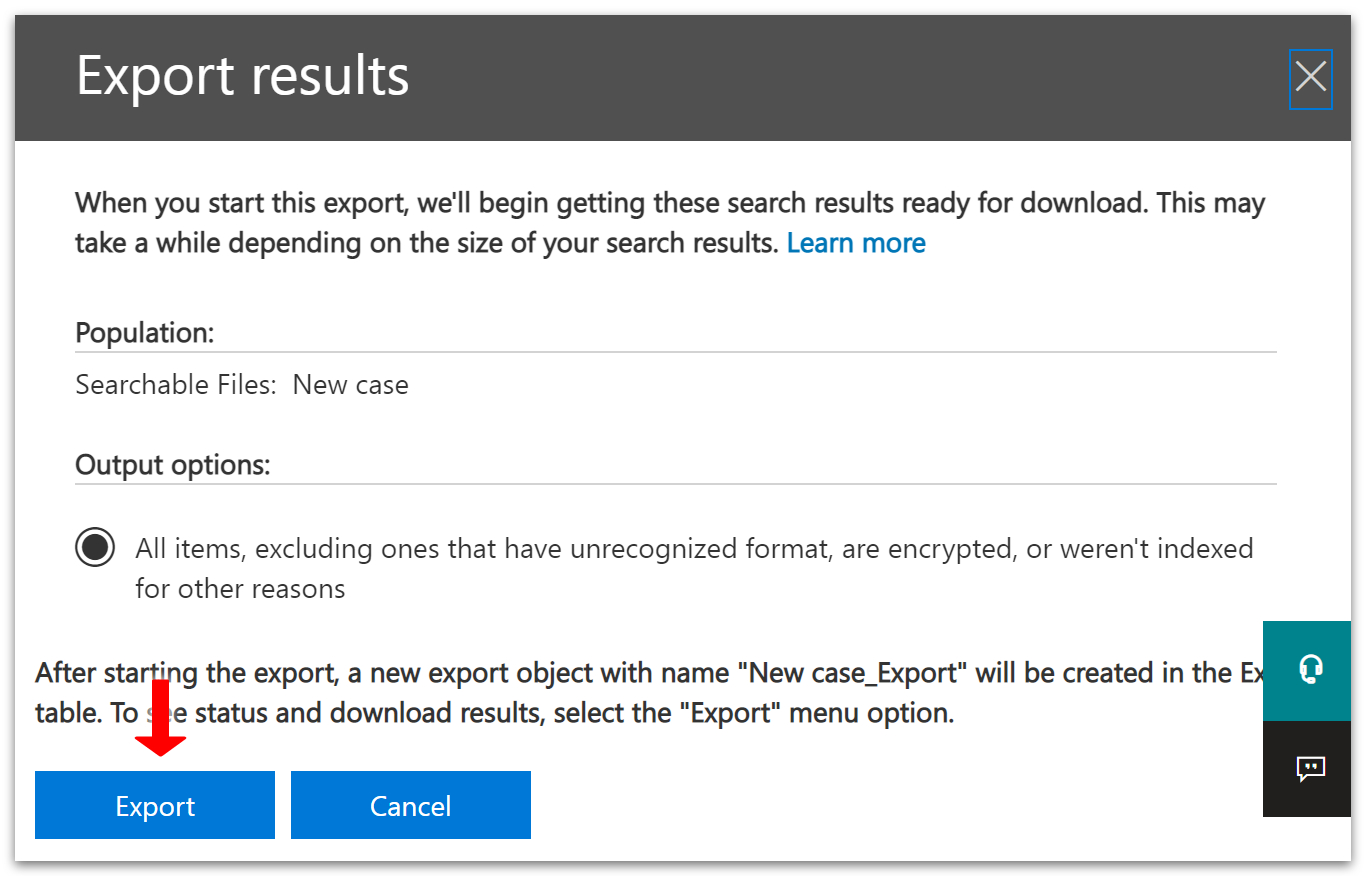
- Leave the default settings and click the ‘Export‘ button.
- When the window closes, head up to the top menu and click ‘Exports.’
- Click on the name of your new case.
- Then click on the ‘Download results‘ button in the pop-up window.
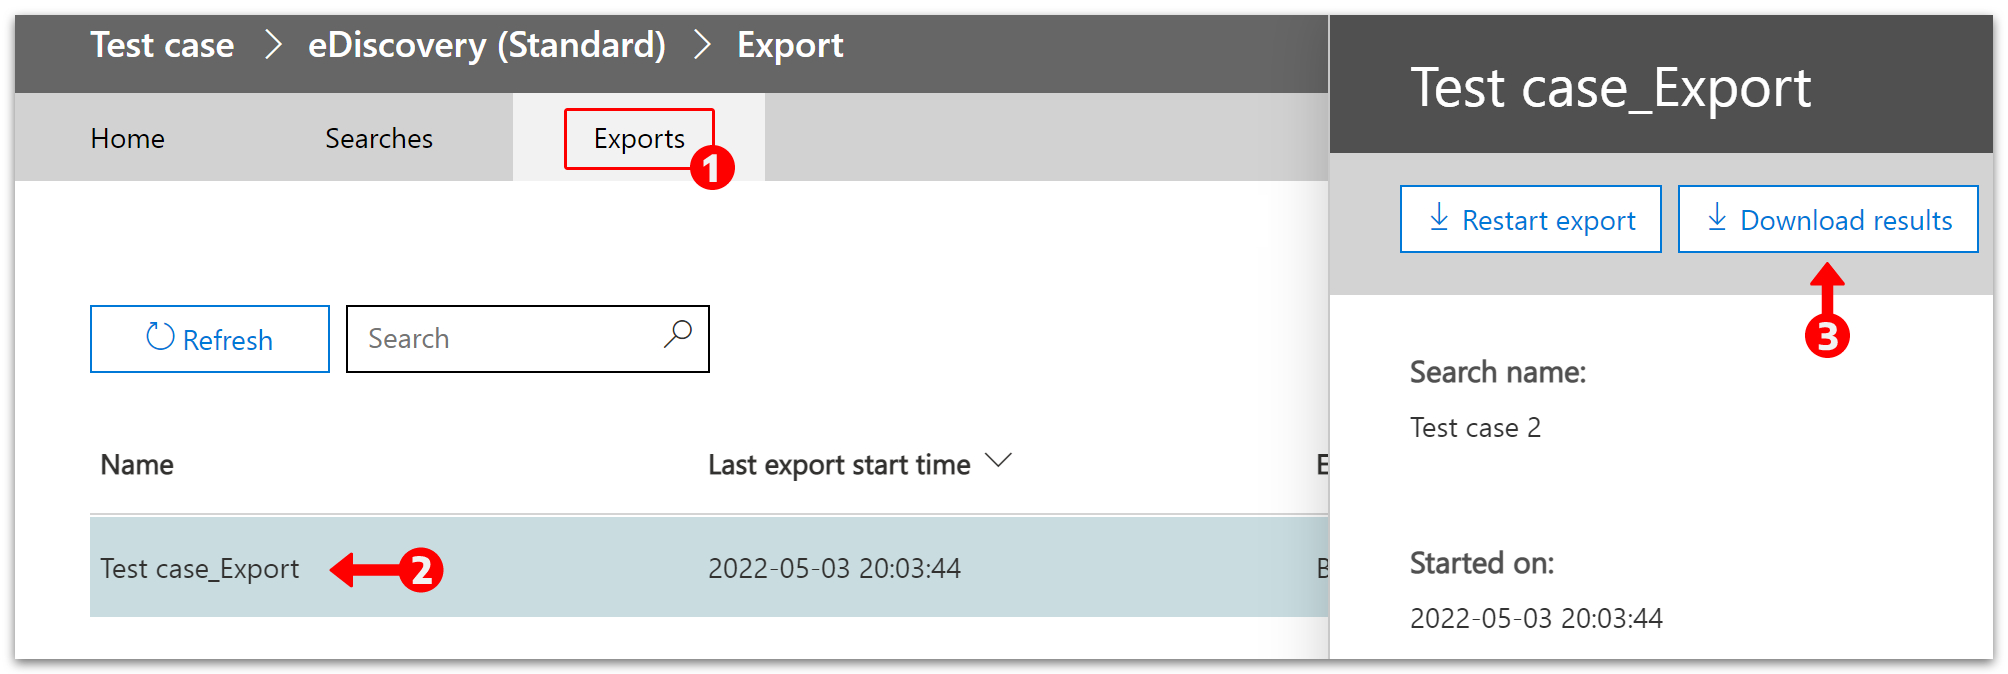
| Note: the download button may take several minutes to become available. |
- If prompted to confirm, click on ‘Open‘ to continue the download.
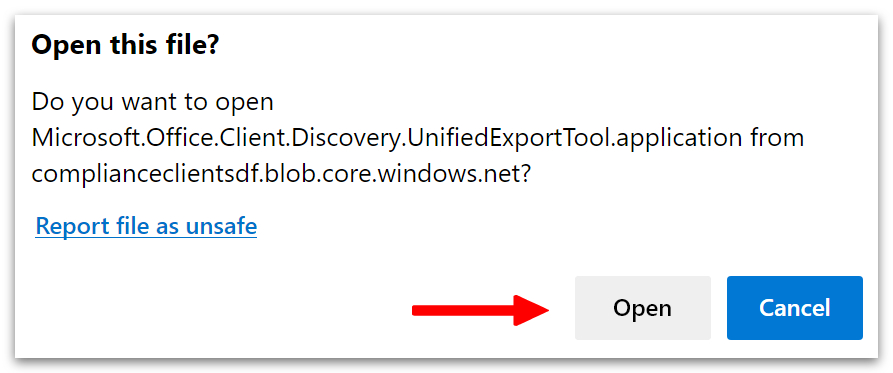
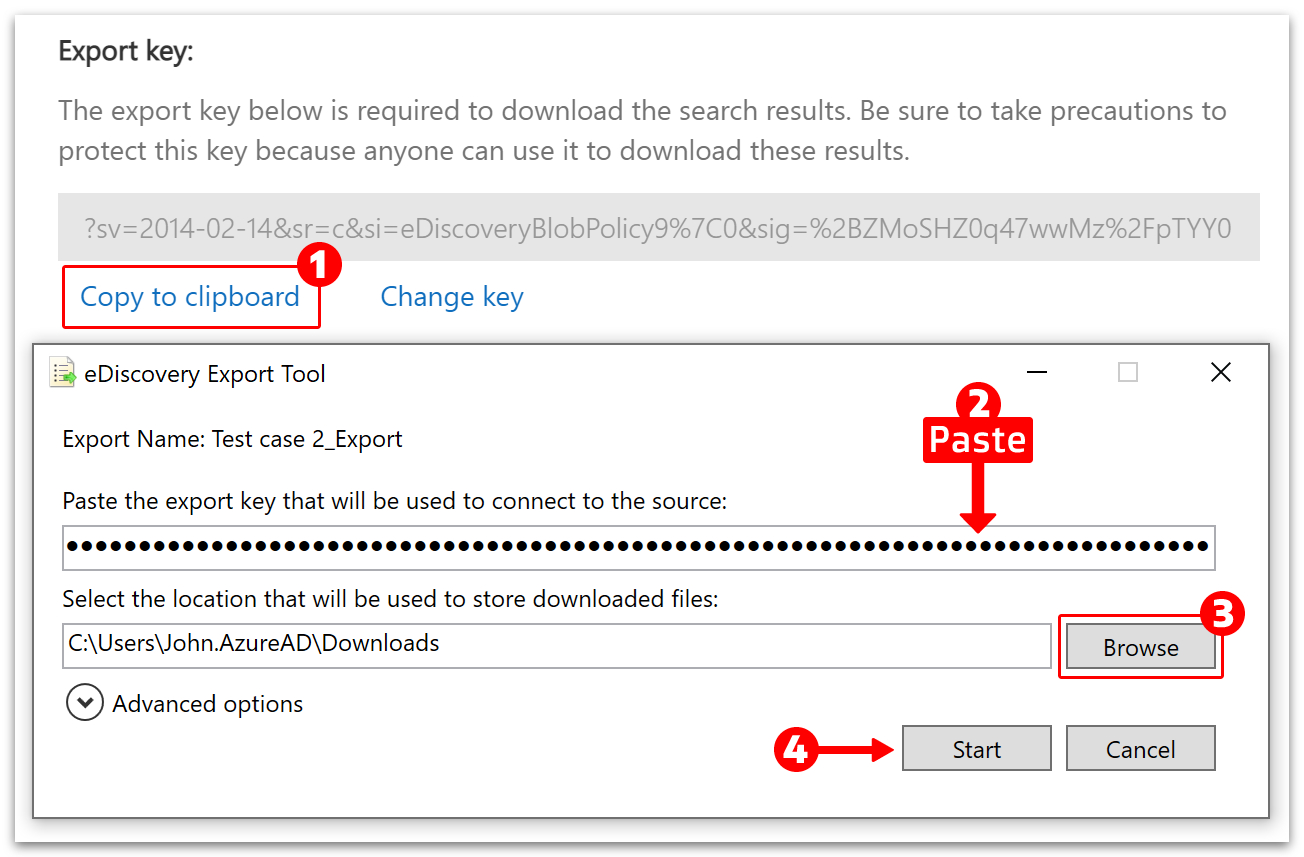
- On the first download, you will be asked to install the eDiscovery export tool.
- Once the tool is installed, a box will appear requesting an export key.
- Click ‘Copy to clipboard‘ under the key.
- Paste the export key into the input box.
- Click ‘Browse‘ to select a save location.
- Then click ‘Start.’
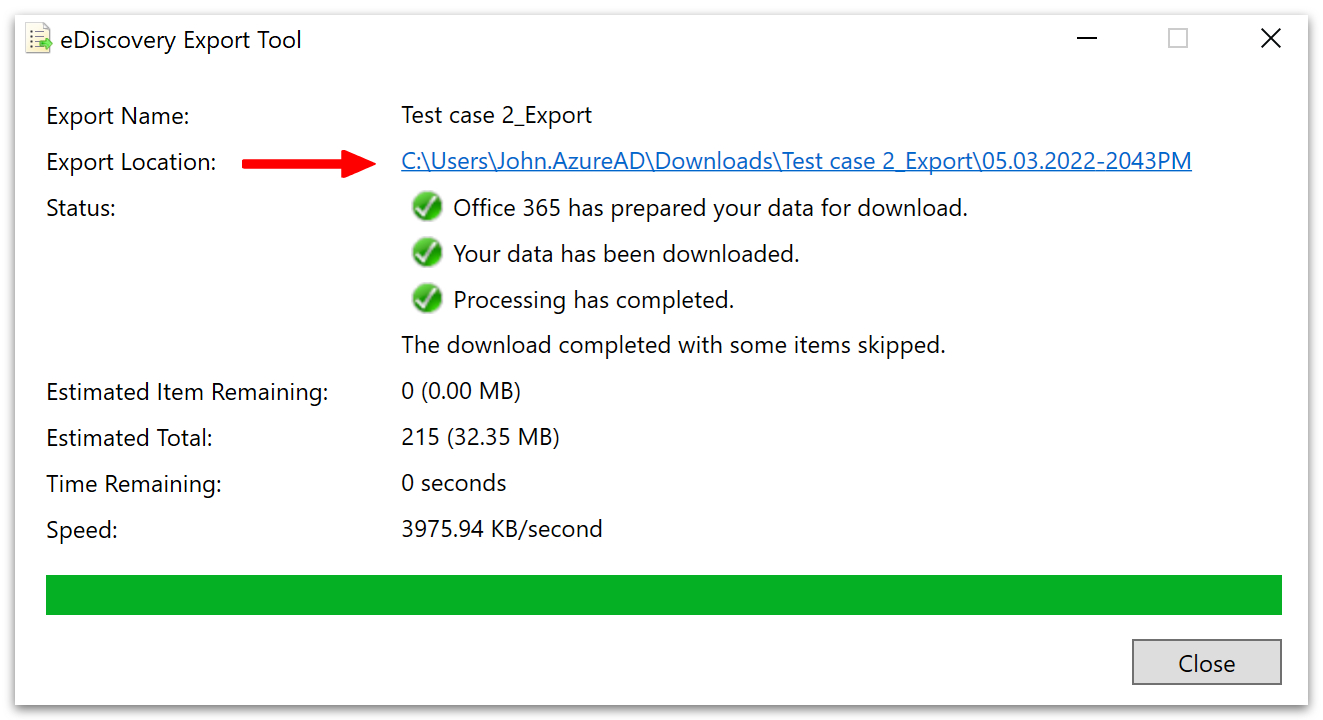
- Click the link next to ‘Export location‘ when the download has finished.
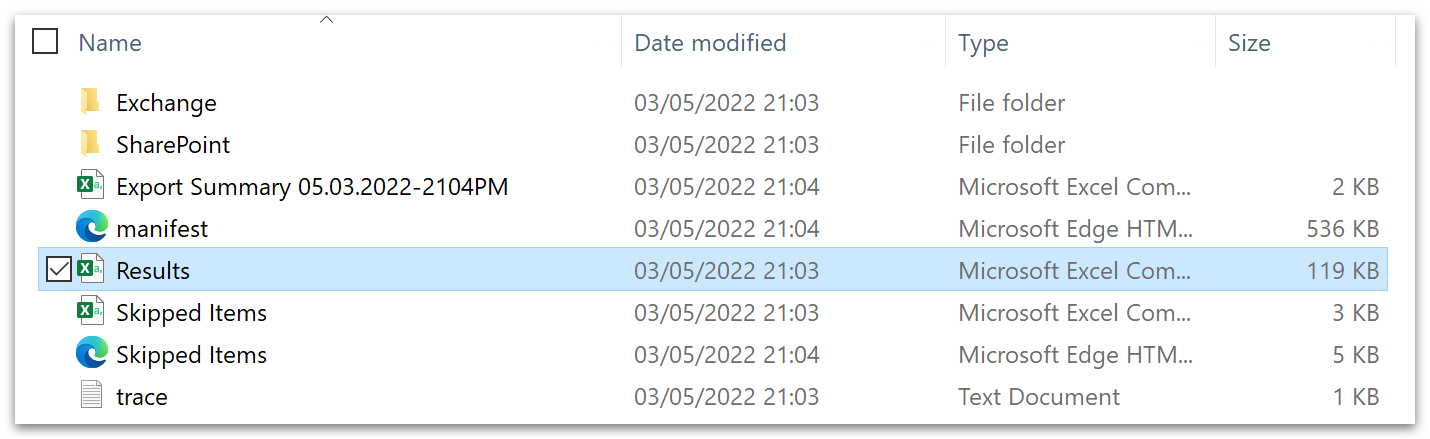
- The results can be viewed in the file named ‘Results.’
Conclusion
There are a couple of things to consider when using the eDiscovery tool. Firstly, is it worth the price? The answer is certainly yes for large organizations that are likely to encounter legal requests for data. But even for small and medium-sized businesses, the eDiscovery tool can be used to safeguard sensitive data.
Secondly, it’s important to consider your retention policy. All chat data is stored in mailboxes until it is automatically deleted as per the retention policy. The default period for data retention is 365 days. You can retain your data permanently by setting up a Litigation hold.
Thanks for reading.