When collaborating on a Microsoft Word document, you may want to know who last opened the file. While there’s only one way of finding out who last accessed the document, there are several ways to see who last modified it. So in this article, we’ll look at all the ways you can find out who accessed or modified a document in Word.
How to see who last opened a Word document:
- Open OneDrive and find your Word document.
- Hover over the three vertical dots to see who last viewed the document.
- Alternatively, click the three vertical dots.
- Then select ‘Details’ at the bottom of the drop-down menu.
- Click ‘views’ below the document preview.
Please continue reading for a complete, step-by-step guide on how to see who last accessed a Microsoft Word document.
Method 1 – View file statistics in OneDrive to see who last opened a Word document
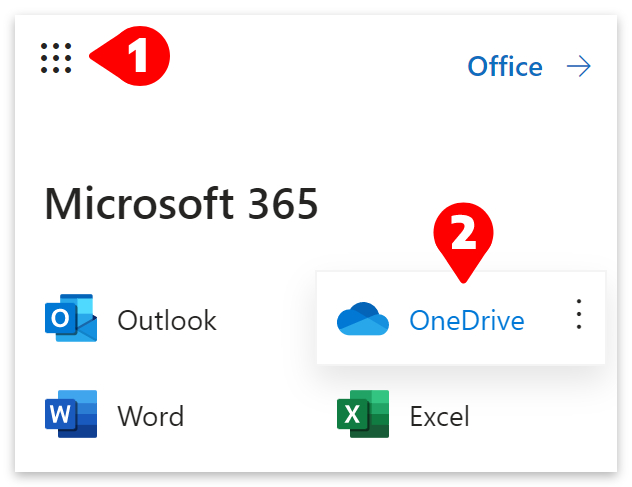
The best way to see who last accessed a Microsoft Word document is to view the file statistics in OneDrive. Please start this guide by opening OneDrive. You can access OneDrive from the app launcher on your Office homepage.
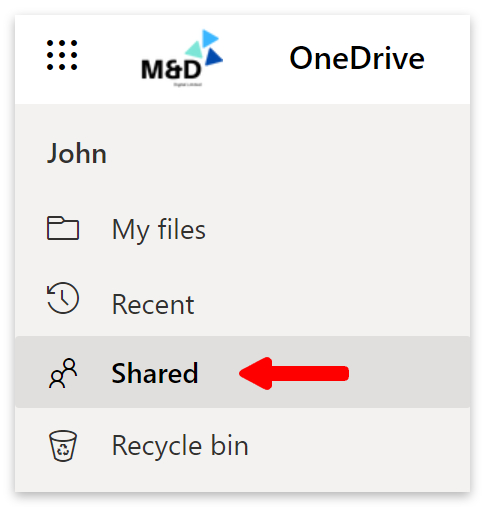
- Locate your file in OneDrive.
- Click on Shared on the left menu if someone shared the file with you.
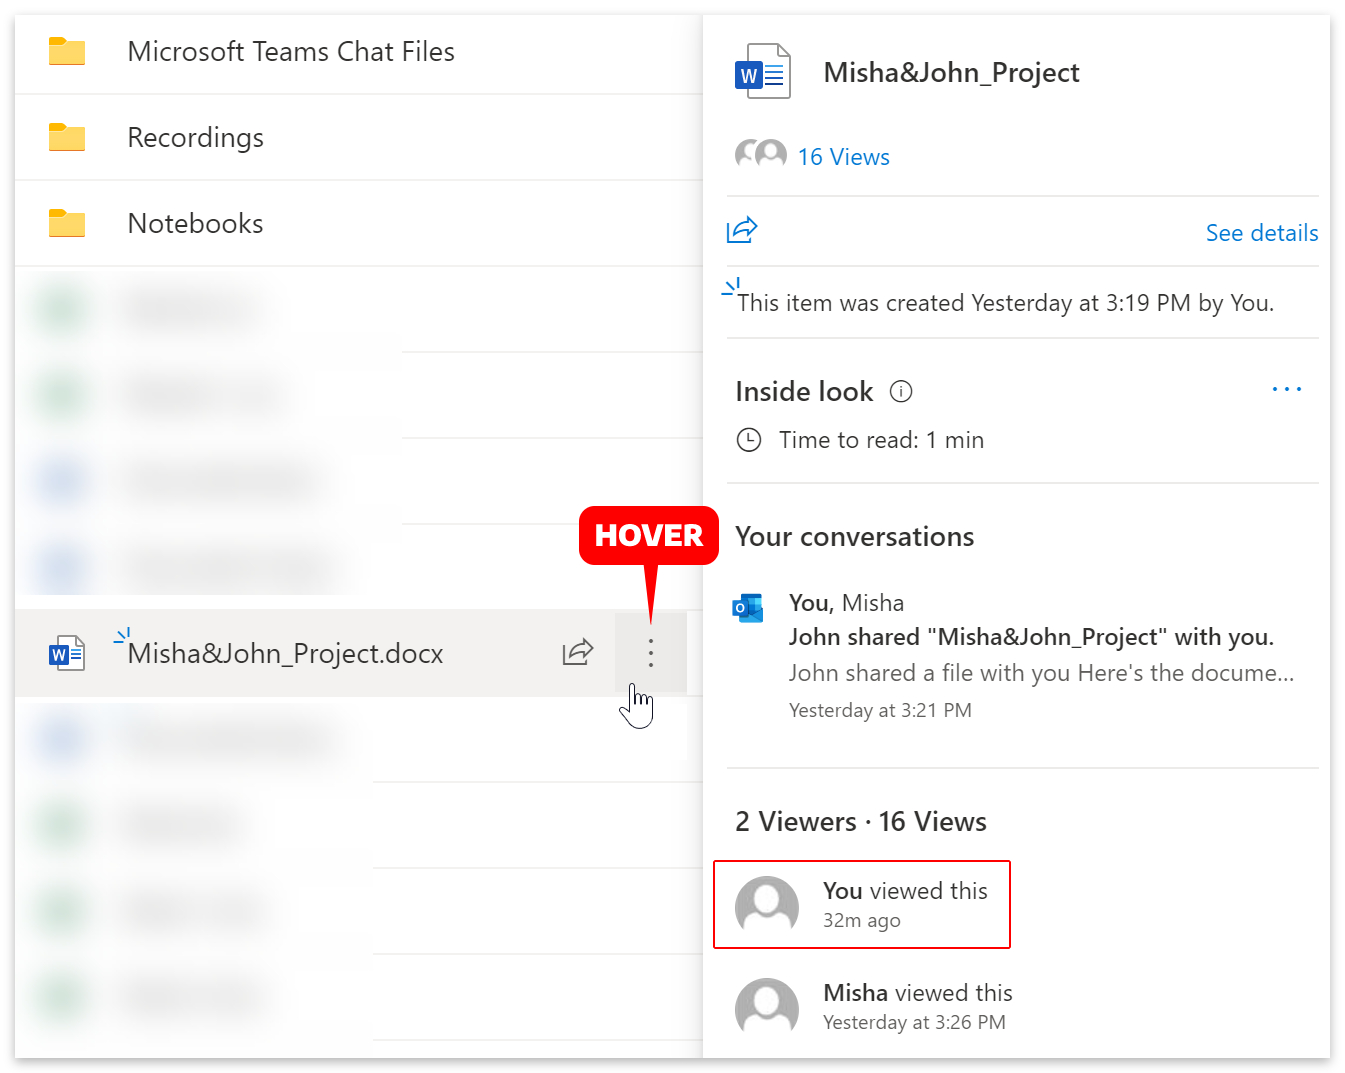
- Hover over the name of your Word document or the three vertical dots.
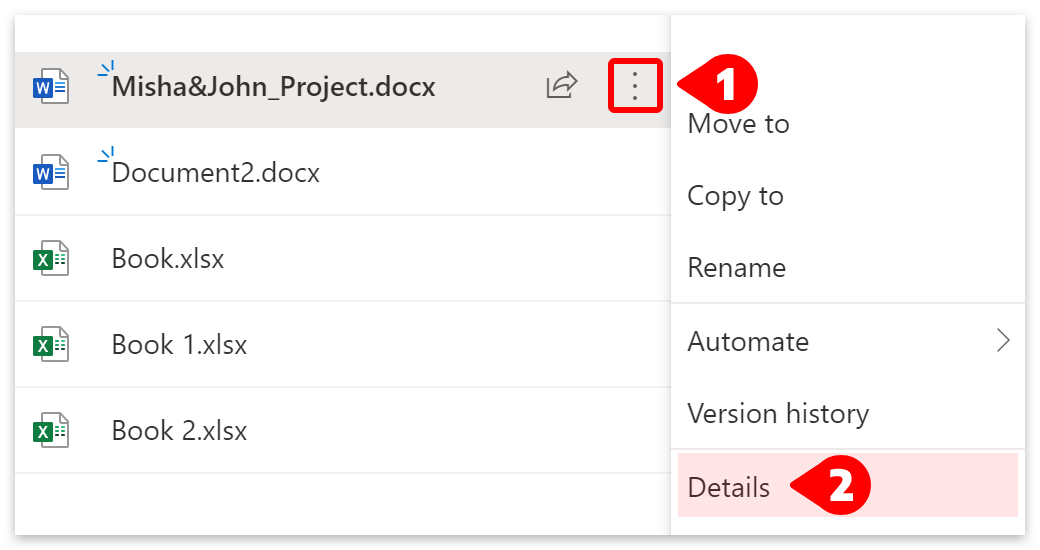
- Alternatively, click the three dots. (1)
- Then select Details from the drop-down menu. (2)
- Then click on Views under the document preview.
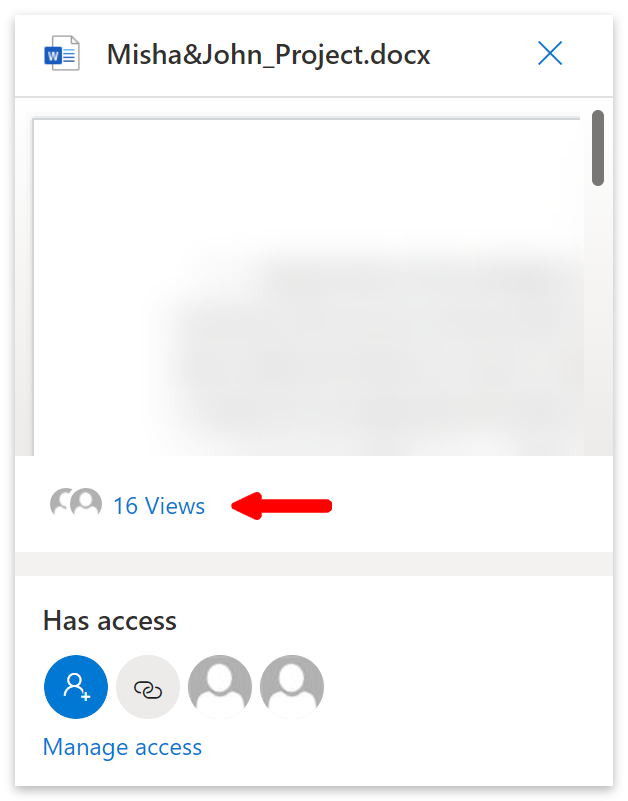
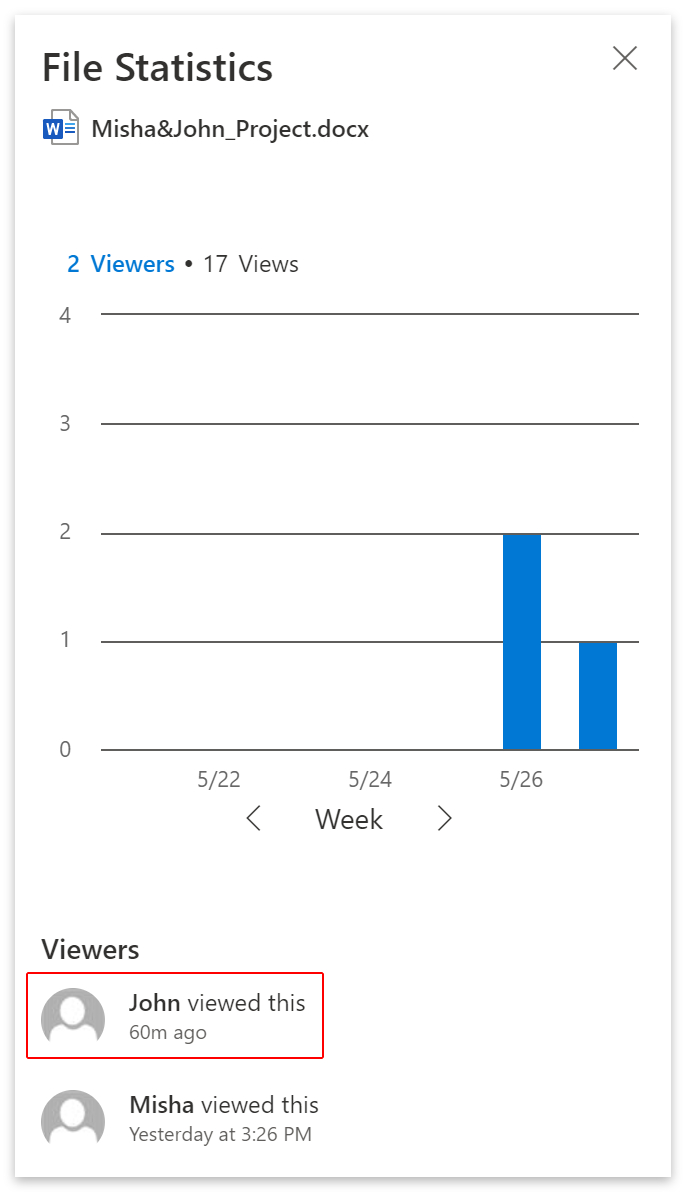
- The file statistics will show you who last viewed the document.
- You will also find a chart detailing the file’s viewing activity.
- Click the
 icon to close the File Statistics.
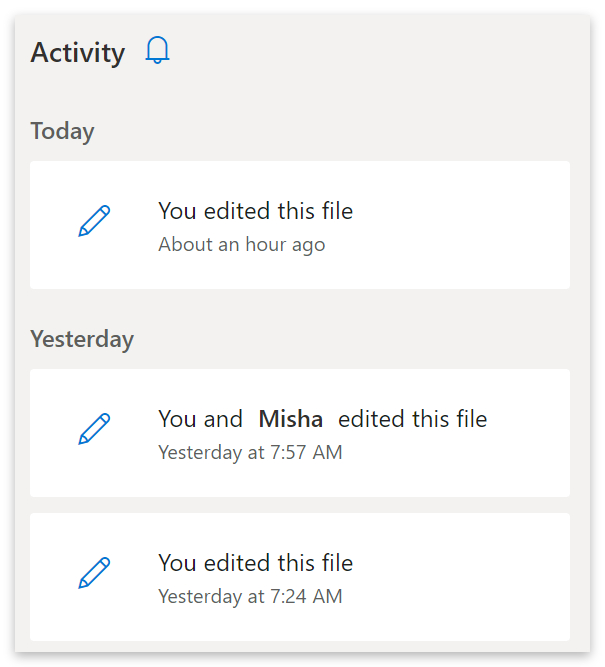
 - Scroll down to view a list of file activities.
| Note: file statistics can sometimes take a few minutes to update. |

Method 2 – View the version history to see who last opened a Word document
One way of seeing who last modified a Word document is to look for the version history. The version history will show you who modified the document and all the changes that the editors made. In this guide, we’ll be working with a shared Word document in OneDrive.
- Open your Word document in OneDrive.
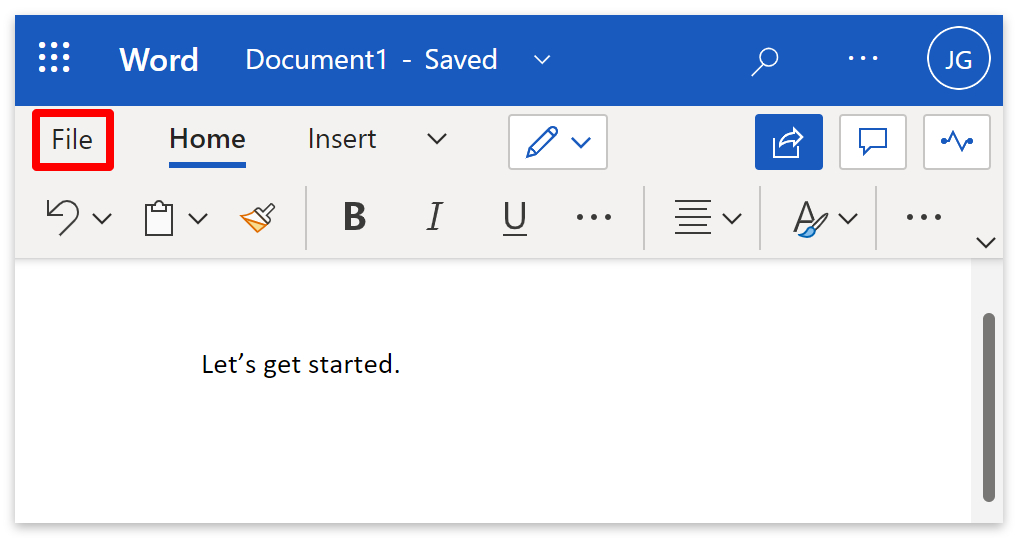
- Click on ‘File‘ on the menu bar.
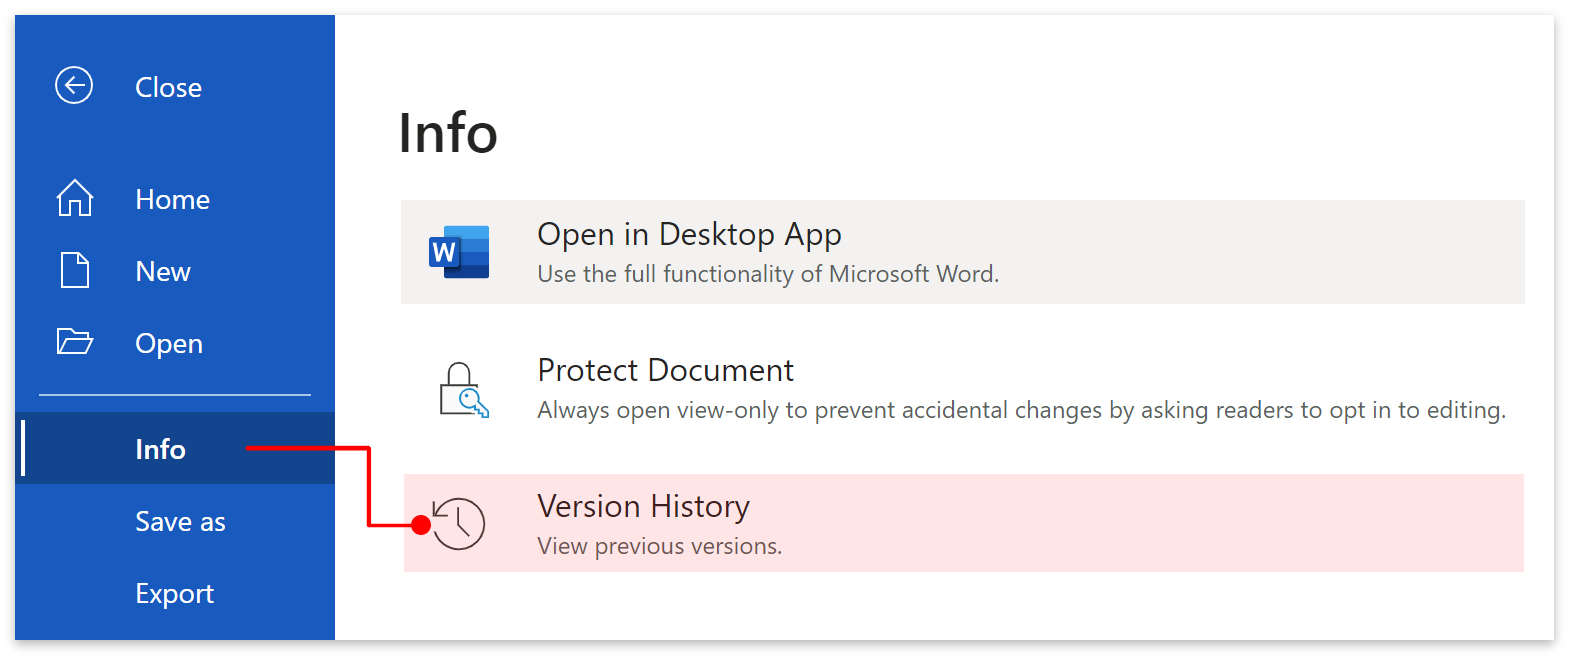
- Click on Info or the three dots
 > Info on the left menu.
 - Then click on Version History.
- Next, click the arrow beside the current version.
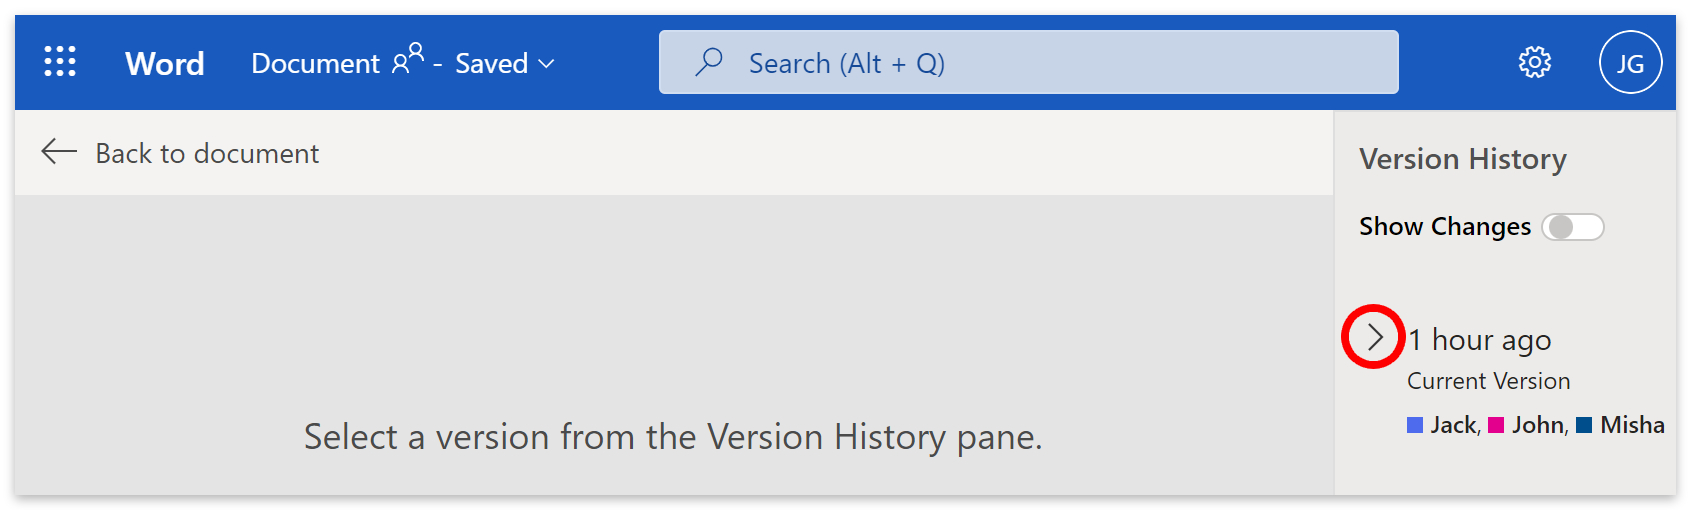
- Select a modification. (1)
- You can toggle Show changes on or off as required. (2)
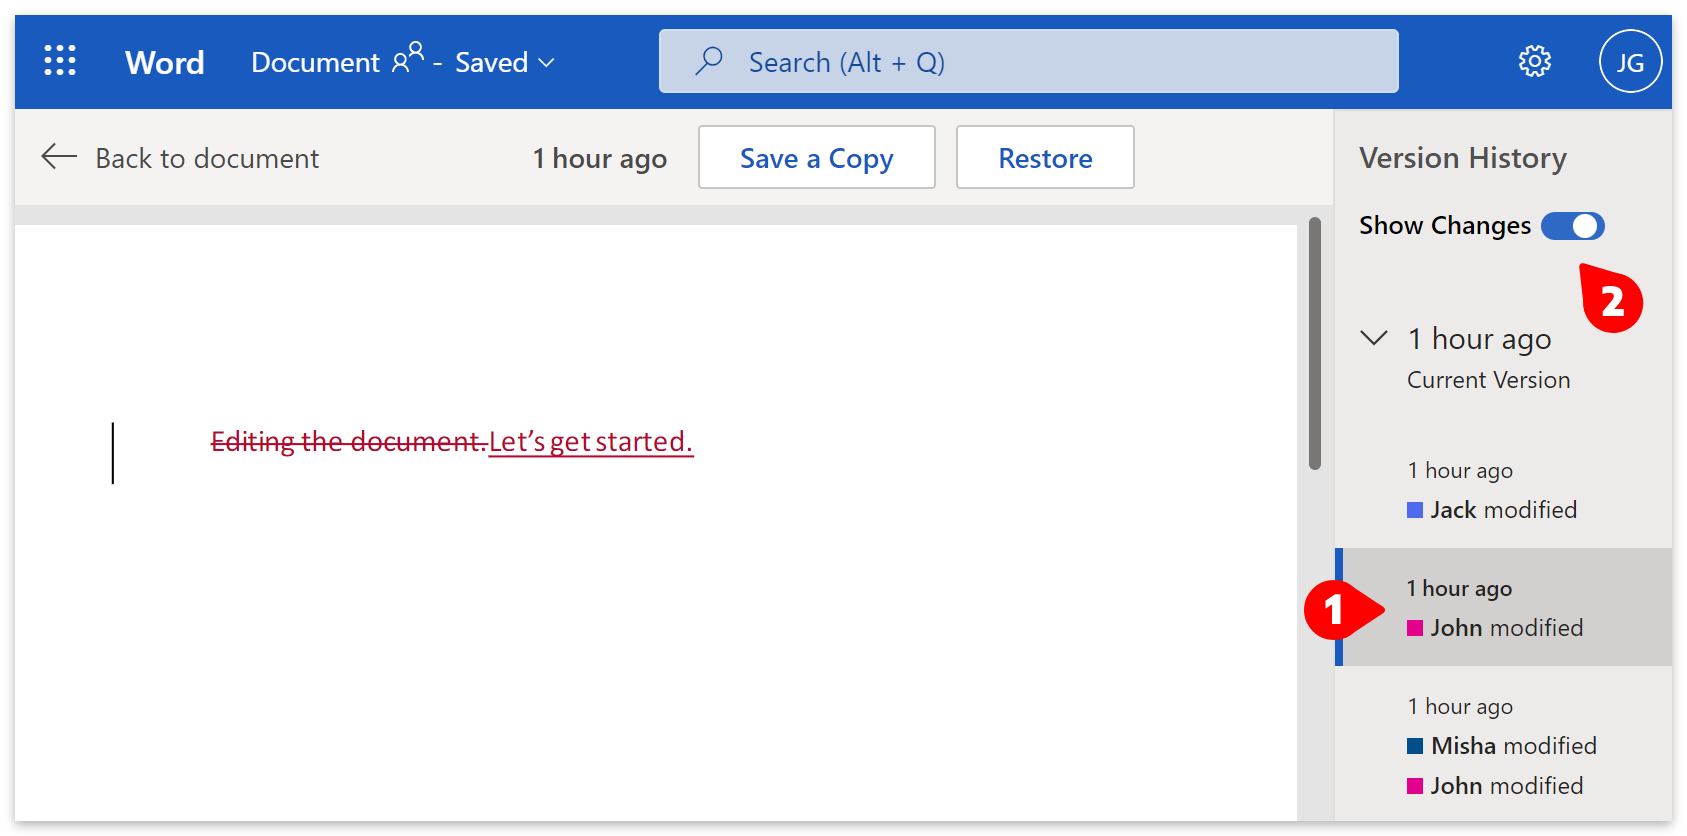
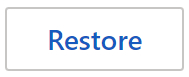
- Select a modification and click the Restore button to return the document to an earlier state.
- When you return to Version History, you will see a new modification marked restored.
- All previous states of the document are saved and can be restored.
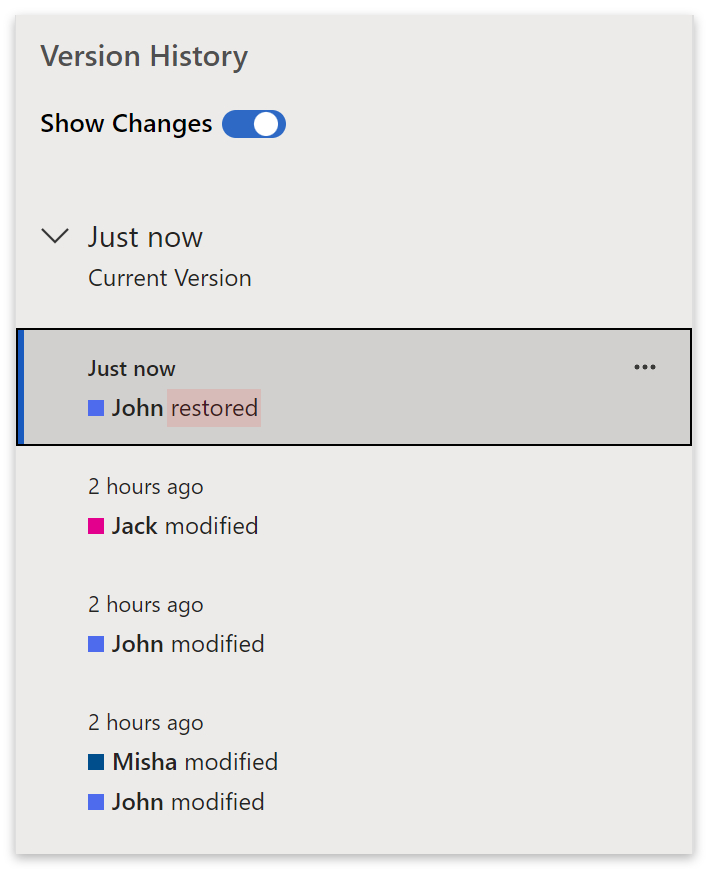
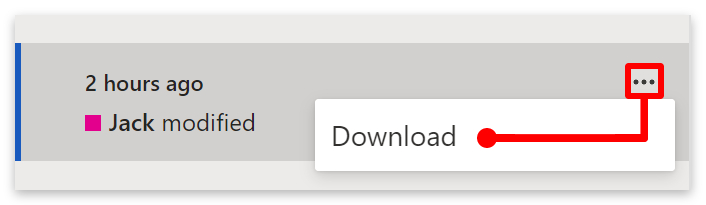
- You can also download a copy of any of the previous states.
- Click on the three dots next to the modification you wish to download.
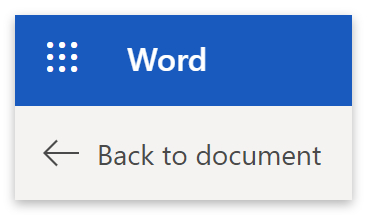
- Click on Back to document in the window’s top left corner to return to editing.
Method 3 – View details to see who last opened a Word document
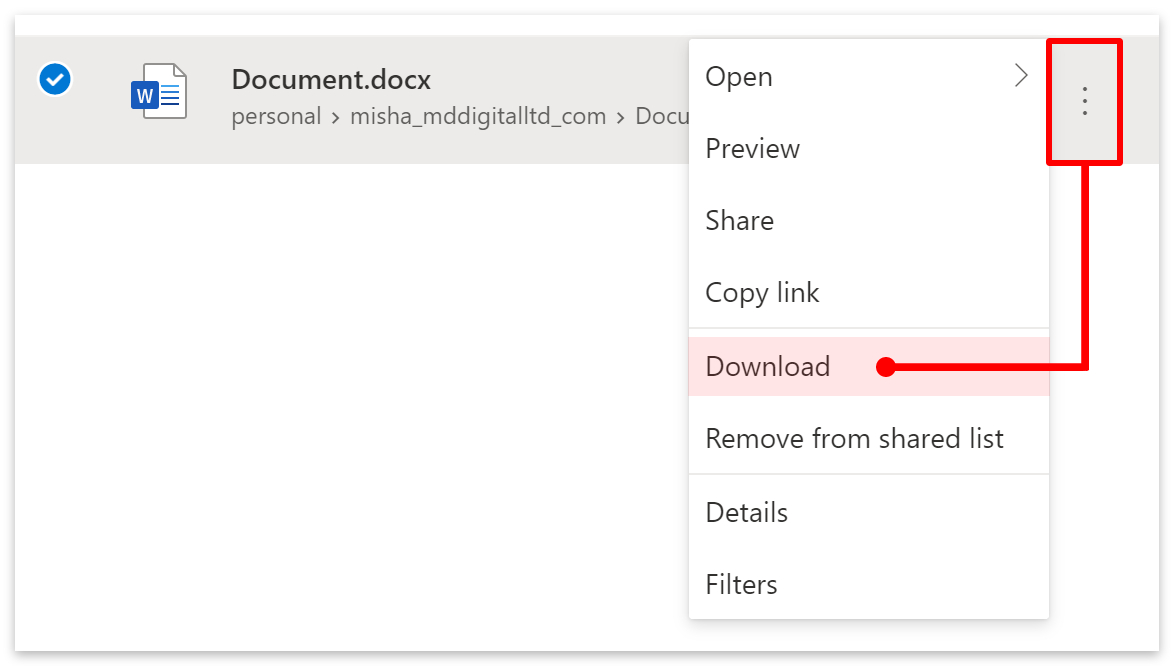
Another way of seeing who last modified a Word document is to view the details. You can do this with any downloaded Word file. If your document is on OneDrive, click the three vertical dots ![]() and select Download from the drop-down menu.
and select Download from the drop-down menu.
- Locate and right-click the downloaded Word document.
- Then select Properties from the menu.
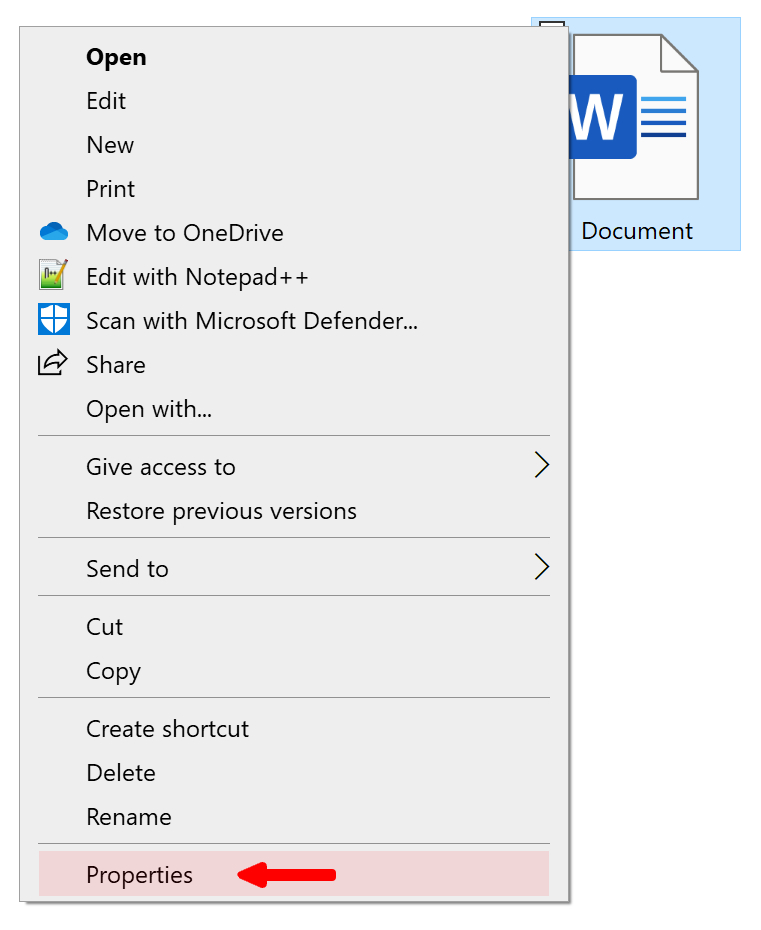
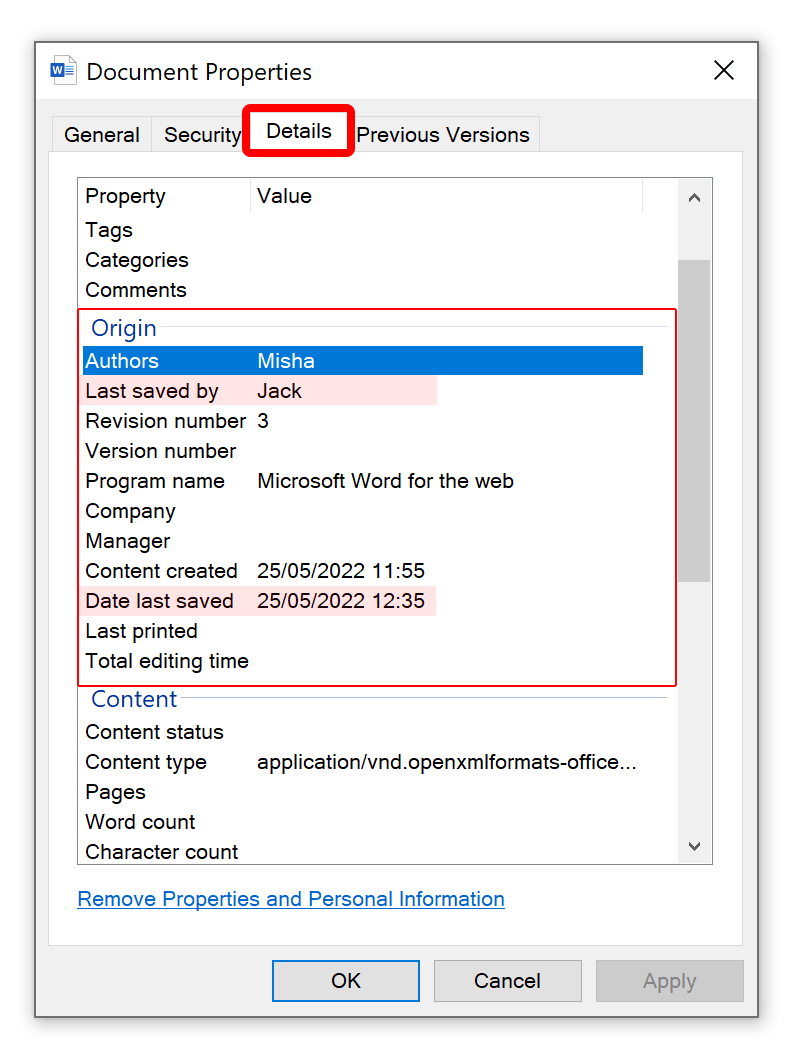
- Finally, go to Details at the top.
- You can find the person who last saved the file under the Origin header.
- You can also find the date the file was last saved by the editor and the number of revisions.
Click on Previous Versions on the top menu to view and recover earlier versions of the document. Previous versions will only be accessible if the Word document was saved using the app. You will not be able to access previous versions with this method if you download the document from OneDrive.
Method 4 – Track changes to see who last opened a Word document
The best way to find out who made changes to a Word document is to track changes. Tracking changes is great for collaborative scriptwriting, where edits can be accepted or rejected. To track changes in your Word document, please follow the steps below.
- Upload your Word document to OneDrive.
- Open your document.
- Click on Review on the top menu.
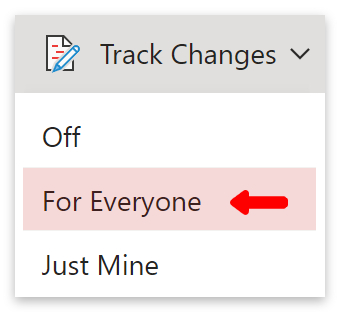
- Then click on Track changes.

- Select For Everyone from the drop-down menu.
- Word will color changes to the document differently for each editor.
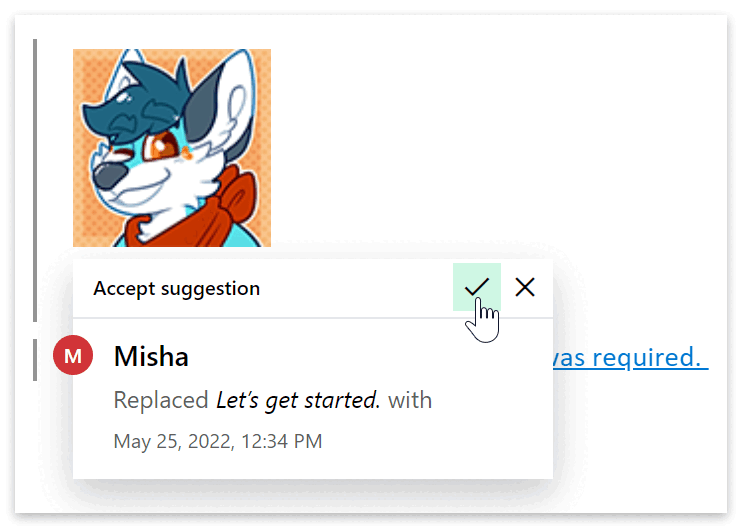
- Click the edits to see who made the changes and when.
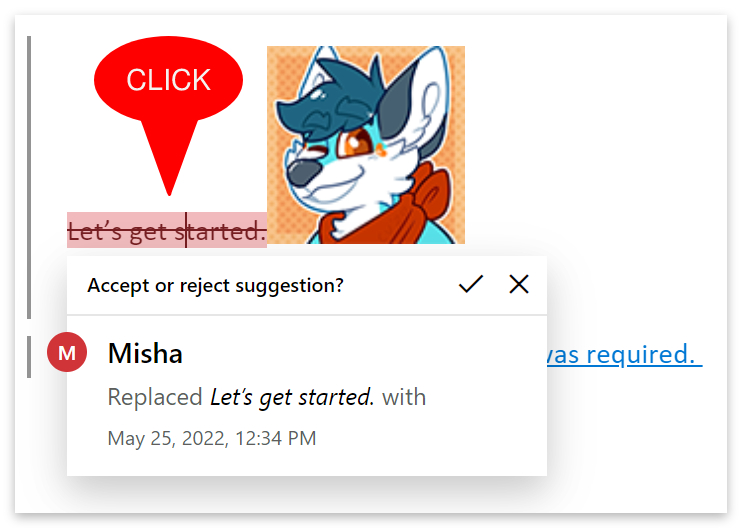

- Click the tick
 icon to accept the edit or the
  icon to reject it.
Method 5 – View the last edit from your Office homepage to see who last opened a Word document
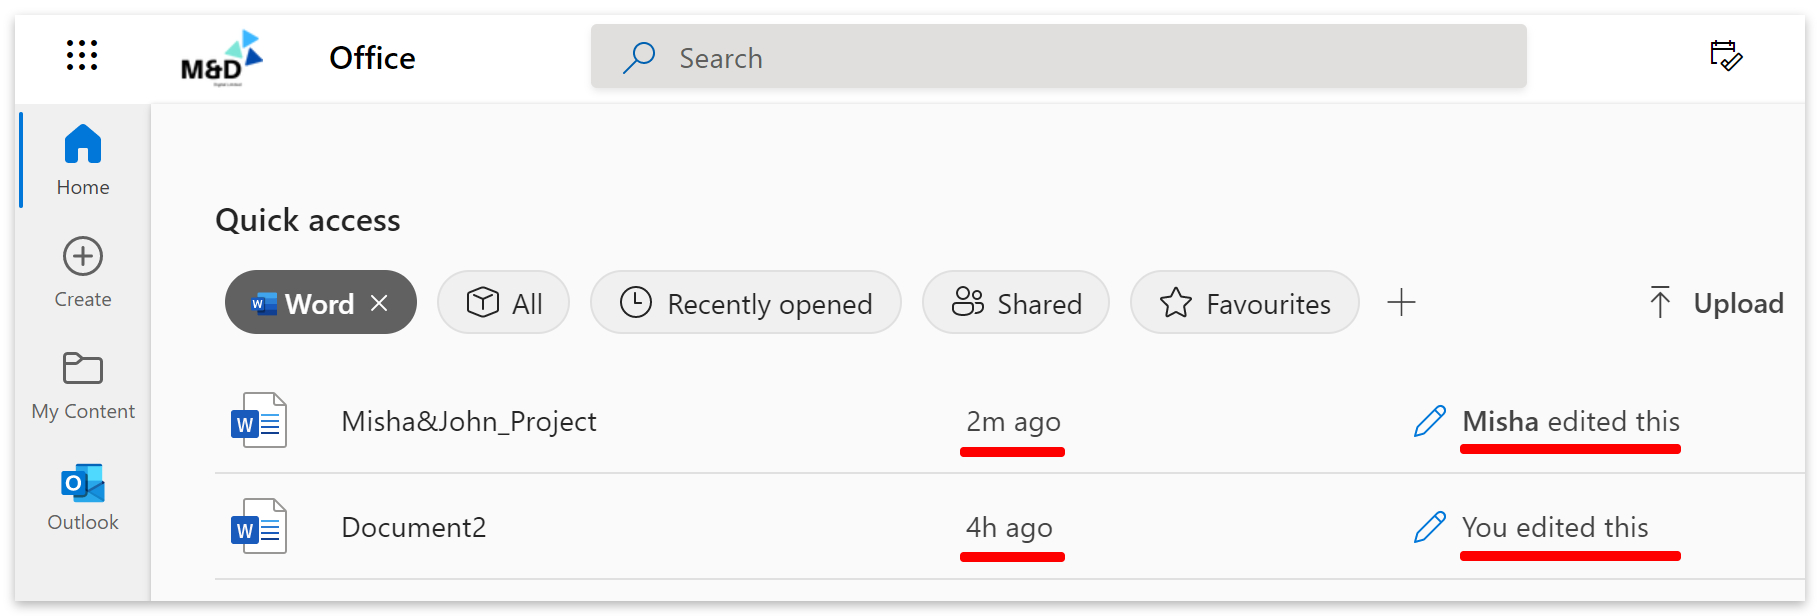
A simple but sometimes inaccurate way of checking who last modified a document is to go to your Office homepage. There, scroll down and look for the Quick access header.
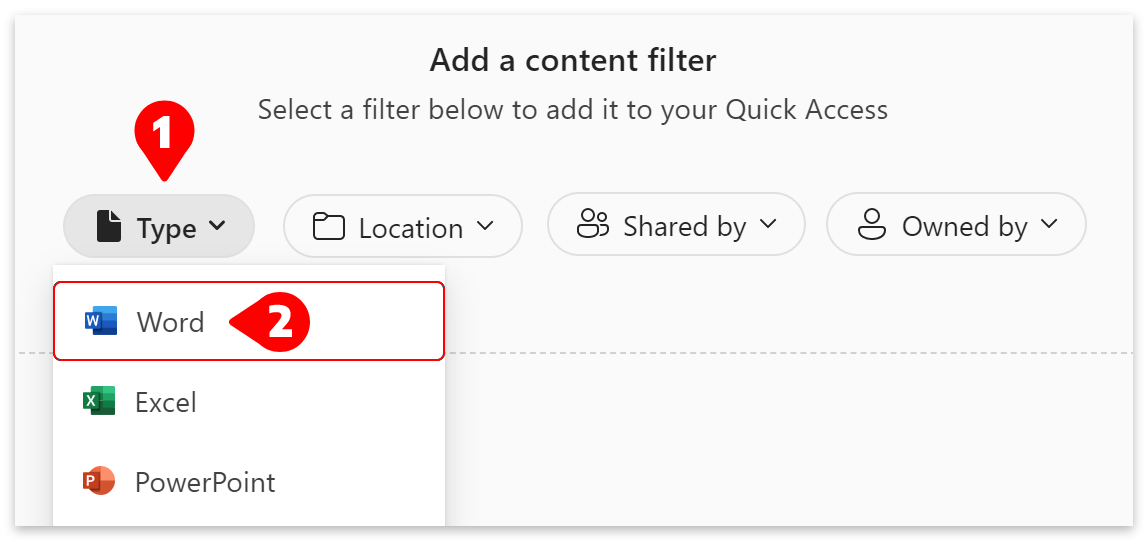
- Click the + New tab to create a custom search.

- Next, click on Type. (1)
- Then select Word from the drop-down menu. (2)
- The list will now be populated with Word documents.
- Look to the right of the file name to see who last edited the document and when.
Conclusion
The best way to find out who last accessed a Word document is to view the file statistics in OneDrive. The best way to track changes inside a Word document is to use tracking or view version history. Methods 3 & 5 are the simplest ways of viewing who last modified a Word document, but we found that method 5 was sometimes inaccurate.
Thanks for reading.