Microsoft Office offers its SharePoint users a tool called “lists”, which resembles Excel in which you can store lists of data, such as contacts, mailboxes, produce information, or members of a group. You can add multiple columns and edit how it’s visualized within SharePoint. This collection of data can also be shared with your team members and people to who you’ve provided access. You can create a list with a predefined template; however, you can only edit the major theme with another predefined Microsoft theme. To edit font and styles you need to use an associated Microsoft application called Power BI. Microsoft’s Power BI is a business analytics service. It has an interface that Microsoft claims is easy enough for end-users to produce reports and dashboards, as well as interactive visualizations and business intelligence features. Power BI allows you to effortlessly collaborate on the same data, collaborate on reports, and share insights across popular Microsoft Office apps like Microsoft Teams and Excel, allowing everyone in your company to make data-driven choices that drive strategic actions. So how do you edit a list with the assistance of Power BI, follow the steps below to see how?
Step by step process – How to set a default font and size for a SharePoint list
- First sign into Office 365.
- Use the app launcher and navigate to “SharePoint”, and click on it.
- In SharePoint go to the Site where your files are located.
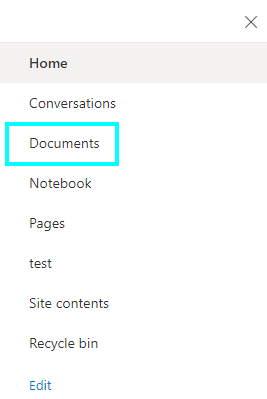
- In the menu bar click on “Documents”.
- Click on the specific folder within your document library.
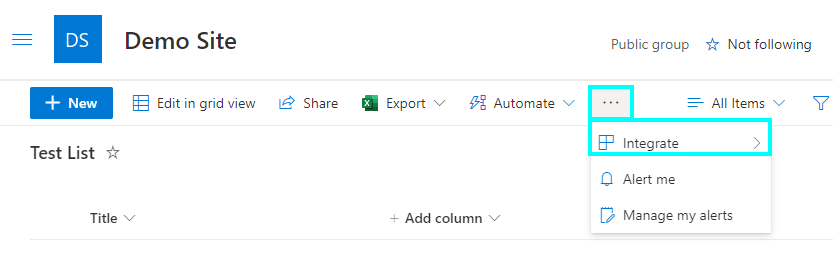
- Now locate the “list” you wish to edit the default font on.
- Click on “Integrate” followed by “Power BI”.
- Click on “Visualise this list”.
- Then click on “Edit”.
- Select a row of information (You can select multiple rows).
- Click on “Format”(Illustrated by a paint roller icon).
- Expand the “Values” dropdown menu.
- Here you can edit the font colours, size, style etc.
- Now click on “Publish to the list” which will set it to the SharePoint list.
Setting those changes will actively apply those specific visual stylings to the list, you can return to the software at any time to change specific settings or revert back to a previous setting if it’s not actively suited. You will need to have a license to use Power BI which can be added on as an additional extra with your Office 365 package. You can visualize the content within nativity however to edit you will need a separate plan.
However, if you have a plan active that includes SharePoint, these additional ads and their editing features will be available for free as they are directly within the package. You can’t edit the form and list settings for font and styles within the SharePoint native list page or home page, changes need to be made within the application.
   |

Why edit list settings for font and colour on SharePoint
The SharePoint list tool provides a great asset for individuals who want to manage list-based content such as contacts or listings. You can use the feature to both share and manage the list, by both adding contents to the list and removing columns if they are not necessary. You can create a new list by clicking on “New” then “List” in the “Site contents” section.
However, some individuals may find the default setting of the font and style for both forms and lists to be quite inconveniencing, either the font is too small or there isn’t a district difference between different rows in themes of styling. Some users may want to highlight different elements within the list, and they may want to reduce the visual focus on certain pieces of information on the list. A feature like this, while not suited for everyone, will help individuals have a better experience with SharePoint.
Let say you have a list of information with different contacts associated with a network you are an admin of or are a user has been granted admin status to manage this type of content. You have organized the content within the list to your liking by editing the view and categorizing what needs to go where. However, you want to add a distinct visual element to certain contacts, to mark out for example liabilities with the contact, you need to mark it a different style to the contacts in general. The main admin can then use the edited list to spot exactly which contacts are the liability and discipline them. You can use Power BI to mark out different individuals and assign them as a potential liability.
Edit form settings in SharePoint
As well as editing lists you can also edit forms within lists. They are essentially a form box assigned to a list of information where you can both edit the listing or visualize the form information in a categorized format on its own. You may find this to be much more effective than editing the default settings for a SharePoint list for fonts and color.
You can only edit the content within the form to assign on the list, you can’t edit the form styles and settings, at least not natively. You can use a software called Power apps to assign a new style to forms within a SharePoint list.
What is Power apps
Power Applications is a collection of apps, services, connectors, and a data platform that allows you to quickly create bespoke apps for your company’s needs. You may easily create unique business apps with Power Apps that link to data stored in the underlying data platform (Microsoft Dataverse) or in a variety of online and on-premises data sources (SharePoint, Microsoft 365, Dynamics 365, SQL Server, and so on).
Power Apps-based apps offer comprehensive business logic and workflow features, allowing you to convert manual business processes into digital, automated ones. Additionally, apps created with Power Apps have a responsive design and can be used on the web or on mobile devices (phone or tablet). Power Applications “democratizes” the process of creating bespoke business apps by allowing anyone to create feature-rich, unique business apps without writing code.
How to use Power apps to set a new default style for text and colour on a SharePoint list – Step by step process
- First sign into Office 365.
- Use the app launcher and navigate to “SharePoint”, and click on it.
- In SharePoint go to the Site where your files are located.
- In the menu bar click on “Documents”.
- Click on the specific folder within your document library.
- Now locate the “list” you wish to edit the default font on.
- Click on “Integrate” followed by “Power apps”.
- Then click on “Customize form”.
- Edit the settings.
- Click on File >> Save >> Publish to site.
In depth – Step by step process – How to set a default font and size for a SharePoint list
Step by step breakdown:
- First sign into Office 365.
Use your account details or if you have a current Skype account with the Office account in question, you can use this.
- Use the app launcher and navigate to “SharePoint”, and click on it.
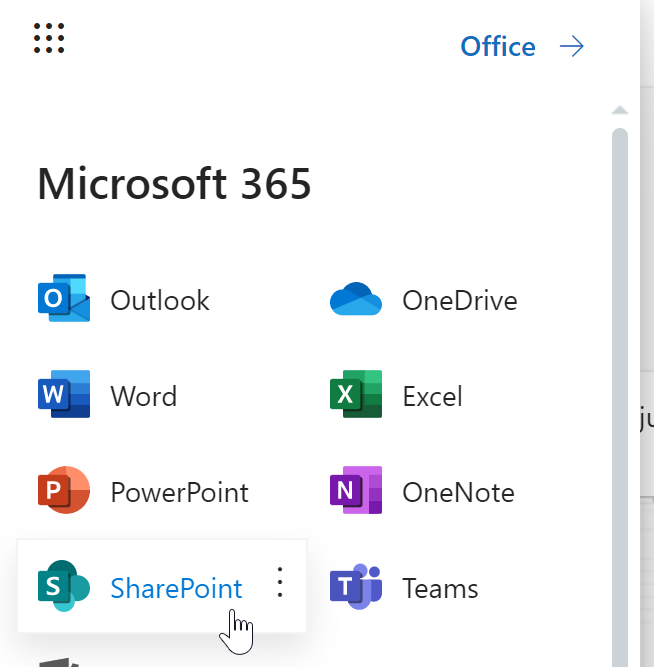
You can access the SharePoint application however this is for individuals who only have a SharePoint plan, A larger group of individuals have SharePoint in Office 365.
- In SharePoint go to the Site where your files are located.
In this example, the site above called “Blog Demo” will be used to create the preview.
- In the menu bar click on “Documents”.
A document library is a safe storage location for files that you and your coworkers can quickly locate, collaborate on, and access from any device at any time. For example, a document library on a SharePoint site can be used to hold all materials relevant to a given project or customer.
- Click on the specific folder within your document library.
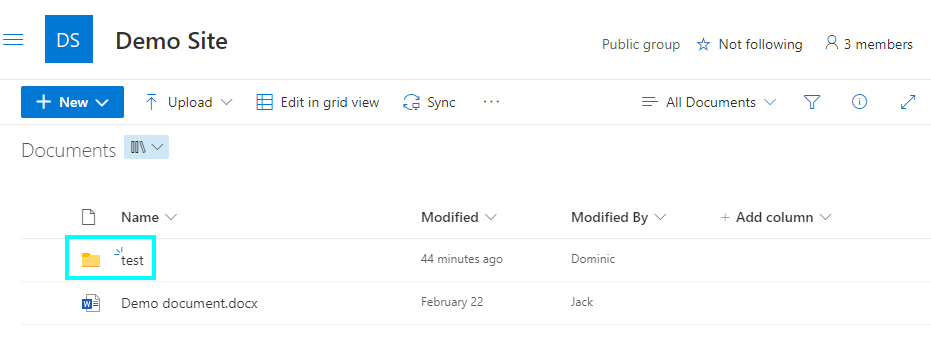
In this case, the folder called “Test” was used to create the preview.
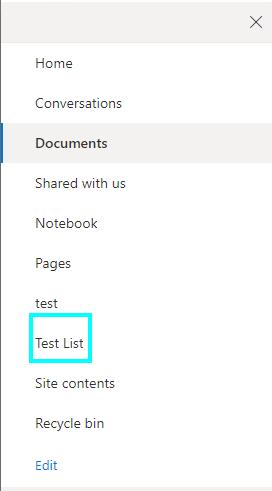
- Now locate the “list” you wish to edit the default font on.
- Click on “Integrate” followed by “Power BI”.
Click here to get Microsoft Power BI.
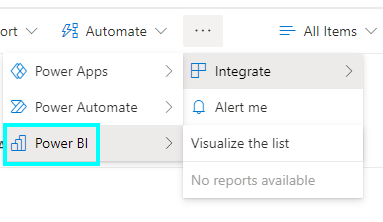
- Click on “Visualize the list”.

- Then click on “Edit”.
- Select a row of information (You can select multiple rows).
- Click on “Format”(Illustrated by a paint roller icon).
- Expand the “Values” dropdown menu.
- Here you can edit the font colours, size, style etc.
- Now click on “Publish to the list” which will set it to the SharePoint list.
That’s it for this Blog thank you for taking time out to read our content, please feel free to email our team about how it went if you followed the steps or if you need more help with the questions we answered in this Blog.