Most mailbox permissions are enabled by default. However, you can limit or modify those permissions in the Exchange Admin Center. You can access Exchange directly or by going to Show all > Exchange on the menu of your Office Admin page.
Set default Calendar sharing permissions:
- Log into your Exchange Admin Center.
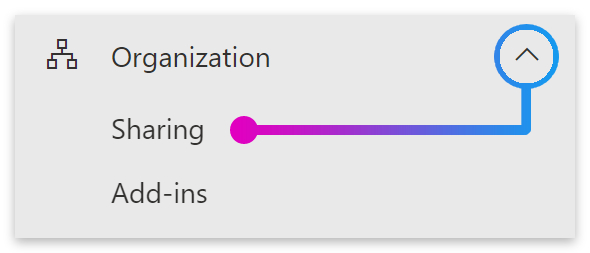
- Go to Organization > Sharing.
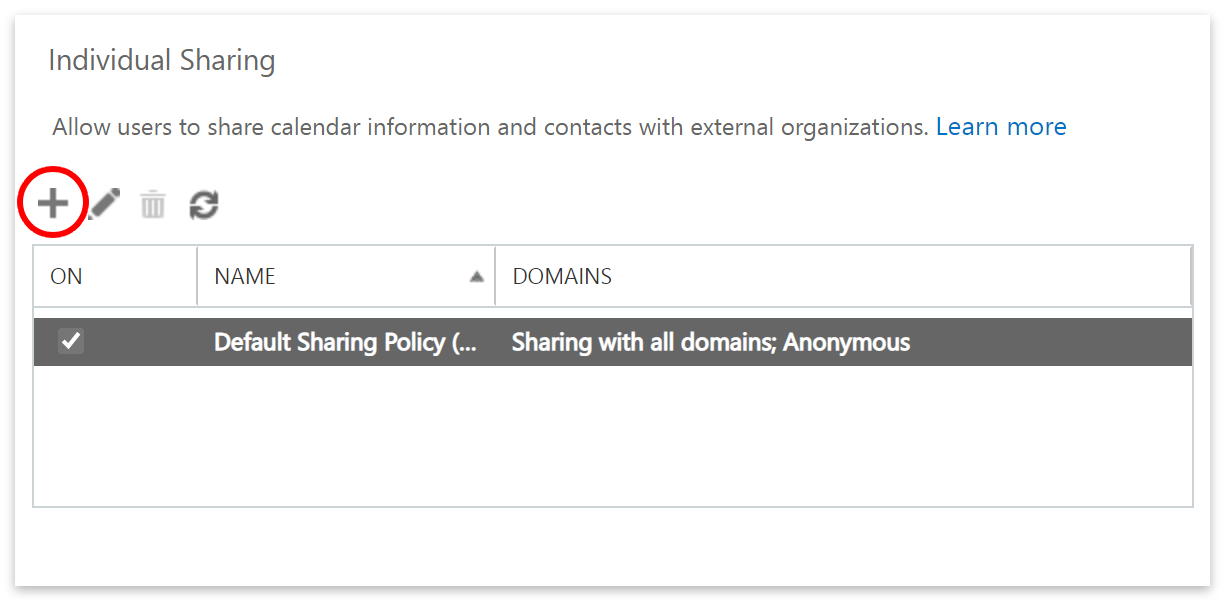
- Click the plus icon
 under Individual Sharing.
 - Create a policy name and click the plus icon to define sharing rules.
- Choose your sharing rules and click Save.
- Check the box next to ‘Make this policy my default sharing policy.‘
- Then click Save and OK.
Please continue reading our visual, step-by-step guide on everything you need to know about setting default calendar sharing permissions in Office 365.
What are Calendar sharing permissions?
Calendar sharing permissions allow users to share different aspects of their calendar internally or with external organizations. All calendar appointment information will be shared internally by default, including time, subject, location, and title.
This article will look at setting the default sharing permissions for all users. But first, let’s touch on sharing calendars with individuals.
- Go to Outlook and open your Calendar.
- Then click on Share in the window’s top-right corner.
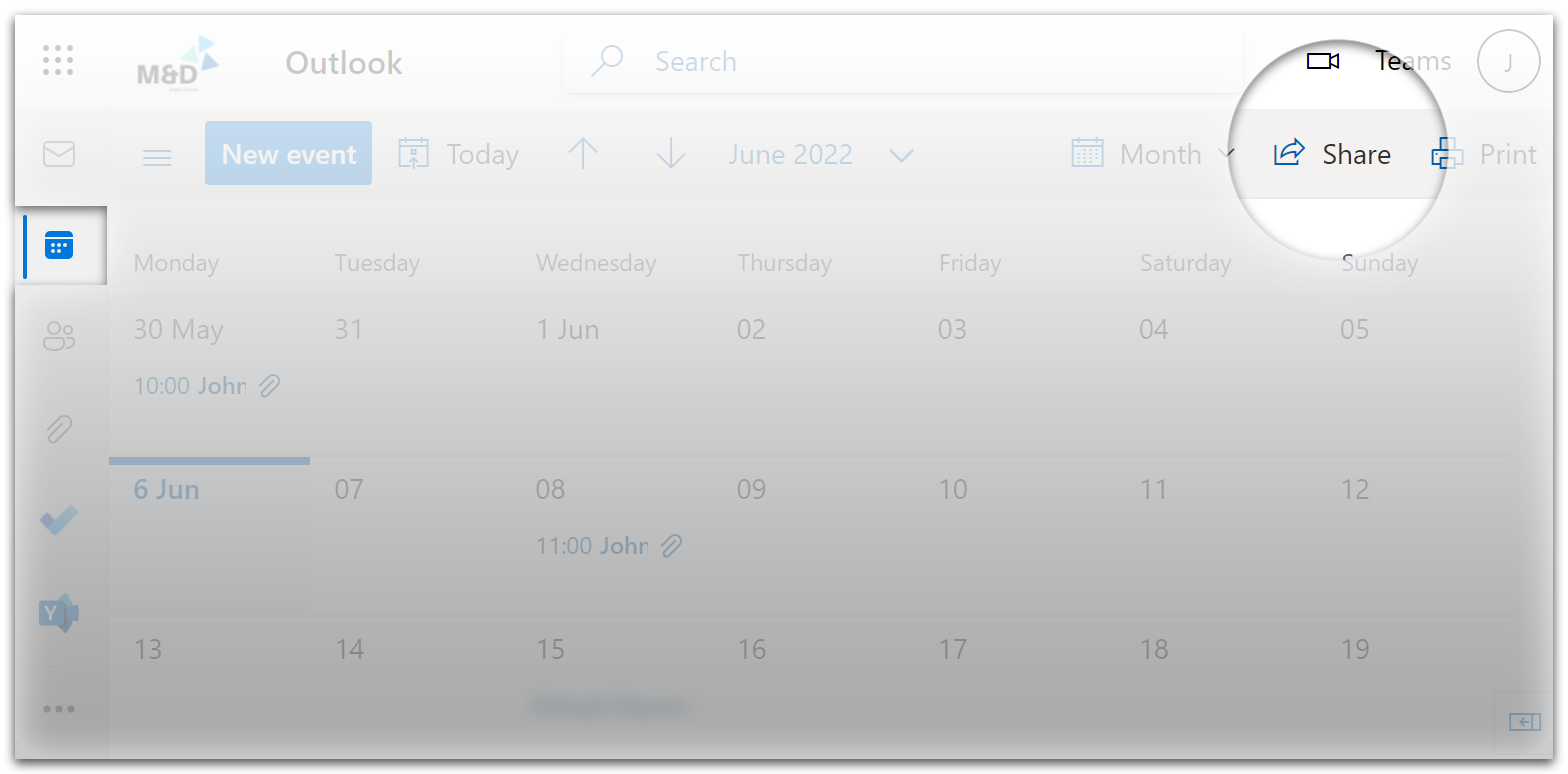
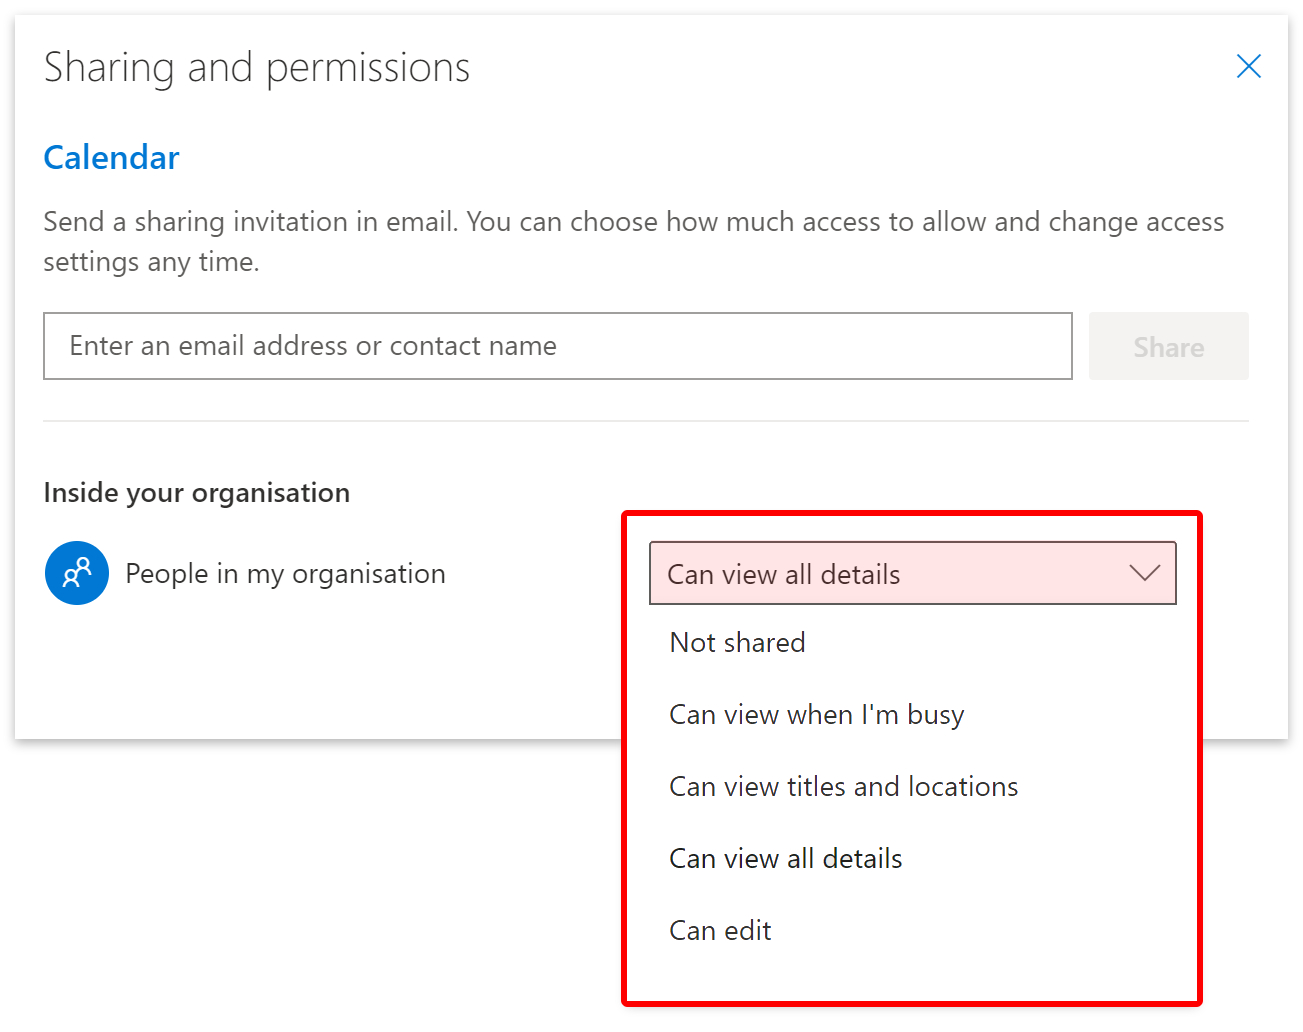
- The Sharing and Permissions box will appear.
- You can enter the name or email address of the person you want to share your calendar with.
- You can also set the access level for people within your organization.

How to edit default sharing permissions
You will need access to the Exchange Admin Center to modify the default sharing permissions for all Office users. Please follow the steps below to access the Exchange Admin Center from your Office Admin page.
- Open your Office Admin page.
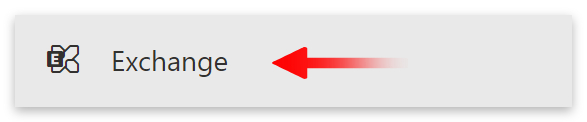
- Click Show All on the left menu.
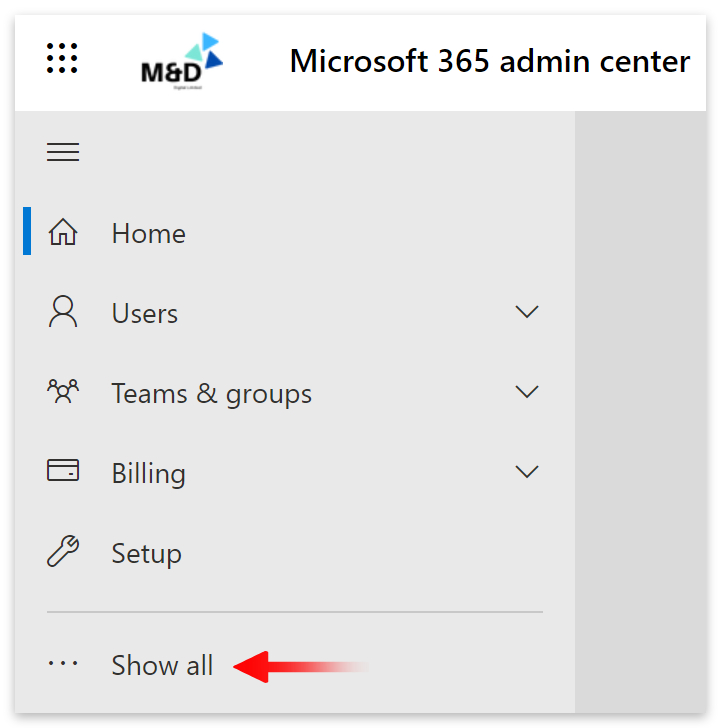
- Then go down and click Exchange.
- Head over to the left menu in your Exchange Admin Center.
- There, click Organization.
- Then select Sharing from the dropdown menu.
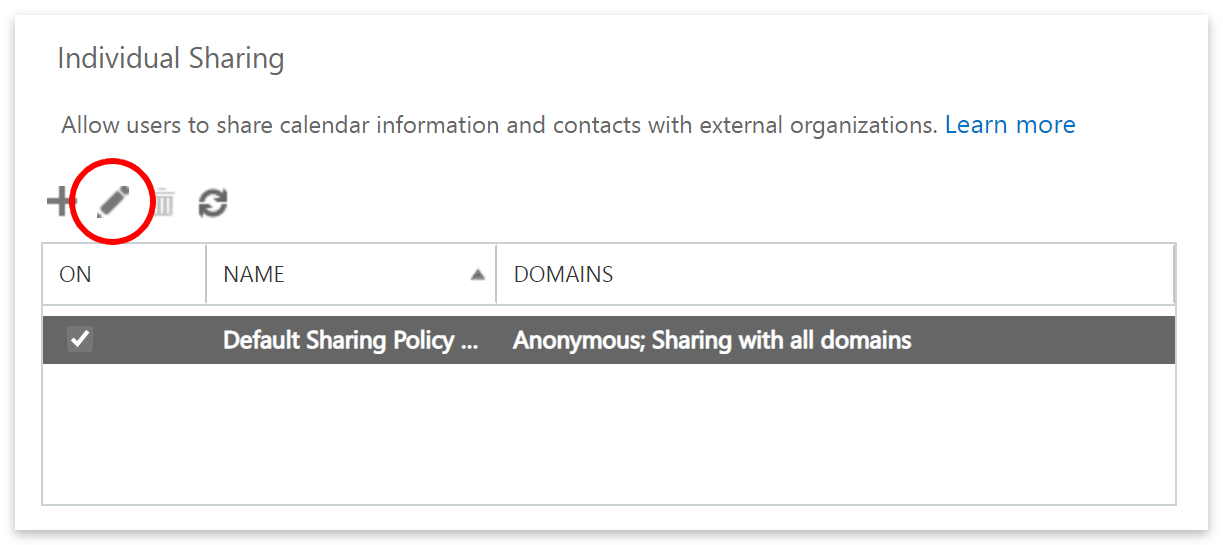
- Go down to Individual Sharing.
- Make sure the Default Sharing Policy is selected.
- Then click the
 edit icon.
| A policy is a collection of roles or permissions ascribed to groups and individual users. |
- Select a domain to modify and click the edit icon again.
- Select to share or withhold calendars.
- Choose what can be shared if applicable.
- Then click the Save button.
- When you’ve finished changing the domains, click the Save button again.
- Then click the OK button.
How to set default sharing permissions
To set default sharing permissions, you must first create a new policy. Please go to Organization > Sharing in your Exchange Admin Center to start this section of the guide.
- Go down and click the add icon under Individual Sharing.
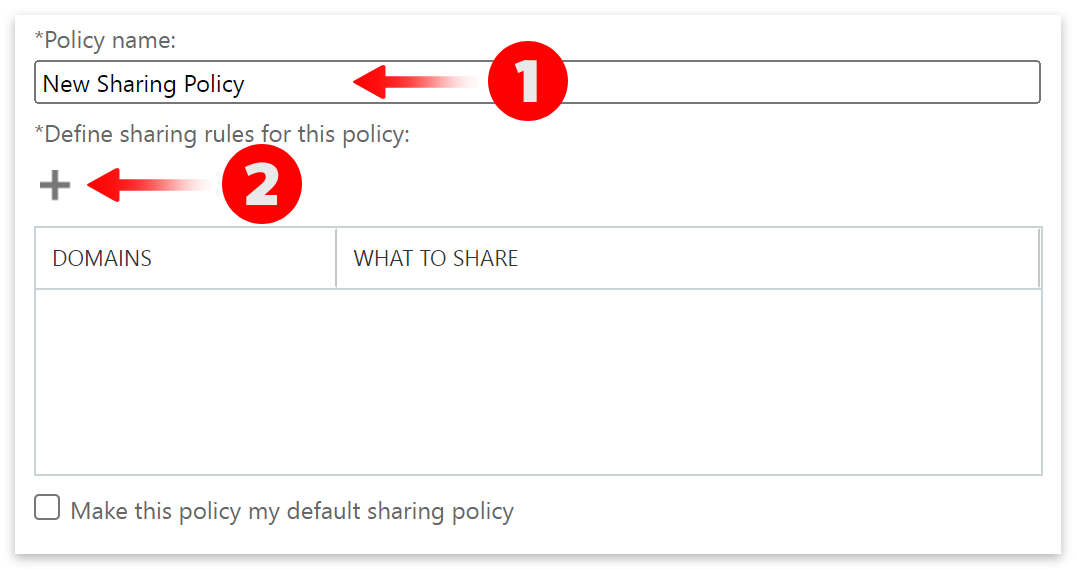
- Create a name for your new policy.
- Click the add icon again to define sharing rules.
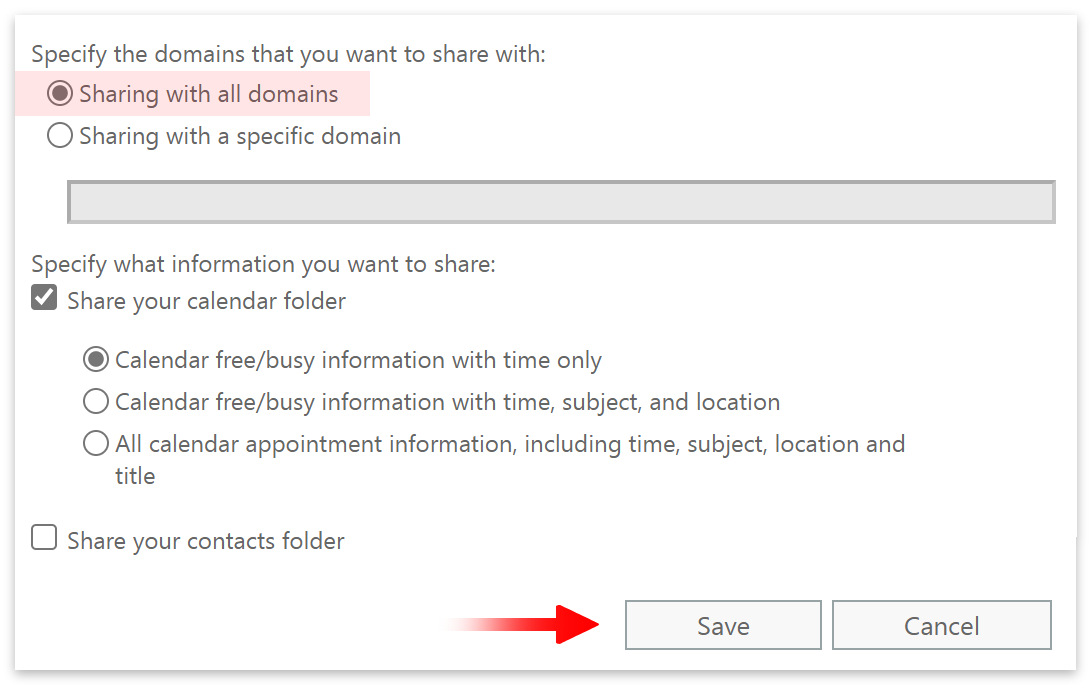
- Choose which domain(s) to share with.
- Then select your sharing options and click the Save button.
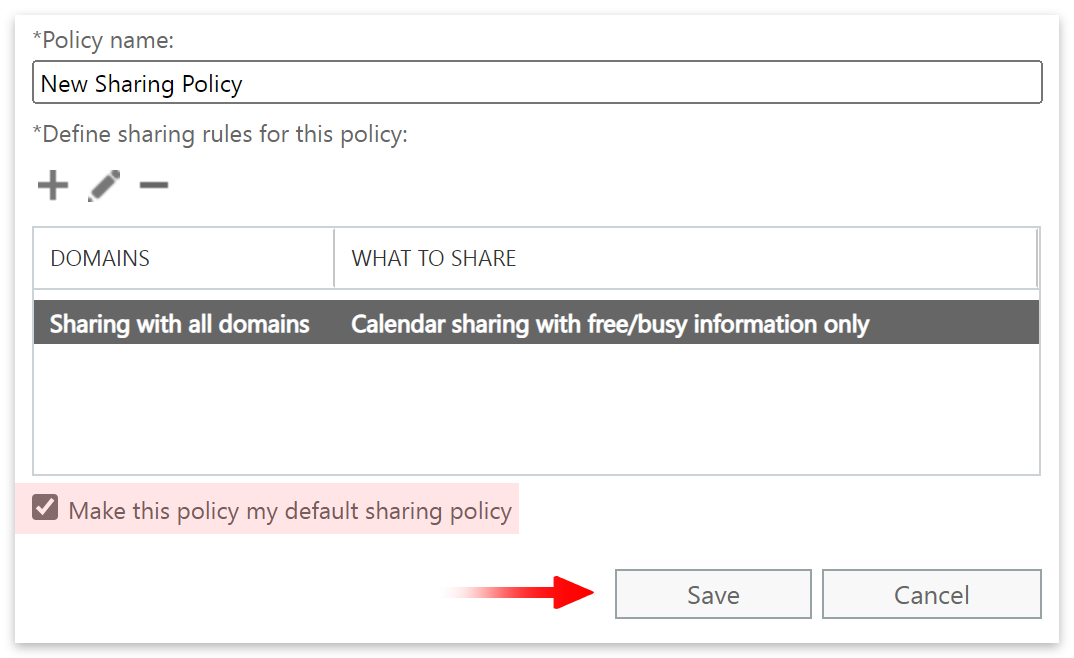
- Check the box next to Make this policy my default sharing policy.
- Then click the Save button and OK.
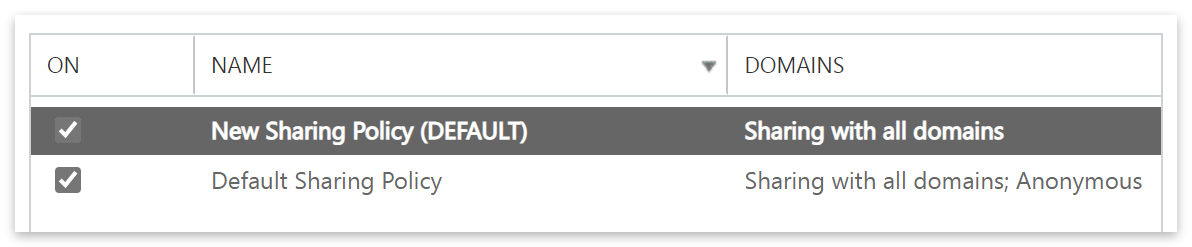
- You will now see (DEFAULT) next to your new policy.
More default user roles
You can modify a host of different user roles, most of which are turned on by default. Please view the comprehensive list below to find out what they do.
| User Role | Description | Default |
|---|---|---|
| My Contact Information | This role allows users to change their address, phone numbers, and personal information. | On |
| My Profile Information | This role allows users to change their name and display name. | On |
| My Distribution Groups | This role allows users to create and manage distribution groups. | On |
| My Distribution Group Membership | This role allows users to manage their membership in distribution groups. | On |
| My Custom Apps | This role allows users to manage their custom apps. | On |
| My Marketplace Apps | This role allows users to manage their marketplace apps. | On |
| My Read Write Mailbox Apps | This role allows users to install apps with the highest permission level. | On |
| My Base Options | This role allows users to modify the settings and configuration of their mailbox. | On |
| My Mail Subscriptions | This role allows users to manage their email subscription settings. | On |
| My Mailbox Delegation | This role allows administrators to grant access to another user’s mailbox. | Off |
| My Retention Policies | This role allows users to view retention tags and modify retention tag settings. | On |
| My Text Messaging | This role allows users to create and manage their text messaging settings. | On |
| My Voice Mail | This role allows users to manage their voice mail settings. | On |
- You can find the link to classic Exchange in the Exchange Admin Center.
- Click Classic Exchange near the bottom of the left side menu.
- There, click Permissions on the left menu.
- Then click User roles at the top.
- You will now be able to edit and create new role assignment policies.

- You can also manage Outlook Web App policies in classic Exchange.
- Please view the table below to find all available web app policies.
| Feature | Description | Default |
|---|---|---|
| Instant messaging | Allow users to send and receive instant messages, view other users’ presence (available, away, busy, etc.), and change their presence. | On |
| Text messaging | Allow users to send and receive text messages and create text message notification rules. | On |
| Exchange ActiveSync | Allow users to manage their mobile devices. | On |
| Contacts | Allow users to manage contacts and contact lists. | On |
| Mobile device contact sync | Grant users access to personal contacts outside Outlook. | On |
| LinkedIn contact sync | Allow users to add LinkedIn connections as contacts. | On |
| Journaling | Allow access to the journal folder in Outlook. | On |
| Themes | Allow users to change their color scheme. | On |
| Premium client | Switch on to give users access to the standard version of Outlook. Switch off to give users access to the light version of Outlook. | On |
| Weather | Allow users to see weather information in the calendar. | On |
| Places | Allow users to see location suggestions for meetings. | On |
| Local events | Allow users to see events in their local area. | Off |
| Interesting calendars | Allow users to browse and add interesting calendars. | On |
| Calendar | Allow access to the calendar in Outlook. | On |
| Tasks | Allow access to tasks in Outlook. | On |
| Reminders and notifications | Allow users to receive email notifications and reminders for tasks and calendar. | On |
Conclusion
There are three distinct permission groups for which you can set default policies. Those are Admin roles, User roles, and Outlook Web App policies. Changing the default Admin policies will only affect administrators. However, User roles and Outlook Web App policies will affect all other users.
Only Admin roles were accessible via the Exchange Admin Center when posting this article. User roles and Outlook Web App policies are only accessible in classic Exchange.
Thanks for reading.