If you want to use OneDrive to share your organization’s files with external users, you might run into a problem. Depending on the configuration of your organization’s sharing settings, external sharing might be impossible. If that’s the case — and you don’t want it to be the case — this blog post will come in helpful. I’m going to demonstrate how you can change your organization’s sharing settings so you can share files and folders stored in OneDrive with external users.
How to share OneDrive files or folders with external users:
- Navigate to Office.com and sign in using your Microsoft 365 credentials > Open the admin application using the app launcher
- Open the SharePoint admin center
- Under Policies, click Sharing
- Move the OneDrive slider to Anyone or New and existing guests
- Click Save
After completing the steps above, you’ll be able to share OneDrive files with external users following the simple steps given below:
- Navigate to Office.com > Open the OneDrive application using the app launcher
- Locate the file(s)/folder(s) you want to share > Click the share button
- Select the link settings > type the users’ email addresses > click Send
I’m going to demonstrate all the steps given above while including screenshots of each step. By the end of this blog post, your OneDrive will be set up so that you can share files with external users.
  | |
 Compatible with Windows, Mac OS, and Android. Compatible with Windows, Mac OS, and Android. | FROM $6.00 user/month |
How to share OneDrive files or folders with external users: step-by-step
If you’re unable to share OneDrive files with external users — for example, getting a message that you must speak to your system administrator because external sharing is blocked — you can follow the steps below to change your organization’s sharing settings and begin sharing OneDrive files with external users.
- Navigate to Office.com and sign in using your Microsoft 365 credentials > Open the admin application using the app launcher
- Open the SharePoint admin center
- Under Policies, click Sharing
- Move the OneDrive slider to Anyone or New and existing guests
- Click Save
I’m going to demonstrate all these steps including screenshots along the way. Note that you must be a SharePoint admin or a Microsoft 365 global admin to follow the steps given in this blog post.
1. Navigate to Office.com > Sign in with the user login information assigned to you > Open the admin app in the application launcher
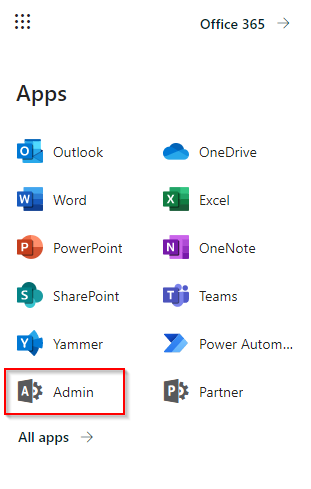
Navigate to Office.com. Once you reach the Microsoft website, sign in using your Microsoft 365 credentials. Remember that you must be a Microsoft 365 global admin or a SharePoint admin to follow the steps outlined in this blog post.
Once logged in you can access the admin section by clicking the application launcher then clicking “Admin”. This will allows the user to access the necessary admin portal to enable sharing.
   |
2. Click Show all > Open the SharePoint admin center
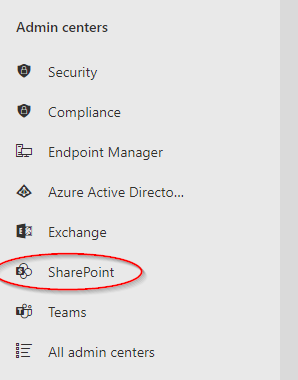
After opening the admin application, click Show all to open the list of M365 admin centers. Alternatively, if you have pinned the SharePoint admin center, it will show up at the top of the list without having to click Show all.
3. Under Policies, click Sharing
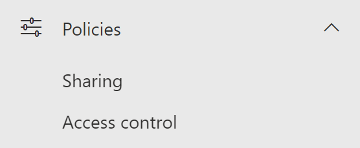
Click the Policies dropdown to open up the menu. Click Sharing to open up the part of the SharePoint admin center where you control your organization’s sharing settings.
4. Move the OneDrive slider to Anyone or New and existing guests

Once the page loads, you’ll see two sliders at the top under the heading ‘Content can be shared with’.
Here’s where you choose who your organization’s users can share content with. If your OneDrive slider is set to Existing guests or Only people in your organization, this will be why you’ve been unable to share OneDrive folders with external users. You must choose which of the sharing options meets the needs of your organization the best, so it’s important to understand the differences between them.
Move the OneDrive slider to either Anyone or New and existing guests. The definitions for each sharing setting are:
Anyone:
External users and guests can access shared files and folders using a link that doesn’t require sign-in. This option is also called “Anonymous sharing” because basically anyone with the link can have access to the files.
New and existing guests
External users and guest must sign to access the shared files or folder. They can either signin with their Microsoft account or need to enter a verification code. The external users will be added to your Azure AD as a guest user. You can view your guest users in the Microsoft 365 Admin Centre > Users > Guest Users.
Existing guests
With this option you can only share items with external users that are in your Azure AD as a guest user.
Only people in your organization
Basically, disable the external sharing at all. You can only share items internally.
After explaining the differences in the sharing settings above, you hopefully have a greater comprehension of the differences between the variety of options.
5. Click Save
Finally, the users can click save which will allow them to secure the recently changed settings to what they require. Once the setting has been updated to anyone can view the document or progressivly lower and less permissive settings, they can then send the file to external user.
After following these steps, you’ll be able to share with external users. After following the steps to enable sharing OneDrive files and folders with external users, here’s how to share files from OneDrive.

How to share OneDrive files and folders with external users
Follow the steps given below to share OneDrive files and folders with external users. You can follow this process whether you’re using it locally and sharing from file explorer or using the cloud application.
Step 1
You need to first log into yout business account related to the work documents ou will send across to the external users. Once you have logged into your OneDrive Business account you can then access your file database.
Step 2
Next step is you need to search for the file you wish to send over to the external user. For example the file “Can’s share on OneDrive” is selected and can now be shared with the users. You can share multiple files in one go or one at a time.

Step 3
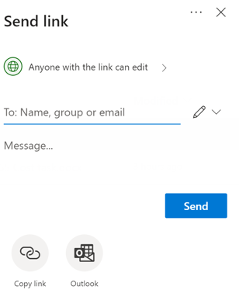
Next, select the link settings for the file(s)/folder(s) you’re sharing after clicking the share button.
Here are the different permission levels you can choose and what they mean:
Anyone with the link: Anyone with the link means anyone external or internal can access the information on the link.
People in X with the link: People from an organisation is a link where individuals within a company can only view the shared link; external devices and users will have no access.
People with existing access: People with existing access to your account can view the links. For example, people you’ve already shared the file with once or admins.
Specific people: The specific people share feature only allows access to a very limited number of users who have access to the link. Any other user regardless of whether they are on the system or the company database or network will be unable to see the corresponding content.
Type in the users’ email addresses and then click Share. Voila — the process is complete!
OneDrive Sharing: Copy Link Process
If users wish to share content by copying a link across to another user they can by following the steps mentioned below. The users can access this if they wish to use it on a document or send it across via text on a mobile device, for example.
If users external or internal need access they can do so by copying a link from the “copy link” button which will allow users to access this feature. Once the users have copied the link, they can then than forward to anyone internal or external.
The link will copy by default however if you need to copy again the box at the bottom will allows users to copy the link again and send it to other users again.
To increase functionality Microsoft have added a feature where users can again edit the permission settings that they require for their tasks. The required share settings are the same from before which are a list of 4 different settings users can use to edit the share permission and allow greater control on who receives the shared files.
Once you have adjusted the share permissions prior to or after copying the link you can than click copy which will allow the users to copy this information and send it over to the required recipients.
Finally, by default users will have the share all feature enabled which isn’t recommended by Microsoft as it’s quite ineffective in keeping data private and it may be lost in the hands of strangers who could potentially get access to sensitive shared data.
Note that it is possible to disable the link in OneDrive for Business. All you need to do is select the file > click on the information icon > and select Stop Sharing. Congratulations, you now know how to share files on OneDrive for Business with external users.