When using OneDrive to sync files with your local desktop, some files may be deleted if you stop the sync from completing. So please continue reading to see how you can stop OneDrive syncing folders without deleting files.
How to stop OneDrive syncing folders without deleting files:
- Firstly, open File Explorer.
- Select your OneDrive folder on the device.
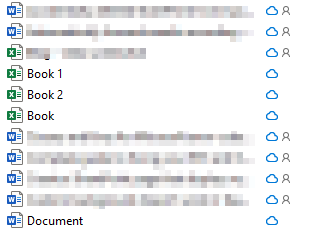
- Open the folder where you want the files to remain after sync.
- Select all the files.
- Finally, right-click and select “Always keep on this device.”
- Get OneDrive for just $9.99 p/m with 6TB of storage!
When complete, the icon under your file will change to a white tick in a green circle, indicating that the files you’ve selected will always be available on your device. Depending on the file sizes, it could take some time. But any modifications you make to the files on other computers will be reflected automatically in your local copy once the process is complete.
   |
Please continue reading our detailed, step-by-step guide on how to stop file synchronization in OneDrive without deleting your files. The guide contains screenshots to help you through the steps.
How to stop OneDrive syncing folders without deleting files
Here is an in-depth guide on stopping OneDrive from syncing folders without deleting files. If you sync a folder with missing content, it may translate onto the desktop, where files will also be deleted in response. The process here prevents files from being deleted when you stop a folder sync, and an in-depth guide illustrated below makes it easier to understand the process. The guide includes screenshots to help you better understand the process and give you more visual context on the steps if you can’t understand certain functions related to the process.
- Firstly, open File Explorer.
To start the process, you need to first open the File Explorer option in Windows; this is where you can manage all your file-based content for the entire desktop, including OneDrive. Here you will be able to access the folder where content gets deleted from.
- Select your OneDrive folder on the device.
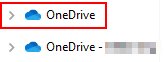
There will be a list of folder options on the left from your desktop folder options to the OneDrive folder option; you may have multiple OneDrive accounts on the desktop; however, choose the one you need to stop files deleting on. Select the OneDrive folder of interest, then open it.
- Open the folder where you want the files to remain after sync.

Next, you need to open the folder where you want the files to remain after the sync; here, you will find that the folders are synced to the desktop and the files within share the same properties as the folder. You can break the sync between folder and files by anchoring the files to the desktop, which stops them from being deleted once you begin to sync the folder.
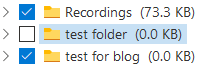
- Select all the files.
- Finally, right-click and press “Always keep on this device.”
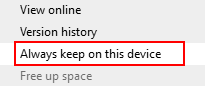
Once the process above is complete, you will no longer erase files. The symbol will change to a white tick in a green circle, indicating that the selected files have been synced to your computer. Depending on the size of the files, this could take a few minutes. Any modifications you make to the files on other computers will be automatically reflected in your local copy once the process is complete. You can finish this process on the desktop, where File Explorer is accessible, and then utilize the folders section to navigate the folders that will sync. A situation like this typically occurs when there are files in the cloud that have been deleted from a folder. If this is the case, changing the file location using the approach described above may be helpful. The process illustrated above will allow you to keep syncing folders without worrying about erased files.

Stop the OneDrive folder sync
You may find it helps to stop folder sync before you commence with the process above to stop the deletion of files in OneDrive when a sync continues. Stopping a folder sync may also prevent files from being deleted while you are trying to complete the steps above to complete the process. Read through and see how you can Stop OneDrive folder sync.
- First, click the “Account” tab in the OneDrive window.
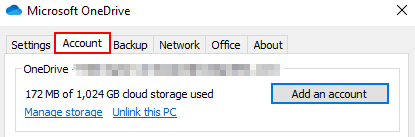
In the OneDrive option at the bottom of your desktop, you can find the Accounts tab, managing preferences for processes within your OneDrive account.
- From there, click on “Choose folders.”

- Uncheck the folder that you need to stop syncing for.
- After that, close the settings menu by clicking OK.

Once the process illustrated above is complete, you will have successfully stopped OneDrive folder sync. You can now use the guide above to stop OneDrive from syncing folders without deleting files.
Conclusion
That’s it for the blog; thank you for taking the time to read our content; we hope that the solution provided above has helped stop OneDrive syncing folders without deleting files. You can also try stopping OneDrive folder sync if you want to keep files secure while aiming to resolve the issue of files being deleted. However, if there are any issues with the steps illustrated above, drop a comment below, and we will address them as soon as possible.