Within Microsoft OneDrive, there may be times in which you want to cease the sharing of several files at the same time. Perhaps a certain user no longer needs access to a particular file, perhaps you are needing to restructure certain aspects of your online workspace. Chances are, you are wanting to do this if you are reading this blog post today.
Now, it appears that currently, there is not a specific way in which you can prevent the sharing of several OneDrive files at once. Before you click away from this article in anger, though, please bear with. Instead, we will go through the pre-existing process of preventing the sharing of OneDrive files, which is thankfully a fairly simple process, if a little tedious.
In order to successfully stop sharing several OneDrive files, you must access the settings of the file or folder and edit the sharing preferences within those settings.
Now, if this alone is not enough detail for you to work with, then do not worry. Not only will we offer you a step by step guide throughout the process, but we will then delve further into the method.
Step by step: How to stop sharing several OneDrive files
- Open Microsoft OneDrive.
- Find the file/folder you wish to stop sharing.
- Highlight the folder, and then click the ‘Information’ prompt in the top right corner.
- Now, look to the heading titled ‘Has Access’.
- Under this heading, there should be a ‘Manage Access’ option. Click this.
- Your next step depends on the level you wish to go to when removing the OneDrive files.
- If you want to stop sharing the file entirely, click ‘Stop Sharing’.
- If you want to add more users to the Direct Access level, click the ‘plus’ symbol next to the subheading.
- If you want to set an expiration date on the duration of how long the sharing link will work, then ‘Anyone with the link can edit’.
As was aforementioned, do not worry if even that is not enough detail for you to work with. We will now look at the process deeper, with accompanying screenshots inserted where necessary to further aid you.
Your first step will be to log in to Microsoft OneDrive. You can, of course, do this manually, but if you are unsure of that process, fear not. Simply login to another Microsoft application, such as Outlook, and launch OneDrive via the application launcher, which can be found in the top left corner of your screen.
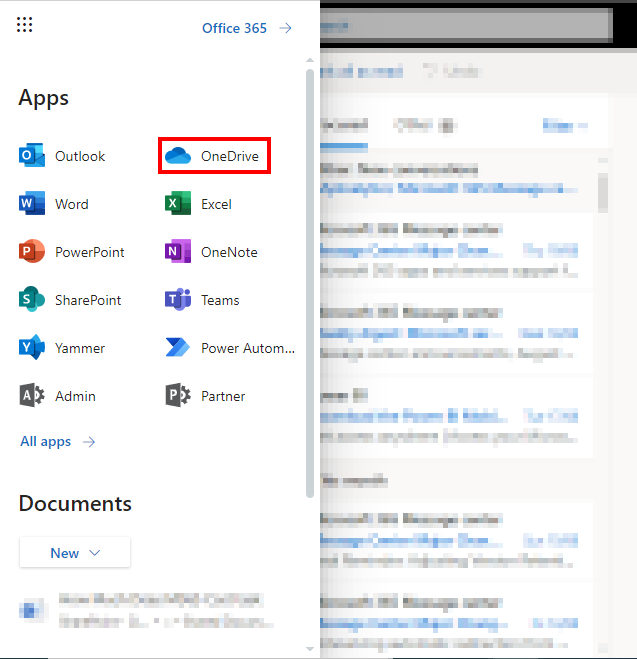
Clicking this will, unsurprisingly, bring you to the main menu of Microsoft OneDrive. Here, you will need to find the folder or file that you wish to edit the sharing settings of. Once you have found it, highlight it, and then look to the top right corner of your screen. You should find the small ‘Information’ prompt, and click that after you have highlighted your folder/file of choice.

Clicking the ‘Info’ icon will display a small menu to you, on the right side of your screen. You will first see something of a preview of your file, and under that will be a section with the title, ‘Has Access’. There will, under the heading, be a small hyperlinked title named ‘Manage Access’, which is the thing you will want to click here.

Once you have clicked ‘Manage Access’, your next step will depend on how much you want to edit your OneDrive sharing preferences.
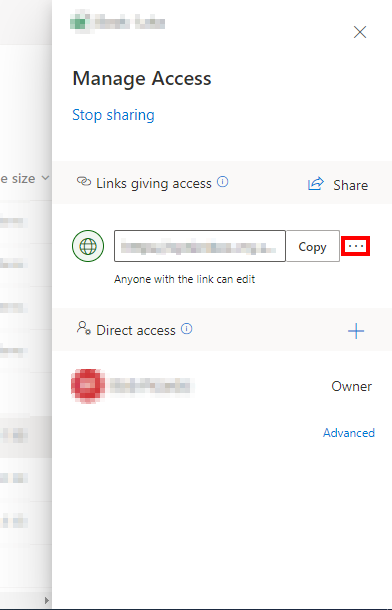
If you wish to stop sharing the file/folder entirely, then you will only have one step to follow. On the new menu shown to you after you opt to click ‘Manage Access’, underneath the large heading (that funnily enough, reads ‘Manage Access’), will be a small passage of text titled ‘Stop Sharing’. Clicking this will stop the file being shared in its entirety.

If you wish to allow other users a higher level of control over the file or folder, then you should look towards the ‘Direct Access’ section of the menu. Under this is a ‘+’ symbol, which is the thing that you will want to click.

Clicking this will yet again open a small menu, populated by a text box in which you can enter the email address(es) of users you wish to have a higher level of access to your file or folder. Simply enter the addresses you want to, and then click ‘Grant Access’ when complete. The box will turn blue, allowing you to click it, after you enter at least one name into the text box.
The final way by which you can stop the sharing of a file in OneDrive is by adding an expiration date to the duration of how long the file can be shared. To do this, from the initial menu on the right side of your screen, click the ellipses to the side of the sharing link.
Clicking this will offer you the option to set an expiration date on your link, which will prevent users sharing it after whichever day you decide upon.

Once you have decided on your date, click ‘Save’ to save the changes you have made.
Thank you for taking the time to read this blog, I hope you found it as helpful as you wanted it to be! As is the case with every blog we post, if you run into any issues whatsoever whilst following the process, or simply wish to let us know any thoughts you may have, then please do not hesitate to get in touch with a member of our team.
Below are links to other blog posts that we have published that are of a similar topic to this one. Perhaps if this blog did not quite answer any questions you had, then one below will be of better use to you!
How to allow web-only access to a OneDrive file – Business Tech Planet
(Allowing web-only access to a OneDrive file via Microsoft Admin).
Troubleshooting tips: OneDrive failed to start – Windows 10 – Business Tech Planet
(Guide to try and start OneDrive through Task Manager).
How to prevent OneDrive syncing duplicate files – Business Tech Planet
(Preventing OneDrive syncing duplicate files in the Credential Manager).