In Microsoft 365, sometimes you may need to block a particular user. Often, removing them from the workspace all together can rectify the issue, yet sometimes you may wish to block the user for a window of time. Chances are, if you want to block them only temporarily, then that’s why you’re here.
The process, thankfully, is a fairly simple one. In order to temporarily disable a user within Microsoft 365, you do so by altering the settings within the User tab of Microsoft Admin.
Don’t worry if this isn’t enough to go on. Not only will there be a step-by-step underneath this paragraph, but following that will be a more detailed walkthrough of the process should you need it.
DISCLAIMER: In order to complete this process, you will need to have access to Microsoft Admin. To gain this, you will need to be a Global Admin. If you aren’t, then get in touch with your provider to see if this status can be updated.
Step by step: How to Temporarily Disable a Microsoft 365 User
- Sign into Microsoft.
- Access the Microsoft Admin tab.
- Click the ‘Users’ subsection of Microsoft Admin.
- Find the user you want to temporarily block/disable and click on them.
- Click ‘block sign-in’, which should be located just below their name.
- Proceed through the pop up menu.
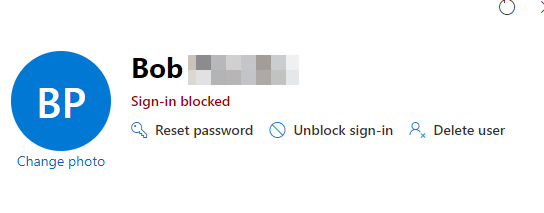
- Looking back at the name, you should see red text that confirms they have been blocked.
Like aforementioned, do not worry if this isn’t enough information for you. Below is a thoroughly structured guide through the procedure, with accompanying screenshots to highlight the areas of importance.
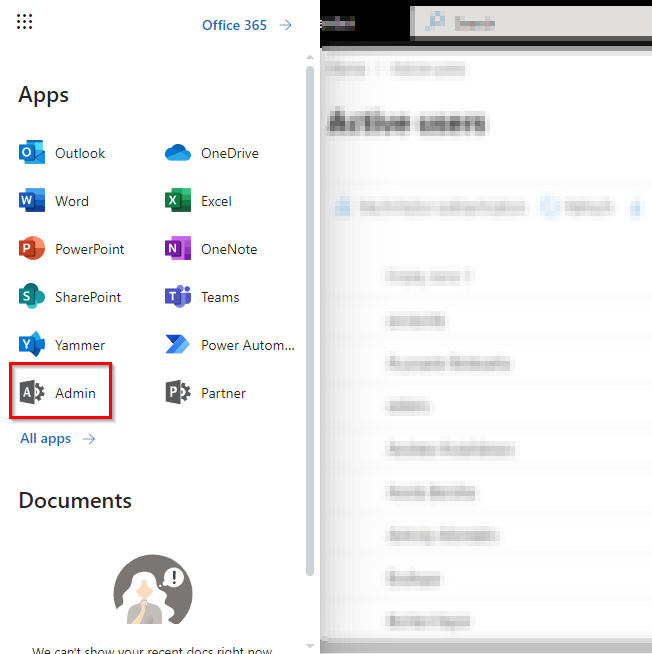
Your first step, after signing into a Microsoft application, is to access the Microsoft Admin tab, which has been emphasised by the red rectangle in the screenshot below.
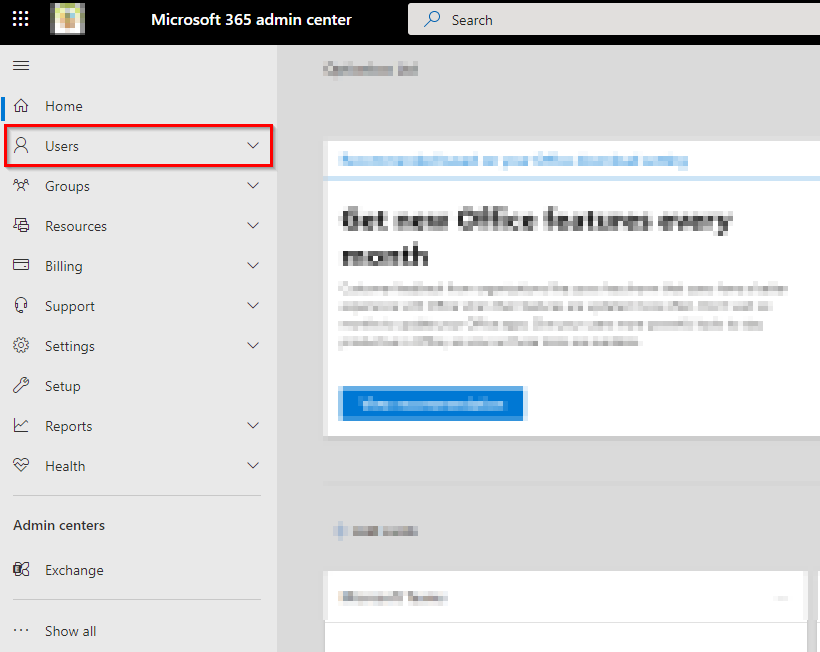
Once you have entered the Admin dashboard, you will want to access the User subsection of Microsoft Admin.
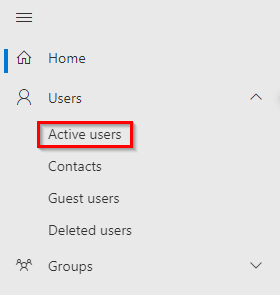
Clicking ‘Users’ will open a dropdown menu. From here, you will want to click ‘Active Users’, like so:
After clicking ‘Active Users’, you will be brought to a new menu. It should be one that displays all current active users within your work, funnily enough.
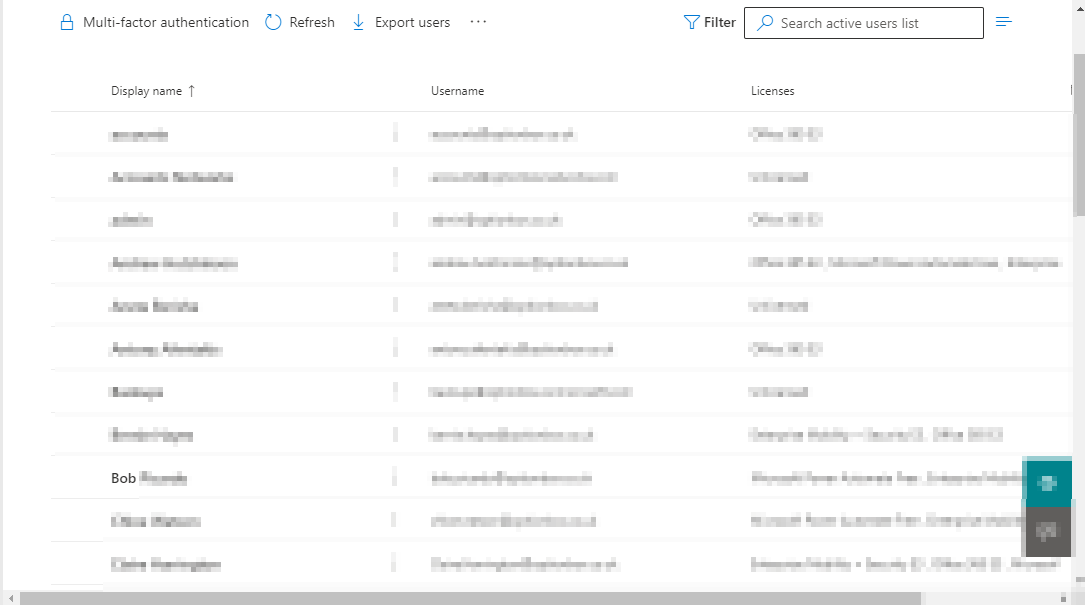
You’ll notice that ‘Bob’ is the one name that remains clear, in and amongst the surrounding blur, and that is because we’ll be using that as the example in today’s blog. Once you have found the name of the user you wish to temporarily disable, clicking their name should open up a menu that will come from the right of the screen, like this:
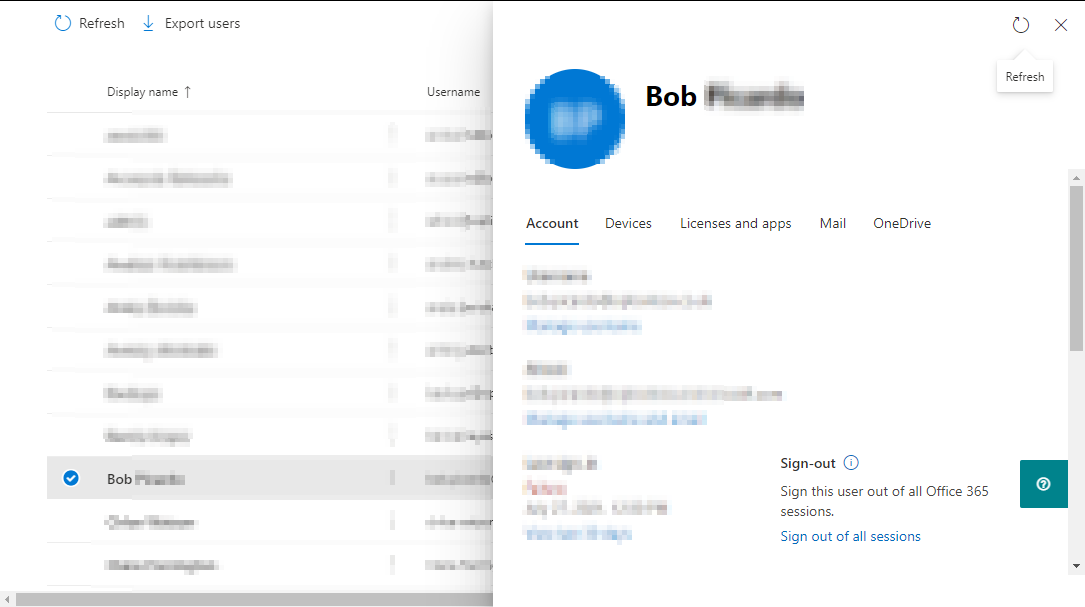
You’ll notice that, unblurred, is a ‘Sign Out’ option. This is noted as a point, as that may be of greater use to you. Clicking that would mean that the user is signed out within 15 minutes, compared to the process that’s being detailed today which can take up to 60 minutes to sign the user out.
The issue with this though, is that whilst the sign out process may be quicker, this would only serve to sign the user out, without blocking or temporarily disabling them.
Anyway, continuing with the initial process. After you have opened the account menu, there will be text underneath the name, asking you if you want to sign them out. Clicking this will open this menu:
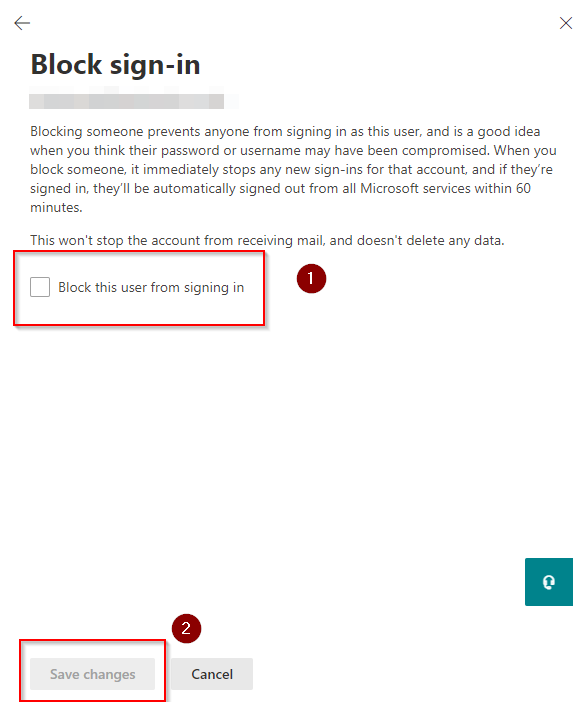
After reading through this text, make sure to tick the box titled ‘Block this user from signing in’. After doing that, click save changes, and the user will be blocked from then on. From there, you should be greeted with this menu:
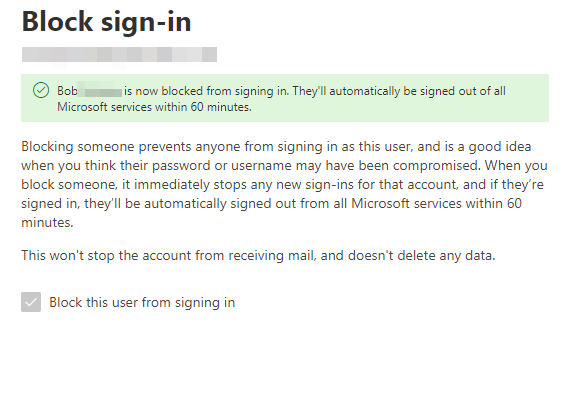
As is evident by the green box, the user has been blocked from signing in and will be forcibly removed from any Microsoft services within an hour of you blocking them. Not only is this process simple to complete, but it is simple to revert, as you just follow the same steps and simply look to unblock them.
As a final confirmation of the user being blocked, you should be greeted with this red text under their name, if you opt to click on it after blocking them:
Now you have successfully, temporarily, disabled a user on Microsoft 365!
Thank you for reading this blog, I hope you found it as helpful as you wanted it to be! As always, if you run into any issues, or simply wish to inform us on how you found the blog, then please don’t hesitate to get into contact with our team.
Below are some links to other blogs we’ve posted, covering a similar topic to this one. If this piece didn’t quite answer your question, then perhaps one below will be of better assistance.
How to temporarily disable a user’s mailbox: Office 365 – Business Tech Planet
(This piece discusses disabling a user’s mailbox via the Active Users settings)
How to remove blocked users from the restricted user’s list: Office 365 – Business Tech Planet
(A walkthrough for removing users from the restricted list through Threat Management)
How to enable disabled add-ins in Outlook – Business Tech Planet
(Enabling already disabled add-ins through COMM Add-Ins)
How to disable the auto-complete feature in Outlook? – Business Tech Planet
(Disabling auto-complete through Mail options)