SharePoint can make a file read-only for several reasons after syncing. Reasons include required columns, site collection features, and library versioning options. Of course, none are complicated issues to resolve. So, you need not worry.
| Issue | Solution |
| One or more of your document library columns require a value for their field. | Deactivate the column’s required field within your document library’s settings. |
| Limited-access user permission lockdown mode is causing SharePoint to handle your files differently. | Deactivate limited-access user permission lockdown mode via the site collection features. |
| New content must be approved upon submission. | Adjust your document library’s versioning settings. |
| Documents must be checked out before they can be edited. | Adjust your document library’s versioning settings. |
In today’s post, you will find three step-by-step guides. The first will cover how you should go about disabling the toggle that makes columns require values. The second guide will instruct you on finding your site’s collection features and more importantly, disable the limited-access user permission lockdown mode feature. Lastly, in the final guide, I’ll be instructing you on how best to configure your document library validation settings. The intention will stop you from having to approve new content and check documents out before editing them.
Contents:
- [1] How to fix required columns in SharePoint
- [2] How to deactivate limited-access user permission lockdown mode: SharePoint
- [3] How to fix problematic versioning options
- [4] Recap
How to fix required columns in SharePoint to prevent files becoming read-only after syncing
Step 1 – Open SharePoint
To begin, head over to SharePoint and open up your site. As with the upcoming guides, all our changes today will occur within SharePoint Online.

Step 2 – Open your site’s documents library
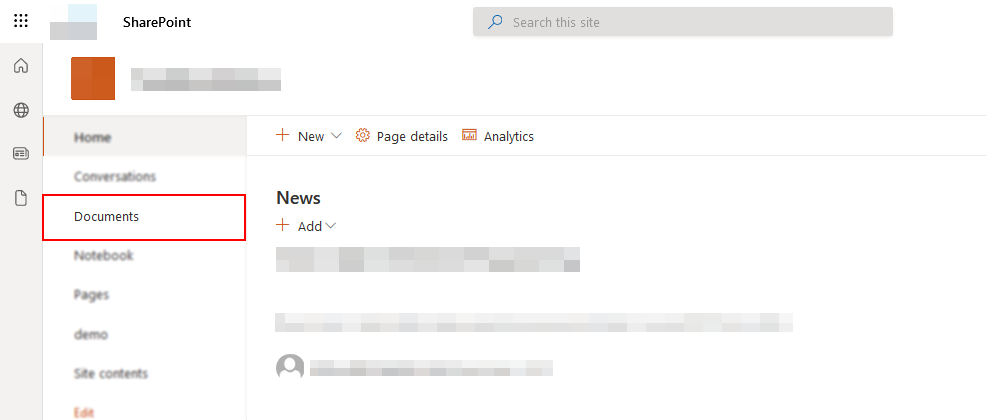
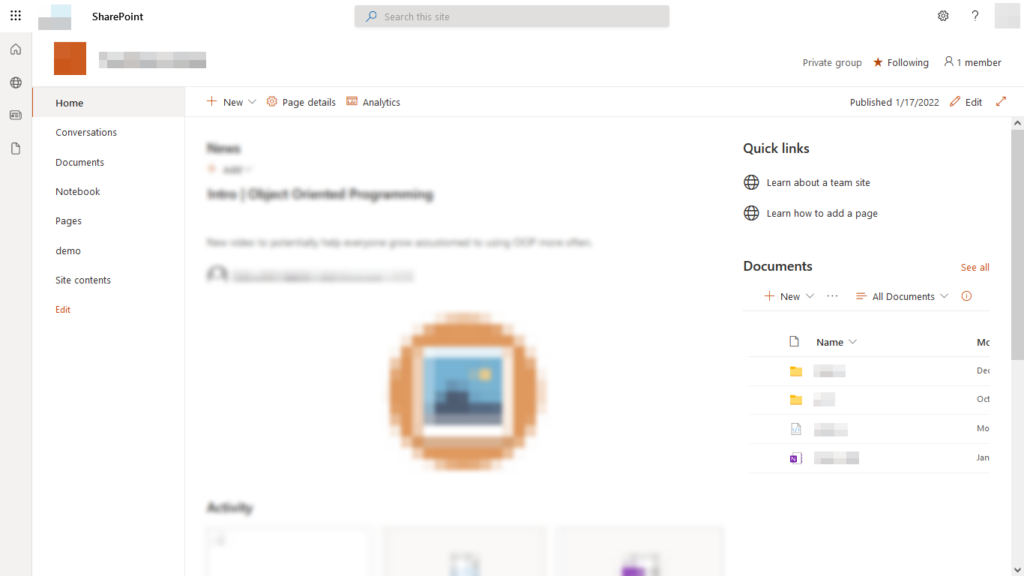
Next, we’ll need to head to your site’s documents library; you’re likely aware this isn’t very difficult. In the second leftmost sidebar, find and click “Documents.” Look at that: done already!
Step 3 – Head to the library’s settings
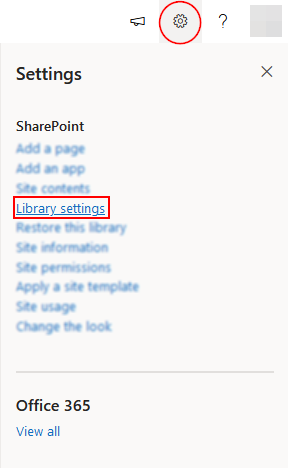
In the top right, by your account’s icon, you should be able to spot a cog. Click the cog to reveal a dropdown; you’ll want to select the “Library settings” option.
Step 4 – Check the columns field for required columns
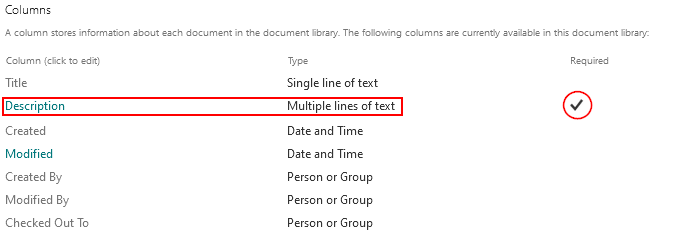
Library settings details a series of configurations that impact your experience within the documents library. One of its many fields is the “Columns” fields: presenting a table of each enabled column. You need to check the table entries for a checkmark in their “Required” column. Should you find an entry as described, click its name in the “Title” column.
Step 5 – Disable the requirement toggle
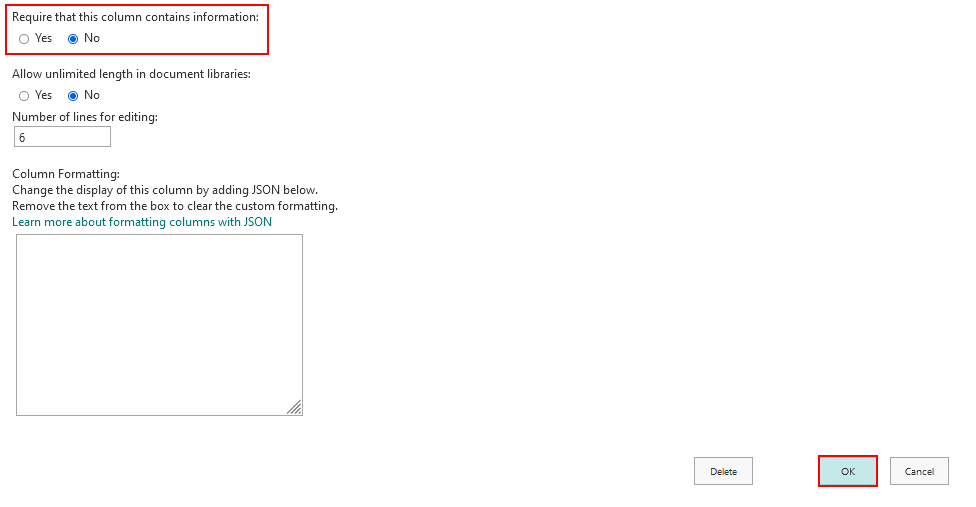
Although the following page contains three main fields, you need only concern yourself with its first: “Require that this column contains information.” You will see a “Yes“/”No” option in the field. Select “Yes.” Lastly, toward the bottom right of the page, you can find an “OK” button- you’ll need to click it to conclude this guide.

How to deactivate limited-access user permission lockdown mode files becoming read-only after syncing
Step 1 – Open SharePoint
To begin, head over to SharePoint and open up your site. Each of the following steps will occur within SharePoint Online.

Step 2 – Open your site’s Site contents
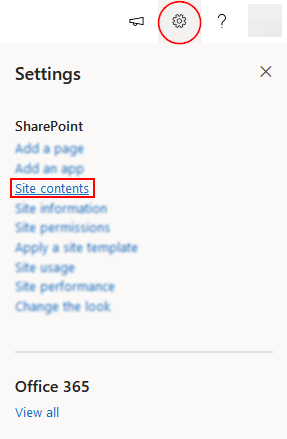
First, reveal the Settings dropdown with the cog in the top right of the page. Next, select “Site contents” to proceed. While we won’t be doing anything within the page, you can use it to access the pages we will be using.
Step 3 – Open your site’s settings
In the site contents, look to the main ribbon below the page’s main header; you’re looking for “Site settings.” You’ll need no more than a click to open the site’s settings page.

Step 4 – Select site collection features
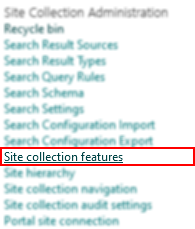
The site settings detail several pages under numerous categories; the typical place to resolve many SharePoint issues. Under the “Site Collection Administration” subheader, you can find and select “Site collection features.”
Step 5 – Deactivate the problematic feature
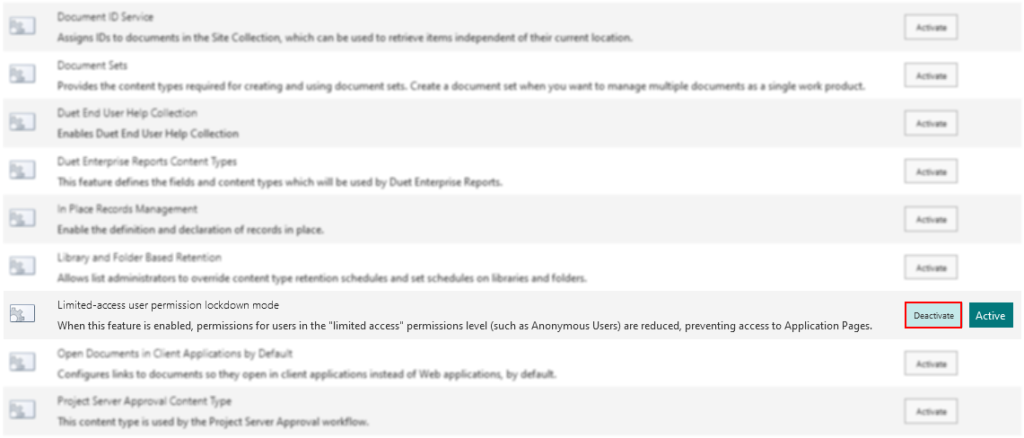
The next page is a little more tedious to deal with- due to the vast number of features to scan through. Fortunately, there is a method to make the process much easier. Use the shortcut Ctrl+F and enter the search term “Limited-access user permission lockdown mode.” Your browser will take you to the feature we’re looking for; click the “Deactivate” button.
Step 6 – Confirm your choice
When attempting to deactivate a feature, SharePoint will inform you that deactivating the feature may have particular risks. If you’re determined to deactivate the feature, confirm your choice by selecting “Deactivate this feature.”

How to fix problematic versioning options files becoming read-only after syncing
Step 1 – Open SharePoint
To begin, head over to SharePoint and open up your site. Each of the following steps will occur within SharePoint Online.
Step 2 – Open your site’s documents library
Next, we’ll need to head to your site’s documents library; you’re likely aware this isn’t very difficult. In the second leftmost sidebar, find and click “Documents.” Look at that: done already!
Step 3 – Head to the library’s settings
In the top right, by your account’s icon, you should be able to spot a cog. Click the cog to reveal a dropdown; you’ll want to select the “Library settings” option.
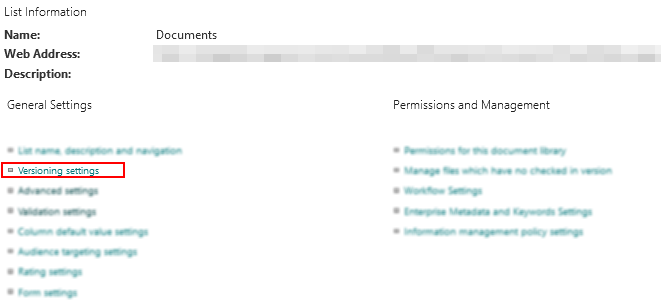
Step 4 – Access versioning settings
In the library settings, look below the “General Settings” category. You should see a “Versioning settings” option- click it to continue.
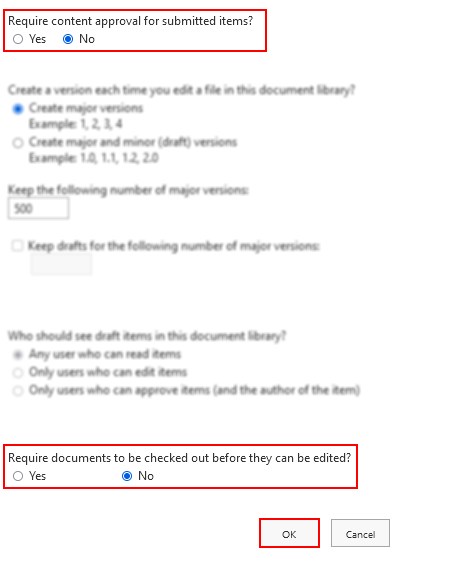
Step 5 – Access versioning settings
Versioning settings are responsible for two toggles we ought to check. The first is “Require content approval for submitted items,” the second is “Require documents to be checked out before they can be edited.” Ensure you have set both options to “No.”
Recap
SharePoint can set SharePoint files to read-only after syncing due to three potential causes. One solution is to stop requiring entries for any document library columns. A second solution is preventing submitted content from requiring approval or needing to be checked out by a user before editing the said file. The final solution comes from deactivating the site collection feature “limited-access user permission lockdown mode.”
Our related articles:
- How to connect a SharePoint list to a Microsoft Teams channel – If you’re big on planning and organization you’ve more than likely used “Microsoft Lists.” In recent years, the application has been made cross-platform via Microsoft 365’s integration functionality. As a result, you can access and edit your “Microsoft Lists” via Teams and other applications.
- A complete guide to monitoring and managing external sharing in SharePoint – Privacy is important. Thus, when you’re sharing documents with external parties, you may consider monitoring what’s going on with your external sharing.
- How to change the location where SharePoint libraries sync on your computer – When using OneDrive/SharePoint on your PC you’ll have noticed its respective OneDrive folder- where cloud stored documents are synced and accessed. In this post, we’ll be covering how you can change where this folder resides.
- The best way to move data from Dropbox to SharePoint Online natively – With multiple cloud services available to businesses, it’s no surprise SharePoint features native mechanics to aid your transition from services like Dropbox to SharePoint online. In this post, we’ll be instructing you on properly using them.