If you have any Microsoft-developed product loaded on your Mac (think OneNote, Microsoft Word, Microsoft Edge, and so on), Microsoft AutoUpdate (MAU) is almost certainly installed as well. The sole purpose of Microsoft AutoUpdate is to automatically update and maintain Microsoft programs on your Mac. Have you ever opened a Microsoft app and discovered that it already had a feature that had just been released? That was done by the Microsoft AutoUpdate program. However, the AutoUpdate software gets stuck on Mac sometimes and it can be quite an issue if you have some updates that affect security, as these won’t be downloaded and could slow down your experience on Mac. Follow for more information on how to troubleshoot this error.
The tips above will allow your to resolve the issue with AutoUpdate whether it may be a data patch preventing the update or just your memory drive not having enough space to allow for the update to process. Follow through for more information on how to resolve the Microsoft Autoupdate stuck on Mac.
What is AutoUpdate
Before we proceed I think it’s essential we know what AutoUpdate is. Most maybe think it’s some sort of native feature within a given application directed by Microsoft just as you would update an OS or an application on your mobile device. Some may assume it’s just a direct update from Microsoft for Mac OS devices. However, the answer may surprise some of you read through for more information.
Microsoft AutoUpdate (MAU) is almost probably installed if you have any Microsoft-developed product installed on your Mac (think OneNote, Microsoft Word, Microsoft Edge, and so on).
Microsoft AutoUpdate’s sole aim is to update and maintain Microsoft apps on your Mac automatically. Have you ever opened a Microsoft app only to realize that it already had a recently released feature? The Microsoft AutoUpdate application was responsible for this.
It also downloads and installs security and bug fixes. So, if you encountered a random malfunction while using a Microsoft program that went away after a time, Microsoft AutoUpdate most likely installed a background update that solved the problem.
Turning off Microsoft AutoUpdate is a good idea
In this sense, disabling Microsoft AutoUpdate means preventing the software from doing its primary duty (i.e., automatically updating other Microsoft apps).
- Type Microsoft auto-update into the Finder’s search bar.
- Double-click Microsoft AutoUpdate in the search results to launch the software.
- “Keep Microsoft apps up to date automatically” should be unchecked.
- Tap Turn Off to continue.
It’s as simple as that. On your Mac, Microsoft AutoUpdate will no longer run in the background.

Quit and restart AutoUpdate
Quite a simple process of simply quitting the auto-update application, however, what that does is reset your auto-update application, allowing for any issues to be mitigated and your application to run at a much more effective rate.
Step by step process to quit and restart AutoUpdate:
- Firstly, open Launchpad.
- Now navigate to “Activity Monitor” and open it.
- Under the processor name find “Microsoft AutoUpdate”.
- Double click on it.
- Now click on “Quit”.
- Once quitted and its record on CPU is removed, close the monitor.
- To restart Autoupdate, open an Office application.
- Once you are in an Office file or document click on “Help” in the top ribbon.
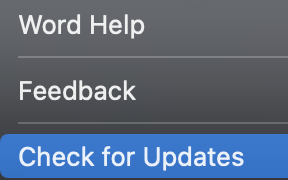
- Now click on “Check for Updates”.
- The Autoupdate application will start — Here, click on “Advanced”.
- Then check the box that says “Automatically download and install”.
- Finally, close the application.
That’s all; you won’t be disturbed by AutoUpdate issues on your computer anymore, and you can go about your day without worrying about the auto-update difficulties that appear on your notification prompt.
Close high memory consuming application via activity monitor
Unfortunately, these days every function requires some form of memory to process that information and the Autoupdate application is no different, sometimes consumption of a whopping 10% of your drive during times of updates. Memory space isn’t infinite and unless you have a supercomputer chances are you are limited to a few gigabytes of memory. However, to make the update application run better you can close applications and monitor certain applications that consume a lot of memory. If your application consumes a lot of memory then chances are that it needs to be switched off to help the Autoupdate application run. Follow through to see how you can achieve this.
Step by step process – Close high memory consuming application via activity monitor
- Firstly, open Launchpad.

- Now navigate to “Activity Monitor” and open it.

- Under the processor name find apps of high power consumption.

In my example, the Adobe Helper application is consuming the most amount of data, its currently not being used so I can quit it. If it was used I would consider other applications such as the next most consuming which is Microsoft Word.
- Double click on it.
- Now click on “Quit”.

Apple will naturally prioritize applications that are being used currently, for instance, if you are working on a word document, it will divulge most of the memory to that application, applications in the background will receive less as they are stagnant. This is the reason why sometimes your computer is slow to react when you refresh a page or scroll through a browser.
In depth – Step by step process Quit and restart AutoUpdate
Step by step breakdown with screenshots
- Firstly, open Launchpad.
- Now navigate to “Activity Monitor” and open it.
- Under the processor name find “Microsoft AutoUpdate”.
- Double click on it.
- Now click on “Quit”.
- Once quitted and its record on CPU is removed, close the monitor.
- To restart Autoupdate, open an Office application.

- Once you are in an Office file or document click on “Help” in the top ribbon.

- Now click on “Check for Updates”.
- The Autoupdate application will start, Here click on “Advanced”.

- Then check the box that says “Automatically download and install”.

- Finally, close the application.

That’s it for this Blog thank you for taking time out to read our content, please feel free to email our team about how it went if you followed the steps or if you need more help with the questions we answered in this Blog.