Notifications and alerts keep us informed, which is especially important in a growing business with several moving parts. If you’ve found your device fails to make you aware of alerts, despite having enabled them, you may be in quite the worry. Fortunately, I have three solutions to absolve your pain.
The following solutions will resolve “not receiving Microsoft Teams notifications:”
| Disable Windows battery saver | Disable Windows focus assist | Disable Windows automatic focus assist rules |
| Settings>System>Battery> Untoggle battery saver | Settings>System>Focus assist> Untoggle focus assist | Settings>System>Focus assist> Untoggle the automatic focus assist rules |
I’ll provide three step-by-step guides to fix your missing notifications in the following post. Each one is reasonably straightforward; they each feature several visual guides in the form of edited screenshots. Follow all three guides for the best probability of success.
Use the following links to access relevant content quickly:
- How to disable Windows battery saver
- How to disable Windows focus assist
- How to edit Windows automatic focus assist rules
- Blog post recap
How to disable Windows battery saver to receive notifications
Although battery saver is known for deactivating several “behind the scene” processes, various animations, and surplus convenience settings, few users know it prevents several applications from distributing notifications and alerts. Microsoft Teams is amongst the affected applications. You can avoid this issue by keeping a charger plugged in or using a PC instead of a laptop.
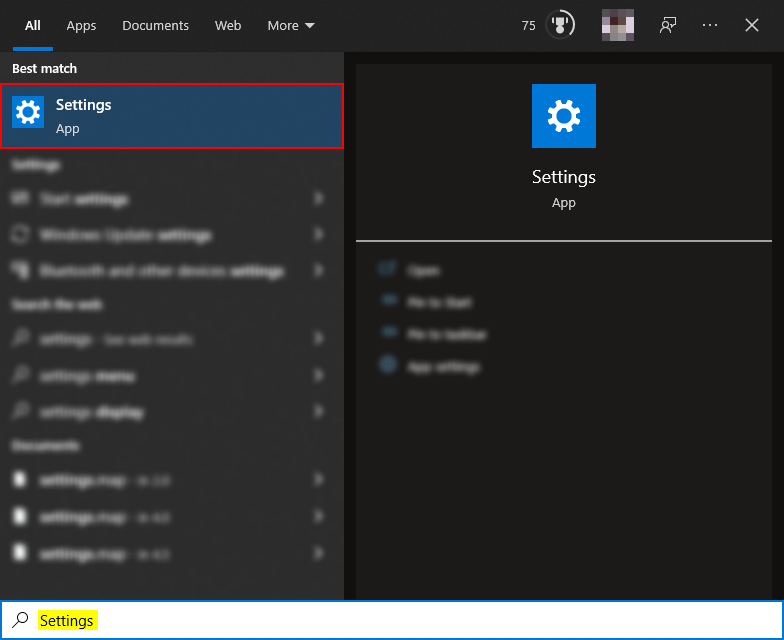
Step 1 — Open Windows Settings
Hit the Start/Win key and type “Settings.” Amongst the results, you will find the Windows Settings app. If you’re not sure you’ve spotted it, look for a white cog atop a blue square.
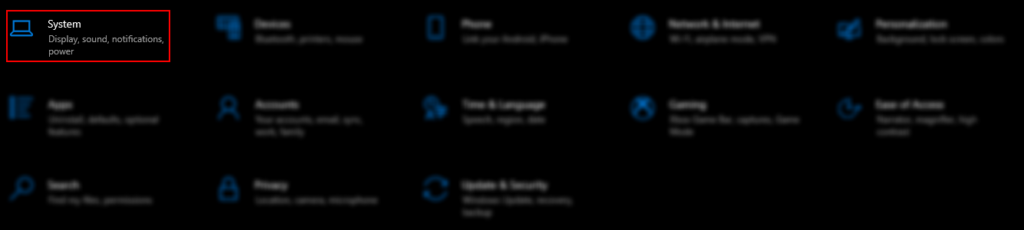
Step 2 — Enter the System category
On the settings page, you will find a grid of icons representing different settings categories. Look for the “System” category: the category icon resembles a forward-facing open laptop.
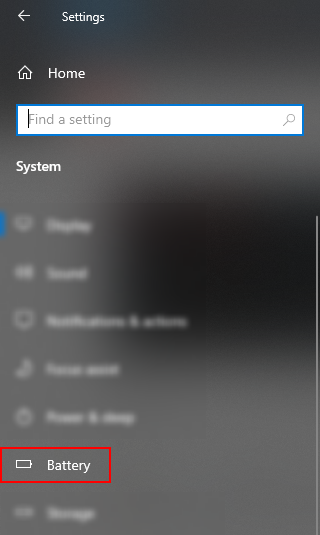
Step 3 — Access the battery page via the sidebar
After entering a category, you’ll notice a sidebar appear; it contains several sub-settings more specific to the category you selected. Find and click the “Battery” listing.
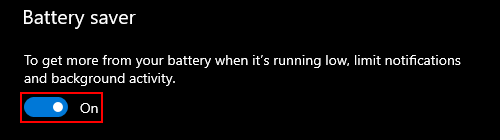
Step 4 — Deactivate the battery saver toggle
Close to the top of the Battery page, you will find a “Battery saver” option featuring a single toggle (as shown below). Click the toggle, setting it to “Off” instead of “On.”

How to disable Windows focus assist to receive notifications
Windows focus assist serves as a “Do not Disturb” mode, in which the user will not be shown notifications or alerts— despite receiving them. Due to the lack of disruptions, the user’s attention is less likely to be divided; thus, their focus is significantly assisted.
Step 1 — Open Windows Settings
To begin, tap the Start/Win button and begin typing to use the search function. Search for “Settings.” When you spot the app, click it.
Step 2 — Enter the System category.
Look through the Settings app’s several categories. You need to find the “System” category. Once you have done so, click on the category.
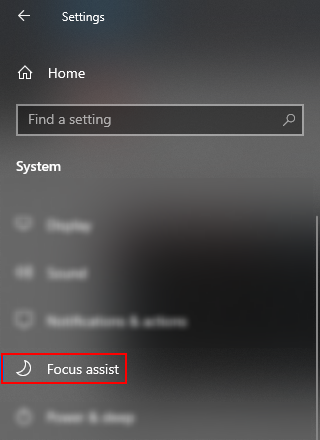
Step 3 — Access the focus assist page via the sidebar
Within the System category, you can find the “Focus assist” page via the System category sidebar. The option can be singled out by its left-facing crescent moon icon.
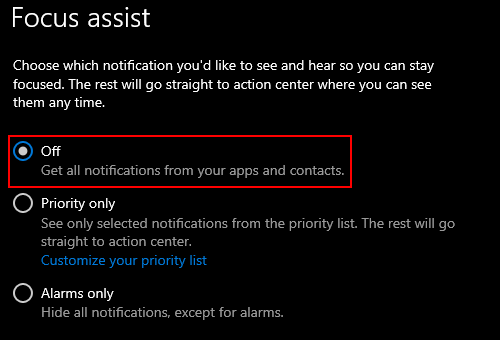
Step 4 — Disable the focus assist toggle
Atop the Focus assist page, you will unsurprisingly find a related set of toggles: “Off,” “Priority only,” and “Alarms only.” Select the first toggle (“Off“) and enjoy your notifications.
How to edit Windows automatic focus assist rules to allow notifications
Although you did not manually enable focus assist, you may still use it unknowingly. Automatic focus assist rules determine when Windows will automatically enable focus assist— supposedly for your benefit. By disabling the rules, we can prevent focus assist from enabling itself. However, you may find you’d like to keep one or two rules active.
Step 1 — Open Windows Settings
Open the Windows start menu by tapping the Start/Win key. On the start menu, begin to type “Settings.” Click and open the “Settings” app shown below when you have done so.
Step 2 — Enter the System category
Find and click the “System” category within the “Settings” page. You’ll find the category resembles a front-facing laptop— its casing ajar. The category features more specific submenus we need to access.
Step 3 — Access the focus assist page via the sidebar
You should now be able to observe a sidebar to the left of your screen. Look for the “Focus assist” option; you will find a left-facing crescent moon icon prefixing the option’s label.
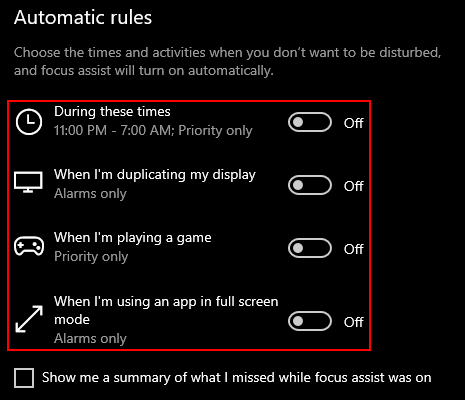
Step 4 — Disable the several automatic focus assist rules
On the “Focus assist” page, you will find a section titled “Automatic rules.” The titled section features multiple toggles relating to various conditions. While a toggle is enabled, focus assist will be activated when its associated condition is met. Set each toggle to “Off.”
Blog post recap
Notifications are a must if you’re looking to stay informed about what’s going on with your team. When notifications fail, users should ensure they have deactivated the Windows “Battery saver” and “Focus assist” functions. You should additionally disable Windows “Automatic focus assist rules.” In doing so, you can be confident you are not inadvertently using focus assist.
You may also be interested in the following related posts:
- How to create a custom team template for Microsoft Teams — Templates serve as an effective means to generate team prefabs. Alternatively, you can utilize templates as makeshift team archives. Regardless, they’re helpful to have. Give the following post a read to learn more.
- How to create custom policies for Microsoft Teams — A Microsoft 365 policy allows you to control your organization’s experience with Office applications. A Teams’ custom policy can be created and activated via the Teams’ admin center— follow the post to give it a try.
- How to collaborate with external users in Microsoft Teams — Although Microsoft Teams is a credited tool for internal collaboration, the app features practical functions for external collaboration. Read the following post to get started.
- How to increase screen share framerate in Microsoft Teams — Screen sharing is pointless if you can only display a choppy mess. Fortunately, I have some potential solutions. Consult our post if you’re curious.