A Teams call is a convenient means to communicate several ideas online— especially when a discussion may otherwise be lengthy over text. Unfortunately, the process is subject to issues we have to deal with from time to time; in this case, the issue is primarily network-based.
A Microsoft Teams call takes advantage of VoIP (voice over internet protocol) to transmit your voice across the internet. Hence, the call is dependent on a stable internet connection. If you’re experiencing issues, you (or your recipient) should consider the following:
- Troubleshoot your device for networking issues via the Windows diagnostic tool
- Troubleshoot your network speed and consider an upgrade
- Review your Teams call stats
Regardless of the platform in question, an online call will be dependent on the Voice over Internet Protocol, often abbreviated to VoIP. Thus, this post will instruct you on testing your network’s speed, troubleshooting your computer for network issues, and accessing Teams call stats.
Some routers allow you to allocate more resources to a connection utilizing the Voice over Internet Protocol. Use the following link to access your router and check for this setting
Below is a list of the topics I’ll be covering today; click a topic of your interest to access relevant content quickly:
- How to troubleshoot network speeds
- How to troubleshoot network issues on Windows
- How to access the Teams call usage stats
- Blog post recap
How to troubleshoot network speeds
Your network speed is assessed based on ping, upload rate, and download rate. Ping can be thought of as your network’s reaction speed. Upload rate, typically measured in megabits per second (Mb/s), refers to the amount of data your network can upload to the internet each second. Download rate, measured in megabits per second (Mb/s), refers to how much data your network can download from the internet each second.
Online speed check tools
At present, several reliable speed testing tools exist. Below, I have provided links to three different tools. For the most reliability, run all three tests and compare the results.
What do the results mean
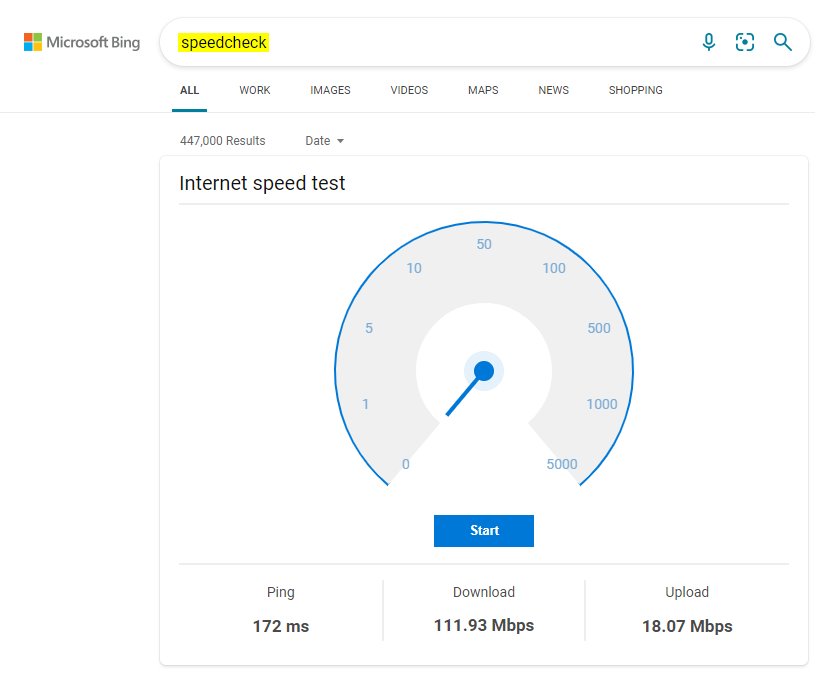
As you can see above, I have performed a speed check with Microsoft’s online tool. Below, I will explain my results in a more straightforward manner for you to understand.
| Ping/latency | Download rate | Upload rate |
| The delay (in milliseconds) with which your network responds to requests. | The amount of inbound data your network can receive (in megabits/megabytes) | The amount of outbound data your network can transmit (in megabits/megabytes) |
| 172 ms (milliseconds) | 111.93 Mb/s (megabits) / 13.99 MB/s (megabytes) | 18.07 Mb/s (megabits) / 2.25 MB/s (megabytes) |
| One-seventeenth of a second delay between network responses | Fast enough to download 11764 average size pictures in 178 seconds (just under 3 minutes) | Fast enough to upload 11764 average size pictures in 16 minutes |
As you can see, my network averages a delay of 172 milliseconds in response time— this is a reasonably average ping. Because ping is a measure of response time, we should value lower values— hence, a ping greater than 200 may be undesirable. Ping is straightforward enough; however, download and upload rates are more complicated.
For simplicity, let’s say your network has four connected devices. Each device demands the same resources, and they are equally split— you will no longer be utilizing your network’s full download and upload rate individually. In short, your active download and upload rate may differ from your stated download and upload rate. In the example, if your upload speed was 4MB/s and your download speed 16MB/s, each user would only be able to work with a 1MB/s and 4MB/s each for downloading/uploading data.

How to troubleshoot network issues on Windows
Windows features a limited troubleshooting tool for a few issues you may experience, take sound and network issues, for instance— Windows can help you troubleshoot them.
Several outcomes may arise from using the Windows troubleshooting tool— this makes providing case-specific screenshots challenging; hence, I humbly request you forgive the minor decrease in the visual context provided.
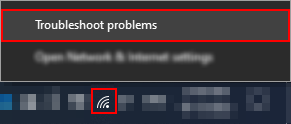
Step 1 — Activate the Windows troubleshooting tool
You can find the Windows internet access icon in your taskbar. If you’re unfamiliar with the icon, refer to the attached image below. When you spot the icon, right-click it— you’ll reveal a dropdown. In the dropdown, select “Troubleshoot problems.”
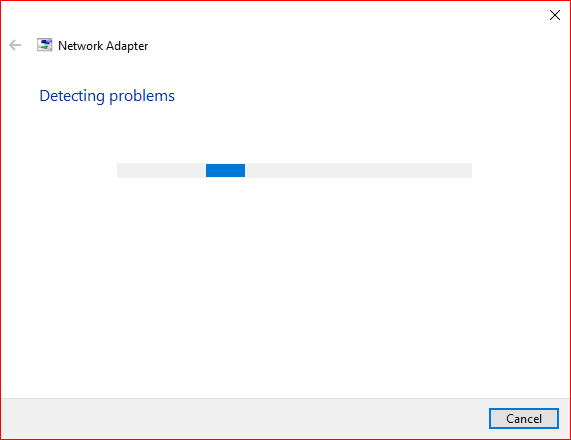
Step 2 — Wait for the tool to initialize
There’s a good chance you’ll observe the “Detecting problems” window— that’s normal. Before using the tool, you need to allow it to initialize and potentially detect any immediately apparent issues.
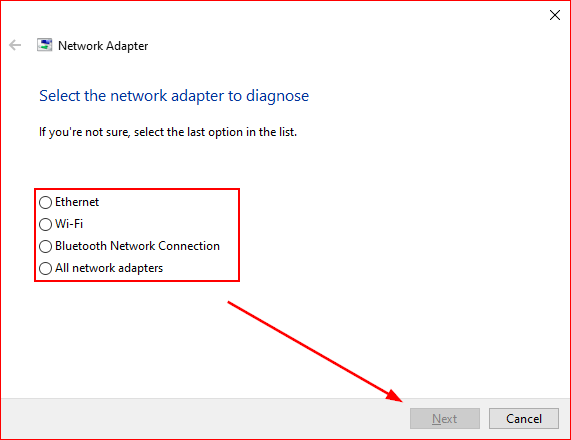
Step 3 — Select a network adapter to troubleshoot
When the initial menu loads, you will be prompted to select ‘A,’ one of three network adapters, or ‘B,’ all network adapters. Your choice will determine which network adapters are tested by Windows.
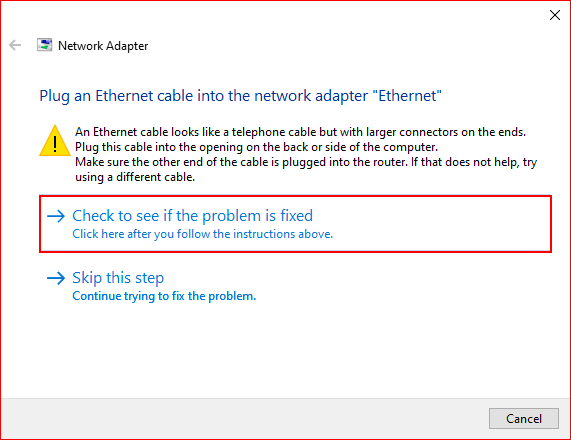
Case 1 — Issue detected
If an issue is detected, you should attempt to follow any instructions given and answer prompts accordingly. The steps here are brief as I cannot predict which of the many potential issues you will encounter.
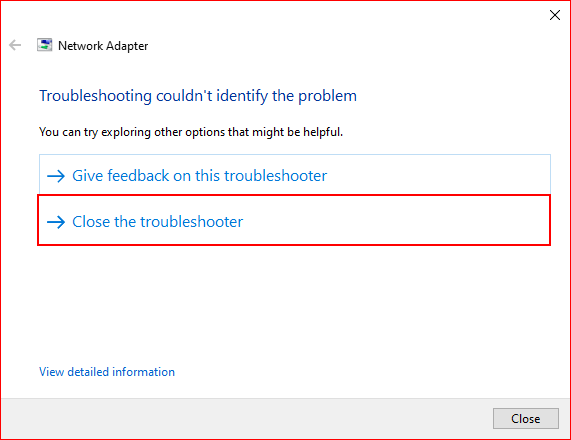
Case 2 — No issue detected
If there are no detected issues, close the troubleshooter by selecting “Close the troubleshooter.”
How to access the Teams call usage stats to see where the call quality issue is coming from
The following guide will require a web browser to complete; consider Chrome, Firefox, Edge, or Safari.
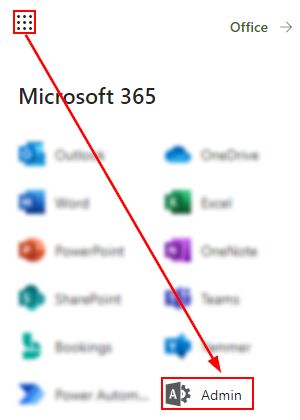
Step 1 — Enter the Microsoft 365 Admin Portal
Start by opening the app launcher in Office. To do so, select the nine dots in the upper left corner— they should resemble a box. Use the app launcher to access the Microsoft 365 Admin Portal; you can achieve this task by clicking “Admin” from within the app list.
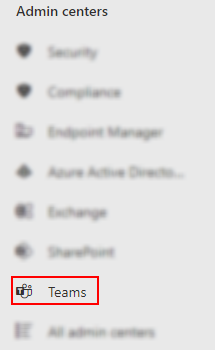
Step 2 — Access the Microsoft Teams Admin center.
By default, the Admin Portal conceals its Admin centers; you will need to reveal the Admin centers before accessing any. Click “Show all,” once the Admin centers are visible, select Teams.”
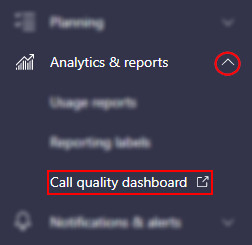
Step 3 — Open the call quality dashboard
On the left, you will find the Teams Admin center’s sidebar. Scroll to the bottom of the sidebar, open the “Analytics & reports” dropdown, and click “Call quality dashboard.”
Step 4 — Sign in to your Microsoft 365 account
Unlike Office apps, the Microsoft Call Quality Dashboard will not recall your credentials; ensure you know your account’s credentials. In the upper right corner, select “Sign In,” and prepare to enter your account’s credentials when prompted.

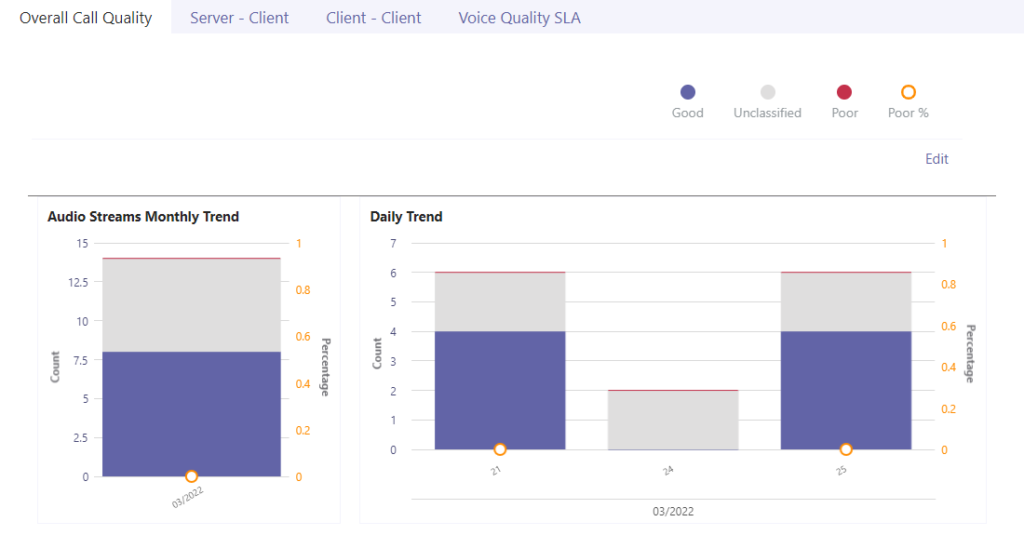
Step 5 — View your accumulated data
Signing in to an authorized account will lead to a dashboard populated with several charts and metrics. If you do not see anything, try switching tabs or taking a call in Teams.
Blog post recap
Due to Teams dependency on VoIP, call quality heavily depends on your internet connection. You should make an effort to understand and test your network; similarly, if you find your network’s current state lacking, consider upgrading it.
You may also be interested in our recent posts: