If you have a spreadsheet or workbook in Excel that you want to share with others, you probably have data that you don’t want them to modify. Maybe you just want them to be able to modify particular cells. On the other side, you could have data that you don’t want to modify unintentionally while you’re working on the sheet. Unlike Numbers, Microsoft Excel allows you to lock cells in a variety of methods. Cells, cell ranges, rows, and columns can all be locked. However what if you need to change some information or correct formula in a cell, how would you try and fix this error with the cells now locked?
In this blog, we will be looking at solutions on how to help users unlock cells in Excel for Mac and find possible solutions to help prevent the error from occurring again. Follow the step-by-step process below to see how you can unlock cells in Excel for Mac.
Step by step process – How to unlock cells in Excel for Mac
- Firstly, Open your Excel document.
- Select the cells you want to unlock.
- Right-click and select “Format Cells”.
- Navigate over to where it says “Protections”.
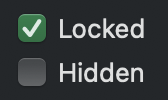
- Uncheck the box that says locked.
- Press “OK”.
Effectively you have now unlocked the cells and now can have them edited if you need. If you need to unlock the whole sheet click the little icon, above cell A1, this will select the whole sheet and you can proceed with the remaining steps from here to unlock the cells. Do bear in mind that unlocked cells can be edited so double check to ensure cells that shouldn’t be unlocked are still locked.
Above is the error message users will receive if they try to edit the locked cells, however, any cells that have been unlocked can be edited as usual without any constraints.

More information locking and unlocking cells
Protected sheets
If you have a very specific range of cells that need to be edited and some that can’ be edited, there is a way Excel can help users who have this particular request. Let’s say in the example below the cells that say edit can be edited and the rest cant be edited.
How do we make sure that the cells “No edit” are not edited and the cells in red labeled “edit” can be edited?. Well, the process is simple for the cells marked edit to follow the step-by-step guide and only for the cells marked edit, not for the no edit. Once this is done you can proceed with the next steps.
At this point by detail, all cells can be edited all the locked and unlocked cells can be edited like normal, here we will show you how to edit the cells in a way that only the edited ones can be selected. For this follow the step-by-step guide below to see how.
Step by step process – protect locked cells
- Firstly click on “Review”.
- Then click on “Protect Sheet”.
- By default, both “Select locked cells” and “Select unlocked cells” will be selected.
- Uncheck the box that says “Select locked cells”.
- Finally, click on “OK”.
Another simple process, this time with better results as there is more control on the cells that can be edited in the sheet, users will now only be able to edit cells that are marked as unlocked. Any locked cells will no longer have the edit permissions enabled. You may even consider locking the sheet with a password that can only be accessed by you. Yes, as novelty as this may sound it may be useful if you are extra concerned about the information non that spreadsheet.
Password is a completely optional feature used to add an extra layer of security to sheets. If you need to have more security you can add a password to make the sheet remains secure.
Remove a spreadsheet’s protection
Whether you use a password to secure your sheet or not, unprotecting it when you need to modify those protected cells again is simple.
- Unprotect Sheet may be found under the Review tab.
- If you don’t provide a password, the sheet will revert to unprotected status right away. If prompted for a password, type it in and click OK.
Keep the spreadsheet safe
- Select the Review option from the drop-down menu.
- Select the Protect Sheet option. (Protecting a workbook is a little different, and you don’t have the same options.)
- If you want to safeguard the document, you may type in a password. If you’re locking the cells for yourself, you don’t need to use a password. However, if you want to share the document, a password should be considered. You have the option of leaving the default things chosen or selecting additional items to allow. Click the OK button.
Try making a modification to your spreadsheet now. You should get a notification indicating the document is password-protected. You can do the same thing with other spreadsheets in the same worksheet.
In-depth – Step by step process – How to unlock cells in Excel for Mac
Step by step breakdown
- Firstly, Open your Excel document.
- Select the cells you want to unlock.

- Right-click and select “Format Cells”.

- Navigate over to where it says “Protections”.
- Uncheck the box that says locked.
- Press “OK”.

That’s it for this Blog thank you for taking time out to read our content, please feel free to email our team about how it went if you followed the steps or if you need more help with the questions we answered in this Blog.