Within Microsoft 365 you, the user, will have a very understandable desire to ensure that your 365 domain has the most protection applied to it as it possibly can. You will most likely store items or documents of great importance and significance within your Microsoft 365 space, and you are completely justified in wanting that space to be protected a great deal.
So, whilst you may be comfortable in the security of your Microsoft 365 working space, this would not necessarily deter you from wanting to increase the protection of it even more, or at least, it shouldn’t. Chances are, this is what you are looking to do if you are reading this article today.
Conditional access is a tool within Microsoft 365 that can be used to bolster your workspace protection, and it is that which we will be looking at today, breaking down the way by which you can access the settings to alter your conditional access settings.
In order to edit your conditional access presets, you must sign into your Azure account and edit the conditional access settings within that portal.
Now, if this is not enough detail for you to work with, please don’t worry. It would hardly be fair to expect that one sentence would be enough information for anyone to comfortably work with. We said above that we would break the process down, and we will be doing this in two further ways, in addition to the above sentence.
First, we will offer you a step by step guide of the process, a bullet pointed list that may well be enough detail for some readers to work with. If it is not though, read on, as following that list will be a complete breakdown of the process. This breakdown will be a detailed analysis of the process, with annotated screenshots to accompany the walkthrough in order to ensure you have as much aid as possible.
Before this though, it is worth noting one thing. Conditional access does hold some power within it, and therefore it is recommended that certain accounts should be excluded from such access.
Emergency access accounts should not be given conditional access. If, for whatever reason, no administrator is able to access your tenant, it would be your emergency account that would be used to access it. If this emergency account had conditional access, it would become far harder to access the account.
As well as that, service accounts are too to be avoided for conditional access. Often, these accounts are used by back-end services, and may sometimes be used to sign in for administrative purposes, which is a key reason as to why they should be avoided when looking at providing accounts with conditional access. Right, time to, finally, get on with the walkthrough.
Step by step: How to use conditional access within Microsoft 365 to block access by location
- Sign into your Microsoft Azure portal.
- Now, look to view your Azure Active Directory.
- From here, opt to click the option titled ‘Security’.
- Now, go to ‘Conditional Access’. From here, click ‘New policy’ at the top of your screen.
- This will bring you to a submenu, on which will be heading titled ‘Locations’.
- Under this will be the words, ‘Not configured’, which you should click on.
- Here, when configuring, you will either be able to include locations that should be blocked, or exclude locations from which you don’t want people to access your work.
- On either screen, you will be greeted with a menu on which you can enter locations you wish to limit access from.
- Then, you will be able to click ‘Block access’ on the next screen.
- After doing this, click ‘Select’, and then ‘Create’ on the next screen to save your rule.
So, you will first want to sign into your Microsoft Azure account. This may appear for you in your Microsoft application launcher, which can be accessed through every Microsoft application, but it also may not, which is completely okay. A simple Google search will prove sufficient enough to find Azure.
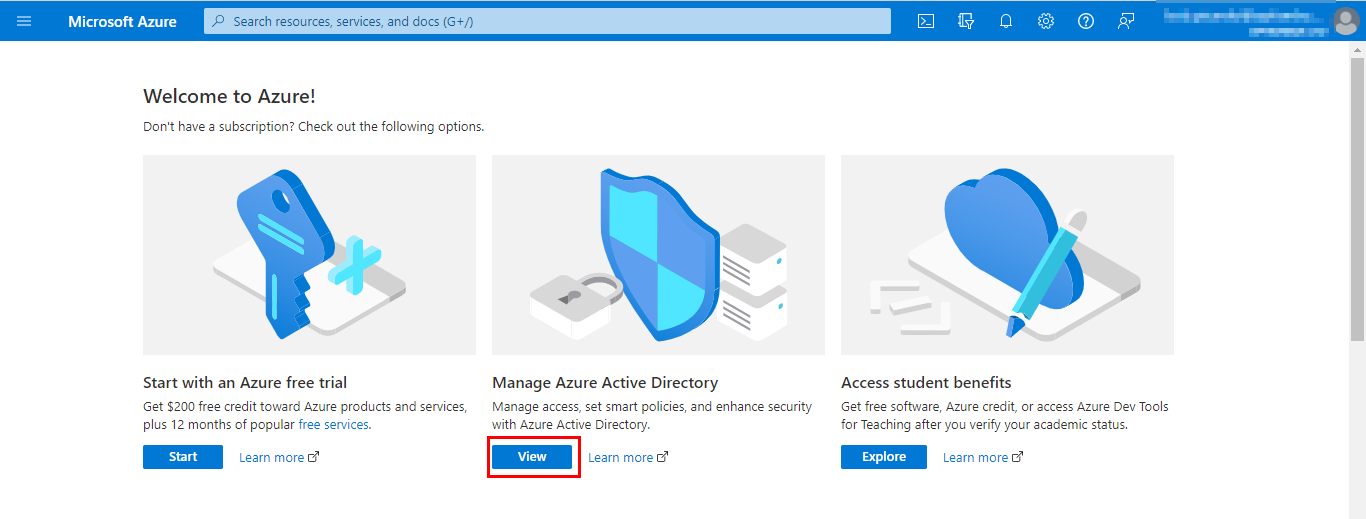
After you have signed in, you will be greeted by the main screen of the portal, something of a dashboard on which you can browse what is available to you. On this dashboard, you will want to click ‘View’, a button that can be found in the ‘Manage Azure Active Directory’. I’m aware this sounds confusing, but hopefully the below screenshot will restore some clarity.
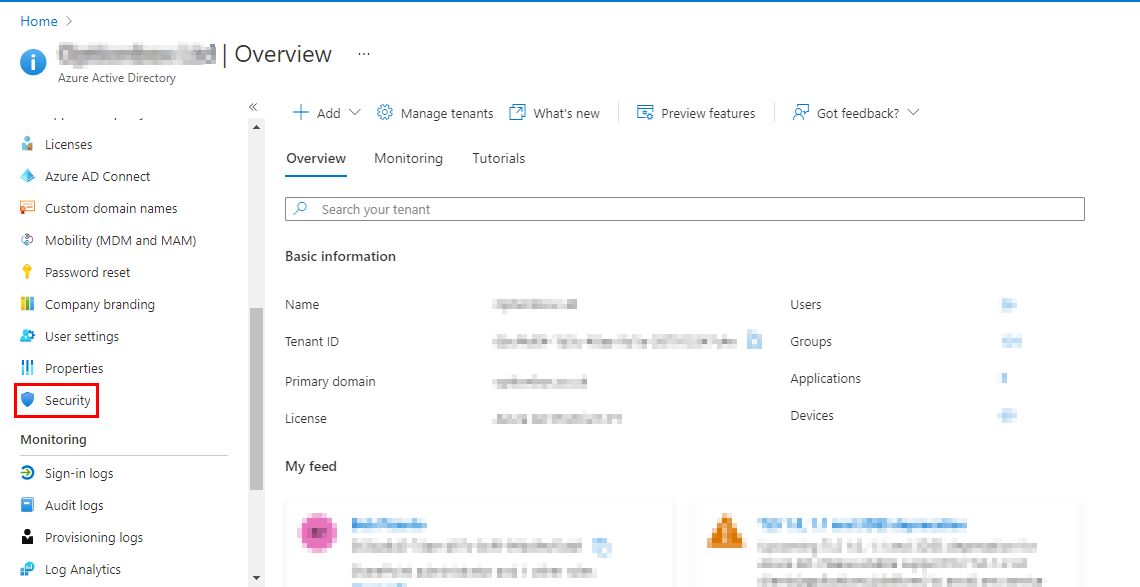
Clicking ‘View’ will bring you to another screen, offering you an overview of multiple settings within your organisation. Here, on the left hand side of your screen, will be a list of different sub tabs that you can navigate through. Of these tabs, you will want to find and click on the one labelled ‘Security’. Again, it has been highlighted below.
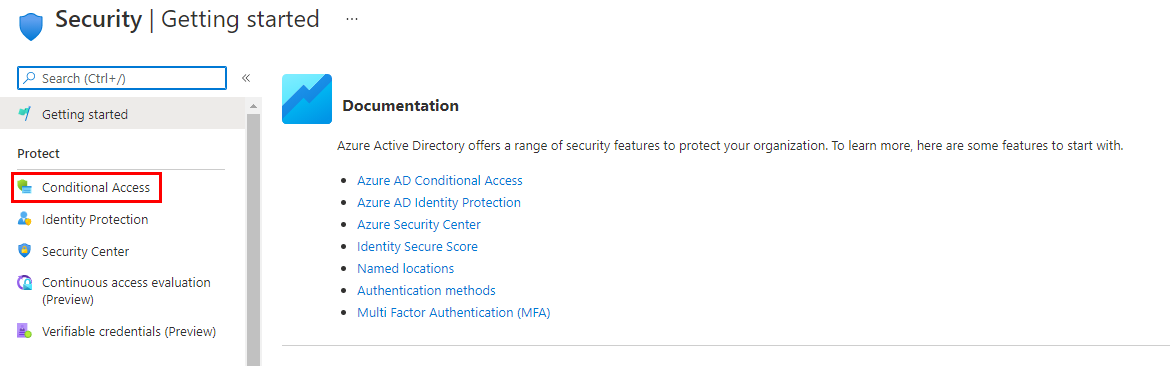
On this menu, you should look again to the left of your screen and click the option ‘Conditional Access’. I emphasise the option part, as there will be two links that read ‘Conditional Access’, but one will take you to a Microsoft article centred on the topic. Look at the below image to see which is the correct option.
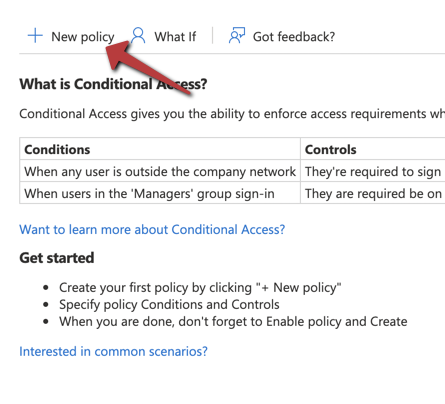
Clicking this will bring you to the conditional access screen, on which you will want to add a new policy by clicking the button that is towards the top of your view:
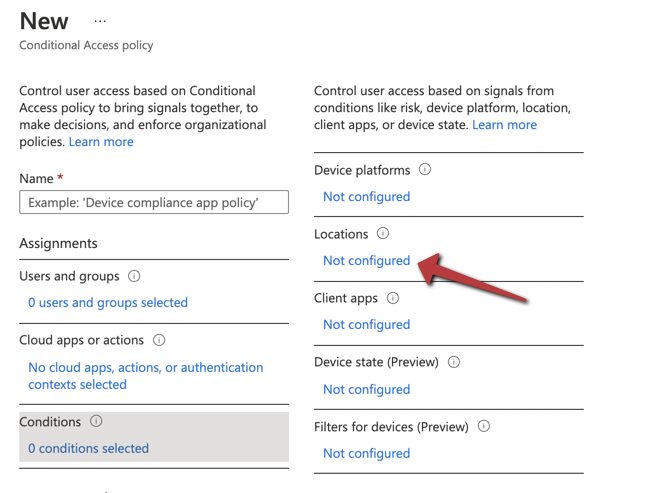
By clicking this, you will be brought to a hub of, yet again, numerous suboptions. Of all the ones presented to you, you will want to click ‘Locations’. More specifically, you will want to click the blue text, that doubles as a link, underneath it. The text reads, ‘Not configured’.
Clicking this will bring you to a menu on which you can edit the locations that can impact your workspace. By this, I mean that you can either include a list of areas that you will allow access from, or exclude a list of areas that you don’t want to access your work. Each option is shown below:
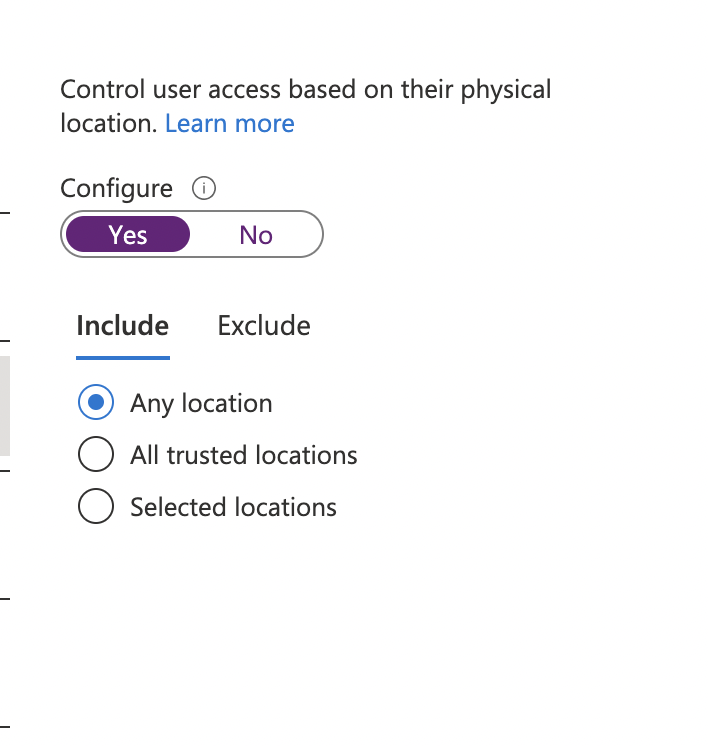
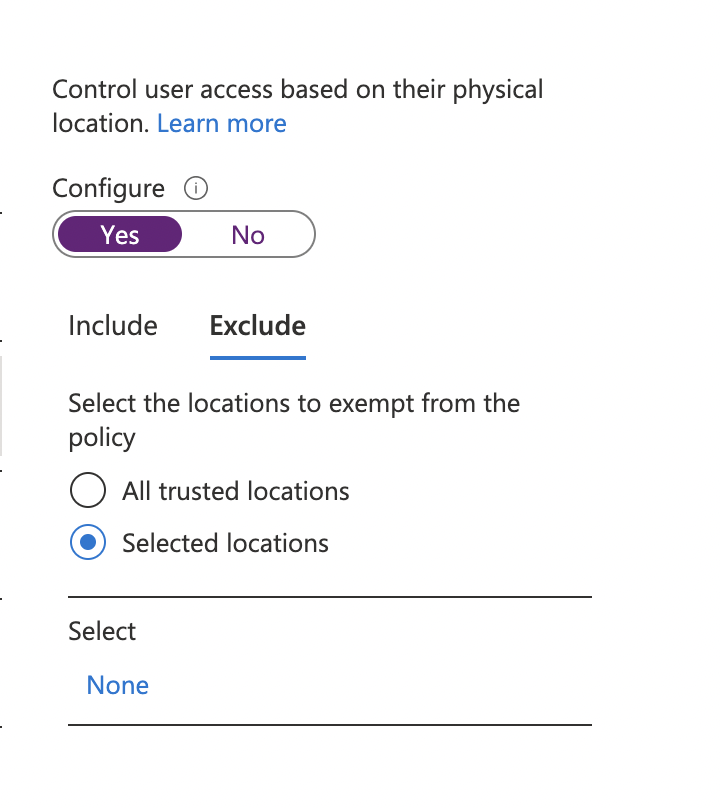
Whichever option you decide to go with, progressing will bring you to a table in which you can enter the names of people or places you wish to include, or exclude, in your work. Excluding may well be quicker, but the choice is obviously entirely yours to make.

After entering the names you wish to enter, progress from the table. You should be greeted with this screen:
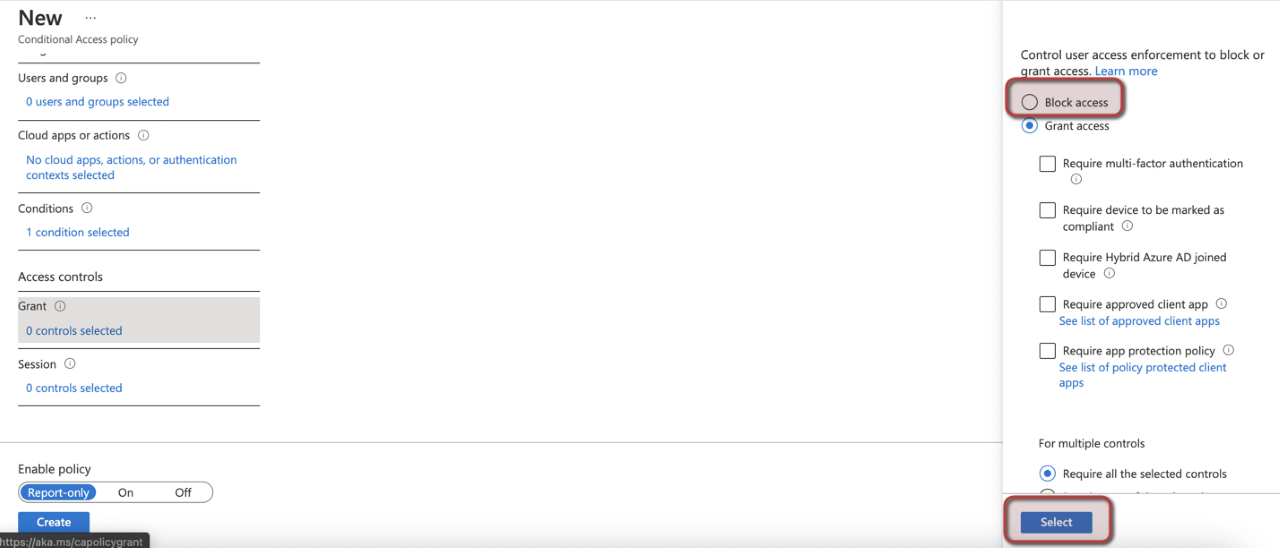
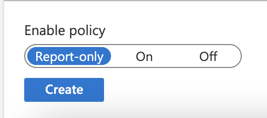
As you can see by the highlights, you will first want to block access, before clicking ‘Select’. Next, under ‘Enable Policy’, select On. After completing this, look towards the bottom left of your screen, and click ‘Create’ in order to set your newly made changes in motion. The ‘Create’ button is in the above image, but is heavily focused on in this one:
Now, whilst completing this process within Microsoft Azure will, in theory, secure your workspace further, it will not completely prevent any outside access. By this, we mean that whilst, yes, you have done what you can to prevent certain people within certain locations accessing your work. What is to stop them from bypassing this though with, say, a VPN?
Your best bet at avoiding any potential breach via a user utilising a VPN is ensuring that your IP address is protected. So, we will quickly offer you a list of the steps you would need to undertake in order to set your Azure up to be protected from outside IP addresses.
- First, create a named location within Azure.
- Next, create a conditional access policy. Presumably, you’ll name it something to do with ‘IP Address’.
- From there, click ‘Cloud apps or actions’ and under there, look to click the Microsoft Dataverse application.
- Here, you will be able to use conditional access to prevent access to your work by IP address.
Thank you for taking the time to read this blog, I hope you found it as helpful as you wanted it to be! As is the case with everything we write, if you encounter any issues or simply wish to let us know some thoughts you may have, please don’t hesitate to get into contact with a member of our team.