Auto populating a Word document with Excel can be quite a tedious process, especially since you may have quite a lengthy Excel document with multiple datasets that need to be populated onto the Word document. In this blog, we will cover the steps on auto-populating a Word document; read through for more information on how you can auto-populate a Word document.
How to use Excel to auto-populate a Word document:
- Firstly, open your Word document.
- Now click on Mailings.
- After that, click on “Select Recipients.”
- After that, click on “Use an existing list.”
- Choose your Excel data document.
- Press “Open.”
- Select a place on your document where you want to insert an Excel dataset.
- Once the document is uploaded, click on “Insert Merge Field.”
- Select a data set column.
- After the placement is complete, click on “Finish & Merge.”
- Then click on “Edit Individual Documents.”
- Finally, a new document will show with the populated word document; you can save or edit this.
- Get Excel for just $6.99 per month from the Microsoft Store!
You will have successfully created an auto-populated document that includes the datasets from the Excel document. Each dataset row will form its document sheet to populate; each page is considered a row for the datasets in Excel. You also need to be aware that the first column in the document is set as your primary input field or title column; this will not be classed as a data set but rather an input merge field for those data sets.


How to use Excel to auto-populate a Word document
Here is a much more in-depth guide on using Excel to auto-populate a Word document. The in-depth guide includes a series of screenshots that allow you to better understand how to complete steps within the process. Screenshots provide visual context on the steps illustrated above; you can use this to navigate through the steps allowing you to auto-populate a Word document.
- Firstly, open your Word document.

Make sure the Word document you have open has all the placement fields and places where you want to add the data set ready. I have the table ready to accept the data set fields, as you can see above. I can put them later on the stage. The first column includes the title for the data set; proceeding from the column is the actual data set information by the first name, and last name information will be added.
- Now click on Mailings.

Once you have your document ready, proceed by clicking on the option for mailing, which is available in the ribbon at the top and can only be accessed on the desktop version of Microsoft Word.
- After that, click on “Select Recipients.”
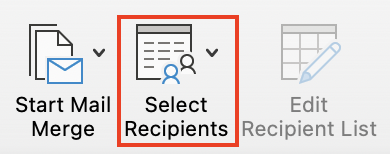
- After that, click on “Use an existing list.”

- Choose your Excel data document.
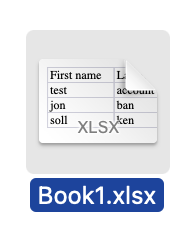
Again, similar to your Word document, make sure that the excel document has all the columns and fields of text properly in place. The first row of information will be your title row; this will be an input field where you can place the rest of the data down. The title field in this example is the first name and the last name. Any information beyond this is a data set; this information will be replaced when I begin to populate the documents.
- Press “Open.”

- Select a place on your document where you want to insert an Excel dataset.

Same as you would select an area to type on your Word document, choose an area where you want to place the Excel data set. in this example, the column next to the first name will be the area where I want to place the first name input field, also applies to the surname which will go in the column next to it.
- Once the document is uploaded, click on “Insert Merge Field.”

- Select a data set column.


The data set column is identical to the title column in your Excel document; this example is first a name and surname. Simply click on the option that applies to you; you may have different data sets depending on the document’s requirements.
- After the placement is complete, click on “Finish & Merge.”

To finish the document off, you simply click “finish and merge” what this does is it takes all your data sets within the columns and merges them with the input field placements you have on your Excel document.
- Then click on “Edit Individual Documents.”
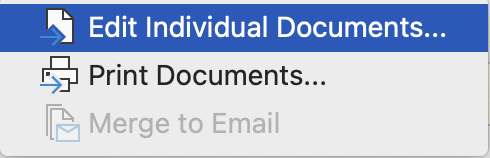
To populate information into individual document pages, simply follow this step; what this does is it takes all your data sets and merges them into the Word document and splits those data sets into individual pages, so in our example, first name and surname in row one will be on Page One. The data sets in row two will form the merged data on page two of our Word document. It will slowly auto-populate the entire excel document in the word pages.
- Finally, a new document will show with the populated word document; you can save or edit this.


You’ve successfully produced an auto-populated page that has the datasets from the Excel file. Each dataset row will have its document sheet to fill out, so each page in Excel will be considered a row for the datasets. You should also be aware that the first column in the document is designated as your major input field or title column, which means that it will not be classified as a data set but rather as an input merge field for those data sets.

Conclusion
That’s it for the blog on how to auto-populate a Word document; we hope the process illustrated above helped you get the answer on how to auto-populate the document. If there are instances where you don’t understand a step feel free to drop a comment below, and we will address those issues soon as possible.


