Your company may support a variety of OS systems on a variety of device types and manage them with a standard set of tools like Microsoft Intune or third-party offerings. Using Windows for Business and Intune, you can administer Windows 10. This is a free service for Windows 10 Professional, Enterprise, and Education versions (Enterprise LTSC is not supported). The service will be automatically deployed without the requirement for individual updates to be approved. This will make managing Windows 10 with Intune much easier.
In this blog, we’ll go through a variety of Windows 10 operations that can all be done through Intune in order to make use of Windows “Autopilot” to assist control the OS from within Intune. The final aim is to be able to duplicate a normal deployment using a Windows NOS Task sequence. Follow the step-by-step process to see how to use Intune to manage Windows 10.
Step by step process – How to use Intune to manage Windows 10
- First, sign in to your Office 365 account.
- Use the app launcher and navigate to admin.
- Now click on “Endpoint Manager”.
- Now click on “Devices”.
- After that click on “Configuration profiles”.
- Now click on “Create profile”.
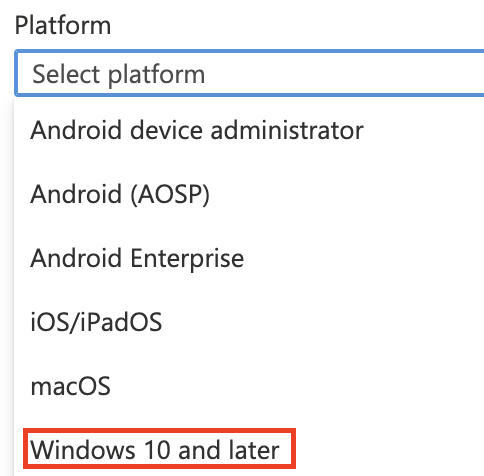
- Set platform to “Windows 10 and later”.
- Set the “Profile type” to “Settings catalog”.
- Now click on “Create”.
- Name the management profile (description is optional).
- Click on “Next” (Repeat after each process).
- Click on “Add Settings”.
- Select “Windows Ink Workspace” (OS script) then click the “x” to exit.
- If you want to add other members to contribute, you can do this here.
- Finally, on the last page “Review + create”, click on “Create”.
That’s it, management of Windows 10 OS script SCCM management can be commenced by the autopilot configuration policy. You have been assigned to manage the OS configuration system linked to the settings based on the current windows 10 OS on your profile. You can of course edit this out by filtering the settings catalog. This may seem quite complex, however, the main bulk of the operations are conducted automatically by the Endpoint manager. You just need to configure the settings protocol that’s it.
Your company may have contemplated bringing in Windows 10 machines and downgrading them to Windows 7 before all of the necessary components are in place for an official upgrade. While standardization may appear to save money, more money may be saved by delaying the downgrading and immediately taking advantage of the cost savings that Windows 10 offers. It’s simple for versions to coexist since Windows 10 devices may be handled using the same methods and technologies as earlier Windows versions.

The Windows 10 update
You may customize the update settings and the user experience with “Windows 10 update rings.” You may choose the update deferral period, as well as whether or not the devices will get Microsoft product updates and Windows drivers. The user experience includes settings such as when devices are updated (update behavior), as well as what the user may do, such as pause or check for updates. For TAP reasons, you can set up several update rings. You can also pause update (feature and quality) deployment for up to 35 days.
Updates to Windows 10’s features (preview)
You may use “Windows 10 feature updates” to lock down the version of a feature update that is installed on your company’s devices. This is in contrast to update rings, which simply allow you to delay updates for a certain period of time before they are released. Another distinction is that you can only manage feature updates, and the feature version will remain in effect throughout the policy period (unlike pausing in update rings). For TAP reasons, you can set up several feature update setups.
Remove the default APPX installed
A preview of management update incorporates the APPX feature which inhibits a new patch to orientate an update for the management of Windows 10 OS. The script gets void and an error message shows.
Follow these procedures to add it to Intune/Autopilot:
Select Powershell Scripts from Intune/Device Configuration – Profiles.
Give the script a name and a Powershell script.
Assign the script to a group that will be processed at the Autopilot time after it has been generated.
Configuration and Settings in Intune
Multiple variables influence your setup needs, including the amount of administration required, the devices and data controlled, and industry standards. Employees, on the other hand, are frequently concerned about IT enforcing stringent restrictions on their personal devices, but they still want access to business email and data. Through the common MDM layer in Windows 10, you can build a uniform set of configurations across PCs, tablets, and phones.
Authentication and Identity in Intune
For cloud-based identification, authentication, and administration, you may utilize Windows 10 and Azure Active Directory in new ways. You can allow your users to “bring their own device” or “choose their own device” from a list of options you provide. At the same time, you may be in charge of PCs and tablets that need to be domain-joined due to certain programs or resources.
Step by step process – How to use Intune to manage Windows 10
Step by step breakdown:
- First sign in to your Office 365 account.
Use your account details or if you have a current Skype account with the Office account in question, you can use this.
- Use the application launcher to navigate towards “Admin”.

The launcher is illustrated by nine dots in the right corner, click on it and find “Admin” as shown above.
- Now click on “Endpoint Manager”.

- Now click on “Devices”.

- After that click on “Configuration profiles”.

- Now click on “Create profile”.

- Set platform to “Windows 10 and later”.
- Set the “Profile type” to “Settings catalog”.

You may want to avoid templates as you will require an abundance of scripts from the Windows OS platforms in regards to the JAVA app functionality and the JS operations scrips.
- Now click on “Create”.

- Name the management profile (description is optional).

- Click on “Next” (Repeat after each process).

- Click on “Add Settings”.

- Select “Windows Ink Workspace” (OS script) then click the “x” to exit.

- If you want to add other members to contribute, you can do this here.
- Finally, on the last page “Review + create”, click on “Create”.

That’s it for this Blog thank you for taking time out to read our content, please feel free to email our team about how it went if you followed the steps or if you need more help with the questions we answered in this Blog.