Time Machine is a feature specific to storage in Mac OS and is quite an effective tool, ensuring data safety should your main drive data get corrupted or lost. Yes, Windows has File History as an alternative convenience to restore lost files, but it doesn’t share the same appeal as something like the Mac OS time machine. Time Machine, highly effective, and syncing it with a virtual drive will ensure the data remains secure. You can’t sync the time machine with OneDrive as it’s a virtual disk that holds no native post on your computer besides an access portal, and the time machine renders a physical copy onto your drive backup as a local copy. You will need to create a virtual drive locally that can sync with the time machine then you can transfer the data over to OneDrive.
How to use OneDrive to store a Time Machine backup:
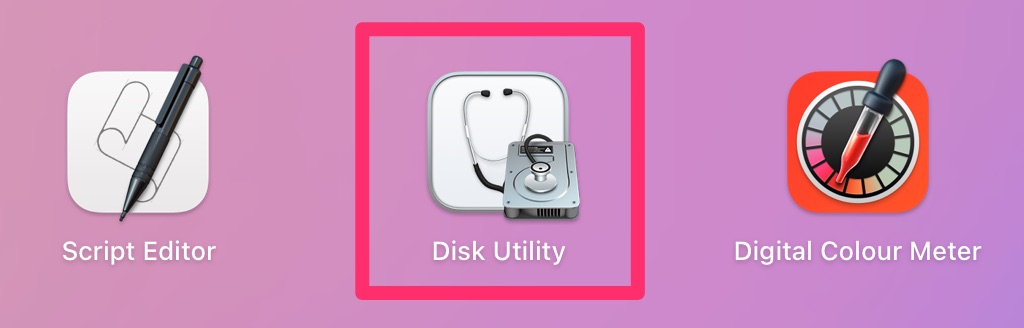
- Open “Disk Utility” from “Launchpad.”
- Navigate to “File” > “New Image” > “Blank Image.”
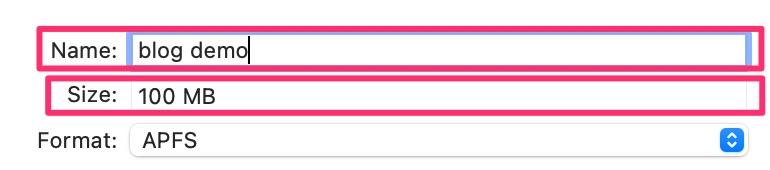
- Name and choose a location for the new image.
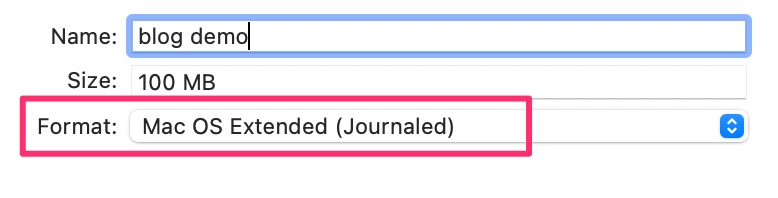
- Set disk name, size, format (Mac OS Extended), encryption (128-bit AES), and partition (Single partition – Apple Partition Map).
- Choose “sparse bundle disk image” as the image format and save.
- Open “Terminal” from “Launchpad.”
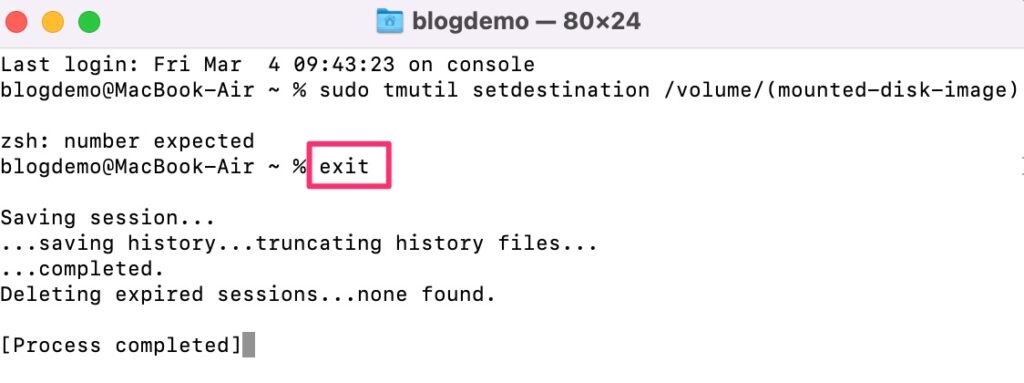
- Enter “sudo tmutil setdestination /volume/(mounted-disk-image)” and press “Enter.”
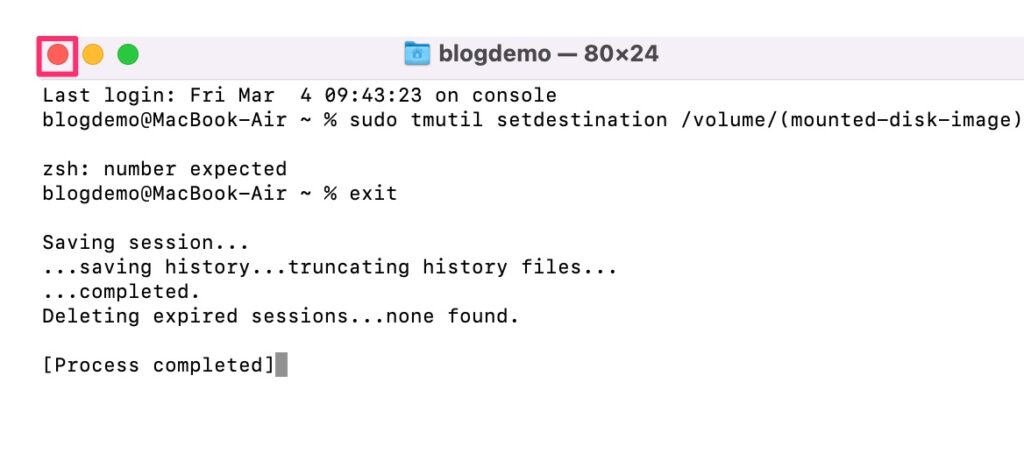
- Type “exit” and press “Enter” to close Terminal.
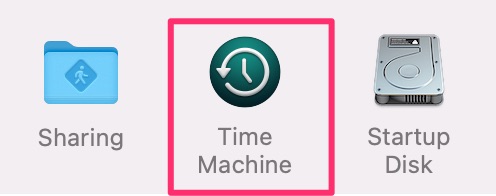
- Open “System Preferences” from “Launchpad.”
- Go to “Time Machine” and click “Options.”
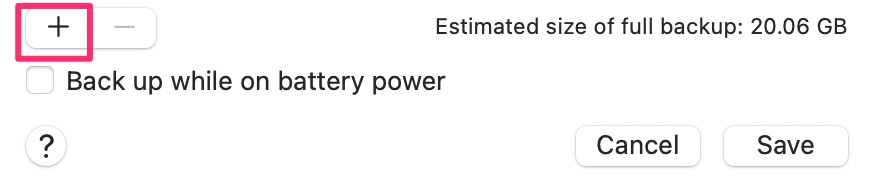
- Add the newly created virtual time machine by clicking the “+” symbol.
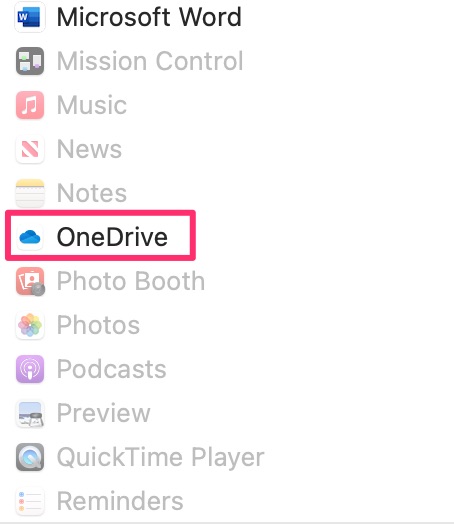
- Select “OneDrive” from the applications list and click “Exclude.”
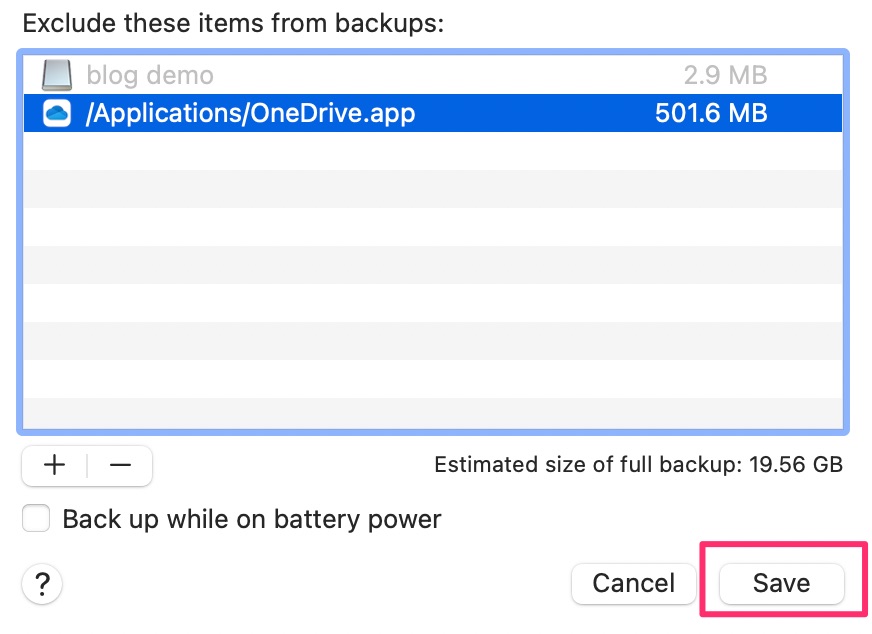
- Click “Save” to finish.
![]() Windows users can try the free
Windows users can try the free ![]() Backup Dwarf app, which is available for download on the Microsoft app store.
Backup Dwarf app, which is available for download on the Microsoft app store.
Time Machine will begin backing up your virtual disk, and OneDrive will begin synchronizing your changes to the cloud. There’s no need to look for an external hard disk or wait for a network server to join. Let’s hope you don’t need to utilize Time Machine’s restoration feature. It may be inconvenient to have to download your backup at the time, but losing your data is far more traumatic.
Once this is complete, the backup time machine will be stored on OneDrive where you will be able to access it on any device that has access to your OneDrive account. Following these steps is quite simple and will just take a few seconds if you already have the cloud sync service set up on your Mac. you’ll need to make a virtual disk, save it to the cloud, and then mount it on our Mac. Your Mac will recognize the virtual disk and begin saving to it automatically after a few tweaks to Time Machine settings. The OneDrive program will sync changes to the cloud whenever macOS saves changes to the virtual disk.
The unique point of a virtual drive is that even if you set the virtual drive’s allotted capacity to 1 TB, the real space used will be limited to the size of the data contained therein. Keep in mind, though, that your virtual disk must be kept on your MacBook in order for Time Machine to access it and keep it in sync with the cloud. In order to achieve this, you’ll need enough disk space.
Most files in OneDrive files-on-demand are only references with a tiny placeholder. When TimeMachine tries to backup, however, it appears to insist on downloading every file first, before it can effectively backup. This isn’t possible: it’ll take an eternity, require more storage than my laptop has, and eat up my CPU for a long time.

How to use OneDrive to store a Time Machine backup
Step by step breakdown:
- On your MacBook, go to the “Launchpad”.

Launchpad is where all your main Mac OS applications are located.
- Here click on “Disk Utility”.
The disk utility file is where all the disk-related content is stored.
- Now click on the “file” tab from the top menu bar and click on “New Image” > “Blank Image”
- Fill out the name for “Save as” and set a location for the new image.

- Name the virtual disk, set a size equivalent to the amount of storage present within your current disk.
- Set format to “Mac OS Extended (Journaled)”.
- Now set encryption to “128-bit AES encryption (recommended)”. At this point, you may be asked for a password. This will be your computer password

- Set partition to “Single partition – Apple Partition Map”.

- Set Image format to “sparse bundle disk image”.

- Then click on “Save”.

- Now close the utility panel and use the launcher to open “Terminal”.
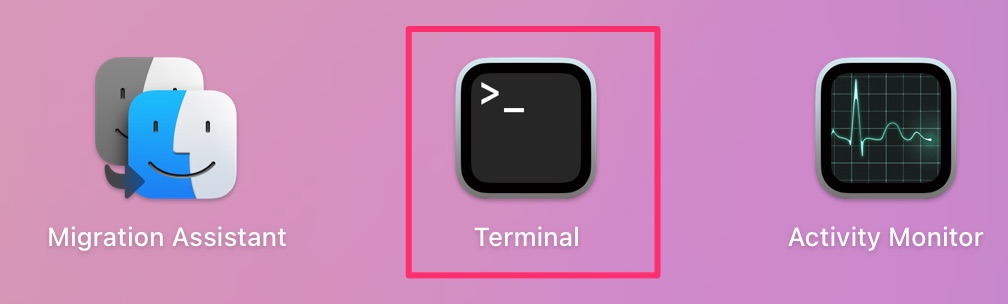
- In the terminal command block type out “sudo tmutil setdestination /volume/(mounted-disk-image)”.

The terminal portal will help you create a portal for a virtual drive, this will allow you to transfer the content to the OneDrive.
- Click “Enter” on your keyboard.
- Now type out “exit” and click on “Enter”.
- Now close the terminal.
- A new virtual port has been created for your virtual TM drive.
- Now in the launcher open “System preferences”.

- Click on “Time Machine”.
- Click on “Options” Your newly created virtual time machine is here,
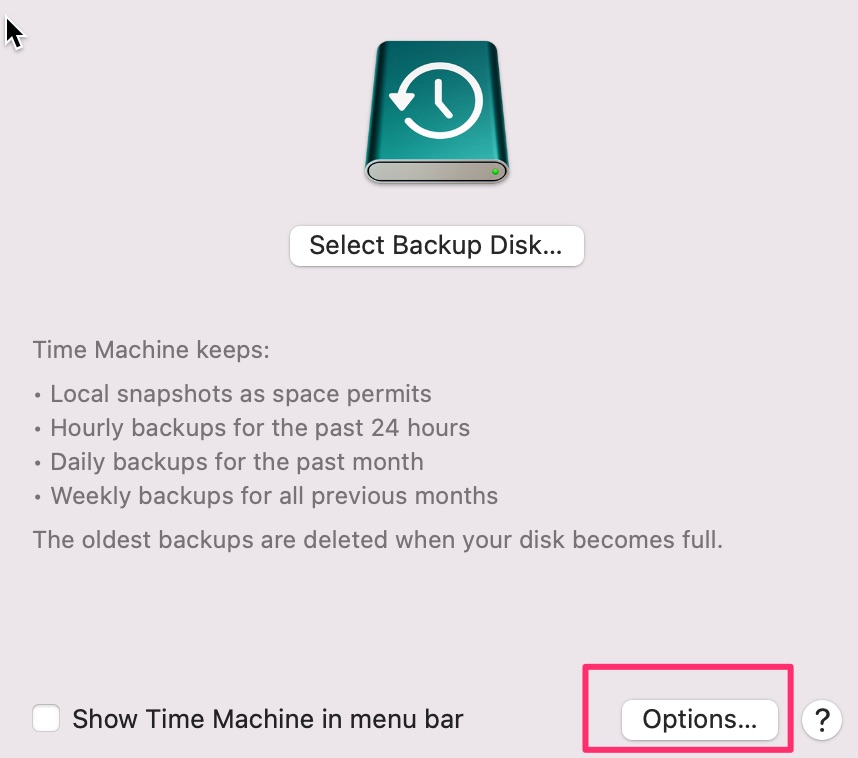
- Click the “+” symbol.
- From the list of applications, select “One Drive”.
- Once OneDrive has been added to the “Exclude these times” list, click on save.
Time Machine will begin backing up your virtual disk, and OneDrive will begin synchronizing your changes to the cloud. There’s no need to look for an external hard disk or wait for a network server to join. Let’s hope you don’t need to utilize Moment Machine’s restoration feature. It may be inconvenient to have to download your backup at the time, but losing your data is far more unpleasant.
That’s it for this Blog — thank you for taking time out to read our content, please feel free to email our team about how it went if you followed the steps or if you need more help with the questions we answered in this Blog.